How to make three-phase gel polish:?
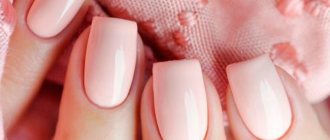
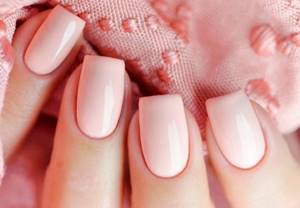
Gel polish is exactly what you need if you are tired of repainting your nails every 3-4 days. Thanks to the special composition, you will get the perfect manicure, because gel polish combines the advantages of regular varnish and artificial nails. The application procedure will not take much time, but the result will please you from 2 to 4 weeks. This coating does not lose its appearance, does not fade, does not chip, and at the same time strengthens your nails.
Fashion does not stand still, the variety of colors is constantly expanding, and the quality of varnishes is increasing.
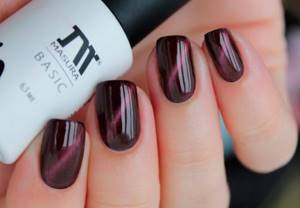
Very interesting among the new products are a variety of jelly gels or “cat’s eye” coating.
Main differences
What does single-phase application system mean? Simply put, this is a three-component product, which includes a base, color and finishing layer. With its help you can do a quick manicure, and such a bottle will take up little space in your cosmetic bag.
A manicure using this gel will last about two weeks. But not all nails accept it, and accordingly, the durability of the coating may be less. A trial application will determine if the product is suitable for your case.
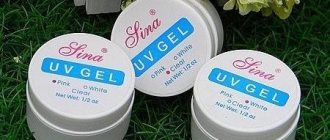
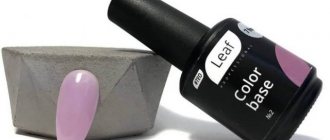
What is three-phase gel polish? This product consists of three different bottles:
- base;
- color;
- fixative
The base coating has the same principle of operation as double-sided tape. At the same time, it strengthens the nail and holds the color well. The fixative performs the function of fixing the color and protecting it. The fixing layer can be matte, glossy or have a scent that remains on the nails after drying.
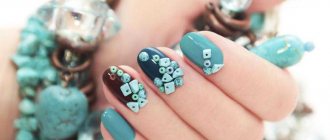
Three-phase gel is a suitable option for those who like to decorate their nails with stickers.
Removing varnish
To properly remove three-phase gel polish, we will need:
- 10 - 12 cotton swabs (we recommend using a cotton base, as it has a better effect on the nail), a couple of orange sticks and 10 pieces of foil approximately 10 by 10 cm.
- Gently moisten the sponge in gel polish remover, cover the nail with it and wrap it in foil.
- We wait about 15 minutes.
- We remove the foil and cotton wool (sponge) from the finger that was the first to wrap, remove the gel polish with a stick (the coating should crumble a little from the impact of the stick).
- Remove the remaining manicure elements with a small nail file.
If you are not going to apply a new manicure right away, it is useful to treat your natural nail with cuticle oil. In case of applying a new manicure, the oil completes the manicure procedure and is applied immediately after removing the sticky layer.
Application process
To prevent the coating from deteriorating in the near future, you need to know how to apply single-phase gel polish:
- You should start by removing the old coating and giving your nails the desired shape.
- Treat the nail plate with a fine-grained buff. This will make it smoother, which will improve the quality of the coating.
- Wipe your nails with a cotton pad soaked in degreaser.
- Push back the cuticle.
- Apply the first layer without touching the periungual ridges and cuticle. The tips of the nail should be carefully painted.
- You can dry your nails in an LED (1 minute) or UV lamp (2 minutes).
- Before applying the second layer, the cuticle is pushed back again. This will make your manicure perfect.
- Apply the next layer with the same care as the first. Dry under the lamp.
After the procedure, you can treat the cuticle with a special oil. This will soften the skin and soothe it.
The differences when covering nails with three-phase gels lie in the step-by-step separate application of each product:
- After preparing the nail plate, it needs to be degreased and disinfected. This will eliminate the risk of fungus appearing under the coating.
- To improve the adhesion of the gel polish to the nail, a special primer is applied. It is better to choose an acid-free one, which does not spoil the structure of the plate. Drying is not necessary at this step; the product will dry on its own within 20 seconds.
- The base is applied in a thin layer over the entire surface and then dried. 2 minutes if using a UV lamp and about 30 seconds under an LED lamp.
- The color layer is also applied thinly. Drying time is the same as in the case of the base. A primer that improves adhesion to the next layer should also be present.
- The fixative coating is thicker than the others. Therefore, after application it is better to dry your nails additionally. This will extend its service life and eliminate the risk of damage.
The service life of such a manicure is from two weeks.
Important! Whichever of these products you use, you need to pay attention to the quality before purchasing. The easiest way is to choose a gel by smell. A high-quality coating does not have a sharp unpleasant aroma, which indicates the absence of harmful impurities.
Three-phase gel for extensions, how to apply. How to extend nails with gel?
How to extend nails with gel?
Gel nail extensions - step by step! What are the differences between single-phase and three-phase extension systems? How to grow your nails yourself?
How to choose a gel for extensions?
Single-phase units are usually preferred by beginning craftsmen. But some remain faithful to them over many years of work. Grattol gels have a viscous structure and are convenient to distribute over the surface of tips or molds. The pink opaque InGarden gel is perfect for a nude manicure; it is quite dense and does not show through. Beige single-phase from Vogue Nails is also a great option for nude; it self-levels and perfectly models the nail.
With experience, masters, as a rule, switch to a three-phase extension system. The widest palette of construction (modeling, sculpting) gels is perhaps from RuNail: the company has classic nude shades, and bright raspberry, blue, green and purple. As a base you can choose, for example, Kodi, and for the finish - Grattol with a sticky layer or Lianail, which is applied like a top coat and does not turn yellow after drying, which allows you to preserve the main color of the extended nails.
Gel nail extensions step by step
The technology for gel nail extensions in single-phase and three-phase systems is absolutely the same, only the gels themselves differ. Either you use a single phase gel for all three steps, or three different gels.
- We carefully treat our hands with an antiseptic, paying special attention to the fingers and nail bed.
- We do a manicure in the usual way and polish the nail plates with a buff.
- We degrease the nails, then apply a bonder (dehydrator) and primer.
- We prepare tips or forms. We cut the tips to the required length with a tip cutter and sand them with a buff to get rid of the smooth surface, then glue them onto the nails. We secure the forms firmly under the nails; they should not move during the work.
- Apply the first base layer of gel. In a single-phase system it can be immediately colored, in a three-phase system it is usually transparent. We distribute using a brush into tips or shapes, creating the correct oval/rectangle, depending on the desired shape of artificial nails. Dry the layer in a lamp.
- Apply a modeling layer of gel. It should not be too thick and lumpy, you should strive for an even distribution. Dry it again in the lamp.
- We grind the surface of artificial nail plates, giving them the desired shape, length and arch. Remove dust with a nail brush or napkin.
- Then we apply the finishing gel and seal the ends of the nails. The last layer is also polymerized in a hybrid lamp.
Now you can complete the gel polish coating and design. If you decide to do without coating and nail art, you can apply softening oil to the cuticle.
Pros and cons of single-phase gels
- A good result without unnecessary time expenditure.
- The application method excludes coating with a base and fixer. Therefore, you should not count on a long service life of such a manicure.
- During application, such varnish may drip, which causes difficulties when modeling nails.
- This product is not suitable for complex designs and decorations. The absence of a sticky layer does not allow you to show originality in the design of your manicure.
- Those with an elastic nail plate often experience cracking of the coating, so sometimes you have to additionally buy a fixer specifically for single-phase gels.
- Single-phase varnish does not dry out the nail plate and can be used even for weakened nails. However, this is not always good, because without the appropriate skills, nail modeling will not work.
- The finishing stage eliminates the formation of a sticky layer.
Tags
gel polish kakgel polish kakgel polishes todaygel polish andgel polish gel polish gel polish gel polish gel polish for three-phase varnish allows you to process the nail.on the nail plate.nail design.If the nail platethe architecture of the nail platethestructure of the nail plate.for nails is applied to the nail plategloss of the nail platefor nail extensionsfor nail extensionsfor extensions Building and
colorcarehandhairmakeeyelashesmakeupnextthineyebrowpedicurewhyfuckviewaccessoriesfreenailsnailsbeautynailview
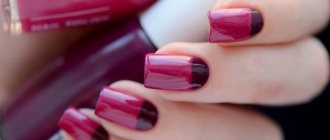
Pros and cons of three-phase coatings
- High strength is accompanied by a glossy shine thanks to the fixative. This varnish does not deform and looks as if it had just been applied.
- The complexity of the process does not always allow you to do a manicure at home, so you have to resort to the services of a professional master. The result is additional costs of time and money.
- Decorative elements on nails in the form of stickers require the use of only a three-phase application system. It is this method that allows you to firmly secure the decorations between the layers.
Attention! Regardless of whether single-phase or three-phase gel polish is used, the surface of the nails must be degreased before application. During the application process, be sure to remove any remaining product that gets on the skin near the nail.
Which product should I choose?
When the question arises, which is better, you should decide what is your priority. Beginners prefer single-phase gels. They are attracted by ease of use and pricing. In addition, for those who like to frequently change their nail color, this option will come in very handy. This is an affordable way to have a manicure for any life situation: be it a wedding celebration, or an ordinary friendly party. With this product you can look your best without being a professional.
More experienced people believe that it is better to spend time and money, which will later pay off in the form of a durable and original manicure. This option is good for those who cannot afford to do their nails often for a number of reasons. It’s easier for them to go to the salon once a month and get the desired result. Or, after spending time, do the same at home, if your skills allow. In this case, a thorough choice of a three-phase agent would be more rational.
Important! Always follow the storage conditions for bottles of gel polishes. Loose closures and dirty bottle necks will render the products unusable. They will lose their qualities, which will immediately affect the beauty of the manicure. Varnishes should be kept away from the sun and heating devices, and open bottles should not be placed near lamps for drying.
What you need for self-application
- There is no need to do hand baths before the manicure procedure. The point is the porous structure of the nail, which will absorb moisture. The time for evaporation will be about 3 hours, and applying the coating to a non-dried surface will promote peeling of the varnish.
- Take your time. Otherwise, miss an important point, which will cause the coating to be short-lived. Shooting and redoing it again is an additional challenge.
- Be careful. If you can handle simple varnish, then applying a gel coating will not be difficult.
- Buy a palette (these are artificial nails that you can apply polish on). After practicing on it, you will identify your weak points and be able to approach decorating your own nails more competently.
- Apply the gel, making the layer as thin as possible. Thick layers may shrink during the drying process, which will ruin the entire appearance of the coating.