What is gel polish, its types
Gel polish is a unique cosmetic product designed to cover nails. It is a hybrid combination of classic nail polish with modeling gel. At the same time, it retains only the best properties of the above-mentioned components.
Covering nails with gel polish provides their owners with the long-term effect of a beautiful and well-groomed manicure.
Color and design can last up to 4 weeks. This is explained by the presence of a dispersion medium in the composition of the drug, which forms a checkered film on the nails. Thanks to it, the gel polish adheres to the surface of the nail as well as possible and lasts for a long time. The uniqueness of gel polish coating is that it is great for natural nails and artificial nails (extensions).
Gel polish coating for beginners is one of the best developments in the beauty industry for nail care in recent years. Residents of Europe were the first to appreciate this product 15 years ago.
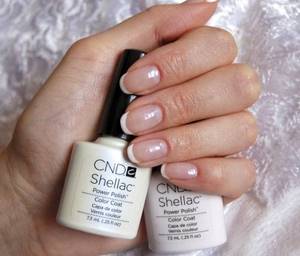
Nowadays gel polish is very popular both among famous beauty salon masters and among ordinary girls who want to get a beautiful manicure at home. In the popular environment, gel polish is called “shellac”. Since the pioneers in Russia were the Shellak CND brand.
Distinctive properties of gel polish:
- High durability. It can stay on nails for 2 to 4 weeks. This is why it attracts a large number of fashionistas who want to wear a fresh manicure for a long time.
- Nice composition. Most often, it contains hypoallergenic substances that reduce the risk of harm to the nail plate. Many brands take care of their customers and add useful strengthening and nourishing components to their composition.
- Color saturation. Unlike regular polish, gel polish does not lose its pigmentation. When properly applied, the coating does not become cloudy, does not wear off, and is resistant to chips and scratches.
- Ability to withstand household loads. Any girl has frequent contact with water, various detergents and household products. Gel polish, hardening upon application, creates a dense film on the nails that does not destroy the manicure.
- Simple application technology. Gel polish is applied quickly, painlessly and dries for a short time under a special lamp. Anyone can create the perfect coating using gel polish.
Gel polish composition:
- A photoinitiator is a molecular compound that absorbs UV radiation. Thanks to it, the gel polish dries quickly under the influence of ultraviolet rays.
- A film former is a chemical component that provides a durable coating and prevents its destruction.
- Thinners are esters, monomers that are used to maintain optimal consistency. So that the texture of the gel polish is moderately viscous and ensures tight adhesion to the nail plate.
- Coloring pigments are organic or inorganic components. The density of the coating and the saturation of shades depend on them.
- Various additives and fillers allow gel polish to strengthen and nourish nails.
According to the application system, there are three types of this product:
- Single phase. To create a manicure, you only need a tube of colored pigment and nothing else. The coating is not permanent, great for strong natural nails. With the help of a single-phase gel polish coating, novice nail technicians can easily create a manicure.
Single-phase gel polish coating is great for beginners. - A two-phase product implies the application of a top (fixing) coating after applying the color. Two-phase products are rarely found in beauty salons, as the effect leaves much to be desired.
- Three-phase gel polish involves three stages of application. The first is the base coat, followed by the color pigment, and the final stage is the top coat. This system is the most reliable and in demand. Because the result is the most durable and practical manicure.
Advantages of the method
Trim manicure is a classic manicure method.
Compared to other types of nail care, it has many advantages:
- Efficiency. By trimming the cuticle, your nails retain their presentable appearance much longer.
- Execution speed. The complete classic manicure procedure takes no more than 30 minutes.
- Versatility. Trim manicure has no contraindications. It can be done by both men and women.
- Additional hand care. The use of baths with beneficial ingredients has a positive effect on the skin of the hands and strengthens the nail plate.
- Manicure can be combined with other caring procedures , such as paraffin therapy or peeling.
- The procedure is carried out not only in salons, but also at home , subject to mastery of the technique.
Classification of gel polishes by texture
All gel polishes are divided into 2 main categories:
- Reflective gel polishes. The main advantage is quick adhesion to the nail. Such tools are easy to use and easy for beginners to work with.
- Non-reflective gel polishes. In addition to this drug, an activating substance is also required. This type of gel polish has a glue-like texture. To dilute it, a special spray is required. And you need to apply this gel polish with a professional gel brush.
Slider design for beginners
Slider design is a technique that uses special transfer stickers. The images are printed on a film that peels off by soaking. The film, due to its plasticity, perfectly follows the shape of the nail plate.
Nail design lessons for beginners using a slider include several main steps:
- The nails are prepared, the surface is degreased and the base varnish is applied.
- An image is selected that matches the size of the nail plate.
- The sticker needs to be soaked in water for 40 seconds, during which time the adhesive base is activated.
- The image is transferred with the adhesive side using the shear method.
- The pattern is carefully smoothed to remove any remaining air and water.
- After drying, the nails are covered with fixing varnish. If desired, the design can be diversified with various decor (sparkles, rhinestones, colored or shiny dust, etc.)
Nail design using a slider: video
Rating of gel polishes
| Segment | Place | Name | Price | Characteristic |
| The best premium gel polishes | 1 | Shellak CND gel polish | 900-1000 rub. | Provides the most dense and long-lasting coverage. Best in its category. Advantages: durability, thick texture, color saturation, huge palette. Manufacturer: France. |
| 2 | Gel polish Beautix UV Gel | 850-980 rub. | It differs from its competitors in the glossy effect on the nails. Advantages: durability, palette of rare shades, dries in 30 seconds. Manufacturer: France. | |
| 3 | Gel polish Akzentz Luxio | 1100-1300 rub. | Ideally distributed over the entire nail plate. Convenient to use. Advantages: durability, contains a huge amount of plant extracts that care for nails. Manufacturer: Canada. | |
| The best gel polishes for beginners | 1 | Gel polish FOX Professional Gel Polish | 320-400 rub. | Leader in quality in this price category. Pros: longevity, pleasant scent, comfortable wide brush, rich pigmentation. Production: USA, Ukraine. |
| 2 | Gel polish BOHEMIA APEX GEL | 440-500 rub. | The product is certified according to a three-level quality testing system. Advantages: uniform distribution, wide range of shades. Production: USA, Europe. | |
| 3 | Gel polish Kodi Professional | 380-430 rub. | Has the ability to change tone depending on the ambient temperature. Lightens at high temperatures, darkens at low temperatures. Advantages: durability, ease of use, available in many cosmetics stores. Production: Ukraine. | |
| The best budget gel polishes | 1 | Gel polish Haruayama Soak-Off | 220-280 rub. | Great product for the money. Pros: longevity, pleasant scent, excellent pigmentation. Made in Japan. |
| 2 | Gel polish Bluesky | 130-200 rub. | Not suitable for beginners. Application requires the attention of an experienced technician. Pros: affordable price, comfortable medium-sized brush. | |
| 3 | Gel polish Tertio | 180-220 rub. | The only gel polish made in Russia. It has light pigmentation. As a result, the color will appear translucent. Advantages: fast drying, wide range of colors. Production: Russia. | |
| 4 | Gel polish TNL MagnetEffect | 130-150 rub. | Allows you to create a cat-eye manicure using a magnet. Advantages: creation of an unusual design on nails, affordable price, economical product consumption. Production: Korea. |
Lessons: nail design with paints
Acrylic paints can be used to create stylish and bright nail designs, which are very popular in 2016. Before you begin the registration itself, you must complete the following steps:
- Cover your nails with varnish and, after drying, apply a base coat of the desired shade.
- After the base has dried, drop acrylic paint onto the coating and use a thin brush to draw the desired pattern. The easiest ones to make are curls.
- Using dots you can draw even dots.
- After drawing patterns and ornaments, cover the nails with a fixative.
Nail design using a slider: video
How to choose gel polish
To cover nails with gel polish, beginners should focus on the following points when choosing a product:
- Professional grade compounds. Such products contain fewer chemical components and more natural ones, which have a beneficial effect on nails.
- A large number of professionals (beginners and professionals) give preference to well-known brands on the world market (Shellak CND, Beautix UV Gel, BOHEMIA APEX GEL), which have long been able to win the trust of girls. There is no doubt about their quality.
- Price. Low price is not a guarantee of good quality. Most likely, this coating using gel polishes is suitable for beginners. Craftsmen interested in providing high-level services should pay attention to more expensive materials.
- Color palette. It should be varied. So that you have plenty to choose the right shade from. But remember that bright colors require 2-3 layers. Accordingly, the product consumption will be greater.
- Easy to apply gel polish and easy to remove from nails. A high-quality product will be evenly distributed over the entire surface of the nail and dry quickly under the influence of UV radiation. In addition, it should be removed even faster after its life cycle (from 2 to 4 weeks) using a special liquid.
Why is it dangerous to use unsanitized tools?
A tool that has not been disinfected can cause infections. The risk is especially great if the tool is used by several people. There are several stages of instrument processing: cleaning, disinfection and sterilization.
- Cleaning is simply rinsing the instrument with water and cleaning agents.
- Disinfection is carried out by placing the instrument in a special solution for a short period of time - such treatment is sufficient at home for an instrument used by one person. As a result, microorganisms located on the surface die.
- sterilized using autoclaves, dry heaters, and sterilizers. This treatment eliminates the occurrence of bacterial and fungal diseases on the hands, hepatitis B and HIV when using the instrument on several people.
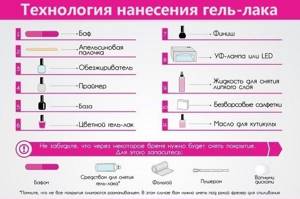
What is required for a manicure besides gel polish?
To apply gel polish to your nails, beginners need the following tools:
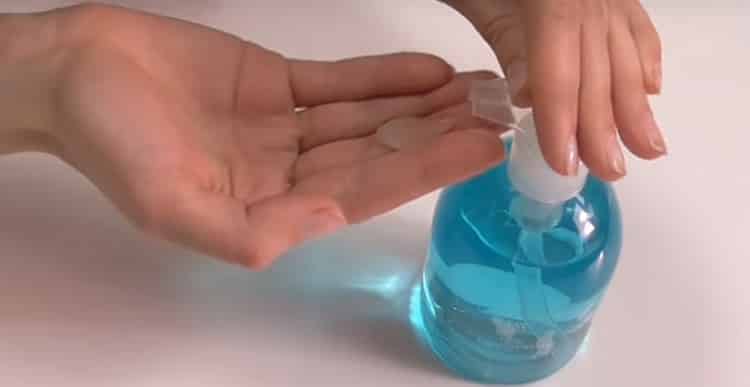
- Hand sanitizer. It disinfects hands, nails and cuticles.
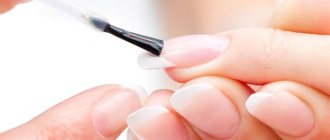
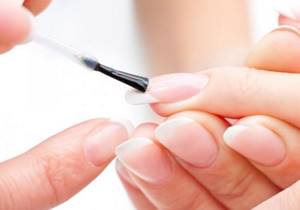
- Primer (base) – it degreases the nail plate, ensures tight adhesion of the natural surface of the nail to the gel polish, thereby extending the life of the manicure.
- Base coat (first layer) – evens out the nails and hides their minor imperfections. It also prepares the surface of the nails for applying the main color.
- Colored gel polish.
- Top coat is the final stage in manicure. The top protects nails from external environmental influences, from chips and scratches.
- Special lamp for drying. The main task of the lamp is to dry the gel polish as quickly as possible. It all depends on its power and variety.
| Type | Characteristic |
| UV lamp | Budget price, ability to dry not only one hand, but two at once. Maximum power – 36 W. Drying time is over two minutes. |
| LED lamp | LED lamp. Drying time: 1 minute. |
| Hybrid | Combines only the best qualities of the two previous lamps. |
- Matching nail files. They allow you to carefully process your nails and create the desired shape (almond, oval, square, soft square and others).
- Buff is one of the types of nail files. It is used at the initial stage of manicure and for removing gel polish.
- Tools for removing cuticles. These include: special gels for softening and removing cuticles, orange sticks, tweezers, manicure scissors.
- Cuticle oil. To make the skin along the nail look well-groomed and neat, cuticle oil must be used during the manicure process. It should be rubbed in with massage movements until completely absorbed.
- Nail degreaser. It removes the sticky layer after using gel polish.
- Gel polish remover, foil and cotton pads. With the help of these media, gel polish is removed quickly and painlessly. The solution is applied to a cotton pad, which must be pressed tightly to the nail and wrapped with foil on top. After 10-15 minutes, the old layer of gel polish can be easily removed from the nails with an orange stick.
Doing a trim manicure at home: step-by-step instructions with photos
It should be noted that the methods of implementation differ among different nail salon masters. Each of our readers (or readers) will ultimately determine for themselves a technique that will be individually convenient. Next, we list the main stages of performing a manicure step by step with some variations.
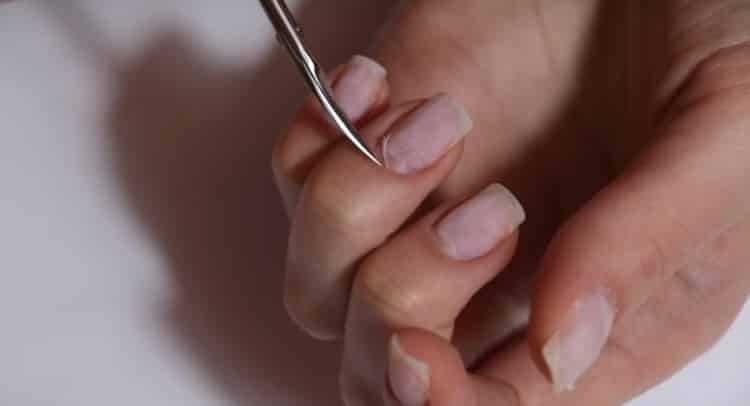
STEP 1: Hand sanitizer, disinfecting tools (especially if they have been used by someone else) . Later we will dwell on why this is extremely important. In the meantime, a short recommendation: avoid using manicure tools that have been used by other people without proper disinfection. This is especially true for everything that can hurt to the point of bleeding: scissors, wire cutters, knives.
STEP2: Nail treatment . At the first stage, while the fingers are dry, the nails are processed (soaked nails, when treated with a file, can bend and then peel). Therefore, first dry cut them with scissors or pliers to the desired length and give the desired beautiful shape to the edges of the nail, and then file them. When using a file, try to make movements in only one direction, since moving in different directions will damage the nail and subsequently peel it off. The final part of processing the nail plates is polishing them with a buffer or a file intended for polishing. With their help you can remove uneven nails and also make them shinier.

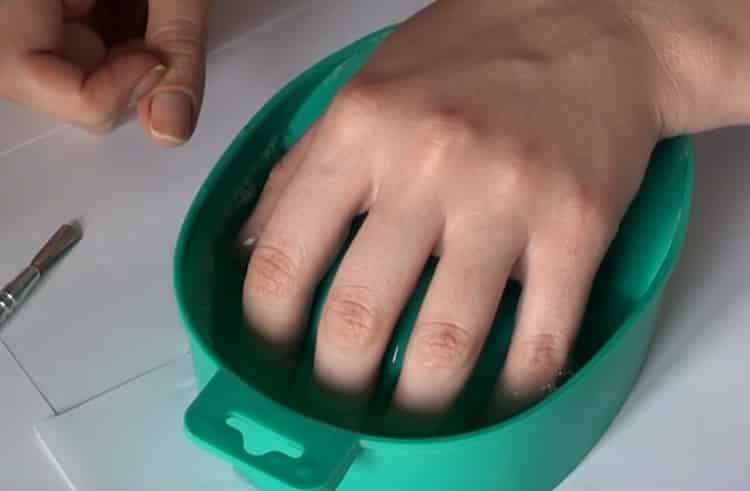
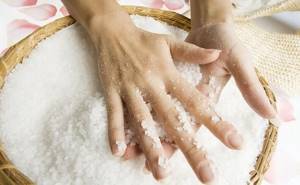
STEP 3: Treat the skin of the hands around the nails. But when working with the skin during a hygienic trim manicure of this type, it is done in a moist state. Prepare a bath at a pleasant temperature (in a special container or suitable dishes in the house). The optimal temperature is 35-40 degrees Celsius. It is recommended to add salt (sea), grated soap and/or oils (essential) to the water.
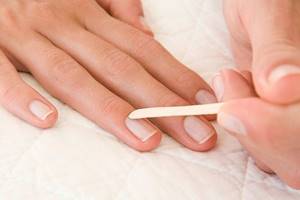
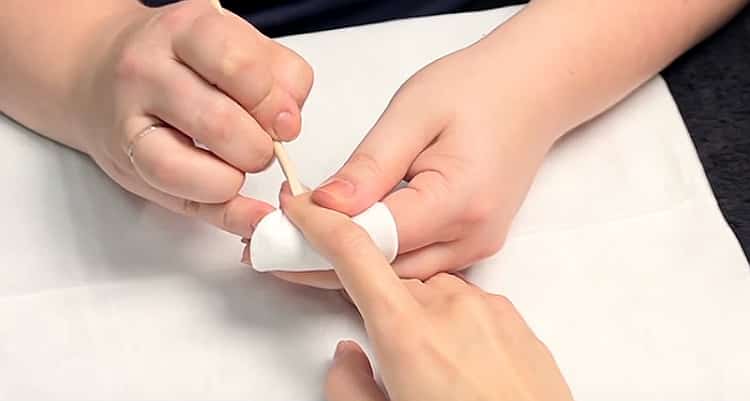
Before lowering your hand, use a manicure spatula to gently lift the skin around each nail.
Hands are lowered into the bath and treated one by one. First, lower your first hand so that your fingers are half immersed in the solution. About five minutes in water will be enough (but some prefer the procedure to last up to 15 minutes).
Remove your fingers from the water one at a time, starting with your little finger (the rest will continue to get wet). First, dry your finger with a towel.
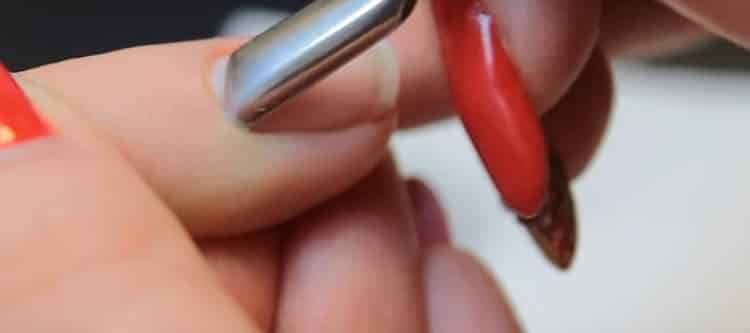
Use a manicure spatula (pusher) to move and lift the skin around the nail again. In this case, you do not need to press hard on the nail, especially at its base, where it is more delicate. If you do this, then the nail may have depressions and irregularities.
Further treatment of the skin around the nail consists of two parts: working with the cuticle and treating the side with a roller. The cuticle is the keratinized part of the skin that covers the nail on the side of the nail plate from which it grows. And the lateral ridges are the parts of the skin adjacent to the nail on the sides.
Each master performs these operations a little differently, and you can verify this by watching video tutorials on trimmed manicure from different authors. Here is one of the most popular options.
First, use special nail scissors to remove the cuticle. They have curved long tips. The cuticle of each finger must be cut off as a whole, not in parts. This will protect your finger from burrs in the future. The continuous movement of the scissors starts from one corner of the nail (in the part from where it grows) and ends in the other corner. The side rollers are not affected at this stage of processing. The removed cuticle should look like a thin single rope.
Next, using tweezers, also called scissors, the lateral ridges of the nails are processed with gentle movements. At the same time, excess skin and all existing burrs are cut off.
After this, the next finger is removed from the bath, and the entire operation is repeated.
It is worth noting that many choose another option - removing cuticles with cuticle tweezers. Which one you choose is up to you, the main thing is that it is convenient and provides high-quality results.
When one hand is treated, some people prefer to change the water (it may cool down). After which everything is repeated with the second hand. Instead of or together with a manicure spatula, you can use a special orange wood stick.
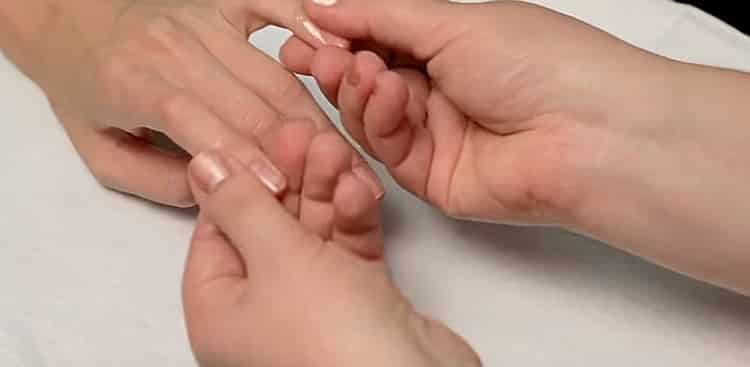
STEP 4: Skin and nail care treatments. When all fingers have been treated, you need to move on to hand care. The cuticle is treated with oil, and the entire hands are treated with nourishing cream. These care methods soothe the skin and make it soft and velvety. For dry skin, use a special cream.
STEP 5: Varnishing . If desired, the nails can then be covered with decorative varnish of any beautiful shade or with a protective coating. There are also additional products used before applying the varnish, as well as on top of it. Before applying varnish, do not forget to degrease your nails, for example, with alcohol. Your nails are ready!
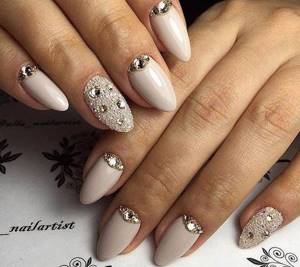
Master class on applying a single-color manicure with gel polish
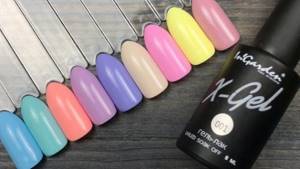
The trend in 2022 is manicure in pastel shades. Such as beige, powdery, pale pink. This color scheme is perfect for gentle and sophisticated natures.
A classic red manicure will never go out of style.
It is ideal for self-confident and self-sufficient women. And most importantly, it will be appropriate at any time of the year and in any environment, be it everyday work or a relaxing vacation.
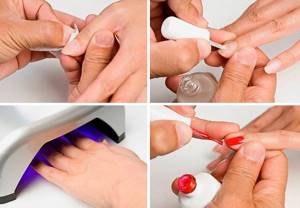
Technology for creating a monochromatic manicure with gel polish:
- It is necessary to disinfect your hands with an antiseptic.
- Next comes the removal of the old gel polish coating using a special solution, cotton pads and foil.
- Correcting the shape of the free edge of the nails using a file and a buff.
- Having previously removed dust from the surface of the nails, you need to generously moisten a lint-free cloth and thoroughly wipe your natural nails with a degreaser. Especially in the cuticle area. You will need one napkin per hand.
- For more reliable adhesion of materials, it is necessary to apply a primer. You only need the right amount of the drug so that moisture does not remain on the surface of the nail. The primer should evaporate following the movements of the brush.
- Applying the base should begin with your thumbs. This will save a significant amount of time during the procedure. The consistency of the base must be stretched from the cuticle to the free edge of the nail.
- Fix the coating in an ultraviolet lamp for at least 30 seconds.
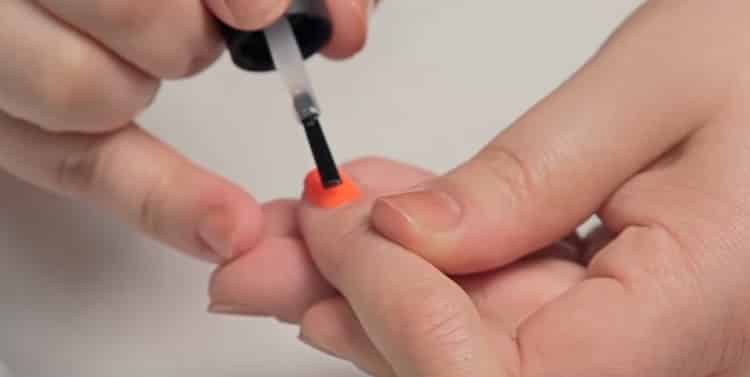
- Next, you should evenly distribute the first thin layer of colored gel polish over the entire surface of the nail. Paying special attention to the sides of the nail plate and the end of the free edge.
- Fix the coating under UV radiation for at least 1 minute.
- Using the same scheme, it is necessary to apply a second layer and then seal it under ultraviolet rays.
- After applying the color, you need to alternately cover all the nails with top coat (finish coat) and dry them under the lamp. For best results, it is recommended to apply the top in two layers.
- At the end of the procedure, use a degreaser to remove the sticky layer with a lint-free cloth.
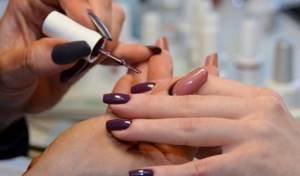
French manicure with shellac
French manicure is one of the most popular types. This is a classic manicure and will suit any situation. French involves painting the tip of the nail with white varnish, and applying a neutral shade to the remaining nail plate: beige, pink or clear varnish.
The processing of plates is carried out in the classical way. It is not necessary to use a buffer for this type of coating, since shellac has excellent adhesive properties. Apply a thin layer of primer and base to oil-free nails, and then dry them under a lamp.
Then apply the colored coating and bake it for 1 minute. Use white shellac to paint the tip of the nail. This should be done in 2 layers, not forgetting to dry the nails under ultraviolet light. A top coat completes the French manicure procedure.
Don't miss the most popular article in the section: How to extend nails with gel polish. Nail extension instructions for beginners. Photo.
Master class on applying multi-colored manicure with gel polish
French manicure, or French in other words, has been popular for many years. Due to the organic combinatorics of the natural shade of nails with white color, you get a neat, beautiful manicure that is ideal for girls and women of any age.
French adds femininity to the image of its owner and emphasizes the length and beauty of her nails.
Step-by-step instructions for creating a French manicure using gel polish:
- The first stage is preparing the nail plate. It is necessary to process the free edges of the nails, remove the cuticle using auxiliary tools, and degrease the surface.
- Apply primer and dry under lamp for at least 30 seconds.
- Apply a thin base coat and dry for at least 1 minute.
- Apply the main color (light beige, light pink) to the entire surface of the nails and dry under a lamp for at least 1-2 minutes. It is recommended to apply 1-2 layers.
- Using a thin brush for nail art, you need to draw a crescent line on the tip of the nails and dry it in a lamp for 1-2 minutes. Cover in 1-2 layers. If you can’t handle a brush, you can use stencils to create a French manicure.
- Fixing the design with a top. Dry under lamp.
- Removing the sticky layer using a degreaser.
- Applying nourishing cuticle oil.
Useful tips from the master
Experienced nail industry professionals advise novice amateurs on how to do trim manicures on their own at home:
- file the nails in one direction;
- work only with a dry nail plate;
- Keep items clean, wipe with alcohol or disinfectant before handling;
- use well-sharpened tools;
- use high-quality base, top, gel polish. Emollient oil, nourishing compositions, creams;
- remove varnish coating with solutions without acetone.
The technique of performing a trim manicure is easy to master and perform for a novice nail design enthusiast. Follow the step-by-step instructions, watch video tutorials.
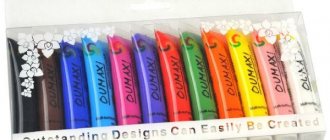
How to apply simple patterns and designs to gel polish
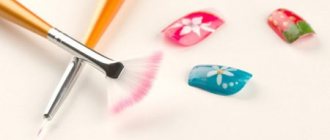
The main tool for creating designs on nails are special brushes.
They are:
- in the form of a fan;
- wide flat with an even or oblique cut;
- thin with different lengths of pile;
- dots;
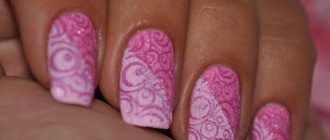
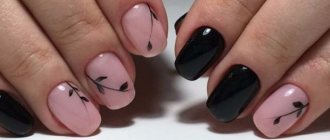
Popular ideas:
- Web. After coating with colored gel polish, beginners should polish the nail and using a thin brush, you can safely draw patterns that represent a spider’s web. The main thing is to initially collect a minimum amount of material, and then add little by little as you go.

- Monograms. The design is created using a single-color gel polish and a brush, convenient for a beginner in size. After the base, you need to put a little dark gel polish on your brush, black will look most expressive, and draw monograms in the shape of semicircles. To get an elegant design on each nail, you can make monograms in different colors rather than one. If desired and in the mood, you can add rhinestones, sparkles, and stickers.
- To create roses on your nails you will need: dots, several colored gel polishes and a thin brush. After drying the base layer, you need to cover your nails with the main color of gel polish and seal the result under the lamp. When it dries, you can draw roses.
Gel polish coating for beginners with designs and patterns is always relevant. Roses will lift your spirits in the spring and summer. And cobwebs and monograms will add zest in winter and autumn.
Required Tools
Trim manicure, the classic version of which involves removing dead skin from the nail folds, requires a certain set of tools. They are used to polish nails, shape them and trim cuticles.
Basic accessories for trim manicure:
- scissors or tweezers;
- wire cutters;
- cuticle pusher;
- buffs for polishing;
- files with the required level of abrasiveness;
- brush for removing dirt;
- steam bath.
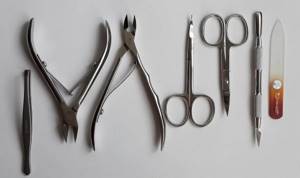
The hardness of the file should be selected depending on the thickness of the nail and the desired functional use. To correct the length, a tool with an abrasiveness of 200-400 grit is suitable, and for polishing a hardness of 900-1200 grit is sufficient.
It is best to choose ceramic, plastic or glass files. They carefully file the nail without damaging the plate. You should not purchase metal files, which lead to delamination and brittleness of the nail.
To apply drawings and create nail designs, you will need additional tools:
- Dots are a metal or plastic stick with a spherical tip for depicting dots and circles.
- Brushes of different thicknesses - for drawing details and performing a French manicure.
- Stamps and plates with designs (stamping kit) – for applying ready-made images to the nail.
Covering the nail involves applying varnish of one or more colors, a base for the varnish and a fixative. Sometimes a liquid is used to quickly dry the varnish, but in the case of a regular coating it may not be useful.
It is also necessary to have acetone to remove any remaining polish from your nails. To care for the skin of your hands after completing the procedure, you will need cream and cuticle oil.
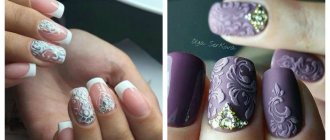
How to apply decor to a manicure with gel polish
Popular techniques for performing nail designs:
- Rhinestone inlay is part of the image of a charming and gentle girl. Rhinestones are glued in a chaotic manner naturally onto the uncured surface of the nail, coated with gel polish. The decor hardens under a UV lamp and at the final stage is filled with a finishing coat to ensure the durability of the manicure. Rhinestones can be complemented with patterns and designs.
- Rubbing. This is a special finely ground powder for nail art. It is rubbed onto the already lamp-dried nail surface. The result is a natural shine effect. A manicure with this design will fit perfectly into a festive look.
- Broken glass. The effect is created using a small piece of multi-colored foil, which must first be cut into small pieces of the desired shape. They should be carefully distributed over the nail plate. You can make an unusual pattern or mosaic out of them. This design is suitable for everyday life.
Gel polish coating for beginners has a lot of advantages. These include: attractive appearance, durability and protection from household defects. In order for the coating to be perfect, you need to choose only high-quality tools and materials, as well as a good, powerful lamp. In this case, a manicure will always please the eye.
Advice from experts on hand care after a manicure
A manicure will last much longer if you properly care for your hands after the procedure.
Nail service experts advise following a few simple recommendations that will help maintain the beauty of your nails:
- On the first day after a manicure, if possible, you should avoid contact with warm water and steam. Therefore, it is better to avoid visiting a bathhouse or sauna, as well as washing dishes.
- To avoid chipping or peeling of the gel polish, all housework should be done with rubber gloves. Household chemicals and too hot water dry out the skin of your hands, which negatively affects their appearance.
- It is not advisable to file coated nails yourself. This opens the sealed end of the nail, which will certainly lead to a violation of the integrity of the manicure.
- Removing gel polish yourself must be done extremely carefully. You need to use only a specialized product that softens the coating well. Excessive pressure with a pusher while removing polish residues leads to damage to the nail plate.
- Manicure correction should be done every 3-4 weeks as the nail grows.
- To soften the skin of your hands, it is better to choose nourishing creams containing fatty oils. Light fluids do not sufficiently moisturize the skin and evaporate quickly. You need to renew the cream after each hand washing.
- Before going to bed, you need to lubricate your cuticles with oil. This will help prevent dryness and improve blood circulation.
- Regular exfoliation of dead skin particles using peeling or scrub will give your hands a well-groomed appearance.