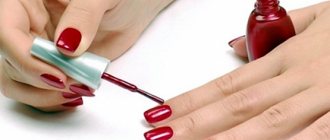
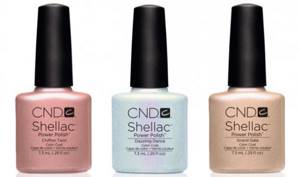
Shellac is a gel nail polish that allows you to create a natural, neat, and most importantly durable manicure. It got its name thanks to the CND Shellac brand, which first introduced this type of varnish to the market. Today, many campaigns and varnish manufacturers include this term in their products.
Accordingly, a shellac manicure is a manicure performed using long-lasting gel polish that combines the best properties of regular polish and gel for nail extensions.
How to distinguish real shellac from fake?
The first and main sign of a fake is the low price. When purchasing any cosmetic product, cheapness is a sign of savings on product components. For example, cheap gel polishes have fewer components that help protect the nail. They are more harmful and also less durable.
Another indicator is smell. Almost all good cosmetics stores should have a sample next to each product. Which needs to be examined not only for color, but also for smell. Real shellac should not emit a sharp, unpleasant chemical aroma.
Next, using the same probe, you need to study the consistency of the drug. Its density should be medium: not too liquid, but not thick either. The first indicator will indicate that the gel polish was diluted with acetone (or any other similar product) to increase the volume of the batch. The second will indicate an expired expiration date or incorrect storage principle.
The most important thing when buying gel polish is to use only professional stores and purchase exclusively familiar brands.
Otherwise, you can allegedly save time and money, but not achieve the desired result (loss of money), or even ruin the appearance of the nail (wasting a lot of time on restoration).
Pros and cons of shellac compared to regular varnish
When creating shellac, the main goal was to create a nail coating that had durability (from gel) and color variety (varnish). To an inexperienced consumer, it may seem that gel polish and regular polish do not have significant differences: an identical application technique combined with the same appearance of the materials.

However, upon closer examination, the following differences can be deduced:
- Regular polish can dry in the fresh air, while gel polish requires exposure to a special lamp with ultraviolet rays. This technology has both positive and negative sides. The latter involves the need to purchase a specialized lamp, the price of which can reach up to 7 thousand rubles, and in some cases more. However, this equipment will eliminate long minutes of waiting and the fear of ruining the monolith of work done with simple hand movements.
- Shellac is somewhat limited in color palette than regular varnish.
- The cost of shellac is higher than the price of regular nail polish.
- The main difference between these coatings is the wear time: shellac stays on the nail without visible damage for up to 3 weeks.
- To remove nail polish, you just need to wipe the nail plate with nail polish remover. In the case of shellac, everything is not so simple: such a composition can only be removed using special mixtures.
Obviously, there should be differences between shellac and nail gel. Initially, the difference could be found in the presence or absence of color in the coating, but today gels with color are produced. Thus, there remains only one, but very significant difference - the purpose of applying these compositions to the nails.
The gel is intended for extension of the nail plate, which implies further manicure procedures. In this regard, the application techniques for shellac and gel are also different.
What difficulties may arise when applying gel polish at home?
- Unable to apply coating accurately
- Gel polish shrunk during polymerization in a lamp
- There are bubbles in the gel polish
- The coating peels off after a few days
The main advice: don’t get upset, be patient and practice this skill. It’s better to get trained at our licensed school “ParisNail”!
One of the reasons may be insufficient lamp power. Perhaps your gel polish is well pigmented and the lamp power is simply not enough to dry it. It is advisable to use a lamp with a power of at least 48 W. Also, the gel polish could shrink due to the fact that you applied it in too thick a layer.
This may happen due to the fact that the bottle of gel polish has been shaken. To get rid of bubbles, you need to open the bottle, but do not remove the brush. Let the material stand in this state in a dark place so that it is not exposed to daylight for a couple of hours. After this, you need to mix the composition with a brush, close the bottle and twirl between your hands.
Perhaps you made mistakes when preparing the nail plate for coating or in the technology of applying gel polish. Also, the reasons may be an incorrectly selected base or top. For information on how to choose them, read the articles “Base for gel polish. What is it and what is it for?”, “Top for gel polish. What is it and what is it for?
How does shellac affect nails?
The debate about the dangers of shellac for the nail plate has been going on for a long time: many complain that after removing the coating, their nails do not look their best. Of course, any impact on the nails can negatively affect their condition, causing deformation, layering and thinning. And the use of shellac is no exception.
However, by strictly following the technology of applying and removing the coating, you can avoid the consequences.
That’s why it’s so important to apply and remove shellac, for beginners, at home, step by step and following simple rules:
- Before performing the procedure, you should make sure that your own nails are healthy enough. It is not recommended to hide imperfections in the nail plate using the shellac procedure, since after removal the nails will acquire an even more deplorable condition.
- Before applying and after removing gel polish, your nails must be given proper assistance: apply moisturizing, nourishing and strengthening masks. The best results are obtained with products based on herbs (nettle, chamomile, aloe), glycerin and keratin.
- Brittle nails and increased splitting indicate a lack of calcium, which must be replenished with both external and internal means. Cosmetologists recommend starting to lubricate the nail plate with special medicinal varnishes containing calcium and other elements three weeks before the procedure. It is also worth taking a course of vitamin complexes, which must include calcium, vitamins D3 and B. They should be consumed during the entire period of wearing shellac and for a certain period of time after.
- After removing shellac, you must regularly use special nail baths. If the nail is severely split, it is recommended to undergo a wax sealing procedure.
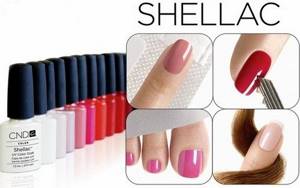
What is shellac, its advantages
Shellac is the name of the most popular product from CND. It was this brand that was the first to invent a semi-liquid but durable coating for manicure. It combines regular polish and gel. The composition was kept secret for a long time; the company mentioned only natural resins. Later, different gel polishes appeared on the market; the name of a specific product became a household name.
Shellac is often called ordinary gel polishes or the manicure itself in which they were used. Some brands, for example BLUESKY, even put the “Shellac” mark on the packaging, but the composition does not match the original CND.
The main advantage is that for strength, you do not need to cut off the nail plate or replace it with another material. Even without this, the material merges with the natural nail. The manicure looks natural, without thick and high bumps.
Durability
The durability of shellac is on average two weeks, but often it increases to 20-25 days. If you follow the technology, carefully apply it, and use high-quality materials, no cracks, chips, or peelings should appear during this time. By the end of wearing, the top layer may fade only slightly, and small scratches will appear on it over time.
Advantages and disadvantages
Shellac has many advantages; the material is comfortable to apply and wear.
pros:
- suitable for nails of different lengths and thicknesses;
- you can give any shape to the tips;
- gives scope for designs;
- coating does not require much time, 2 - 3 hours is enough;
- convenient to use;
- worn 14 - 20 days;
- rich palette of shades;
- makes thin nails thicker, increases strength;
- The product in the bottle does not dry out and does not deteriorate.
The disadvantages include the cost. This type of coating cannot be called budget; shellac is much more expensive than gel polish. In recent years, many alternatives have appeared from domestic, American, and Chinese manufacturers at prices 3 to 5 times lower.
How often can shellac be applied?
You can often hear from manicurists that shellac can be applied an unlimited number of times. And this is not at all strange, because such procedures are their “bread”, a way to make a living.
But responsible professionals who are not trying to get rich at the expense of their clients argue that: although in the hands of experts who know what they are doing, shellac cannot cause much harm to the nails, it is still worth giving the nail plate a rest.
No matter how wonderful and harmless this product is, it still contains components that can deplete the nail , depriving it of essential microelements and vitamins. For example, to absorb calcium, nails need vitamin D, which is produced by the sun.
However, under the coating layer, the nails are unable to absorb the required dose of the vitamin.
Thus, the frequency of applying shellac has no clear restrictions. However, it is recommended that after each 3 procedure you give your nails a rest for at least 14 days, and in winter the period increases to 3 weeks.
Don't miss the most popular article in the section: How to draw monograms on nails step by step for beginners. Instructions with photos.
Why choose shellac
Women have long appreciated the durability and dazzling beauty of shellac coating: it does not require “repair” or repainting for at least 2 weeks. During this period, the durable gel, applied in stages using a unique technology, is not afraid of scratches and chips. This prospect, of course, pleases working and traveling women, who just need to take classes in how to apply shellac, learn how to do an exclusive manicure on their own and enjoy it for half a month.
You can learn how to do this correctly by watching video tutorials for beginners on how to coat nails with silk. All the fair sex needs is to carefully review the lessons and follow the recommendations of experts step by step. But first you need to stock up on full equipment to apply shellac yourself.
How long does it take on average to apply shellac?
If you have step-by-step instructions, any beginner can do a shellac manicure at home. However, for beginners this may take significantly longer than for professionals. Compared to applying conventional varnish, the shellac coating procedure has many nuances, new devices, tools and materials.
Therefore, it is very difficult to voice a specific part of the time: everything depends on the dexterity and adaptability to new conditions of the person who is going to perform the procedure. In addition, an important factor is the condition and quality of the nails themselves.
However, if we exclude the human factor and determine only the time of the procedures and the properties of the preparations (what to hold for how long, how long it will take to dry, etc.), then the whole process should not take more than 30-50 minutes.
Don't miss the most popular article in the section: How to extend nails with gel polish. Nail extension instructions for beginners. Photo.
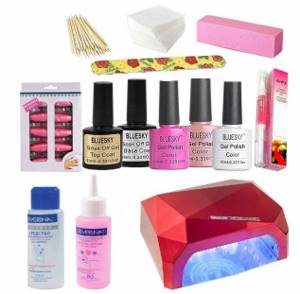
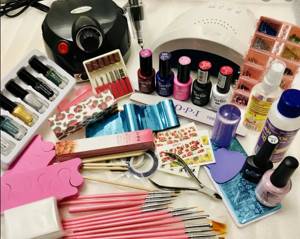
Preparation of tools and materials
There is a basic set of necessary tools and materials that will allow you to easily create a beautiful shellac manicure at home. It includes:
- Ultraviolet lamp with a power of 36 W. If you purchase a UV lamp with a lower power, there is a chance that the layers of varnish will not “set”. In this case, a manicure will not work;
- Nail degreaser. Often it is purchased in the same place as the Shellac manicure kit. In extreme cases, you can use regular medical alcohol;
- Base or base coat;
- Colored shellac;
- Top coating (finish);
- Nail file or polishing buff;
- Orange stick;
- Lint-free wipes (lint will ruin the manicure, and you will have to remove the shellac and reapply it). Necessary for removing the sticky layer at the final stage;
- Shellac remover.
We recommend purchasing the base, finish and color varnish from the CND brand . This is due to the fact that only the official manufacturer provides a quality guarantee. You can, of course, buy cheaper analogues. But you won’t get a quality manicure with them. By saving, you will not get the desired result - a neat, long-lasting and beautiful manicure.
Tools needed to apply shellac
Most of the tools needed for step-by-step application of shellac at home can also be found by beginners, as they are mandatory for every lady:
- manicure set (tongs, spatula, orange stick, files);
- brush for removing dust from the nail plate;
- ultraviolet lamp;
- lint-free wipes;
- foil with sponges.
Shellac lamp
A lamp plays a big role in manicure using shellac . The process of drying a nail is called polymerization. For this process, one of three types of lamps will suit us:
- Ultraviolet;
- LED;
- Gas-light, cold cathode.
The most popular are ultraviolet lamps, largely due to the fact that they were the first. LED lamps carry out the polymerization process much faster.
Where an ultraviolet lamp requires 2 minutes, an LED lamp requires 2 seconds. But it should be borne in mind that LED lamps do not dry all types of gels and varnishes.
Cold cathode lamps are considered the most functional today.
This lamp dries all existing varnishes, does not have a negative effect on the skin of the hands, and polymerizes quickly enough.
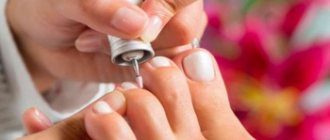
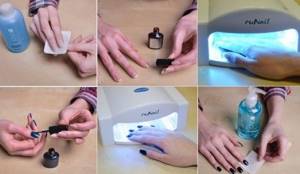
Preparing nails for shellac application
Not only the appearance of the manicure, but also the duration of its wear will depend on the correct preparation of the nail.
At this stage, you need to complete the following steps:
- Nutrition of the nail plate . Hands need to be steamed in a special bath, preferably based on medicinal herbs, for example, aloe. This is necessary to keep the nail in good condition.
- Cuticle removal . Steaming also helps to soften the cuticle, which means its better removal. You should also apply a special cuticle remover to the cuticle. Then move it to the edge of the nail using an “orange” stick and cut it off with pliers. It is worth noting that this “island” of skin must be trimmed as much as possible: the smaller the cuticle, the longer the regrowth of the plate will not be noticeable.
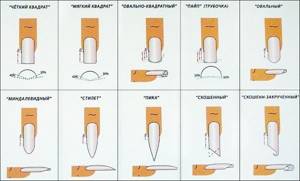
- Shaping. To a large extent, a successfully done manicure can be judged by the shape of the nail. It is worth remembering that after applying shellac it will not be possible to correct the shape. That is why it is necessary to give the nail the most attractive contours from the very beginning through the use of a nail file.
- Polishing . In order for the gel polish to lay evenly, without depressions and “incisors,” the nails must be “smoothed” using a special polishing file.
- Cleansing . Clean the nail from any nail powder remaining after the previous 2 steps. This must be done with a brush: the usual “blowing off” of dust will not be effective enough in this case.
- Removing fatty components . The completion of nail preparation is degreasing them with a special product. This is necessary for good bonding of the nail and shellac. After this procedure, you should not touch your nails with your hands or touch any other surfaces or objects with them.
Set of shellac varnishes
A shellac polish set that lacks a lamp and other necessary items is harder to find. More often they come in basic or professional configurations. In the first case it is 1-5 colors, in the second it is 5-10 shades plus other compositions needed for manicure.
BlueSky only has a set of 5 flower beds designed for making patterns.
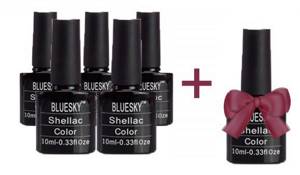
Shellac polish set from BlueSky
It includes white, black, pink, gold and silver shades. There are sets for French makeup, which include 2 shades of shellac, a base and a top.
Inexpensive Chinese manufacturers offer larger sets of polymerizing varnishes, for example:
- HNM NAIL GEL POLISH – 4 flower beds, top and base coats;
- BUKAKI ZHG88 – 3 shades of varnish, glitter product, black gel paint, base and top;
- FAIRYGLO FG-7ML-S-ANY3 FG-7ML-BT – 3 colors of varnish, base, top, manicure accessories.

HNM NAIL GEL POLISH
Usually the volume of bubbles is 7 ml, which is very beneficial for beginners. But if you want variety, you should buy varnishes separately. Otherwise, with flower bed kits, you purchase items that you may already have at home.
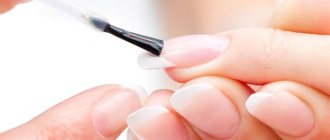
Applying the base layer
This layer is designed to protect against the negative effects of the tinting layer, as well as improve its adhesion to the nail.
The application of each layer is divided into several points:
- Painting the left edge of the nail;
- Coloring the right edge;
- The final stroke in the center of the plate;
- Before performing the remaining steps, you need to make sure that the edges of the nail are thoroughly sealed with a coating.
This technique allows you to evenly distribute the coating over the surface of the nail without clinging to the skin.
The entire application process includes the following steps:
- The jar of varnish must be scrolled several times along the base of the palms. This will allow the shellac to warm up and settle evenly on the nail.
- Directly applying the foundation itself. The layer should not be thick, otherwise it will take longer to dry, which will lead to unwanted spots in the final result.
- Drying the coating. You need to dry it in a special lamp for about 13 seconds.
Color layer
The color palette from CND is updated annually, so you have a large selection of different shades, the choice can only be limited by your preference. Apply the color coat carefully and dry your nails in an ultraviolet lamp for about 2 minutes at 36 W.
Try to apply the layer as thin as possible. If you apply a thick layer of varnish, it will swell during the drying process, and you will have to go back to the very beginning and do the whole job again, starting with degreasing your nails.
One coat will look pale and will be almost transparent. Therefore, a second layer is necessary . It, just like the first one, should be thoroughly dried with a lamp.
Applying shellac
This tonic layer gives the nails color and is applied according to the following instructions:
- Apply a thin layer of shellac. There is no need to seal the edges of the nail.
- Dry the coating in a lamp for about 3 minutes.
You can make shellac for beginners at home using step-by-step instructions from professionals. - Apply another coat of varnish. Moreover, you can use either the same color or a different one. By mixing two different shades you can get a very interesting and original option.
- Keep your nails under the lamp for another 3 minutes.
It is worth considering that the layers should be incredibly thin, almost transparent. Otherwise, the varnish may swell and form unpleasant bubbles.
Before applying the varnish, you need to check its condition: it should not be too thick. Damage to the coating can occur due to improper storage or purchasing a low-quality product, which will have a bad effect on the condition of the nails. It must be stored with the cap tightly screwed on and at room temperature. Also, do not leave it in areas exposed to sunlight.
Shellac kit with lamp: the best options
A ready-made set for shellac with a lamp should be selected based on your own capabilities:
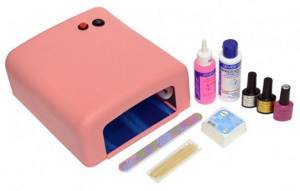
- the starter one is suitable for those who want to do their own manicure, but have no experience with shellac;
- the basic one is suitable for those who have already tried to do a long-wearing manicure and are ready to do more than just a simple coating;
- Professional is needed by specialists, since it contains several flower beds that need to be used up before the expiration date.
BlueSky Shellac Standart set with lamp
Chinese sets are popular in this category:
- YSQZXHMY MANICURE TOOLS,
- COSCELIA NAIL POLISH KIT,
- JEWHITENY MJ006,
- ROSALIND RB-7KIT10TOOLS-01,
- BURANO PURPLE SET,
- MODELONES NEW NAIL TOOLS SET (B),
- MODELONES Z10 NAIL ART TOOLS SET,
- COSCELIA NAIL ART KIT.
In terms of content, they are more similar to professional ones, but they cost the same as basic ones. There are kits for beginners with a lamp from well-known companies - TNL, Kodi, Grattol, Bluesky. In terms of the number of items, they are more modest, but these compounds are of higher quality, and when using them there is less chance of allergies.
Watch the video about the gel polish starter kit from AliExpress:
Starting
The starting list of items necessary for a “long-lasting” manicure looks like this:
- low power drying lamp,
- base,
- finish,
- varnish of one color.
This is enough to apply the coating to your own prepared nails, especially since you can choose the shade of the varnish. Manicure and accessories are purchased separately, at the same time paying attention to the sharpness and quality of the former.
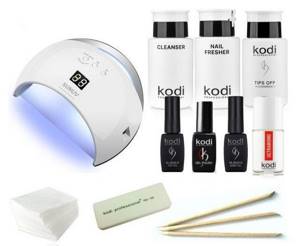
Starter set of Kodi gel polishes with UV LED lamp SUN 6 48 W.
Sometimes the flower bed may not be included in the starter kit, but then it contains a primer, cleanser, degreaser, cuticle remover, orange sticks, oil and buff. In this case, the varnish is purchased separately.
Base
The basic kit is more complete; it contains:
- ultraviolet lamp;
- 1-3 polymerizing varnishes;
- base;
- finishing agent;
- stencils for French nails for different shapes of nails;
- buff;
- several orange sticks;
- lint-free wipes.
Basic set
With it you can do manicures not only for yourself, but also for your friends. True, you will have to buy a remover and degreaser, but every woman has manicure tools.
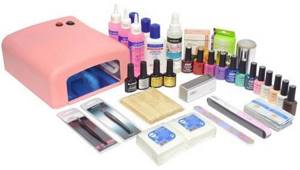
For professionals
The finished professional kit includes:
- a sufficiently powerful ultraviolet or LED lamp;
- 10-12 varnish colors;
- top and base;
- stencils;
- degreaser;
- remover;
- primer;
- buff;
- foil for removing the coating;
- lint-free wipes;
- set of orange sticks.
Professional manicure set
With this list of items, you can provide nail art services if you have the appropriate skills. Moreover, the shelf life of the varnishes from the set is usually longer than in the standard and basic ones. But, of course, you will also need disposable files and a sterilizer, and the latter does not come in kits.
Applying decor
The scheme and technology for decorating nails with shellac is practically no different from decorating with regular varnish, however, here after decorating the nails you need to apply another layer of varnish.
Decor can be done using:
- Ribbons and strips;
- drawings;
- patterns;
- pictures;
- coloring technique, using multiple colors;
- sequins and rhinestones, etc.
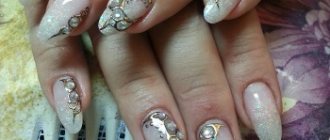
How to attach rhinestones?
Manicure with shellac and rhinestones is an extravagant trend in the field of nail art. It is recommended to decorate one or two nails with rhinestones, carefully choosing the colors. The marigolds will acquire a neat and elegant look without making the image vulgar.
Adhesive rhinestones are imitation stones of different sizes. One side is flat, the other is embossed. The decoration is attached to the nails with a smooth surface. You need to attach rhinestones to shellac correctly, otherwise there is a risk that they will fall off very quickly.
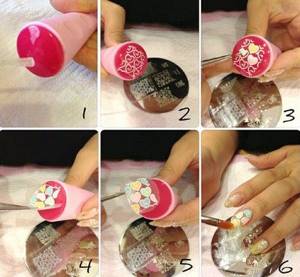
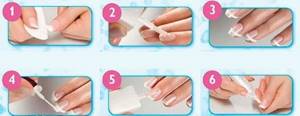
Technology for applying rhinestones to shellac step by step:
- Step 1: coat your nails with shellac, cure the layer in an ultraviolet lamp. The coating must be sufficiently hardened. Only in this way will the fastening of the stones be strong and the design will not be smeared;
- Step 2: onto the design created and thought out in advance, apply “stones” with tweezers or a toothpick. You can use a sharp stick, then dip it in water or varnish;
- Step 3: Wait for the glue to dry so that the crystals are well attached. Remember that rhinestones are applied to the top coat after the main manicure has already been completed;
- Step 4: fix the work by applying a topcoat without a sticky layer and dry it in a UV lamp for 2 minutes.
When applying rhinestones, use special glue or gel. As a last resort, you can use clear varnish and a fixative, but such products make the rhinestones less shiny.
Applying top coat
Finishing painting consists of only 3 steps:
- Direct application of the mixture, which has several nuances:
- it should be applied in a fairly thick layer;
- Using this coating, it is necessary to seal all the free edges of the nail (thus the colored base will remain, as it were, in an entomological vessel).
- Drying. The exposure time of hands under the lamp is no more than 130 seconds.
- Removing the sticky layer using a special product in which you need to moisten a lint-free cloth. It costs quite a lot, so in extreme cases you can use acetone or alcohol. However, these substances can slightly damage the manicure, so they should be used with caution.
How to coat
- Salons often use removers to remove cuticles. If the cuticle is very thin, hardly noticeable, or has barely had time to grow, you can simply push it back with an orange stick, after applying a special oil.
- To prepare for the procedure, the nail plate is filed down with a special grinder. But you can save money by purchasing a regular soft polishing file: the result will be no different.
- To improve the adhesion of the coating to the nail, we need to treat it with a disinfectant (degreaser), paying special attention to the end, sides and inside of the free edge. Then apply the primer.
- Cover your nail with base coat. It allows you to strengthen the nail plate and prevent the harmful effects of coloring pigments.
When applying gel polish at home, do not forget to carefully seal the ends when covering with the base. Polymerize this layer in a minute in an ultraviolet lamp or in 10-30 seconds in an ICE or hybrid lamp. It is advisable to buy a powerful lamp, because devices with less power often sadden their owners with the effect of dull spots on the surface of the coating and, of course, do not help save time.
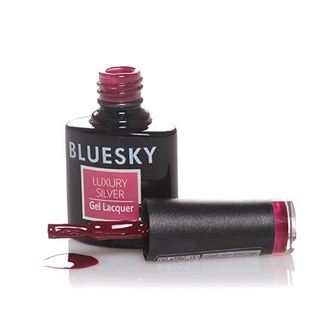
Bluesky, Gel polish Luxury Silver No. 088
Gel polish (10 ml) wine-purple, without pearl and glitter, dense.
270 rub.
270 RUR Buy
-20%
Lianail, Tiffany Factor Gel Polish No. 196
Gel polish (10 ml) dark mint green, without glitter or pearl, dense.
399 RUR 319 RUR
399 RUR 319 RUR Buy
Famous Names, IBX Mini Pack
The system for restoring and protecting nails includes: IBX Repair (2.7 ml), IBX Strengthen (3.75 ml) and Dadi Oil cuticle oil (3.75 ml) as a gift.
(236)
RUR 1,630
RUR 1,630 Buy
- Prepare the gel polish for application by rolling the coated jar in your hands for half a minute.
Cover the nail with colored shellac, without sealing the sides and ends (this is only permissible for the base and top; if you accidentally painted an unnecessary part, remove the polish with a napkin).
Cure in the lamp for the required time.
Then apply a second coat and dry again.
Don't skip the second (and sometimes third) coat - it gives the deep, rich color for which this coating is so famous. But if a pale shade is enough for you, apply in one layer. By the way, to prevent shellac from thickening, store it indoors at room temperature, tightly closing the bottle after each use.
- Apply a thick layer of top coat to the nail and cure.
- Remove the sticky layer with a lint-free cloth, which experts soak in a liquid to remove the sticky layer. A cotton pad will not work - the fibers may stick to the coating. Alternatively, you can wipe off the sticky layer with regular alcohol or a product containing acetone. In some cases, substitutes deprive the coating of its shine, so it is worth trying several options before painting the nails on both hands.
If for the previous stages you used products, for example, from Color Couture Entity One, it would be logical to apply a Top Coat top coat from the same company. Thanks to nanotechnology used in the manufacturing process, the top gives the nail plate strength (due to increased resistance to damage) and elasticity, captivating with a charming mirror shine. It is polymerized in an ultraviolet, hybrid or LED lamp.
Planet Nails, Buff, white
Buff for polishing natural and artificial nails.
(41)
63 RUR
63 RUR Buy
Severina, Liquid for degreasing nails and removing the sticky layer Cleaner, 1000 ml
The product effectively degreases and dehydrates (gets rid of excess surface moisture) the nail plate.
(19)
853 RUR
RUR 853 Buy
What are we saving on?
Now let's see what and what we can replace with when applying gel nail polish at home:
- trimmed manicure instead of a product for softening and removing cuticles;
- a regular file instead of a professional grinder;
- nail polish remover with acetone or alcohol instead of disinfectant and sticky layer remover.
We do not change:
- base coat;
- color coating;
- top coating;
- lint-free wipes.
How to make French shellac yourself?
French shellac, for beginners at home, can be done step by step quite simply, the main thing is to follow the following technology:
- The initial stage is the nail preparation stage: removing the cuticle, shaping, polishing and removing sebum.
- Then you need to apply the primer and leave it for a while. When the nail has acquired a whitish tint, you can proceed to the next stage.
- Apply the base coat (left edge, right edge, middle, sealing the edges of the nail) in a small layer.
- Dry the plate under a specialized lamp for from a few seconds to 3 minutes, depending on the characteristics of the varnish.
- Using a special product and a napkin, remove the sticky layer formed after drying.
- Carefully attach the template without going over the top edge.
- Paint the upper part of the nail in the required color, and in as thin a layer as possible.
- Hold your nails near the lamp and remove the adhesive layer.
- Remove the template, being careful not to damage the applied varnish layer.
- Paint the plate with a final coat of shellac and let dry for a few seconds.
- Remove the adhesive layer.
French shellac
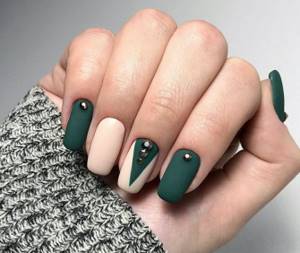
French manicure coated with shellac is a recognized classic manicure. It is suitable for any season and holiday. Let's look at how a classic French manicure is done using shellac varnishes:
- The nail is treated with a buff and base. Then it is dried under the rays of a UV lamp;
- The main part of the plate is painted pink or beige. Of course, you can use black or red, but it is recommended to leave dark colors for the cold season (autumn-winter), when the contrast with the skin will be more noticeable;
- Next, the tip of the selected shape is drawn with a brush. It can be straight, oval, triangular. Drying is in progress;
- You can stick rhinestones along the contour or draw a pattern. Afterwards the fixative is applied.
You can complement this style with any pattern or stickers.
How to remove shellac correctly?
Instructions for removing shellac, for beginners at home, step by step are as follows:
- Divide the cotton wool and foil into portions for each nail.
- Wash your hands and nails thoroughly with detergent.
- Soak one piece of cotton wool with shellac remover.
- Apply to the nail so that the product does not come into contact with the skin. This mixture contains some components that, when exposed to the epidermis for a long time, can damage it.
- Carefully wrap with foil so that the fleece does not slip.
- Do steps 3-5 with each finger.
- The exposure time is approximately 13 minutes, during which the foil on the nail needs to be slightly “tugged”.
- After the time has passed, first remove the foil and then the cotton wool from each finger individually.
- Remove the soaked layers of manicure with your hands or (if you can’t remove them) with an “orange” stick.
- Finally, rinse your hands with soap.
Nail care after shellac removal
To restore nails and protect them from further damage, it is necessary to carry out cosmetic procedures.
These include:
- Olive oil bath . Heat a small amount of it in water. Keep your fingers in the bath for about 13 minutes, every day for 3 weeks.
- Lemon juice mask. Place a drop of fresh citrus juice on each nail and then rub in with gentle movements. Leave for about 3 minutes, then rinse with running water.

- Sour berry mask . Mash any sour berry (for example, viburnum or lingonberry) into a paste. Apply to the plate and, wrapping it in foil, leave for 13 minutes.
- No less than nails, cuticles will also need care. They must be soaked daily with any essential oil . There is no need to rinse it off, so the amount of oil should be minimal.
If the nails are excessively weakened and peeling, more complex cosmetic procedures should be performed:
- Sealing a nail with wax in a salon. With its help, the nails, covered with a thin film, will be protected from further damage and will also acquire a healthier appearance.
- You can buy a special medicinal varnish at any pharmacy. The base of such a varnish must include calcium, many vitamins, and keratin. With regular use, the polish will heal your nails, making them stronger. And from the very first use, making the nails thicker due to the coating, the varnish will relieve discomfort and the fear of breaking the nail.
Applying shellac at home is quite simple even for beginners, especially if you use step-by-step instructions. However, so that the beautiful appearance of your nails does not become a fleeting pleasure, the plates must be looked after both before and after the procedure.
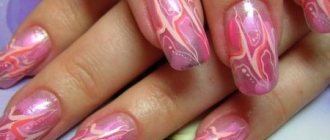
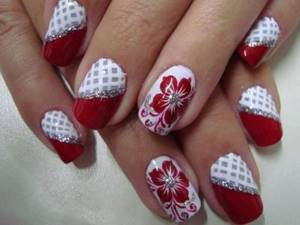
Shellac nail design options
Before you start applying shellac, consider in advance what style you want your nails to look like over the next 2-3 weeks.
Solid shades look fashionable and elegant, but if you are one of those who like bright and bold looks, stock up on several gel polishes and decor. The shellac palette is presented in different color variations, which gives everyone the opportunity to create their own unique design.
If you prefer to follow fashion trends, then this year the following will be popular:
- louboutin;
- varnish with stickers;
- rhinestones and sparkles;
- moon manicure;
- ombre;
- cat's eye;
- French
Let's look at some interesting options in more detail.
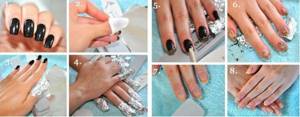
Manicure in the Louboutin style is a double-sided coating and is perfect for owners of long nails. When performed in the classic variation, two colors are used: black and red.
The inside of the nail is carefully coated with scarlet shellac and dried. Painting the outer part black occurs in the same order as described in the instructions above, only the top coat is applied to both sides.
Experiment with shades of gel polish; beige and pink, black and sapphire combine very beautifully. The main rule: do not use colors that can make your nails feel dirty.
A manicure with rhinestones can create a festive mood. To complete this, you only need to buy additional pebbles. They are laid out on wet shellac, dried, and then everything is covered with a finish.
Moon marigolds have not lost ground for several seasons. No special skills are needed to implement such a design. Special stickers are sold that will help you make a perfect line the first time. When choosing a color combination, focus on personal preferences or the season.
Cat's eye involves the use of gel polish with metal chips. To create iridescence and patterns, you will need to move a special magnet over the nail at a short distance.
Don’t be afraid to use your imagination, draw a variety of pictures, use inscriptions and stickers. Express your individuality with an original manicure.