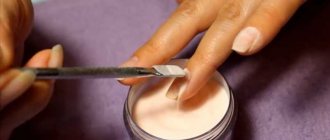
Since ancient times, women have made varnish from herbs and oils. By this they showed their superiority over other ladies who could not have well-groomed nails. Today anyone can afford to decorate them with varnish. How to make your own nail polish and still pamper your hands with care? Let's talk about it.
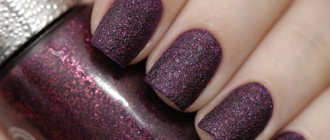
Matt lacquer
Using starch
Cornstarch can not only transform an ordinary glossy varnish into an elegant matte finish, but also make it lighter. Mix 4-5 drops of varnish with a small amount of starch. Apply this mixture on your nails. After drying, the varnish will become matte.
Using powder or matte eyeshadow
You can make the polish matte by adding loose powder or matte eyeshadow to the bottle. To make sure you don’t spill anything, roll up a small funnel out of paper. Along with powder or eye shadow, add a couple of small steel balls to the bottle to better mix the contents.
Mix light loose powder with clear polish to create a white matte polish.
Why is store-bought varnish dangerous?
Many women are increasingly starting to think about making nail polish at home. What prompted them to search for such an idea?
Store shelves are full of a variety of beautiful tubes. These include not only decorative varnishes, but also many of their counterparts aimed at caring for and caring for nails. However, despite such a wide range of these products, female representatives do not trust their manufacturers.
Varnishes contain substances such as toluene, camphor and formaldehyde, which negatively affect the female body, and are completely contraindicated during pregnancy.
How to prepare healthy varnish yourself? Let's consider this.
Sparkling or pearlescent varnish
If you want your nails to sparkle, add glitter to your polish or sprinkle it on your wet nails. To add originality to your manicure, sprinkle glitter only on the tips of your nails.
thegluegungirl.blogspot.ru
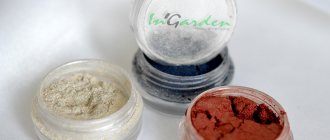
You can achieve a pearlescent effect on your nails using ordinary eye shadow. Grind the shadows first. Crush them in any container with a hard object and turn them into powder. This will ensure an even coating. Then carefully add directly to the polish.
3.bp.blogspot.com
To get the exact color of the eyeshadow, mix it with a clear polish. If you apply the same shadow on your eyelids, you will get the perfect color combination.
herbsofgrace.com
If you hate to crush the shadows, apply them with an applicator to slightly damp nails. The same can be done with loose mineral shadows. Then simply blow off the excess and cover your nails with sealer or clear polish.
www.thebeautycontext.com
Adviсe
A few final recommendations:
- The most convenient way to add bulk components to the varnish is using a small funnel made of paper.
- Introduce supplements gradually to monitor changes and find the desired effect.
- If you are not sure that the result will impress you, then prepare a small amount of polish and test it on your nails. If the effect is not impressive, continue experimenting.
- It is best to use a high-quality and not very thick varnish as a base, otherwise you will not be able to fully stir the mass and achieve the desired uniform consistency.
- You can transform not only transparent varnish, which is an excellent base for bright experiments, but also white or any color. And as a result of experiments and trials, you can get an absolutely incredible shade.
- Try combining several shades. Moreover, if you don’t mix them, you can get unusual effects and stunning original nail designs with gradients, interesting transitions and abstract patterns.
- Use several methods at the same time. So, having given the varnish an interesting shade with the help of a dye, you can add shine to it by adding glitter to the mixture. Also try using starch after dyeing for a vibrant matte finish.
Using the methods described, you can conduct experiments at home and get an unusual and exclusive nail polish that you will not find in the store.
Glowing polish
Using acrylic paint
If you mix polish and fluorescent acrylic paint, your nails will glow in the dark. Fluorescent ink from gel pens is also suitable for this purpose. All this can be found in art stores and in regular stationery stores.
picmia.com
A clear varnish base gives the best shine. If desired, it can be applied over colored varnish. With white varnish, also feel free to use fluorescent paint of any color.
Using glow sticks
For this method you will need a half-empty bottle of nail polish and one glow-in-the-dark stick. If you are using colored polish, make sure the shade matches the color of the stick.
Knead the glow stick well, especially if it is in the form of a thin bracelet or necklace. Using sharp scissors, cut one end of the stick. Dip the cut tip into the bottle and carefully squeeze out the glowing liquid. Cap the full bottle and shake well. After this, apply nail polish.
wikihow.com
Remember that when using sticks, the glow effect will only last a few hours. Don't forget to seal your masterpiece with clear polish to make your manicure last longer.
Beeswax polish
The main ingredients in this recipe are beeswax and alkane root, which is widely used in the preparation of a huge number of cosmetics.
Beeswax is also famous for its properties. It is added to various cosmetic preparations and is widely used in folk medicine.
The tandem of these two substances has a positive effect on nails. They acquire a healthy and well-groomed appearance.
In order to prepare a miraculous varnish, use ¼ teaspoon of beeswax, ½ teaspoon of alkana root and three tablespoons of olive oil.
Vitamin E, well known to all women caring for themselves, will fit perfectly into the mixture, but even without it, the varnish will be quite useful.
Preparation procedure:
- Combine the olive with alkanes root and heat in a water bath.
- After the solution has warmed up, it is cooled for five minutes and passed through a sieve.
- Then beeswax is added to the mixture and sent back to the water bath.
- After the wax has melted, cool the mass. The varnish is ready!
Editor's choice: Plain manicure - trends for 2022
This very simple recipe will help your nails always look great.
Why do you need to apply a top coat?
The final stage in shellac coating is the topcoat.
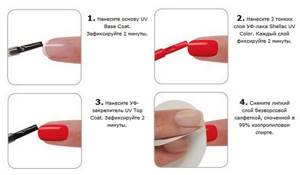
Its main purpose is:
- alignment;
- drying;
- preservation of bloomed varnish;
- strengthening
Recently, coatings have appeared that also perform decorative functions. There are top coatings that allow your manicure to glow under the influence of ultraviolet light and make your nails glossy or matte. Gives a sandy texture.
Step-by-step instruction
Before you begin the process of applying varnish, you should consider that the girl has 40 minutes of free time, eliminate or minimize distractions, and also think through the design. In addition, you need to check the shape of the brush; it should not be narrow and dense. Instructions for creating the perfect manicure:
- Apply wax or oil to the periungual area without touching the plate. This will help you subsequently easily remove excess material from the cuticle and rollers.
- It is recommended to apply a coat of base to facilitate subsequent application of colored varnish.
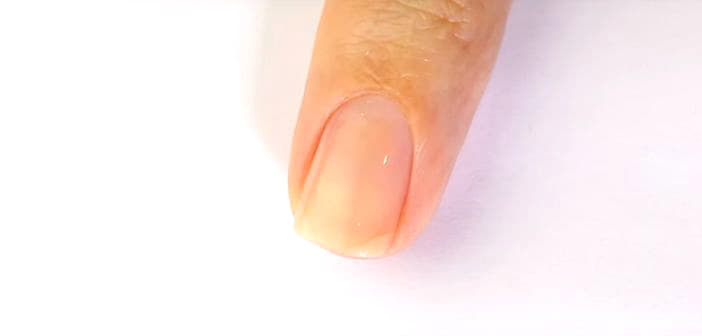
- Take a brush of colored varnish and wipe it on the edge of the bottle so that very little varnish remains on it, literally on the tip. This way it won't bleed onto the skin.
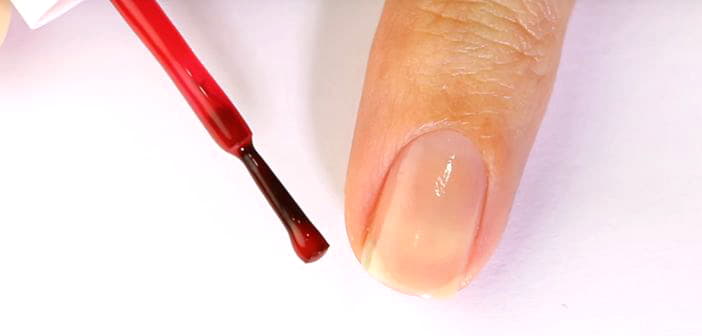
- We paint our nails with regular polish, starting with the little finger. You should place a drop in the center of the plate, then carefully “adjust” the varnish with a brush to the base.
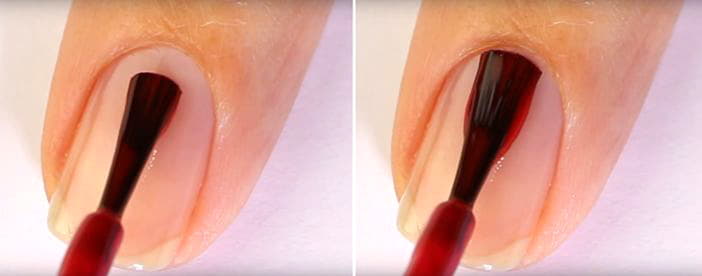
- Then, with slow movements, holding the brush confidently, you need to apply the varnish to the side surfaces of the plate. Thus, the varnish does not flow onto the cuticle.
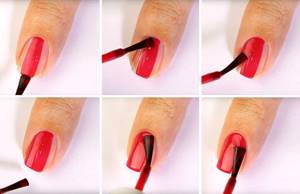
- You need to complete the manipulations with a brush at the end of the nail. Thanks to this, the varnish will last longer.
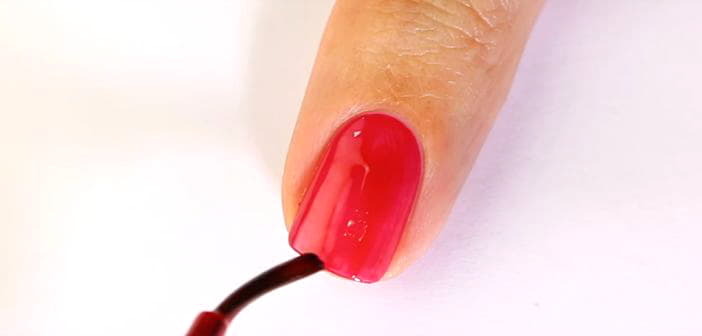
- Apply another coat of varnish to deepen the color.
- When performing movements, the elbow should rest on the table and the hand on which we are applying the varnish should also lie on the table; you should not apply the varnish while holding your hand suspended.
- Apply a quick-drying top coat. This item is optional, but it will extend the wear time of the coating and make the manicure perfectly glossy.
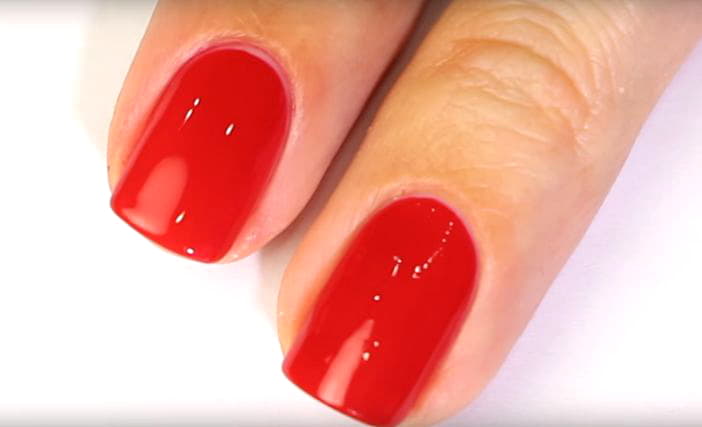
On the left is a top coat applied to the nail, on the right is a nail without a top coat.
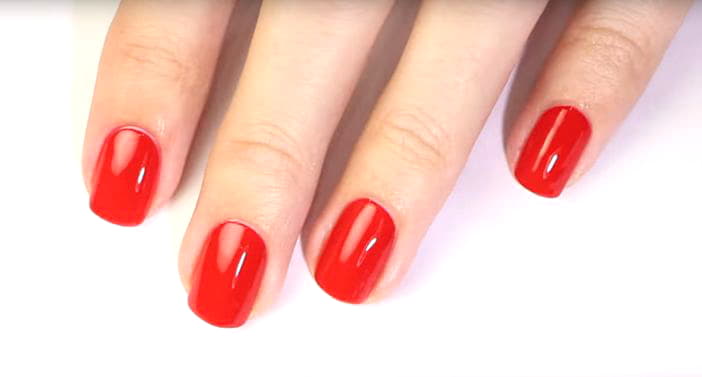
Ready-made manicure with regular polish
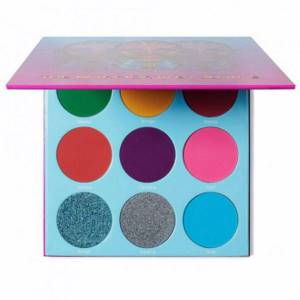
Homemade polish using clear base and eye shadow
You will love the matte look of this nail polish. It's easy to make and apply, and dries much faster than regular store-bought ones. You can adjust the amount of shadow according to your desired shade and apply it like regular nail polish. Add a little more shadow for a rich color and less if you want a lighter shade.
List of ingredients:
- Dry eye shadow – 1 cosmetic jar x 5 grams.
- Transparent nail polish – 1 bottle x 10 milliliters.
What does nail polish consist of - are there any chemical components and harmful substances?
The solvent helps distribute the remaining components of the varnish, creating a uniform, smooth consistency. After applying the varnish film, the solvents evaporate, which explains the pungent odor when drying. Separately, you can take out products that help remove cuticles at home. Many components will coincide, although they will ultimately have different effects. Searching for ideas for a fashionable manicure - drawings on nails with gel polish.
If the varnish has dried during long-term storage, do not dilute it with remover, this will disrupt the structure of the coating. Use a special factory thinner for this.
To minimize the time of this process, several solvents are usually used in one varnish:
Polymer additives in nail polish play the role of a foundation. Two substances belonging to this group are used in coatings: Formaldehyde resin and nitrocellulose. Together, they give glossy shine, hardness and reliable adhesion to the nail plate.
- Ethyl acetate and butyl acetate are less toxic substances that create a viscous structure of the varnish and promote its drying on the surface of the nails.
- Sterylalkonium bentonite - maintains color pigments in a suspended state and holds the structure of the varnish as a single whole.
- Benzophenone-1, a component that absorbs ultraviolet light, which keeps the color unchanged.
- Dimethicone optimizes the drying time of the varnish as much as possible.
- Isopropyl alcohol neutralizes the explosion of nitrocellulose, which is part of varnishes, during transportation.
- Ethyl alcohol dissolves all ingredients included in the composition.
The most durable hair dye will allow you to maintain the shine and color of your curls for a long time.
Formaldehyde resin should not be confused with formaldehyde. Today, formaldehyde is prohibited for use in this industry, as it is highly toxic and causes cancer.
Plasticizers give the molecules of the substance elasticity and the ability to resist stretching when the varnish is used on the nail plate . Strengthens the strength of the coating and extends its retention time without cracking. This component in the varnish is camphor. This article will help you evaluate the advantages and disadvantages of Refectocil eyebrow dye.
It is produced from camphor tree and other plants. But despite the naturalness of the product, it has a detrimental effect on the body, which is why many manufacturers refuse to use it. Do you like long, neat nails? Find out what is a good gel for nail extensions: reviews, opinions of masters and specialists.
Poor quality manufacturers include prohibited, toxic components in varnishes. The use of low-quality products can lead to various diseases and pathologies. Therefore, before purchasing, carefully study the label and read the composition.
Coloring pigments are used to give color to varnish. By combining natural and artificial dyes, you can achieve absolutely any shade and additional effect:
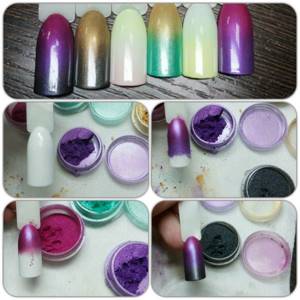
Sometimes glitter, crushed pearls, and metal dust are added to pigments.
- Mica. Gives the effect of pearlescent color, is an ingredient of natural origin.
- Titanium dioxide is used for white, as well as for adjusting the tone of other shades.
- Bismuth oxychloride gives a pearlescent shine.
- Silica keeps pigments evenly distributed, preventing them from settling.
- Citric acid is a color regulator.
How to do a quartz manicure?
A nail plate with imitation of streaks and veins, like on the surface of quartz, is one of the main nail trends of recent years. How to repeat this image? First, stock up on a soft pink polish with a translucent texture, white polish, a toothpick or needle, and, of course, base and top coats.
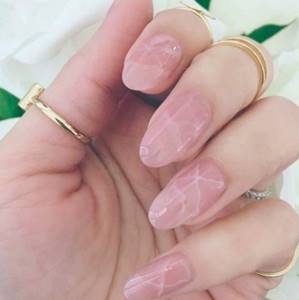
© carbonfairy
1
Apply a base coat and paint your nails with a soft pink translucent polish in several layers (for example, a classic French polish is suitable). In this case, it is not so much the specific shade that is important, but the texture: the varnish should not be dense, otherwise it will not be possible to create the quartz effect.
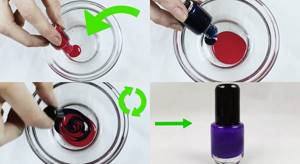
Red, yellow and blue is a good combination
Take a container, preferably not deep. Place the three types of paints separately from each other, as if making a triangle. Take a brush and start mixing them one by one, but in one direction. In about 30 seconds, you will see the result. If the black color is too saturated, it can be diluted with a drop of white.

Advantages and disadvantages
The return of transparent manicure to fashion has delighted almost all lovers of minimalism. After all, it looks quite laconic and neat, and also has many advantages.
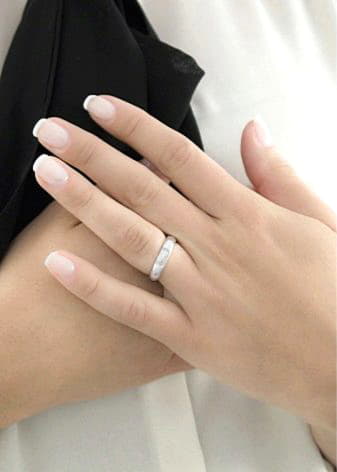
Let's look at some of them.
- A transparent manicure does not take much time. This is very important for women who have a busy work schedule, or those who do not like to spend a lot of time in salons.
- Even if such a coating remains on the nails for a long time, the areas of regrowth are practically invisible, and this saves both time and money.
- If the manicure is even slightly damaged, it will not be visible.
- It gives your hands a well-groomed look.
- This coating allows you to choose any decor option you like. Transparent or light rhinestones will look especially beautiful. In this case, they can even be suitable for every day.
- In addition, this coating can even be used under false nails.
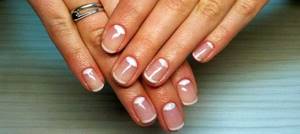
However, we should not forget about the disadvantages of this coating. There are few of them, but they still exist.
- This manicure is quite easily soiled.
- If the nail plate has even the slightest imperfections, they will be immediately visible. Moreover, in this case, the transparent varnish will act as a magnifying glass, only magnifying them.
How to make stickers
The fastest way to decorate your windows is with stickers and original beautiful decorations purchased in the store for the New Year. A large selection of fairy-tale characters, snowflakes, toys, sleds with Santa Claus or pictures with the symbol of the year - the metal Bull, will lift your spirits and create a holiday atmosphere. It is worth noting that they do not leave marks on windows and interiors, and some can be used repeatedly.
But, New Year's window stickers made by yourself will look no worse.
Cooking method
First, break the crayon into small pieces. Cup them and place them in the microwave for a few seconds to melt them. Then pour the liquid mixture using a funnel into a bottle of clear varnish. Close it with a lid and shake it well so that the ingredients are evenly mixed together. Your homemade varnish is ready to use.
Simple ways to make homemade nail polish will complement your look and save your budget.
Found a violation? Report content
Should I use nail polishes, how to choose the right one
A real lady cannot imagine life without makeup. Manicure has become a mandatory addition to image and style. This article will help you analyze in detail the composition of hair dye.
When choosing a varnish, you need to pay attention to the composition of its components. You shouldn’t succumb to fleeting weakness just because you like the color:
- Pay attention to the content of essential oils, they will fill you with vitamins and strengthen your nails.
- Poor quality products can destroy the nail plate, making it brittle and split.
- When painting your nails, ventilate the room; evaporating substances can harm your health.
- To protect your nails from chemicals, use a base coat.
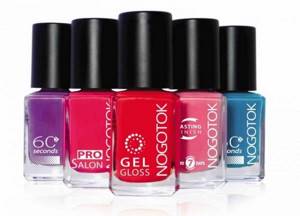
Cost – 350 rub.
Where to begin?
You need to prepare in advance:
- Clear nail polish;
- Dyes - eye shadow, ink, leftover colored varnishes, maybe blush;
- A paper funnel for pouring dye into a bottle of varnish;
- A toothpick for mixing, you can use a match, but a toothpick is more reliable;
- A sharp object for scraping shadows;
- Napkin for cleanliness on the table.
Advice! All procedures with varnish must be done in the absence of children, because some of the items and substances listed above should not fall into their hands.
copal species
Required ingredients:
- soft, light-colored copal (1 dose);
- turpentine (2 doses);
- camphor (3%).
The third element is needed to give the varnish good elasticity. This composition is placed in three quarters of the bottle. The bottle is thoroughly corked and kept in a warm place, for example, near a radiator. The bottle needs to be shaken periodically. You should get a high-quality solution from all components. It settles and filters. Cotton wool serves as a filter here. If the resulting varnish is not transparent enough, concentrate the bottle in a water bath for 10-20 minutes.
Making your own window decorations
How skillfully Grandfather Frost himself paints windows! Unusual patterns can be seen right on the window, and if you look closely, you can understand how to make a New Year's decoration for the window and implement it in the most wonderful ideas. Inspired by beautiful patterns, many decorate windows with homemade Christmas tree decorations, pine cones or twigs. This window decoration for the New Year can be done not only by adults, but also by children. Fresh creative ideas will come to mind during the work process, and they will be able to give a lot of positive emotions.


