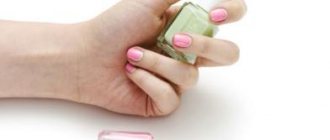
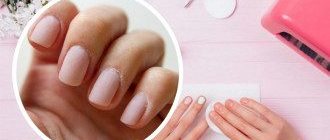
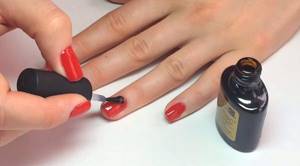
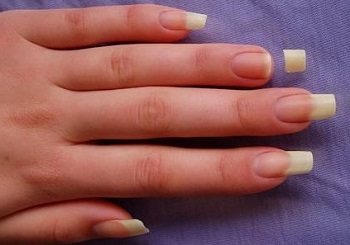
If you have reached the stage of removing gel polish, you have probably already appreciated all its undeniable advantages: durability for 2-3 weeks, strengthening of the nail plate, a wide color palette, no long and painful wait for the coating to dry.
However, this material has one small drawback: the gel polish removal step takes longer than removing regular nail polish. And to carry out such a procedure, special liquids for removing gel polish are required.
You've probably heard that gel polish spoils your nails, making them thin and brittle. It is a myth! It's not the material that ruins your nails! One of the reasons for damage to the nail plate is improper removal of the artificial coating, so this procedure must be approached with special responsibility!
Is it possible to remove gel polish yourself at home without damaging your nails? What materials and tools are needed for this? Let's figure it out.
How long can you wear gel polish?
First, let's figure out what period of wearing the coating is optimal. Often girls wear gel polish for a month, or even longer. However, they do not understand that they can damage the nail plate.
Technologists advise walking with the coating for no more than 2-3 weeks. Prolonged wear puts stress on the tip of the nail plate, its root suffers from the weight of the coating. All this can lead not only to breakage, but also to deformation of the nail plate.
Alcohol or vodka
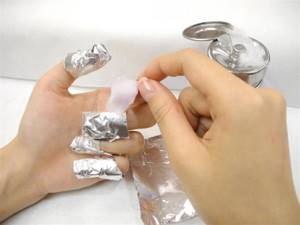
These substances do an excellent job of removing the top coating, but only if the correct proportions are met. Alcohol must be combined with water in equal proportions, vodka remains unchanged. To begin, blanks of cotton pads need to be moistened in the prepared solution and placed on the nails. To speed up the procedure, the fingers are wrapped and secured with foil.
After 17-18 minutes, the foil with cotton pads can be removed in the order in which they were applied to the nails. If the coating remains hard, then the procedure must be repeated again.
When removing gel polish, you must not use force, otherwise there is a risk of damage to your nails.
Don't miss the most popular article in the section: How to draw monograms on nails step by step for beginners. Instructions with photos.
How can you not remove gel polish?
RULE 1: Under no circumstances should you pick at the gel polish or tear it off the surface of the nail plate, because this can cause serious injury! If you are careless, you can remove the top layer of the nail along with the material, and this can lead to thinning and, at a minimum, painful sensations when in contact with water and various surfaces.
RULE 2: do not file away partially peeled off gel polish. In this case, you also risk cutting off the top layer of the nail and ruining it.
What other consequences might arise?
- There is a possibility of tearing not only the gel polish from the nail, but also the nail plate from the nail bed.
- You peel off the artificial coating, and the nail plate becomes thinner and thinner each time.
- Those with thin nails may feel unbearable pain during coating - the base will burn strongly in the lamp. They can also get a burn to the nail plate, which in turn can lead to onycholysis - separation of the nail plate from the nail bed. It will take quite a long time to treat onycholysis.
- You will have to strengthen the nail plate, and this will require additional time for the manicure procedure.
- You will have to buy materials to strengthen the nail plate: acrylic powder, gel or polygel. And these are additional financial expenses.
- Thin nails become mobile and weak, so the coating may be worn less than usual. You will have to try very hard to avoid detachments and chips.
We hope these reasons are enough to convince you not to peel off the coating from the nail plate and do the gel polish removal according to the rules!
By the way, the peeling process itself is quite painful, it’s hardly worth it.
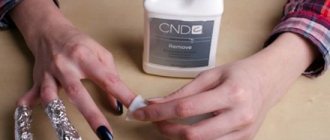
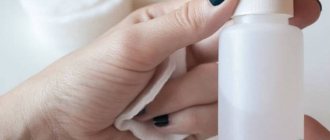
How to remove gel polish using acetone and foil
Photo: familylifestyle / Depositphotos
An inexpensive way for those who do not want or cannot purchase special devices. However, keep in mind that your nails may be damaged. So you should resort to this method only as a last resort.
What you will need
- Cotton pads;
- scissors;
- nail file;
- Vaseline or fatty cream;
- nail polish remover with acetone;
- foil;
- nail buff.
How to remove gel polish
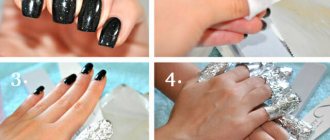
Cut triangular blanks from cotton pads that follow the shape of your nails so that the acetone has less contact with the skin. If the discs are double-layered, divide the triangles into two parts.
Shot: @Yuliya GoodNails / YouTube
File off as much of the varnish as possible with a nail file. This will make it easier for acetone to penetrate the gel, and the duration of the procedure will be reduced.
To protect the skin around the nail from acetone, lubricate it with Vaseline or fatty cream.
Shot: @Yuliya GoodNails / YouTube
Soak the cotton balls well with nail polish remover (you can use it without acetone, but the effect will be worse), apply them to your nails and wrap them with foil on top - this way the active substance will not evaporate.
Shot: @Yuliya GoodNails / YouTube
Wait 15-20 minutes, occasionally massaging your fingertips to speed up the process. When the time is up, pull the foil and cotton wool off your fingers. If the polish does not come off with the disc, carefully scrape it off with an orange stick.
Shot: @Yuliya GoodNails / YouTube
After this, sand the plates with a buff - a special file in the form of a rectangular block. This is done to make the nails smooth.
Here's the whole process:
Please note that the coating may be difficult to remove with a stick. Therefore, before buffing, you will have to use a hard file to remove excess. Because of this, there is a high probability of sawing through the top layer, and then the nail plate will become thin and weak.
Linda Zhuravleva
Author of Lifehacker.
I really don’t like removing the coating at home and am always ready to pay a few extra hundred rubles for it at the salon, but not so long ago I still had to “remove my nails” myself.
I didn’t remove the polish very well before the procedure, and then I forgot to apply cream to my skin. As a result, the problems began when pieces of cotton pads soaked in nail polish remover ended up on my hands: sensitive skin began to tingle unpleasantly due to the acetone. But I dutifully endured the allotted 15 minutes.
The coating turned out to be very durable, I had to sweat a lot before I finally removed it. The result was disappointing: the nails looked thin, weak, and bent at the slightest pressure (apparently, I was overzealous when polishing with a buff). To complete the picture, the skin around the nails burned, it was sore, it even peeled off.
After some time, everything returned to normal. Still, you need to be careful with this method. Before the procedure, carefully file off the nail polish and lubricate the skin around the nails with Vaseline. And after removal, try not to rub the surface of the nail with the buff as hard as I can, as I did - nothing good will come of it.
Gel polish removal methods
There are two ways to remove artificial turf: using sawdust and soaking it with a special gel polish remover or napkins.
Sawdust

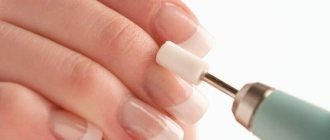
To remove the coating using sawdust, a special apparatus and removal cutters are required. Therefore, this option is suitable only for those girls who are familiar with hardware manicure.
Perhaps someone will have the thought: “Why not try to remove it with a rough file?” But we’ll immediately answer that this method is quite problematic, takes too much time and can damage the natural nail. It is necessary to try very hard to treat the area near the cuticle, and there is a risk of rubbing the skin. Therefore, at home, the easiest way to remove it is by soaking.
If you want to master sawdust removal, then sign up for basic courses at our licensed school “ParisNail”! After training, you will not only do a flawless manicure for yourself, but will become a real professional in the nail industry and will be able to work as a manicurist!
Maceration
This method involves soaking the gel polish with a special acetone-containing liquid. Below we will consider the list of materials required for this procedure and detailed technology for removing gel polish.
NOTE! Not all base coats can be soaked, so ask the seller to select the base that is suitable for this type of removal.
Why is it filmed?
Gel polish coating lasts ideally for at least 2 weeks, regardless of the brand and price. Otherwise, it is necessary to identify the causes of coating detachment. Experts divide them into 2 categories.
Physiological features:
- Soft and fragile nails lead to a reduction in the period of wearing gel polish. In such a situation, the solution to the problem is to carry out procedures to strengthen the nail plate.
- Excessive hand moisture negatively affects the wear quality of the coating. The problem is eliminated by using an acid primer immediately before applying the base coat.
- Irregularities on the nails reduce the wear time of gel polish. Experts recommend straightening the nail plate before starting the session.
- Some diseases of the body lead to peeling of gel polish: diabetes, hormonal imbalance, disorders in the nervous system, taking potent medications. When other causes can be ruled out, you should pay closer attention to your body.
Incorrect application technique:
- The most common reason is poor cuticle processing.
- Unsatisfactory degreasing of the nail plate. Sometimes standard nail polish remover is used as a degreaser. But experts recommend purchasing a special product that is used specifically for gel polish coating.
- Insufficient baking of each layer in the lamp. Be sure to follow the instructions for the lamp.
- One of the layers is applied too thick. In this case, the coating will peel off in less than 2 weeks. Each product should be applied in a thin layer and dried thoroughly under a lamp.
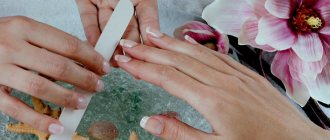
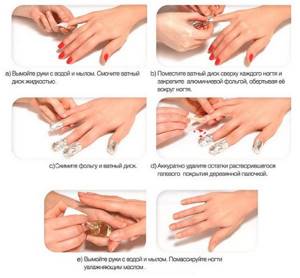
Materials and tools for removing gel polish using the soaking method
To soak gel polish with a special liquid, we will need:
- a rough file, the abrasiveness of which is approximately 100 grit;
- cotton pads;
- scissors for cutting cotton pads;
- gel polish remover;
- aluminum foil (you can use food grade foil instead of professional grade);
- orange stick or metal pusher;
- buff;
- file for natural nails;
- cuticle oil and hand cream (if you do not plan to apply a new gel polish coating immediately or on the same day);
- paper towel or napkins.
Nail file classic pink 100/180 g ParisNail
Gel polish remover E.MiLac Remover 1000 ml
Orange sticks small IRISK 90-100 pcs
Pusher for manicure P-09 wide spatula/peak length 132 mm Nippon Nippers
Buff mini 100/180 white ParisNail 50 pcs
Disposable files 220/280 11.5 cm (05 Turquoise) IRISK 10 pcs/pack
Two-phase cuticle oil strengthening Apple Vogue Nails 10 ml
Nourishing hand cream “Delicious hands” Blackcurrant IRISK 250 ml
Instead of liquid, you can use special napkins for soaking gel polish.
In this case we will need:
- rough nail file;
- gel polish remover wipes;
- orange stick or metal pusher;
- buff;
- file for natural nails;
- cuticle oil and hand cream (if you do not plan to re-coat);
- paper towel or napkins.
Straight file black UT-401 A 100-180 ZINGER
Wipes for removing gel polish, polish in individual packaging InGarden 200 pcs
Orange sticks medium IRISK 8 pcs
Buff mini 100/180 black ParisNail 50 pcs
Disposable files 220/280 11.5 cm (06 Purple) IRISK 10 pcs/pack
Cuticle oil “Jasmine” in pencil ruNail
Hand cream Cream Oil with grape seed oil and jojoba ARAVIA 550 ml
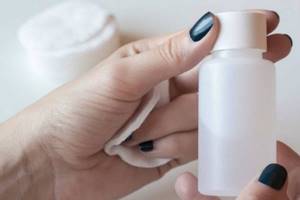
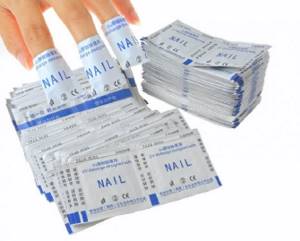
How to remove gel polish with special wipes
Shot: @Art Simple Nail / YouTube
Such wipes can be easily found in cosmetic stores or on the Internet, and then carried with you and used, among other things, to remove regular nail polishes. However, gel polish is not always removed on the first try and there is a risk of drying out your nails.
You will need
- Nail wipes;
- file;
- fatty cream or Vaseline;
- orange stick.
How to remove gel polish
Each package contains several individual bags, each of which contains a lint-free wipe soaked in acetone. The inside of the bag is made of a material resembling regular foil.
First, cut off the top layer of gel with a nail file. Treat the skin around your nails with a rich cream. Cut off one edge of the bag, put it on your finger and press gently so that it does not fly off. Wrap all your nails in the same way.
Wait 10-15 minutes and remove the polish with an orange stick. If some areas are stubborn, remove them with a file. Or soak your nails using new wipes.
How to save money on manicure?
Do you want to perfectly master the art of manicure from A to Z and never spend 2,000-3,000 rubles in a salon again? Then learn how to do a manicure yourself and save money, time and nerves!
Come to our School for an online course from top teacher Tatyana Svoboda “Manicure for yourself,” which can now be completed for only 499 rubles !
The teacher will tell you all about the technique of applying the coating, removing it, modern designs, how to strengthen your nails, and much more. You will become a real pro and will be able to create your dream nail designs, and, if you wish, monetize your hobby in the future!
Course bonuses:
We give all students a 15% discount on ready-made manicure starter kits, as well as a 5% discount on purchases at ParisNail and 15% on any other online course. Upon completion of the training, you will be issued an electronic certificate of completion of the course.
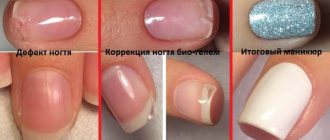
Nail care after removal
Recommendations:
- Balanced diet. To ensure that your nails remain strong and strong after the gel polish removal procedure, you need to adjust your diet. The daily menu should include a complex of vitamins, minerals and proteins. This diet helps restore metabolism.
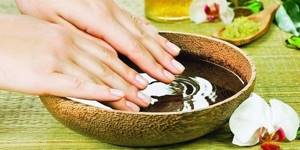
- Olive oil baths. Olive oil will perfectly help strengthen and restore thin, damaged nails. Pour olive oil into a shallow container, heat it in the microwave to a comfortable temperature and place your hands in the bath. The duration of the procedure is 12-14 minutes. The result is noticeable within 6-8 days with daily use.
- Baths with sea salt. Sea salt helps to quickly strengthen nails and prevents them from splitting and brittleness. In a bowl with warm water you need to dilute 20-25 g of sea salt. Keep your fingertips in this solution for 10-12 minutes. At the end of the procedure, be sure to apply a caring cream to your fingers. Experts recommend using such baths once every 3-4 days.
- Berry mask. One of the most famous methods of strengthening nails after removing gel polish is a berry mask. Experts recommend choosing sour berries: red currants, cranberries. The berries must be crushed to obtain a homogeneous mixture, then apply the mixture to the nails, securing with polyethylene or cling film. After 17-20 minutes, rinse your hands with warm water. The acids contained in the berries will give your nails a healthy and shiny look.
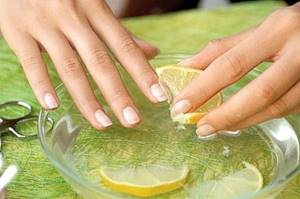
- Lemon juice. Lemon juice is great for removing split nails. To do this, you just need to rub freshly squeezed lemon juice into the nail plates using your fingers or cotton pads. After 2-3 minutes, it is advisable to apply a nourishing cream to each nail to consolidate the result.
You just need to follow professional recommendations when removing gel polish at home, according to experts, and then you can save time and money on visiting the salon and keep your nails healthy.
Article design: Oksana Grivina
Is it possible to remove extended nails yourself correctly?
Before you figure out how to remove extended nails yourself, and whether this can be done at all, a few words about what materials they are made from.
Nail extensions are, in fact, “sculpting” them from special polymer materials: acrylic or gel.
Interesting!
Both acrylic and gel are acrylates - polymer materials. The difference is in appearance and features of working with these materials. Each of them has its own advantages and disadvantages, so you need to choose based on specific conditions.
The advantages of acrylic include:
- less dust during operation;
- strength;
- low shrinkage;
- possibility of repair;
- the ability to remove it using a special solvent;
- plastic.
It also has disadvantages:
- smell;
- dullness;
- tendency to yellowing.
In turn, the gel boasts the following advantages:
- aesthetic appearance;
- hypoallergenic;
- no odor;
- resistance to chemicals.
The disadvantages include the following:
- fragility;
- impossibility of repair;
- dust from working with materials;
- reaction to temperature changes (frost or bath).

So, we have found out the main differences between the two materials for nail extensions. Both of them are a plastic mass, which then polymerizes and thus hardens: acrylic - under the influence of heat, gel - under a UV lamp.
To remove nails, the master dissolves acrylic in a special liquid, but simply files off gel nails, because they do not enter into chemical reactions, which means there is no way to dissolve them.
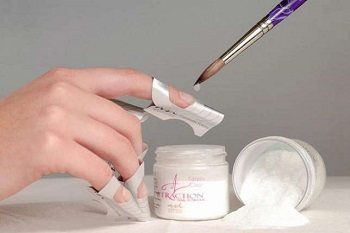
Removing acrylic nails
So, the time has been booked, the materials and tools have been prepared, let’s begin!
We begin the process of removing acrylic nails by cutting off the top layer with a coarse file. After the top layer is removed, the nails are no longer so strong, and you can begin to soften them.
Softening acrylic nails
To remove acrylic, you need to dissolve it with a special liquid, but this is not varnish; it cannot be removed in a couple of seconds.
Therefore, we moisten a cotton pad with liquid, place it on the nail and wrap it with foil or put on clips. This is necessary to ensure that the liquid does not evaporate too quickly.
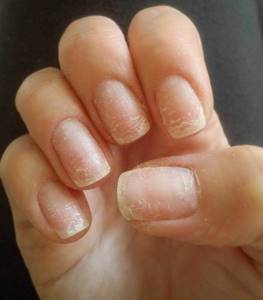
Why do gel nails break?
Broken nail
Gel nails begin to crack, break, or peel for two reasons:
- To a large extent (up to 90%) this is the result of unprofessional work of a master who violated the technology.
- Human factor. There may be a rare case of the body rejecting some ingredient of the gel - a banal allergy.
If you are intolerant to the gel, it is better to use tips - plastic overlays that imitate natural nails. They are sold in sets of various shapes, lengths, and designs.
Material for extending or strengthening nails: gel or acrylic
There is an opinion that acrylic is not so safe, and hardening nail gels are harmless.
In fact, acrylic became safe when EMA (ethyl methacrylate) was introduced into it , which gives artificial nails the necessary elasticity.
Acrylic nail extensions
Why is acrylic used as a base? Its chemical composition resembles natural nail plates, consisting of keratin (a type of protein formed from amino acids). When monomer molecules combine, they undergo polymerization.
The chemical composition of gels and acrylic is not very different in terms of polymerization technology . To harden the former, light (UV radiation) is used, and for the latter, heat is used.
The effect of gels on the nail plate can be harmless if the technology is strictly followed.
Features of manicure with false nails
False nails are the fastest way to hide the imperfections of natural nails, the ability to adjust the shape , hide delamination and yellowness . But care for such nails must be correct so that they stay on your hands long enough.
Fake nails
False nails are glued to the nail plate using special glue, and then covered with varnish of the desired color, creating an original design. It is important that your nails are disinfected before applying the sticker, the old varnish is removed from them, and the surface is degreased.
Features of nail care with overlays:
- The varnish must be removed using products without acetone .
- It is necessary to regularly inspect your nails to avoid splitting and damage.
- After washing, hands should be dried thoroughly .
- more calcium in food while wearing false nails .
- This type of manicure requires regular care - oil baths.
- It is better a hardware or classic manicure after removing your nails .
Manicures with false nails require regular care.