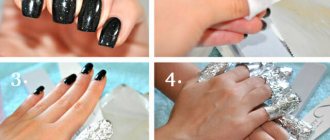
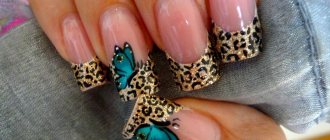
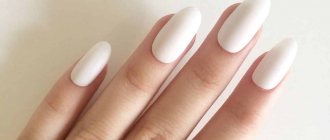
How to remove gel polish at home / bleskk.com The gel coating looks bright and stays on the nails for quite a long time. But as it grows, it can ruin the whole look, giving your hands an unkempt appearance. Sometimes there is no opportunity to visit a nail salon, and you have to remove the gel polish yourself. The editor-in-chief figured out how to do this correctly and get by with fewer losses.
- How to remove gel polish at home
- How to remove gel polish at home without foil
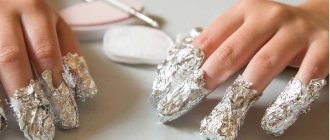
- Removing gel polish using foil
- How to care for your nails after removing gel polish
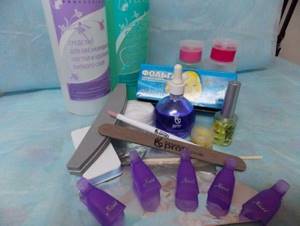
To remove gel polish you will need:
- Cotton pads;
- File with abrasiveness up to 180 grit;
- Nail polish remover - choose one that is suitable for gel polish;
- Orange stick;
- Nutritious cream.
How to remove gel polish at home
- It is necessary to lubricate the skin around the nails with a rich cream or cuticle oil. This will protect it from the effects of acetone and aggressive substances in nail polish remover. Use a hard saw to cut off the top layer of the coating.
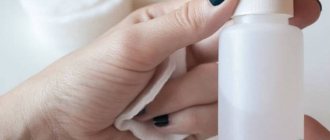
- Then you need to apply cotton pads soaked in nail polish remover to your nails. You need to keep them for no more than 10-15 minutes.
- After this, you need to remove the remaining softened gel polish with an orange stick. You should not use iron products - this way you can injure the nail plate.
What you need to have
When doing manicures for their clients, many masters urge them not to remove the gel polish themselves. This is due to the fact that if you perform the procedure incorrectly, you can significantly damage the nail plate. And also, to remove a design made with gel polish, it is necessary to use a special liquid, and not ordinary acetone.
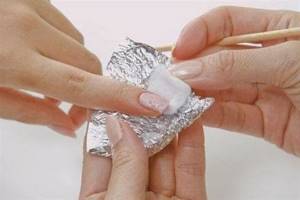
Nail polish removal procedure
The procedure is simple, but it must be done step by step. If you decide that your nails have grown enough and it’s time to remove the gel polish, arm yourself with a few accessories.
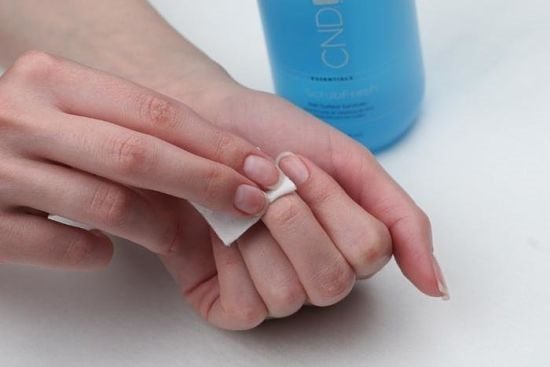
Giving your nails a break from gel polish
- A special liquid for removing gel polishes that does not contain acetone. It can be purchased at the same retail outlets where various accessories for the nail industry are sold. Important! Do not confuse it with the liquid for removing the sticky layer, this is a completely different composition and will not give any results. Also, do not use acetone for this procedure.
- Foil. You can use regular cooking foil. Cut it into small rectangles.
- Cotton pads or fabric sponges. They should be of such a size that they completely cover the nail plate.
- Buff or nail file with coarse-grain coating.
- Manicure orange stick.
- Nourishing cream or Vaseline.
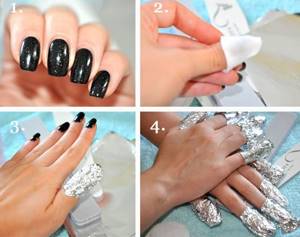
Stages of removing gel polish
Note! For ease of use, the cotton pad can be cut in half, or even into four parts. If you have short nails, then a quarter will be enough. The size of the foil rectangles will also be determined by the length of the manicure.
How to remove gel polish at home without foil
If it is not possible to remove the coating using foil and acetone, ordinary colorless varnish can come to the rescue.
You need to wash your hands and degrease the nail plate so that the polish adheres well. Apply clear polish to each nail in several layers; the thicker the coating, the easier it will be to remove. Then you need to prepare a warm bath for your hands with the addition of soda and hold your hands there for 2-3 minutes. Use an orange stick to remove the gel polish. First remove what comes off easily; if there is any remaining coating, repeat the procedure. But don't try to scrape off the polish.
Shellac removal procedure
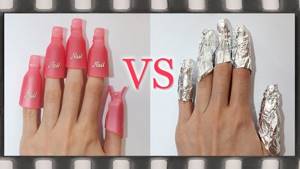
Sometimes, instead of foil, to remove gel polish, they use adhesive tape, caps, or manicure bottles, into which remover is poured and fingers are dipped for a while. The entire process of removing the old coating with foil can be divided into three main stages, each of which can be done at home:
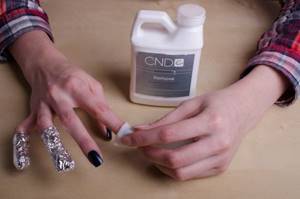
After completing the procedure, nails and cuticles can be treated with a nourishing cream. The process of removing gel polish using foil takes a little time, and doing it at home will not be difficult.
Glitter Nail Designs: Step-by-Step Guide
To make your manicure flawless and delight you for as long as possible, you need to follow exactly the step-by-step instructions:
- Prepare your nails correctly : the plate must be processed, filed, sanded and degreased.
- Take the tools necessary for the work - these are design materials, glue, a manicure spatula, cotton swabs, sharp scissors, tweezers.
- If you use tear-off foil, prepare in advance the parts you will be working with (they are cut from the tape with sharp scissors, as many times as needed) and glue. Can be used on dry extended nails.
- The transfer material is applied to a plate coated with gel polish, Shellac or regular varnish, on the surface of which manicure glue is applied. You first need to press it firmly, and then carefully but sharply tear it off.
- A manicure with holographic foil is done in the same way as with a tear-off one. The only difference is that this material has a textured surface and is suitable for creating three-dimensional patterns.
- Aquarium design is used in nail extensions. After the master applies the second layer of gel and dries it in the lamp for a couple of minutes, carefully place pieces of foil prepared in advance on the tips of the nails. Then a forming layer is created - and the decor turns out to be voluminous, since the decor is not on the surface of the plate, but inside it. You can also create an aquarium design by coating your nails with gel polish.
- Using “mirror” material you can create an original lunar manicure . To do this, a foil strip is attached to the base of the prepared plate (see point 1) (the excess parts are cut off, the surface itself is leveled with a cotton swab). A colored varnish coating is applied on top so that a piece of foil remains unpainted.
- Creating a casting effect , or the so-called Hollywood manicure , requires a certain skill. First, apply glue to the nail and wait a little until it becomes transparent. Place the material on the plate with the matte side, then quickly remove it. If there are empty spaces left, the procedure will need to be repeated.
- “broken glass” design is one of the brightest and most stylish. Foil for it is sold in the form of sheets; before the manicure begins, small parts are cut out of them, resembling fragments in shape. You need to glue the “shards” very carefully onto a nail that has been previously coated with varnish and glue.
See how easy it is to use transfer foil for gel polish:
We invite you to watch a master class on aquarium design using casting techniques and elements of Chinese painting:
Another way to perform a moon manicure with foil:
See how you can perfectly print foil on your nail:
In the video you will find three ways to perform a “broken glass” manicure:
Any design is completed with a top coat.
Professional products
Safe removal of shellac at home is best done using professional products designed for this purpose. There are 3 categories of solvents for erasing varnish: with acetone, with vitamins and without acetone.
All liquids, regardless of type, act on the following principle: they penetrate the hardened gel and make it soft for subsequent removal.
Removers that exclude acetone contain its substitutes:
- ethyl acetate;
- methyl ethyl ketone;
- amyl acetate
These substances have a delicate effect on the nail, but require longer exposure time and often do not completely remove the coating in one application.
The most popular and affordable means for safely removing gel coating include:
| Means | Description | Production | Price |
| YOKO | The composition contains vitamins A and E, has a simple method of application, and after application it can be quickly removed along with the shellac with a paper napkin. | Production - USA. | Cost – 370 rub. |
| Perfect | Clear composition, easy to use, does not require auxiliary tools. Easily removes the coating within 10-15 minutes. Plus - low cost. | Production - Korea. | Cost – 150 rubles. |
| CND | Professional remover with essential oils and vitamins A, B and E. Gently removes the gel layer without damaging the natural nail. Acts within 5-7 minutes, non-toxic. | Production - Great Britain. | Cost – 1050 rub. |
| Severina | Despite the relatively low cost, the product has a good composition and fast action. The gel coating can be easily wiped off with a cotton pad after use. The downside is the long exposure time. | Production - Russia. | Cost – 270 rubles. |
| Rio Pro | It has a triple effect, softens, degreases and at the same time removes the dispersion layer of the coating. | Production - Russia. | Cost – 190 rub. |
| Beauty Pro | Effective on all types of gel coatings, contains vitamin E, which helps strengthen nails and remove the coating without damaging the plate. | Production - Russia. | Cost – 90 rub. |
| TNL | A low-cost substitute for professional acetone-based products, used to remove gel polish and biogel, acts quickly, removes coating in one application. | Production - South Korea. | Cost – 75 rubles. |
| In Garden | A product for softening and removing acrylic coating and tips from extended nails, used together with foil. | Production - USA. | Cost – 200 rub. |
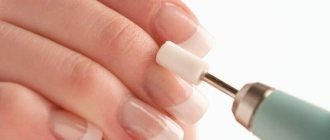
When choosing a suitable shellac remover, it is important to consider the base on which the coating is applied; different types of products are used for natural and extended nails. Using a steamer or milling cutter will simplify the process and get rid of the gel without damaging your nails.
Alternative method
There is another fairly common method that can be used to remove a design without foil.
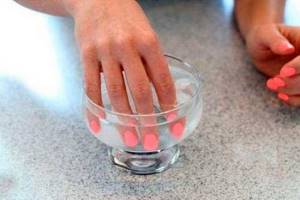
Finger container
Note! This is not the safest alternative. It is effective, but can harm the condition of the nail plate and the skin of the hands. It is not recommended to use this method often.
Restoring nail plates after shellac removal
Long-term use of shellac and rough removal often leads to weakening and thinning of nails. To restore their strength and elasticity, there are several life hacks:
- lubricating the plates with iodine;
- baths with the addition of peach or olive oil, sea salt;
- paraffin hand baths;
- the use of restorative oils for cuticles and medicinal varnishes.
Proper nutrition will help improve the condition of your nails. The diet should include fish, eggs, cottage cheese. Periodically, you can take vitamin and mineral complexes for skin, hair and nails.
Home methods for removing shellac - pros and cons
Each woman decides for herself where to remove shellac - at home or in a nail salon. Both options have their pros and cons. Removing it yourself saves time and money. You can remove the coating at any free time, especially if it needs to be done urgently.

Disadvantages of home methods:
- You need to buy a large number of devices and medications.
- Inept actions can lead to nail injuries, skin burns and other problems.
- The use of aggressive cheap products such as alcohol or acetone leads to nail separation and increased fragility.
To eliminate unwanted consequences, you need to carefully care for your nails.
general information
Shellac allows you to diversify your manicure design , apply different patterns and decorative elements, and experiment with classic or colored French manicure.
The procedure replaces the usual varnish coating and even extensions. Compared to the latter, shellac is more gentle; even on short nail plates it looks quite impressive.
The application procedure is more expensive than a regular manicure with painting, but the result is worth it.
Girls do not skimp, going to the master with pleasure. After almost an hour, your hands become well-groomed and your nails look elegant.
The only thing that can upset you is another trip to the salon to remove the shellac. The procedure requires money and time.
What if your master doesn’t work for some reason, and your manicure already looks completely unpresentable?
For such cases, the most resourceful girls and fashion bloggers began to experiment. It turned out that finding a way to remove Shellac yourself is not so difficult.
Everyone has all the necessary tools at home. These include regular nail polish removers , a little cling film and your patience.
Using foil for extensions
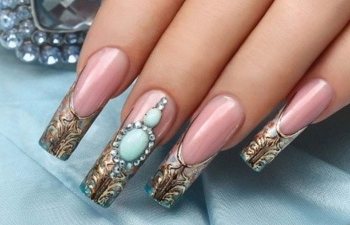
Casting on nails
The foil is applied either directly during nail extensions (attached to gel/acrylic), or on already modeled nails.
The aquarium design, in which the foil is “soldered” between layers of gel, is one of the most spectacular in the nail industry and one of the most complex. Only experienced craftsmen can make such decor on their own.
The design process for ready-made nails is as follows:
- A base for varnish is applied to a polished, degreased plate , and then a color coating .
- The foil is applied to the gel polish (no need to use glue).
- A protective layer is applied on top - it allows the coating to retain its original appearance for as long as possible.
For casting on nails (that is, when using foil directly during extension), take tear-off or transfer foil. It is applied to the not completely hardened extension gel.
The casting technique is difficult to perform - therefore only experienced craftsmen do it.
Original ideas for manicure
Foil is an ideal tool for creating original and festive decorations. Among the possible options are reflective, lunar shiny nail art, oblique French, thermal manicure, metal casting, stripes.
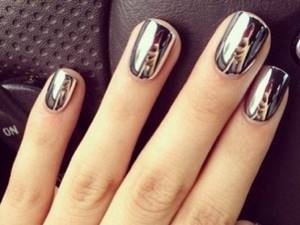
Reflective manicure
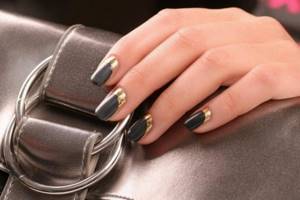
Lunar manicure
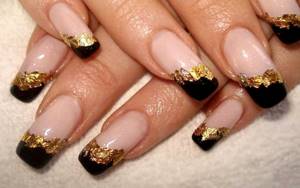
Oblique black jacket with gold foil
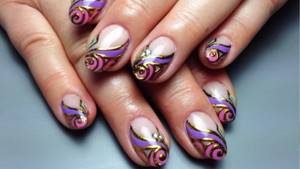
Casting technique
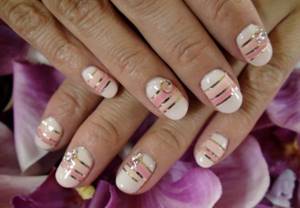
Foil strips
You can experiment with “precious” foil: gold, silver. Mirror elements look amazing on black, white, and red surfaces. It is acceptable to combine foil decoration with lace, glitter, and print.
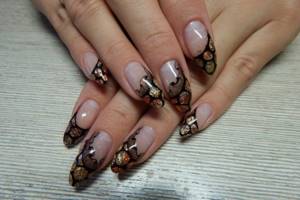
Foil and hand-drawn lace
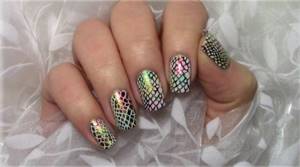
Printed foil
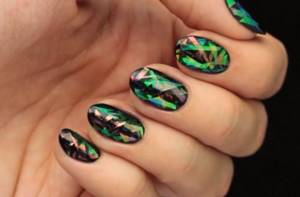
"Broken glass"
Foil is a universal decorative element that looks the same on long and short nails, on gel and natural nails.
Experiment with foil, but don't overload the design.
List of care procedures
Beautiful hands give girls femininity and sophistication. The nails should always look well-groomed, and the skin should be soft and tender.
Here are a few factors that can worsen the appearance and condition of the skin on your hands:
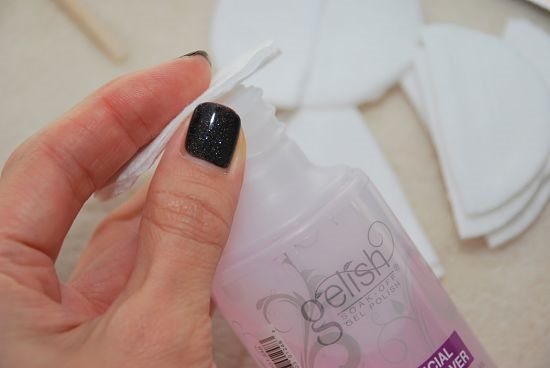
Removing gel polish at home
Note! It is necessary to take care of the skin of your hands daily.
Use moisturizing and nourishing creams. The cuticle and periungual ridges should be regularly treated with special oil.
Source
How to remove shellac correctly
In order to carry out this procedure at home and not waste time and money on visiting a salon, you will need a special liquid that will carefully and carefully remove shellac from your nails. It is not difficult to purchase a professional liquid for this process; many companies offer a wide selection of products for safe coating removal.
The second integral element is special sponges that are placed on each nail. They resemble a small pocket into which you place your nail. These sponges are made on a cotton base, but there are also many options with a foil base. It's up to you to decide.
The shellac removal procedure itself is absolutely simple. All you need to do is soak each sponge with liquid and attach them to your nails. Thanks to these pockets, the liquid does not spread, but adheres tightly to the varnish, which ensures a quick dissolution process. You will need on average about 10-15 minutes for the varnish to completely dissolve. Ideally, you remove the sponge along with the coating. If there are any remaining polish on the nail, you can carefully remove them with a special stick . These sticks are made of orange tree wood, one end of the stick is sharp and the other is beveled. With this orange stick you can easily remove pieces of polish.
