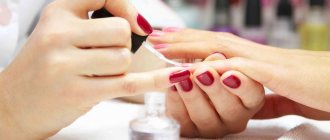
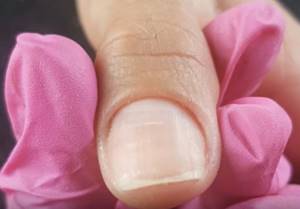
Gel polish under the cuticle is applied with a brush from the bottle, fluffing it or bringing it closer to the skin with pushing movements. You can also use a fine bristled tool. For a good result, a clean manicure is important, that is, cutting off the stratum corneum of the skin, clearing the sinuses, and removing dust. But you should handle your nails with care, otherwise injury, infection, unevenness and separation will occur.
The thickness of the gel polish and base, speed of work, hand position, and good lighting are important for deep coverage. Any streaks that have arisen are removed with an orange stick and a flat brush soaked in degreaser. If the coating has already dried, the defect is cleaned with a pusher or a hardware diamond nozzle.
Pros and cons of applying gel polish under the cuticle
When performing a manicure on their own, most girls and, of course, nail technicians tend to apply gel polish under the cuticle, since the method allows:
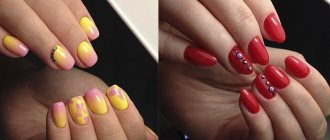
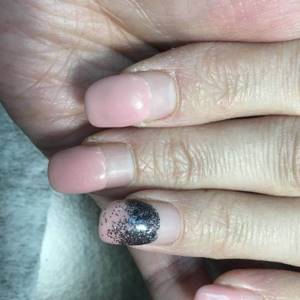
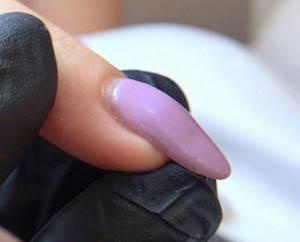
- give your nails a more attractive look, make them visually longer and more elegant;
- Wear the design longer and it will seem fresh for at least 2-2.5 weeks;
- your nails will look beautiful and neat when they grow noticeably;
- save time and money on manicure.
It also has disadvantages:
- difficulties in implementation; not everyone immediately masters the technique even after the training course;
- the likelihood of streaks appearing, which are then difficult to correct;
- the need to perform high-quality hygienic manicure, which not everyone can do, especially at home;
- the danger of damaging the nails in the matrix area and deteriorating their appearance, causing further disease;
- the sloppy appearance of the hands as they grow back plates, if the coating was done poorly.
How to remove artificial material correctly and why is it important?
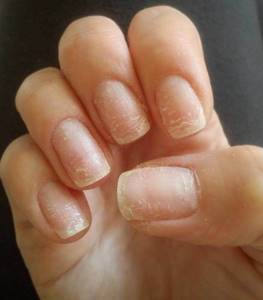
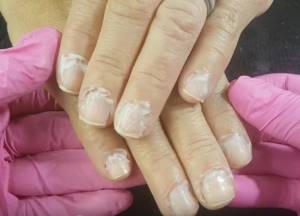
You've probably heard that gel polish spoils your nails, making them thin and brittle. It is a myth! It's not the material that ruins your nails! One of the reasons for damage to the nail plate is improper removal of the artificial coating, so this procedure must be approached with special responsibility!
Is it possible to remove gel polish yourself at home without damaging your nails? What materials and tools are needed for this? Let's figure it out.
How long can you wear gel polish?
First, let's figure out what period of wearing the coating is optimal. Often girls wear gel polish for a month, or even longer. However, they do not understand that they can damage the nail plate.
Technologists advise walking with the coating for no more than 2-3 weeks. Prolonged wear puts stress on the tip of the nail plate, its root suffers from the weight of the coating. All this can lead not only to breakage, but also to deformation of the nail plate.
How can you not remove gel polish?
RULE 1: Under no circumstances should you pick at the gel polish or tear it off the surface of the nail plate, because this can cause serious injury! If you are careless, you can remove the top layer of the nail along with the material, and this can lead to thinning and, at a minimum, painful sensations when in contact with water and various surfaces.
RULE 2: do not file away partially peeled off gel polish. In this case, you also risk cutting off the top layer of the nail and ruining it.
What other consequences might arise?
We hope these reasons are enough to convince you not to peel off the coating from the nail plate and do the gel polish removal according to the rules!
By the way, the peeling process itself is quite painful, it’s hardly worth it!
How to protect your nails and skin when applying gel polish under the cuticle
Gel polish application under the cuticle should be performed with clean hands and nails, treated with tools and following the following precautions:
- for thin and brittle plates, it is better to use not a metal pusher, but a plastic one or an orange stick;
- perform sliding movements with the tool along the surface, rather than cutting into its depths;
- use the device only after a training course, or at least use the softest cutters possible;
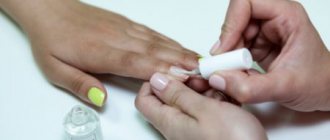
- Before coating, apply protectors to the skin around the nails, which will prevent the gel polish from staining it;
- remove streaks before drying in the lamp;
- If the problem is discovered after polymerization, apply remover to the stain to soften the cuticle, then clean off the gel polish with a pusher.
And there is no need to strive to literally flood the flower garden under the skin. You should paint in such a way as not to feel pain or discomfort.
How to properly treat cuticles before gel polish
To properly treat the cuticle before gel polish, there are 2 ways:
- Hardware manicure.
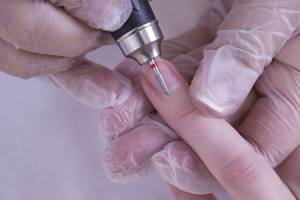
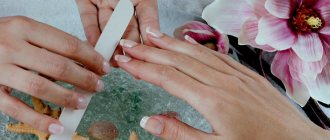
First, lift the cuticle with a pusher and use it to clean the nail near the skin. You can do the same with a “short flame” router. Next, the cuticle is lifted and cut off with a cylindrical cutter. In some cases, it is better to use the classic “flame” with a red notch. - Manually.
The cuticle is pushed back with a pusher or an orange stick. Using the second tool, the pterygium is cleaned dry, working along the space of the nail near the skin. Then a remover is applied to the cuticle. It is kept for the required time, blotted with a napkin and once again cleaned with a pusher all the previously passed places.
The keratinized but soaked part of the cuticle is cut off with special scissors or nippers. Lightly go over the side rollers with a buff, removing small burrs.
Is this manicure harmful?
If all stages of the procedure are followed correctly and the nails and skin are handled carefully, a deep manicure is not dangerous. But if you put too much pressure on the plates and try to cut off as much “extra” as possible, problems may occur:
- wounds on the skin that can become infected;
- damage to the growth layer of the nail, after which the plate becomes uneven, layered, brittle, or begins to move away from the bed (this is onycholysis).
After the coating has dried and when you continue to wear the manicure, you should take care of your skin. Emollient oils and creams are applied to the cuticle daily.
Tools to help
To remove gel polish from the skin around the nail at home, it is not enough to choose a suitable composition to protect the cover. For convenience, you will need to use the following tools:
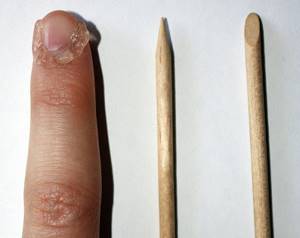
The most convenient device, according to manicurists, is a wooden stick obtained from the wood of an orange bush. You can buy it at your nearest specialty cosmetics store.
How to properly use an orange stick?
Dip the stick into gel polish remover and shake off excess. Carefully, trying not to catch the decorative coating on the nail, collect the sticky layer of shellac from the cuticles and periungual surface. After each time, wipe the stick on a napkin. We repeat the procedure until the excess varnish is completely removed from the skin. This method is the most convenient for removing gel polish, even after drying the manicure under a lamp.
Cotton swab or toothpick
Another common way to remove gel polish from the cuticle is to use a cotton swab or toothpick. Girls claim that the second option is more convenient, since a toothpick removes excess gel polish from both the cuticle and the periungual surface very carefully. You can also use a cotton swab. But it will not be possible to clean the surface in hard-to-reach places. A cotton swab leaves small particles on undried varnish, which are quite difficult to remove.

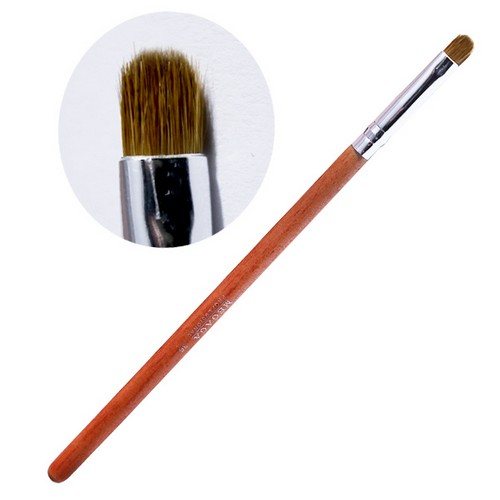
Small brush
This is another tool that allows you to remove gel polish from nails and the periungual surface. The brush is very convenient to use for evenly applying the product to remove the sticky layer from the nail plates, as well as for cleansing the cuticles and skin around the nail. There is absolutely no need to buy a separate brush for home use. For such work, a small artistic brush or a brush from used varnish, previously rinsed from the previous composition, is suitable.
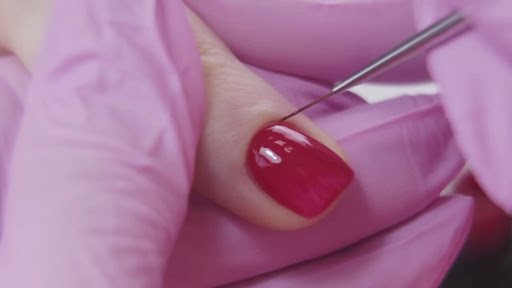
How to apply gel polish under the cuticle: step-by-step technology
The step-by-step technology for applying gel polish under the cuticle is as follows:
- After drying the base, the peel is pushed back again with an orange stick.
- Then you need to position the light correctly so that it falls on the space under the cuticle.
- The finger is positioned so that the free edge of the nail is below the base.
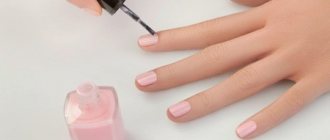
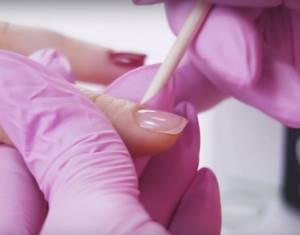
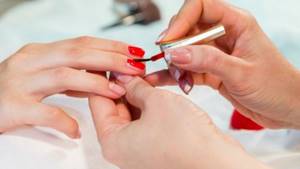
- Apply a minimum of varnish to the brush and place it on the plate close to the cuticle.

- Then you need to go down 1-2 mm.
- Using pushing movements of the brush, the material is sent closer to the cuticle and under it.

- The tool is led down to the end.
- Then they return to the base of the nail, but place the brush slightly diagonally, fluff the pile with pressure on the surface, and paint the next strip along the side roller.
- The same is done on the other side of the plate.
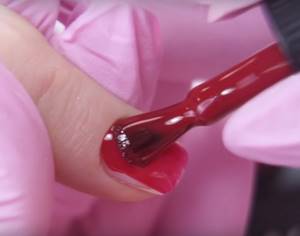
- Then add more material to the brush and paint the nail to create a dense shade using long strokes from the base down.
- After drying, cover with a second layer of flower bed following the same steps as the first.
To apply gel polish evenly at the cuticle, you should use your finger to pull the skin away from the nail at stages 6, 8 and 9.
Working with a separate brush
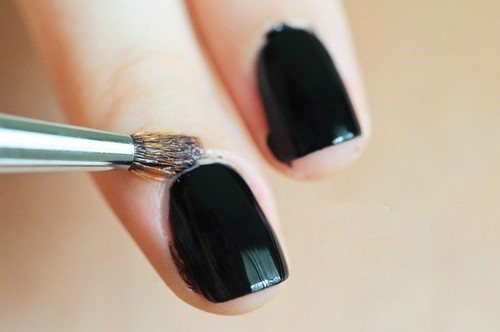
To simplify the process, you can use a thin “hair” brush designed for making drawings:
- First, a flower bed is applied along the center line and side ridges with a tool from a bottle. This is done as close to the cuticle as possible.
- Apply gel polish onto a hair brush so that part of the bristles near the applicator remains clean.
- Pull the cuticle away from the nail with your finger and use short strokes to paint the remaining light stripe on the base and at the side ridges.
- Then use a brush from the bottle to coat the surface again.
- After drying, a second layer of the flower bed is applied, but without using the “hair”.
You should work with a thin brush in literally dotted strokes. Otherwise, instead of covering, she will make bald spots, pushing the already applied flower bed away from the surface.
The first thing you can do is paint the space under the cuticle with a thin brush and dry this layer. And only then apply the flower garden to the rest of the nail with a regular tool from the bottle.
Tactile method of subcuticular application
Subcuticular application of gel polish is possible in another way:
- Most of the material is removed from the bottle brush by wiping it on the edges of the container.
- The instrument is placed 2-3 mm from the cuticle, slightly moved down, then pushed up as far as possible.
- The nail is painted in the center to the end and sealed.
- Turning the pile slightly, apply gel polish to the sides of the plate.
- Wring out the brush again.
- The skin is pulled away from the nail and held.
- Place the brush with the edge of the bristles towards the sinus and fluff it up strongly.
- The lateral villi move along the cuticle, painting the space.
- Using the same sides of the brush, apply the product close to the side rollers, also alternately pulling the skin away from the plate.
- Then another layer of gel polish is applied over the wet one and dried.
The second time they paint without fluffing the brush.
Watch the video on how to properly apply gel polish under the cuticle:
Secrets of applying close to the cuticle
Good masters know the secrets of applying close to the cuticle, which can also help when doing a manicure yourself:
- High-quality nail preparation is necessary. The excess part of the cuticle should be trimmed evenly, and the pterygium should be thoroughly cleaned. If tiny fragments of skin remain on the plate, streaking is inevitable.
- When doing a trim manicure, you should cut the cuticle with a continuous strip, not in pieces. Only in this way will the remaining part be smooth, and therefore the border of the gel polish will be neat. But for this you need to have good scissors or nippers and work with them correctly.
- Move back the cuticle after drying the base, before the first application of the flower bed. This is done using an orange stick on each finger immediately before using the material, and not on all of them at once.
- Set the light correctly. Its source should be located below the master’s face, and the radiation should fall on the area under the cuticle, but not on top of it.
- Choose high-quality bases, gel polishes and tops. They usually have a thick consistency, spread less, and it is easier to avoid coating defects.
- Even when performing a manicure yourself, keep the hand on which it is being done with your fingertips pointing down. This will prevent the varnish from spontaneously spreading onto the cuticle.
- Have support for the arm in which the brush is located, even when applying the coating to yourself. It is better to place your elbow on the table. And rest your little finger on the palm of your other hand or on a stand.
Manicure stages and possible mistakes
Today there are 3 main types of manicure:
Combined and hardware manicure must be done using a special manicure apparatus, but before using it, it is better to undergo training, since improper operation of the apparatus can lead to damage to the nail plate, for example, cuts. For beginners, it is better to do a classic manicure at home.
Stage 1. Shape filing, cuticle processing
Before applying gel polish, you need to put your nails in order: treat the cuticle, file the shape.
What do we do at this stage?

Stage 2. Preparing the nail plate for coating
What do we do at this stage?
Mistakes at the nail plate preparation stage
Mistake #1:
Typically, people with oily skin or those prone to excessive sweating have a moist and oily nail structure. When preparing such nails for coating, it is necessary to use a dehydrator (nail prep) to deeply dry the nail plate, remove excess moisture from it and improve the adhesion of the natural nail to the artificial coating.
Mistake #2:
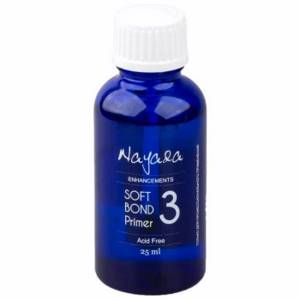
The free edge of the nail is one of the most vulnerable places: if you do not pay proper attention to it, chips and detachments may appear. To improve the adhesion between the nail plate and the artificial material, it is necessary to use a primer. Primer is translated as “primer”. There are acid-free and acidic primers.
The acid-free primer acts as double-sided tape and ensures strong adhesion of the natural nail to the artificial nail.
The acid primer lifts the keratin scales of the nail plate for better adhesion to the artificial material. Since the acid primer contains aggressive components, you must be careful not to get it on the skin and cause a burn. It is recommended to use it before extensions for girls with wet or oily nail texture.
Stage 3. Covering the nail plate
What do we do at this stage?
Errors at the stage of covering the nail plate
Mistake #1:
You used the wrong base for your nails.
The condition of the nail plate is different for everyone: for some it is strong, while for others it is thin, soft and plastic. You cannot use the same base for all nails. It is necessary to analyze the condition of the nail plate and pay special attention to the choice of base coat.
Today there are 3 main types of base coatings: hard, elastic and camouflage. What are their fundamental differences? Which one to choose? Let's figure it out.
Hard bases
Elastic bases
Elastic bases are great for beginners: they are easy to work with, as they do not spread, and the alignment is perfect. Using elastic bases you can extend your nails. Elastic bases are great for soft, highly flexible nails. But on long nails they sag over time, that is, after a while a “dip” appears across the nail.
Why is this happening?
Bases are soft gels, and they, in turn, as we said above, can be elastic or not.
Elastic bases perfectly strengthen the nail plate when leveling, because they are flexible, tenacious, and when the free edge moves, they, like an elastic band, move with it. But this is precisely why shrinkage occurs.
There are bases that contain solid plasticizers. Solid materials do not move with the nail and, accordingly, do not shrink. But keep in mind, UNDER HEAVY LOAD, almost any base will give minimal shrinkage.
What to do?
Strengthening with acrylic or hard gel, but this is a completely different procedure. In addition, the harder the material, the worse it soaks and the more difficult it is to cut.
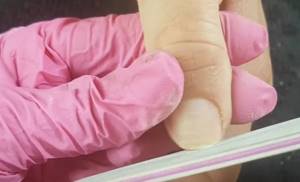
ADVICE! Sometimes it is not very clear from the name of the base whether it is hard or elastic. To determine the type of base, you can do the following: apply a small drop or strip of base to the surface of a transparent plastic bag and put it in a lamp to polymerize. If after polymerization the drop (strip) bends, it means you have an elastic base in your hands. If you can’t bend the drop and it cracks, then the base is solid.
Mistake #2:
You held your hand in the lamp incorrectly and the coating did not dry well.

How to hold your hand in the lamp correctly?
Mistake #3:
You stored and transported the gel polish incorrectly, it has thickened or air bubbles have formed in it, which is why the coating does not adhere well and is difficult to work with.
Trim manicure when painting nails under the cuticle with gel polish
With a trim manicure, painting nails under the cuticle with gel polish turns out to be of better quality if you follow the procedure correctly:
- First, shape your nails using a nail file. You should not file them after soaking; this will lead to delamination and weakening of the plates.
- Place your fingertips in a bath of warm water so that your nails and cuticles are completely submerged. After a few minutes, take your hand out and blot it with a napkin.
- The previous stage can be replaced by using a remover. It is applied to the cuticle and side ridges, left for the time specified in the instructions and washed with a napkin.
- Push back and lift the cuticle with an orange stick or silicone “hoof”. They also need to clean the pterygium from the surfaces using movements without strong pressure on the plate.
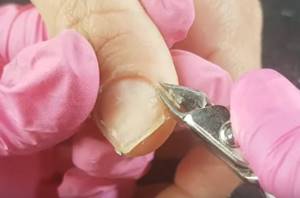
- It is necessary to remove the cuticle before applying gel polish using scissors or nippers designed for this purpose. If possible, it is worth pulling it up during the process so that the removed part is not pressed against the plate again.
- When all the plates have been processed, wash your hands and dry with a towel. Nails and the skin around them are treated with an antiseptic.
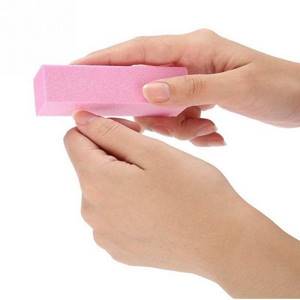
- The surfaces of the plates are polished with a soft buff to remove roughness. Then they are wiped with a degreaser, and the base can be applied.
What to do if the top is numb and dry
Every girl dreams of a luxurious manicure. Today this is not a problem. In any nearby beauty salon, masters will create a unique manicure design. If desired, you can create beautiful nail decor at home using gel polish and the necessary tools, which are offered in specialized stores. But in addition to the necessary materials, you must have the skills to use helium varnishes. For example, if varnish accidentally gets on the cuticle and skin, how can you remove it without disturbing the beauty of the manicure?
Removing polish residue from cuticles
How to paint nails under the cuticle with gel polish with an unedged manicure
Before painting your nails under the cuticle with gel polish, some people perform an unedged or European manicure:
- The peel is peeled back with an orange stick to reveal the “pockets.”
- The shape of the nails is corrected with a file with an abrasiveness of 180 grit, and the length is adjusted if desired.
- The side rollers are ground with the same tool.
- It is necessary to lightly walk over the surface of the plate, especially if the old coating was cut off from it.
- The file is placed edgewise and the sinuses are cleared, removing the pterygium.
- Then you need to take a ceramic file or euro-pumice and use it to process the side pockets of the nail with its edge.
- Use the flat surface of the tool to polish the cuticle.
- When it lifts, use the edge of a ceramic file to remove the layer of rough skin.
- Remove sawdust using a cloth moistened with a degreaser.
- The skin around the nail is treated with the soft side of the buff to get rid of hangnails.
- Once all the plates are finished, they are wiped down again with a degreaser, and you can proceed with the coating as usual.
This method of performing manicure is good for dry and thin cuticles, practically absent. At stage 8, you can use the orange stick again if the skin has not lifted well as a result of the previous action.
Why does gel polish run under the cuticle?
Gel polish flows under the cuticle for several reasons:
- The manicure was done poorly, the cut was uneven. The remaining skin particles may be difficult to see, but are revealed when a flower bed comes into contact with them.
- Primer applied too much or poorly dried. Or there is a lot of base on the nail, it lies incorrectly, “humped”, which contributes to the flow of the flower bed.
- An excessive amount of gel polish was taken. It may end up not only on the rear cushion, but also on the side ones.
- The hand on which the coating is being performed is lying incorrectly. If it is on a flat surface, or your fingers are raised up, the gel polish will inevitably stain the skin at the base of the nails.
- Incorrect hand position in the lamp. You should not lift your fingers up even a little bit, as undried gel polish may partially flow down to the cuticle.
- The base is poorly applied. The clear product is difficult to detect on the skin until it dries. But if the base is there, the gel polish will also flow.
- The flower bed has a liquid texture. Such funds spread even in small quantities.
- The work of the master is too slow. In this case, even thick products will move from the plate to the skin.
Shellac under the cuticle: how to paint using the technique so that it doesn’t smear

You should apply shellac under the cuticle to prevent it from running, using the same technique as with gel polish, that is, this is your choice:
- A “native” brush from a flower garden, with which the product is applied first in the center, then along the side rollers. At the same time, the cuticle is pulled up, and the pile of the instrument is pushed towards it with small movements.
- Fan technique, in which the brush is fluffed. Staining under the skin is carried out with the edge of the pile, and the cuticle itself is strongly pulled away from the nail.
- Use a thin brush for the most difficult operations. You can first paint the main part of the nail with the tool from the bottle. Only then take a “hair” and apply the material close to the cuticle. Or you can also use it first and dry this gel polish track in a lamp. Then the nail is painted completely.
It must be taken into account that the texture of shellacs is usually more liquid than that of gel polishes. Therefore, beginners should use the latter method, although the choice, of course, depends on personal preference. And be sure to dry each nail separately in a lamp, and not cover everything and only then polymerize it.
Gel polish flows onto the cuticle: what to do
If the gel polish flows onto the cuticle, you need to do the following:
- Take an orange stick, a flat or thin brush, and a toothpick, dip them in degreaser and wipe off the stain. The choice of tool depends on the size and location of the problem.
- If the previous option does not help, it is better to erase the coating completely and then reapply. For the procedure you will need a lint-free cloth and a degreaser.
- If a streak appears after polymerization, you can try to remove it with a pusher and an orange stick. Sometimes cuticle nippers or scissors help. But you can’t use them often; the tools quickly become dull.
- You can cut out the streak with a hardware attachment. Use a diamond cutter with a thin tip.
- If the side rollers are stained with gel polish, the polymerized product is removed with a file with an abrasiveness of 180 grit. Then you need to go over the skin with a soft buff.
Painting under the cuticle with gel polish is not easy for those who have taken courses. But with experience and the use of different techniques, choosing the appropriate one, this skill comes. And if errors occur, there are many ways to eliminate them. The main thing to do is to perform a good hygienic manicure.