- October 7, 2018
- Nail care
- Tatiana Pekha
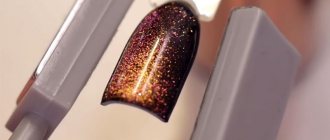
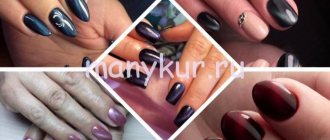
If you like to be the center of attention, then a shimmering manicure with cat eye gel polish will help you complement any of your looks and highlight your nails. This varnish got its name for its resemblance to the stone of the same name - cat's eye or cymophane. The peculiarity of cymophane is the refraction of light, causing glare running across the surface of the stone. The mesmerizing lights of a cat's eye are so beautiful that they contributed to the creation of gel polish with a similar effect. The gel polish contains tiny metal shavings, which, when applied to the nail, react to a special magnet. As a result, the metal particles are arranged into three-dimensional patterns. Further in the article we will look at how to properly apply cat eye gel polish and what to combine such a manicure with.
What is good about the shimmering effect of gel polish?
Coating with cat eye gel polish allows your imagination to run wild: you can fill the design with rhinestones, patterns and sparkles. To get a bright and colorful manicure with magnetic gel polish, you need to understand a little about its composition. Gel polish with a shimmering effect contains a different number of metal particles, different in color, size and shape. It is these parameters that you need to pay attention to when choosing a certain type of cat eye gel polish.
So, let's look at what affects the quality and depth of the glare:
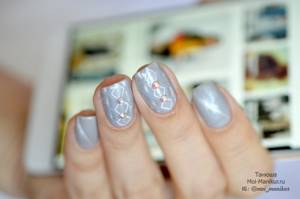
- The pearlescent shade of gel polish is very convenient, as it can be combined with many colored coatings. Thanks to this, a special depth and volume of the manicure appears.
- Pearl “cat's eye” consists of a large number of iridescent particles. This gel polish is applied without any substrate and has a pronounced neon highlight.
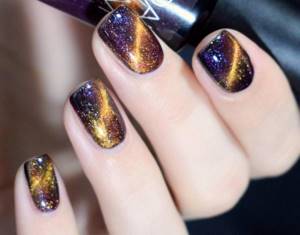
- “Cat eye” with golden shimmer looks great on any main shade of gel polish.
All types of cat eye gel polish look harmonious when creating original nail art. To add tenderness to your manicure, you can draw designs, monograms on the surface of the “stone,” or decorate it with rhinestones.
Manufacturers of magnetic varnishes
Bluesky Shellac
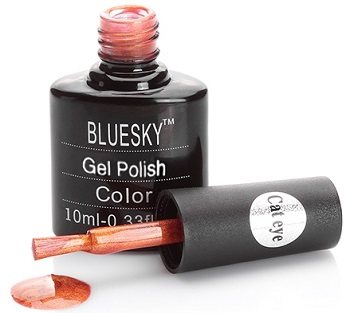
Gel polish "cat's eye" from Bluesky
The manufacturer presents a wide range of gel polishes, the price and quality of which are reasonably related, and the coating is durable.
Masura
Offers a large selection of varnishes with this effect. The line is represented in almost all possible shades.
Kodi Professional
In the Kodi you can find gel polishes in brown, red, green and blue shades. Well imitates texture and characteristic shine.
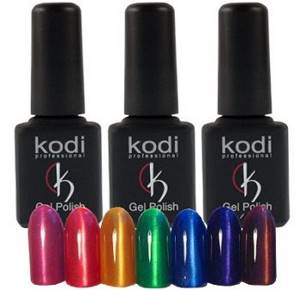
Cat eye gel polish from Kodi Professional
Dance Legend
A popular Russian brand, known for a wide range of professional coatings. Its line includes more than 10 regular cat-eye manicure polishes in the most popular colors.
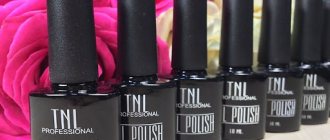
TNL Professional
A huge number of deep, bewitching flowers will not leave the most discerning girls indifferent. Thanks to the excellent durability of the gel polish, the manicure will decorate your nails for at least 2 weeks. The main advantage of TNL gel polishes is their excellent compatibility with other brands.
How to apply cat eye gel polish?
A manicure with a shimmering effect lasts longer than regular gel polish. What is this connected with? First of all, with the presence of metal particles in the composition of this coating.
Also, shimmer and small sparkles help maintain the structure of the nail, preventing it from bending and peeling. For a smooth coat of cat eye gel polish, stir the contents of the bottle thoroughly to dissolve any metal particles that have settled to the bottom. But it is important not to overdo it and not to fill the gel polish with air, so the bottle should be rotated and not shaken. So, let's look at the technique of applying cat eye gel polish:
- A base layer of gel or base is applied to the nails and dried in a UV lamp.
- If the “cat's eye” is enlightened, then before the main coating you need to apply a substrate (black or colored).
- We cover the nails with cat eye gel polish and bring a special magnet to the nail plate, holding it at a distance of 5 mm.
- You need to hold the magnet for 5 seconds, as a result of which a lunar glare will appear.
- The “cat eye” has a rather dense texture, so when using a base, you can get by with one layer of shimmering gel polish. Dry this layer in a UV lamp for about 2 minutes.
- The final stage of manicure is coating with a finishing agent, and then drying it.
- After polymerization, using a special liquid and a cotton pad, you need to wipe off the dispersion layer.
Use cuticle oil to prevent the skin from growing back too quickly and ruining the look of your manicure.
Subtleties of “Cat eye” makeup

Cat Eye makeup was invented in Ancient Egypt. In this state, cats were considered sacred animals, so women strived to be like them. Over time, such makeup still attracts attention and captivates others. How to draw "Cat's Eye" arrows? Your main task is to create an oblong eye shape with raised corners. There are many options for this makeup. The principle is one - lengthen and narrow the eyes.
You need to draw arrows carefully; there should be no white spots between the eyeliner and the edge of the eyelid. Otherwise, the makeup will not look impressive. This makeup is suitable for all girls. You just need to choose the right color, determine the width and length of the arrow so that it looks like an extension of the eye and blends harmoniously with your image. Let's look at the basic rules for performing the "Cat's Eye" arrow technique:
1. Focus on the shape of your eyes.
If you have close-set eyes, extend the arrow beyond their corners, as if making them further apart, lengthening them. Conversely, if your eyes are set wide, you need to narrow them.
You should not go far beyond the corners of your eyes. The line must be drawn to the end of the inner corner, completely. You should not make it too wide, this creates the effect of an impending eyelid.
For narrow eyes, Cat Eye makeup should be elongated and wide - this makes them visually larger. In this case, it is necessary to emphasize the lower fold of the eyelid. This cannot be done with eyeliner; use a brown pencil, draw on the eyelid with it and blend well.
If you have small eyes, the arrows should be voluminous and clear. You don't want to draw them too far beyond the outer edges. Short, wide and structured - they will make your eyes wide open and look very impressive. The lower eyelid needs to be emphasized with shadows and shaded.
Mascara for narrow eyes should be lengthening, for small and wide-set eyes it should have a volume effect. This will emphasize your look, making it even more harmonious and suitable for the whole image.
2. Experiment.
Cat eye arrows go perfectly with both casual wear and formal suits. But keep in mind that for the office, bright makeup with black shadows will be inappropriate, and for evening outings, a “daytime” discreet makeup will be lost in the bright light of the spotlights. Use accessories to complete the look, bright lipstick if your makeup is too neutral.
Any hairstyle with arrows will suit you, depending on your style and the planned event. When going to work, for example, to the office, tie your hair in a bun. This way you will look very feminine and at the same time mysterious.
3. Consider age.
Age-related makeup has its own rules and features, which also apply to “Cat Eye” arrows. Don't make your lips too bright; it's better to use neutral shades. But at the same time, the lips should not be “lost” on the face. The ideal solution would be to use a colorless gloss or pencil a shade darker than your lips. For a party or a walk, you can let your hair down and curl it. Your look will look a little casual, but at the same time very fashionable and stylish.
Recommended reading:
- How to even out your face with makeup: 20 beauty hacks for perfect skin tone
- Correct eye shape: how to do perfect makeup
- Almond-shaped eyes: features of daytime and evening makeup
4. Choose your hair color.
The execution of “cat” makeup can be different:
- For blondes.
Blonde girls have to put a lot of effort into eye makeup so as not to look vulgar. Eyeliners that are too black and a rimmed lower eyelid can look unsightly and provocative. Cat eye arrows should be very neat if you use black eyeliner or pencil. Do not apply the same shade to the lower eyelid, otherwise the image will turn out too dark.
You need to draw arrows starting from the middle of the eyelid and going slightly beyond the edge. The lines can be made wide and noticeable, but they must be very clear and structured. Shadows should be used only neutral ones or without them at all. Lipstick can be any shade, depending on the look you choose.
- For brunettes.

For dark-haired girls, any version of the “Cat Eye” will suit you. They can be any size. But if you have black hair, then you should not make the arrows too bright and wide. The lower eyelid can be lined with brown shadows and shaded well.
For daytime outings, you should choose lipstick in neutral shades, for evening outings - any tones. It is important that the eye makeup does not look too bright. There should be only one emphasis on your face.
- For fair-haired and brown-haired women.
The hair shades of fair-haired and brown-haired women are not very saturated and bright, so “cat-like” arrows can be made as effective and expressive as possible. Use different colors of eye shadow and eyeliner.
The lower eyelid needs to be lined to highlight the look. Choose a lipstick that is the same natural shade as your lips, or a little darker. You can also not be afraid of a double emphasis on the face and at the same time highlight the eyes and lips. The main thing is to look at yourself in the mirror and evaluate whether the image is vulgar.
- For redheads.
Cat's eye arrows look great on redheads, especially in black. They can be any size. For daytime makeup, it is better to draw thinner lines, for evening makeup, wider ones. Eyeliner for the lower eyelid should be done based on the shape of your eyes. You can try different options or do without it altogether. It is best to draw it using brown shades. Don't forget to blend them well after application. Red lipstick goes well with fiery hair, but you need to choose the right shade.
Sign up for eyelash extensions at Anna Klyuchko's studios with a 15% discount until February 8
12 studios throughout Moscow, St. Petersburg, Nizhny Novgorod and Tula
223 masters for every taste
High-quality service with a 7-day guarantee
Regular promotions and gifts for clients
Full volume 1990₽ 1692₽ Double volume 2590₽ 2202₽ Triple volume 2890₽ 2457₽ Hollywood volume 3400₽ 2890₽
Book 15% discount
5. Consider eye color.
We have already told you about how to properly do “cat” makeup for girls with different eye shapes. Now let's find out how to choose shadows.
- For blue and green eyes.
Such eyes are distinguished by their beauty and brightness. Makeup done with black pencil and eyeliner suits them very well. But if you ask about what is better to choose, then you should choose the second option. Eyeliner perfectly draws thin, clear lines, while it is difficult to make neat arrows with a pencil.
Shadows can be used in any color, with the exception of green and blue. However, when experimenting with the palette, you should prefer more neutral shades. Exotic makeup can ruin the whole concept.
- For gray and brown eyes.
Black and brown shades of eye shadow for the “Cat Eye” arrows suit these girls well. The size and shape of the line should be chosen depending on the shape of the eyes. If you want to highlight your lower eyelid, remember to blend it. It deepens the look and highlights the eye color.
Only until February 8th
Win guaranteed February gifts! Discount on massage, body wrap, laser hair removal, as well as the main prize - MACBOOK AIR

Many people often confuse two makeup techniques: “Cat Eye” and “Smoky eyes”. Their results are indeed similar, but the principles of implementation are completely different. To make a smokey eye, the pencil and shadows must be completely shaded. Arrows for “Cat Eye” must be clear, only light shading is allowed.
Features of magnets for gel polish
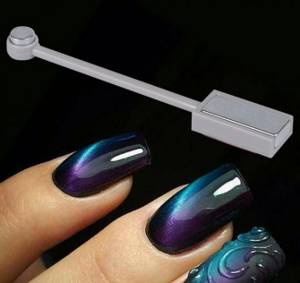
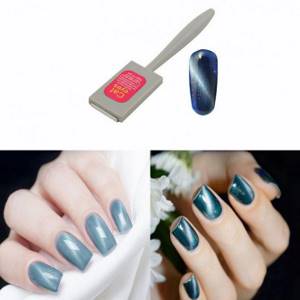
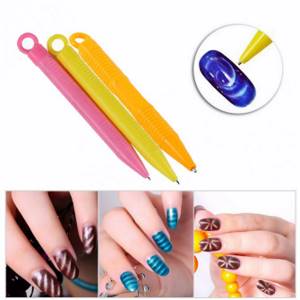
When working with shimmering gel polishes, the most common magnet is used. A strong magnet can successfully collect the glare, but this does not guarantee that after a second the metal particles will not spread across the nail plate. It is better to use a special magnet for cat eye gel polish. How to make a manicure neat and at the same time attractive? You can use magnetic pens to create more complex designs. Special magnets for gel polish have their advantages:
- A high-quality magnet has a durable and comfortable handle that allows you to maintain the required distance and the correct tilt of the magnetic plate. The handle allows you to conveniently control the direction of the pearlescent highlight.
- The ideally flat surface of the magnet allows you to get a deeper glare effect.
- The intensity of the glare depth depends on the degree of concentration of metal particles in the gel polish.
The location of the magnetic stripes on the nail plate depends on the type of magnet.
Powder with a “cat” effect
Special Cat's Eye powder helps create an interesting design with the effect of shining precious stones.
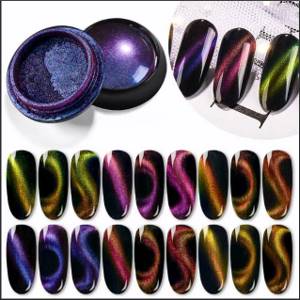
Reference! The volumetric effect is achieved due to finely dispersed colored pigment, which is mixed with magnetized metal microparticles. These particles are so small that they can be easily mixed to a uniform consistency in any coating: base, top, varnish or finish. After application to the nails, the magnetic particles freeze in a UV or LED lamp, forming a smooth surface with a volume effect.
Magnet patterns
Once you become familiar with the technique of applying shimmering gel polish, you will be able to perform various manicure designs. Next, let's look at unusual types of magnetic flare:
- If you hold the magnetic plate strictly parallel to the nail, you will get a direct highlight that can be moved along the nail plate in any direction (diagonally, along and across the nail).
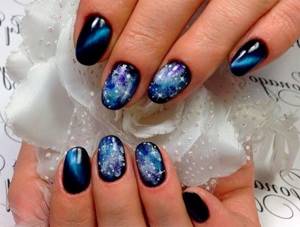
- If you hold the magnet perpendicular to the nail plate, you will get a gradient overflow. The ombre effect looks especially beautiful if you apply a “cat’s eye” to a black base.
- When the magnet is placed edgewise along the center of the nail, blurry and dark edges are formed. This effect allows you to visually lengthen the nail plate.
- If you install a magnetic plate edgewise along half of the nail, in the upper or lower part, you will get a shining arched jacket.
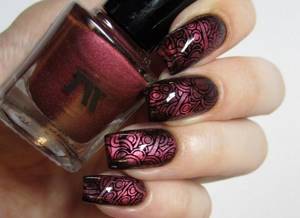
When using a magnetic pen, you can practically draw with metal shavings, creating sinuous patterns. The print imitating crocodile skin is very popular.
Common mistakes and how to avoid them
It would seem that there is nothing difficult to do; no special professional skills are needed. But not everyone can create a “cat-look” eye makeup. The reason for this is banal mistakes made due to ignorance or inattention. Let's fix this!
- Wrong arrows. Remember! Those with a narrow shape should not draw thin lines, and with a round shape, the end of the arrow should noticeably extend beyond the outer corner of the eye.
- When drawing arrows, you need to close your eyes - so it turns out that instead of the playful look of a cat, your arrows turn out different and at the wrong angle.
- Applying eye shadow after eyeliner can cost you a makeover. If the shadows fall off even a little, the shade of the eyeliner will change significantly.
- The mucous membrane of the lower eyelid is drawn with a regular pencil - no, you can damage very delicate tissue, use kajal.
Video: how to do cat eye makeup.
Now you know the intricacies of this chic makeup, how to do it correctly and how to avoid mistakes. The main thing is that it is done carefully, give preference only to high-quality cosmetics, and do not be afraid to draw arrows.
Follow simple rules and you will definitely succeed! Having mastered this technique, you will be able to create the image of a real film star, capable of winning the hearts of millions. After all, cat eye makeup always looks beautiful, and with it your eyes become expressive and attractive!
Adviсe
You need to work with cat eye gel polish carefully so as not to spoil the impression of the manicure. Here are some recommendations:
- The highlight should be identical on all nails, so that the angle of the shining line is the same and located in the same direction, so the manicure will look more harmonious.
- If necessary, adjust the direction of the highlight, and only then send the gel polish layer for polymerization.
- The intensity and depth of the glare does not depend on the degree of proximity of the magnet to the nail plate. Therefore, you should not bring the magnet closer than a couple of millimeters, otherwise you risk smearing the uncured coating.
- With each subsequent layer of cat eye gel polish, the highlight will be more blurred. Try to get the perfect shine after the first coat.
It is also worth paying attention to the quality of the gel polish itself.

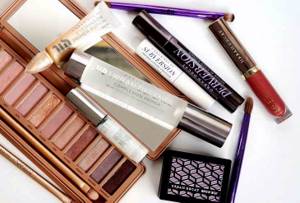
What you will need
Cat eye makeup is not complete without the following tools:
- pencil;
- eyeliner;
- shadows;
- eyeliner brush;
- blending brush;
- concealer;
- foundation;
- powder;
- blush;
- mascara
You can choose between eyeshadow, eyeliner and pencil depending on what you are more comfortable using. In order for your makeup to look neat, be sure to use foundation as a base, and you can always remove spilled shadows or sloppily shaded eyeliner with concealer. It is better to choose a neutral blush color, just to add lightness to the look.
Also, the look can be both daytime (with a minimum of makeup on the eyes) and evening. The only thing that will help you beat both looks is bright lipstick. Red classic is ideal for both day and evening.
Inlay
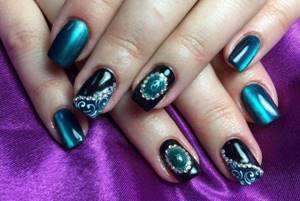
Manicure with cat eye gel polish, in addition to rhinestones, looks royally beautiful. Come up with a pattern of stones, rhinestones and bouillons in advance so that the decor differs in color from the main coating. The size of the rhinestones can vary to give the inlay more volume. A cat-eye manicure with rhinestones can be complemented with broths. It is better to plant rhinestones on a hard gel so that they do not fall off prematurely. If you are not afraid to experiment, then use special decorations for nail art, so the depth of the metallic shine will become even brighter.
Cat eye manicure ideas
The cat-eye manicure itself is quite self-sufficient, but despite this, some decorative elements will help it sparkle in a different way.
- Rhinestones and sparkles can both emphasize depth and create an overly bulky look, so you should be very delicate. By giving your manicure a matte effect, you can create a completely different look and feel free to experiment.
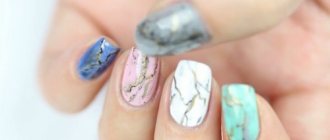
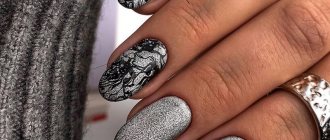
- Cat eye manicure goes well with various reptile skin prints . It is important to choose the right colors here.
- It is theoretically possible to create a French manicure with magnetic varnish, but the beauty of the design will be very questionable, but as for the lunar manicure , the “cat’s eye” fits perfectly into it. It is better to make the hole in natural colors, and the main color can be any.
- But if you want to add mystery to your manicure, then create a space effect .
- Patterns and stickers can be used in combination with this type of manicure, just remember one rule: they should support the existing mood of the design, and not interrupt it.
- This manicure goes well with “liquid stones” , emphasizing the depth and beauty of the design.


A cat's eye manicure is mysterious; the most important thing is to convey the natural shine of the stone and emphasize its beauty. You can easily do this if you know the technique of creating and decorating this type of manicure.
More interesting articles:
Matte cat eye
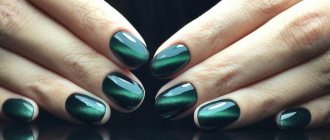
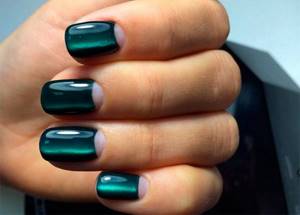
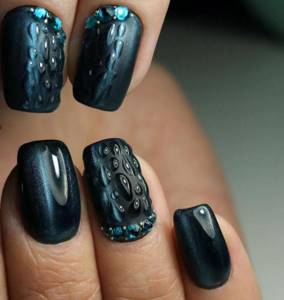
A standard application of cat eye gel polish can be completed with an unexpected solution - covering the amazing highlights with a matte topcoat. What will come of this? If you choose a deep emerald, burgundy or blue gel polish color with a pearlescent highlight, then the matte texture will add restraint to this design. The glare does not shimmer, and you get the impression that you are looking at a picture of space. It will be interesting to apply drops of glossy top on a matte surface to imitate rain or dew. Or you can paint monograms with gel paint without a sticky layer.
Basis for creating the cat effect
Metallic multi-colored particles can be added to different bases : from transparent to bases of various colors. To get a pronounced volumetric effect, manicurists use a dark base.
If the base is transparent or translucent , you should give preference to shades from a dark color palette, since without a black base the 3D effect will be barely noticeable. On light colors, you can achieve volume using a top coat. In this case, the main gel can be of any color.
—>
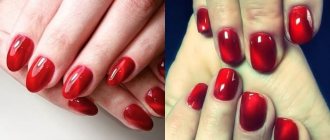
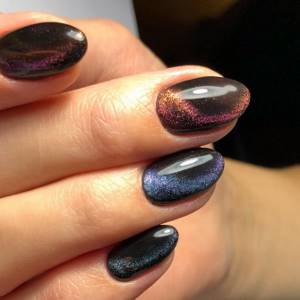
Combination with other colors
Trendy cat eye colors are: burgundy, blue, emerald, brown, gold and turquoise. In tandem with such bright colors, you can always add a pair of marigolds with a white coating. Casting or inlay looks ideal on a white background. The dark colors of the “cat’s eye” look original, that is, the highlight has a tint, and the rest of the coating remains the color of the base. With these varnishes you can create a gradient highlight: apply a black base, dry it thoroughly, and cover the nail lengthwise with two types of shimmering gel polish. These shades must be applied carefully so as not to stain the brush. Under the influence of a magnet, a highlight of different shades is collected. Don’t forget that a single-color coating of shimmering gel polish can be a great addition to any look, try and experiment.
Life hacks for using a dry cat
- To create a highlight, even a small amount of pigment is enough, but the effect will largely be determined by the color of the substrate: Black color always enhances brightness, so it’s better not to skimp and add a little more pigment.
- On black it is better not to use light colors of the rub: it can show through and will have to be applied in two layers.
- By choosing the color of the substrate to match the pigment, you get a very harmonious combination.
- But it is not recommended to use white as a base: it will dampen the brightness and shine of the rub. Although if you prefer a muted effect, then you have the right to choose this option.
- It is better to take a top that is not very thick, as this will complicate the uniform kneading. It is better to level the surface with the next layer.
That's all, respect to those who read to the end, not just scrolling through the pictures =) Tanyusha was with you, bye-bye!
Materials provided by the online store ingardenshop.ru