What is the basis of a beautiful manicure? It is hidden not only in the quality of manicure tools and materials, but also, first of all, in how carefully and evenly you apply the coating to your nails. Particular difficulties arise in the cuticle area, which, if done improperly, can completely ruin the manicure. Today we will share with you some tricks on how to apply gel polish under the cuticle at the level of a professional master. These simple tips will also come in handy when doing manicures with regular polishes.
Why is it so popular to apply gel polish under the cuticle?
Everything is simple here:
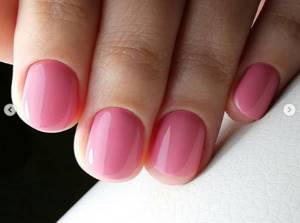
- Firstly, it is beautiful and aesthetic when no transparent strip of the nail plate appears between the cuticle and the color coating.
- Secondly, the manicure looks fresh longer , since as you wear it and the nail grows, the transparent strip does not appear so quickly and correction of the gel polish can be postponed for another week.
Is it harmful to apply gel polish under the cuticle?
This question is quite natural, because according to the rules for applying gel polish, the coating must be placed with a thin hair away from the cuticle. But, as practice shows, there is nothing dangerous in this, the main thing is that some rules for creating long-term coverage are followed:
- A high-quality manicure procedure was previously carried out, which eliminates the appearance of hangnails and injury to the cuticle.
- During the manicure process, not only the eponychium (the upper part of the cuticle) was removed, but also the pterygium (read more about the structure of the nail plate here).
- When creating a coating, gel polish does not get on the cuticle.
- The cuticle is regularly cared for not only in the salon, but also at home.
If you follow these rules, you can not be afraid and feel free to apply gel polish under the cuticles of yourself or your clients. And now I propose to directly consider ways to paint gel polish close to the cuticle. Let's agree that the preliminary manicure in each case has already been completed.
Removal methods
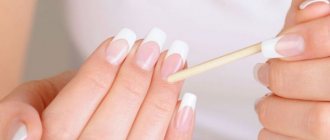
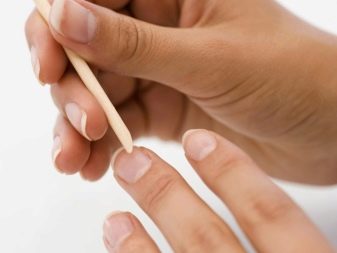
There are several ways to treat cuticles. At home, experts recommend avoiding circumcision and simply pushing away the excess skin with an orange stick. In a salon with a trusted specialist, you can try a more intense effect.
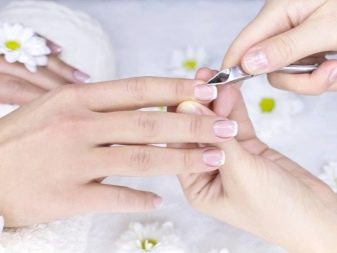
Edged
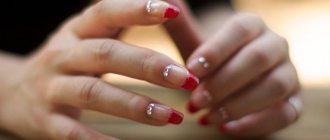
The meaning of a trim manicure is that excess skin is simply trimmed off. It is not recommended to do this yourself, so it is better to contact a professional in the salon. If a person has diabetes, then this type of processing is strictly prohibited. Cuticle trimming is carried out using standard tools: nail scissors and tweezers. The cuticle must first be softened.
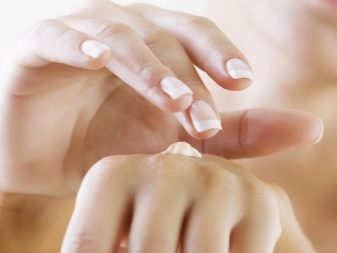
Using a pusher or an orange stick, excess skin is pushed to the base of the nail, after which it is cut off, moving from the sides to the central part of the nail. Everything needs to be done carefully, without tension, simply cutting off the already dead shoot. The procedure ends with disinfection of the wounds using hydrogen peroxide and nourishing the skin with a rich cream.
In addition, such a procedure is not absolutely safe - any careless movement leads to wounds. In some cases, there is even a possibility of matrix infection
Having decided to carry out a trim manicure, it is important to steam the cuticle well, and upon completion of the procedure, treat it with an antiseptic and a special restorative ointment.
Unedged
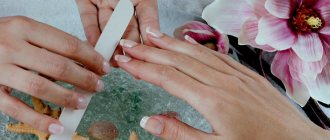
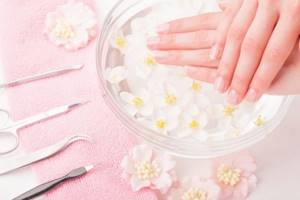
An unedged manicure that takes a sufficient amount of time is carried out using a special stick and a solution for removing cuticles, called a remover. The pusher stick can be made of plastic, silicone, or disposable from orange wood. Remover, as a rule, contains various acids, from lactic to fruit, with the help of which already dead cells are broken down. The procedure begins with a basic preparatory stage, after which three nails are covered with remover. You should start with only three fingers, so that the product does not remain on the epithelium for too long.
According to the instructions, the time of action of the remover is counted, after which the excess is carefully removed using a cosmetic disc. Using a pusher, the cuticle is pushed back to the very base of the nail, and dried pieces are removed with cotton wool.
A type of unedged manicure can be called a hardware procedure, which is carried out using a special machine. Working like a sanding file, this device gently removes dead cuticle without affecting living and healthy cuticles. It is recommended to carry out this procedure only in a salon.

Moving aside
In the case when a person’s cuticle grows very slowly and looks unnoticeable, you don’t have to do anything special with it - just move it to the base. In this case, having prepared the nails, you need to apply regular oil or gel to them, then move the pterygium and generously smear your hands with cream.
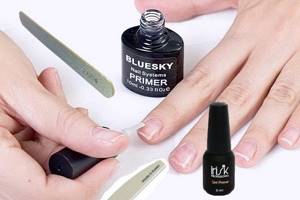
Technique 1: semi-dry gel polish brush
The main feature of this method is that the coating is done with a semi-dry brush: this applies to the base and colored gel polish and top coat. This allows you to apply the gel polish as close to the cuticle as possible due to the fact that it does not spread and is very pliable.
- Apply the base for gel polish. We place the semi-dry brush from the bottle almost perpendicular to the nail in the area of the lunula and move it with a pushing motion under the cuticle. In this way, we brush on one side and then on the other side of the nail. We paint the central part as usual, without bothering, but also with a semi-dry brush.
- We dry the base in a lamp: since the layer is very thin, the drying time can be slightly reduced.
- As a rule, applying a second layer of base is not required unless the first layer is very thin and bald spots are visible after drying. Therefore, the next step is to apply colored gel polish using exactly the same technique as the base, but in 2 layers, each of which is polymerized in a lamp.
- And the final stage is to apply the finishing layer of gel polish, followed by drying in an ultraviolet or LED lamp and removing the dispersion layer, if present.
This technique is suitable for both home and salon use. The main thing is that the gel polish brush is comfortable for you: thin and flat.
Tested for myself
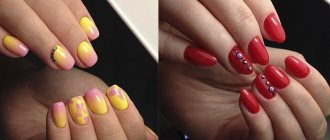
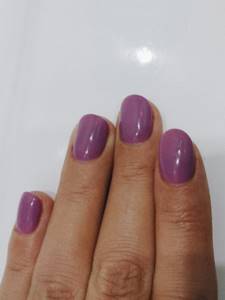
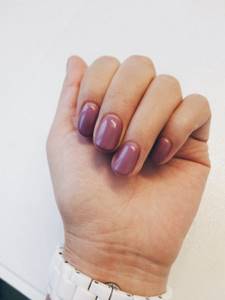
The expert’s skeptical attitude did not stop me from trying the fashionable “under the cuticle” manicure. I found a salon on Instagram that has been practicing this type of coloring for a long time, and made an appointment with the best artist for November 25th. My goal was to see a clear difference between classic and popular technology. To do this, I had to do both types of manicure and test them for 4-5 weeks.
At the salon it immediately became clear that the cuticle coating would cost 10% more than the classic one. The markup includes the cost of the work of a specially trained master (and courses on this technique are really expensive). In addition, painstaking, almost jewelry-like work using this method takes more time from a specialist. It's no surprise that he tries to make up for the time spent per client.
The master was surprised by my request to paint the nails on my right hand “under the cuticle”, and on my left – with the usual “butt” method, but fulfilled my strange wish. True, at the end I couldn’t resist making a value judgment: “It turned out ugly on the left one, the gaps are visible!” All the way home I meticulously peered into the lavender surface, but did not find any significant difference between my hands.
1 / 2
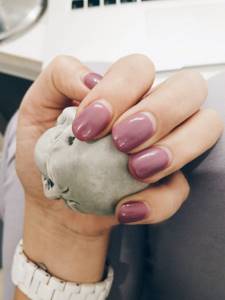
But, what’s most surprising in my experiment is that I didn’t notice any noticeable differences between the classic “butt” and the newfangled “deep manicure” technique as my nails grew!
1 / 2
As time went. Hangnails appeared, the nail plate grew, and the gap increased almost evenly on both hands. Well, okay, on the right hand it was smaller by a fraction of a millimeter. However, the weather did not do this, and already on December 5, that is, 10 days after the procedure, the nails of both hands required emergency care.
I continued the experiment, shyly hiding my hands in polite company. On December 16, 22 days after the procedure, the picture looked completely deplorable. The nails had grown so long that the white hole was almost completely exposed. But a little more than 3 weeks have passed - according to the specialist, this is the standard period of wearing gel polish.
1 / 2
Warning questions: no, my nails do not grow faster than those of the average girl. In general, for a healthy adult, the growth rate of fingernails is approximately 1 mm per week or 3–4 mm per month. I was not too lazy to take measurements with a ruler. After a month, the regrown part on the left hand is 3 mm, on the right - a little less. I fit well into the average range.
1 / 3
On December 22, having waited exactly 4 weeks after the procedure, I finally complete my experiments. Their outcome disappointed both me and my colleagues. Like all modern women, the pace of our lives is incredibly fast: we build a career, raise children, play sports, travel, make acquaintances. Having well-groomed hands is a must do for us, but how can we squeeze a manicure salon into our schedule?! Reducing the number of visits there seemed to all of us a tempting prospect. It’s a pity, but the maximum acceptable interval between visiting a specialist is still no more than 2 weeks
And it doesn’t matter how your manicure was done: “butt” or “under the cuticle”. My experience has clearly shown that the difference here is not fundamental at all.
Technique 2: Fine Nail Art Brush
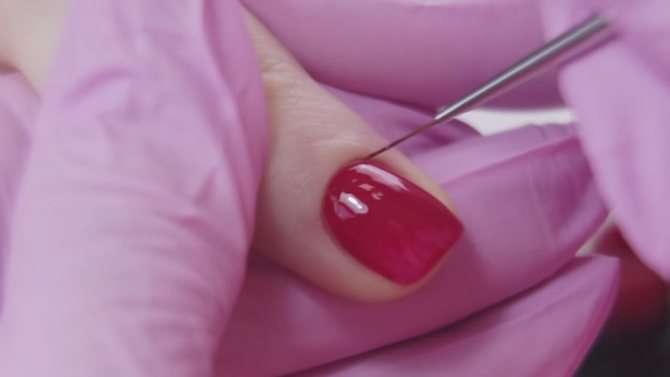
The second method of applying gel polish under the cuticle involves using a thin nail design brush, which will draw a contour in the cuticle area as close to it as possible. To do this, first place a drop of gel polish on the palette and prepare a brush.
- Using a brush, paint a thin strip of gel polish along the contour of the cuticle, getting as close to it as possible so that the transparent strip of the nail is not visible.
- It is recommended to dry this strip in a lamp separately, which is a slight disadvantage of this method, as it increases the time for creating a long-term coating.
- Next, using a regular gel polish brush, paint over the rest of the nail plate from our outline. Dry it in a lamp. Look at the coverage density to determine how many coats of gel polish you need to apply this way. Each layer is completed in these two steps.
- We complete the creation of the coating by applying the finishing gel polish.
This method is also suitable for use at home and by manicurists. At first glance, it may seem a little labor-intensive, but in fact it is very effective when applying gel polish under the cuticle.
Depth of field: the dangers of a deep manicure
If I haven’t convinced you of the pointlessness of the method and you are a supporter of an aggressive coating, even “under the cuticle”, even “up to the elbow,” it’s worth knowing one more important point.
“If pterygium is cleaned too thoroughly, there is a risk of significant damage to the proximal nail area and matrix. And this will entail the separation of the plates and the introduction of infection,” warns our expert Vlada Listarkova. In principle, any mechanical effect on the matrix should be extremely careful! So give your hands and heart only to a responsible, highly qualified master.
Photo: Unsplash.com
Technique 3: Pushing back the cuticle
This method is more likely to be only for manicurists, when they have one free hand with which they can lift the cuticle and apply gel polish underneath it. You can try to do this yourself, but with some nails it will be real “yoga for fingers,” so I don’t recommend it! So, a technique for masters.
- When starting to apply the coating, use the thumb of your free hand to fix the cuticle, as if lifting it up. Place the little finger of your working hand against the little finger that fixes the cuticle - this will avoid hand tremors while working.
- The gel polish itself is applied with a brush from the bottle using pushing movements towards the cuticle.
- Each layer is polymerized in a lamp for the time required according to the manufacturer’s instructions.
Secrets of applying gel polish under the cuticle
In conclusion, I would like to draw your attention to some tricks that make it faster and easier to apply gel polish this way.
- The main thing in a beautiful and correct application of gel polish under the cuticle is a high-quality preliminary manicure and the removal of all irregularities and roughness in the area of both the cuticle itself and the side ridges. There should be no hangnails or cracks on the skin.
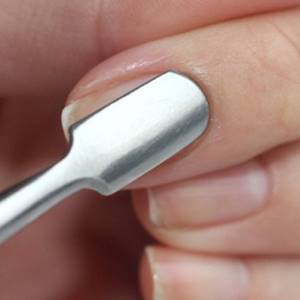
- To help the gel polish lie as close to the cuticle as possible, take an orange stick or pusher and first move it away. After applying the coating, the cuticle will “return to place” and cover the visible border of the gel polish.
- Try using different techniques to paint the nail plate under the cuticle if something doesn’t seem to work for you the first time. After all, you know that in manicure the ideal is achieved only by practice.
I hope these tips help you create your perfect finish!
Subtleties of choosing cuticle scissors
Choosing quality manicure scissors is not so difficult
You just need to know the criteria to pay attention to when choosing. Of course, purchase them only in specialized stores or sharpening centers
The best material is medical steel. But not all alloys are suitable for making manicure accessories.
Pay attention first of all to the hardness of the alloy. Indicators such as 40x13 or 30x13 will tell you that the scissors will serve you for a long time and will not become dull quickly. Buy single items, not sets
As a rule, the quality of tools in sets is somewhat lower. Focus on which scissors will be more convenient for you to trim the cuticle. If your nails are not rough or thick, then choose nail scissors with the thinnest blade. For removing rough cuticles, a model with a wide blade is more suitable. Pay attention to how the tool lies in your hand. The soft stroke guarantees that you will be comfortable working with them. The working part of such scissors occupies only a third of the blade. The blades should compress tightly without visible gaps or gaps. Scissors with an adjustable screw will give you the opportunity to tighten the blades if they become loose. It’s just better to do this not on your own, but with a specialist. Only well-tuned, not loose and not too tight scissors will allow you to quickly carry out such a delicate procedure without damaging living tissue. You definitely need to pay attention to sharpening. You can check it on a regular plastic bag. If the scissors cut through it effortlessly, then the model is worthy of your attention. But even in this case, the tool must be given to specialists for sharpening at least once a year.
These simple rules will help you choose a quality tool. You should also immediately learn the rules for caring for it. Be sure to treat the tool with antiseptic agents before and after work, but choose non-aggressive compounds. Use scissors for their intended purpose, that is, cut only the cuticle with them. Attempting to cut your nails with scissors will cause them to become loose and unsuitable for manicure. The same applies to attempts to sharpen them yourself using a needle or other improvised means. Only a professional master should sharpen manicure tools!
In this article, we have provided the basic information that is necessary to master the technique of classic cuticle trimming using nail scissors. Follow these rules for choosing and cutting the cuticle and do not forget about timely care of the tool. In conclusion, we invite you to watch another video from the charming Natalya Golokh, in which she will once again demonstrate in detail the procedure for performing a trim manicure using scissors.
OneGirl.ru » Manicure » How to trim the cuticle correctly? Removing cuticle with scissors