Applying gel polish butt to the cuticle is important and necessary in creating a high-quality and beautiful manicure. Since shellac, unlike acrylic nails, does not have the possibility of correction, the gel polish “under the cuticle” technique has successfully taken root. This look has a lot of significant advantages, but it also requires the master to have experience working with gel polishes and a strong hand in hardware manicure. Let's get acquainted with all the nuances and learn how to paint under the cuticle quickly, efficiently and safely.
Advantages and disadvantages of subcuticular technique.
- The ability to enjoy the perfect manicure where it is impossible to change the design.
This method of decorating nails is chosen by girls preparing for business trips, seaside holidays, long absences (including to the maternity hospital);
- Beautiful, durable, sleek design with perfect highlights that last over 3 weeks.
Depending on the growth rate of the natural nail plate, you can see a flawless manicure without gaps in the overgrown nail even more than the standard 14 days (for those whose nails grow slowly);
- Pleasant financial savings.
In this design, the fact of its long-term wear is visible much later, when the nails grow, which means you can make an appointment for a visit to the master a week later;
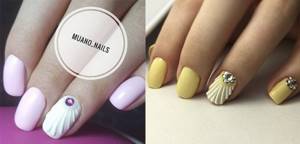
- Expressiveness and aesthetics.
Deep application of gel polish into the subcuticle pocket will create the visual effect of impeccably well-groomed nails, without the unesthetic gaps typical of growing nails. In addition, this design creates an incredibly positive mood. It will seem to others that your nails, already painted with shellac, are growing. Only you and your master will know the secret of a perfect finger outfit.
You can enjoy all these pleasant moments only if your nail artist is familiar with all the subtleties and secrets of cuticle design. Otherwise, you will have to face such annoying moments as:
- sagging and unevenness of the coating line.
If the gel polish under the cuticle is painted unattractively, without the correct bend, a torn and bumpy line at the nail hole can lead to premature detachment of the coating after regrowth. Or you will simply have to change the design in favor of a more aesthetic one;
- low design durability.
If the master has poorly removed the pterygium and eponychium in the subcuticular part of the nail, the water that gets there, coupled with household chemicals, will help reduce the durability of the coating. And instead of saving, you will have to spend twice as much;
- design with aesthetic flaws.
Inexperienced craftsmen, when performing this design, often inadvertently leave droplets of gel polish on the cuticle itself or on the side rollers. This is unacceptable when painting the nail plate deeply. Pigmented skin, at a minimum, looks unsightly, and at maximum, can lead to an allergic reaction to gel polish;
- damage to natural nails.
The “under the cuticle” technique requires very careful preparation of the matrix zone (the root zone of the nail). Excessive cleansing and pressure on the nail can lead to the risk of a fungal infection or even separation of the nail plate.
How can you reduce the risk of negative aspects so that a new type of design brings you only joy? Let's find out...
How to do ombre
This is what beauty salons call a smooth transition from one nail polish color to another.
There is nothing complicated here, so the stages of creating such a manicure can be divided into several simple steps:
- The nail plate is prepared for application of varnish - the edge is adjusted, sanded, polished and the edge of the cuticle is leveled.
- Two or three rows of varnish are applied to a piece of foil close to each other so that they connect. You can mix them in the middle.
- Foam rubber (you can use a piece of sponge for washing dishes) is dipped into this varnish and pressed against the nail several times.
- This operation is performed for all fingers.
Now all that remains is to wait until the varnish dries and remove its remnants. If your fingers have not been prepared, this will be quite difficult to do. That is why it is important to know what is applied around the nail during a manicure with a sponge, and specifically in front of it.
Water manicure is much more complex, so instructions for it will require a separate article. Let's not waste time on this and move directly to the topic.
How to protect nails and skin and remove imperfections when designing “under the cuticle”?
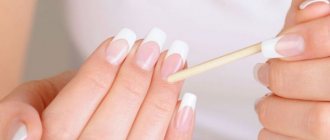
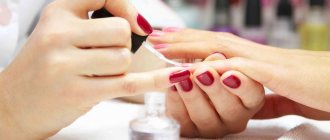
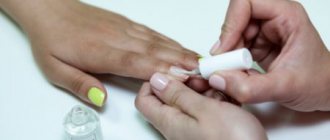
Safety precautions when applying gel polish to nails require a minimum distance of 1 mm from the cuticle area. Thus, we protect the nails from harmful bacteria and provide at least minimal access of oxygen to the nail plate. How to combine this requirement and the popular subcuticular coloring? Practitioners give the following recommendations:
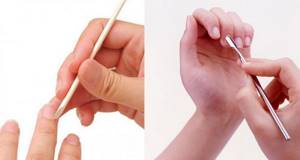
- For fragile, thin, weak nails, use plastic pushers or an orange stick. It is even preferable to remove the latter from the nail and from under the overhanging periungual skin. Less pressure on the nail and lower risk of injury;
- protect the cuticle and adjacent skin with special preparations - “skindefenders”. This pink little thing from the popular brands Masura, Konad, Mo You London, El Corazon will allow you to quickly and efficiently remove tiny droplets and smears of gel polish, without the need for correction using a gel polish remover;
- If you don’t have a rubber-based preparation to protect the cuticle on hand, as well as wooden sticks for correction, use a clean nail polish brush and shellac remover. Try to choose a product from a professional brand, with softening and moisturizing components;
- If you still missed the moment of correction, after drying the manicure in a lamp, apply a preparation to soften the cuticle on the dried gel polish, wait a while and scrape off the blemishes from the skin with the sharp part of a metal pusher. Failed? Dont be upset. Let the shellac finally set on the nail and, when you can hold your hands longer in warm water, try again to remove unwanted particles of the coating.
Preparation
When starting a manicure, first of all you need to clean your nails if they are covered with varnish. It is recommended to do this with special products that do not contain acetone, which dries out the nail plate. Old polish is removed with a cotton swab, moving from the base to the edge of the nail plate.
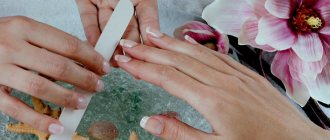
Shaping nails
The next stage of manicure is giving the nails a beautiful shape. The nail plate must be dry, otherwise it will begin to peel. The shape of the nail can be any, it all depends on taste and preference. Round is the most neutral shape, it is easy to make at home and fits any style. If you need to remove a large length of nails, you can cut them off with scissors, but it is better to use a nail file.
Common nail shapes
How to file correctly
When working with a file, it is recommended to hold it perpendicular to the nail plate. You need to move confidently, but without strong pressure, from the corner to the middle of the nail, all the time in the same direction, otherwise the plate will peel and break. After all the nails have become the same length and shape, they can be processed with special polishing files. This will remove unevenness and roughness.
The perfect cuticle design: three simple ways to create the look.
So we moved on to the most important thing - creating a finished look in gel polish using the tricks of subcuticle design. The general technique for creating a manicure in this style is as follows:
- Having prepared your nails, apply base to them as close to the cuticle as possible, but without going beyond it. And don’t forget to seal the free edge;
- Gel polish must be applied in very, very thin layers, without making any indentations, using a natural brush or a painting brush. Try to additionally slightly pull back the back of the nail with the thumb and forefinger of your free hand;
- dry the first layer for 2 minutes in a UV lamp and 30 seconds in an LED device;
- Apply a second (if necessary, then a third layer), polymerizing in a lamp for the same amount of time. Do not forget to seal each applied layer of color coating;
- Without removing the sticky layer, apply top coat. The area where the finish is applied must match the area of the colored gel polish. Drying in a UV lamp should take 3 minutes;
- Decorate the manicure with any desired decoration or painting, repeat the application of the top and, after baking in the lamp, remove the stickiness. The movements should be wiping, and the napkin with liquid to remove stickiness should move from the cuticle to the free edge.
The very effect of the coating, as if by magic growing from under the nail fold, can be created in three ways.
Using a separate brush.
It is more convenient to work in this case by applying a few drops of shellac to the palette (to draw the subcuticle pocket).
And as a tool, choose a thin brush with a beveled angle from a set for Chinese nail painting. Stages of design execution:
- place the brush sideways to the nail plate as close as possible to the cuticle and paint the semicircle and the area of the side ridges with several strokes of equal thickness, pulling the skin with your finger;
- dry the contour in the lamp and re-apply the gel polish to the previously dried strokes;
- Having drawn a kind of frame (translucent hole), use a brush from the gel polish itself to paint the central area of the nail with thin, smooth strokes;
- try not to create overlapping layers. If they accidentally formed, and you noticed it after drying in the lamp, lightly buff the edges of the color coating, smoothing out the transitions. The top will help you completely eliminate visual flaws.
Using the original gel polish brush.
Just like the first method, this option also requires concentration and accuracy.
As a rule, beginners begin to master the rather complex subcuticular technique from here. Image creation steps:
- Having collected a little gel polish on the nail, place the brush at an angle of 45 degrees to the nail (lift the back roller and pull it with your finger);
- Using the pointed corner of the brush, make a stroke in a semicircle, spreading the brush like a fan. Repeat the same application on the other side of the nail;
- usually the central zone of the nail is already relatively evenly painted. However, to be sure, apply a few strokes to even out the color. If you need to remove over-applied coating, increase the angle of movement of the brush on the nail. For a more dense application of color, try to hold the brush almost lying on the nail.
Mechanical (tactile) method.
Creating an image in this way is convenient only if you (or the client) have sufficiently flexible periungual skin (elastic, mobile, moisturized and well-groomed). Otherwise, your hands will quickly get tired of constantly controlling the cuticle and back roller. Due to the labor-intensive and elaborate nature of the work, this method is most often used by experienced craftsmen. And they paint the nail with the original brush, from the gel polish. Involuntary flaws are corrected with a dry hair brush. Essentially, with this subcuticle technique, you are using a second coating method. The only difference is that you push back the cuticle more than once, at the very beginning (before applying strokes), but accompany each brush stroke by constantly pushing back the overhanging skin. Thanks to this, although the manicure takes longer, it is performed more carefully and efficiently. The manicure turns out to be the most expressive and looks fresh and tidy for longer.
Types of decorative coatings
If you want to add some variety to your usual manicure, but don’t have time for painstaking painting, then we recommend that you familiarize yourself with some interesting trendy solutions. They can add zest to your look!
Variations of French manicure
When you are bored with the classic French manicure, you can think about how to paint your nails this way, experimenting with other color combinations. The lighter one is placed as the base, and the darker one frames the tip of the nail. Contrasting shades look interesting. The principle of applying varnish is the same as in French manicure.
As a second color, white can be considered universal - it goes well with any paint. In summer, you can afford the craziest color combinations. Examples of the most successful: purple + light green, red + malachite, gray + yellow.
How to paint your nails with two colors
You can paint your nails with two colors in different ways, interestingly combining different colors and shades. The color scheme should match your mood, clothes and makeup.
Features of this manicure:
- Harmonious combination of color and texture;
- Highlighting the nails on the middle and ring fingers with a different color or a smooth transition on one of the nails of each hand;
- It is advisable that the varnishes be of the same brand.
Want something interesting?
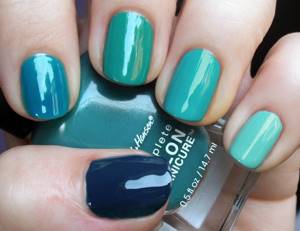
Monochrome - a combination of different shades of the same color. It looks easy and is the easiest to select. The shades differ in lightness and saturation; they are not diluted with other color tones
Pay attention to the following combinations: blue+light blue, brown+orange, dark green+light green;
A combination of related colors. Looks harmonious and somewhat more interesting than a monochrome combination
Related pairs: red + orange, green + yellow, blue + purple and others like that;
A game of contrasts. The combination of opposite colors is the most catchy and attractive. For example, yellow + purple, orange + blue, turquoise + coral.
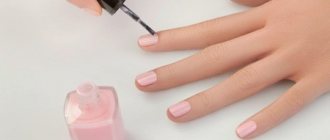
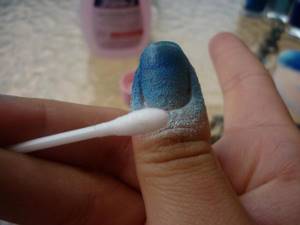
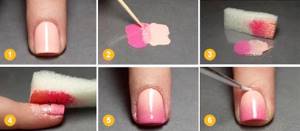
It’s clear how to paint your nails in two colors, but how to make a smooth color transition?
- Choose two polishes. Cover your nails with one of them (the main one);
- Apply both colors in the desired order on a small piece of sponge or a regular eyeshadow applicator;
- Moisturize the skin around the nail with any rich cream;
- Make an imprint on the nail with a sponge or applicator;
- Use a cotton swab dipped in nail polish remover to clean your finger and touch up the coating near the cuticle;
- Treat your nails with a protective coating.
Multicolored marigolds
Creative makeup or manicure best reflects the changeability of a woman's mood. They can successfully complement any image.
The main condition is that the colors of the varnish should be in harmony with the style and wardrobe.
Painting your nails with different colors is generally a bold experiment that can be done in different ways. Let's look at the most common of them:
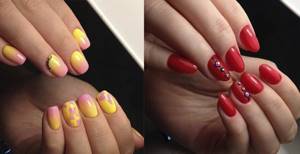
Gradient manicure
All nail polish colors must be from the same range. The principle is extremely simple: a multi-colored manicure, for example, in orange tones, suggests that each nail is painted in its own shade of orange. This creates an original gradient.
Finding five polishes in similar shades is quite difficult, so you can try mixing two polishes to create the entire palette. Each nail should end up being 1-2 shades darker than the previous one.
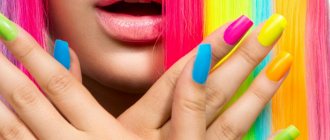
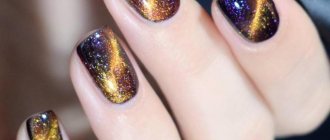
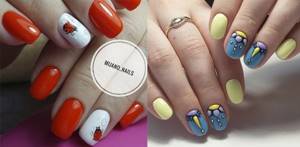
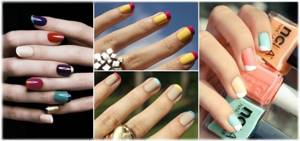
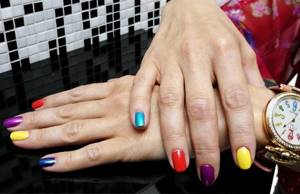
Rainbow nail art
It looks very impressive if you paint your nails with different colors of the rainbow on both hands. The rainbow effect can be created either through a traditional combination of shades or by combining all kinds of rich colors. Just paint each nail a different color and enjoy. By the way, the shades can be saturated or pastel as desired. A little trick: a bright rainbow manicure will stand out better if you wear clothes of muted colors, focusing exclusively on your nails.
Important nuances: how to paint correctly and how to correct mistakes in the cuticle design.
The beauty and effectiveness of this design depends not only on mastering the brush, but also on observing the following subtleties and life hacks:
- apply thin layers, which will allow you to reduce the formation of a dispersion layer (contact with which is undesirable for the skin);
- To ensure uniform distribution of color, do not forget to lift the pigment from the bottom of the bottle (by rolling the bottle briefly between your hands, or stirring with your own brush or toothpick);
- If you have been painting with one shellac or another for a long time and suddenly see microparticles of plastic from the cap on your nail along with the coating, do not apply this gel polish straight from the bottle. It will take a lot of time to remove grains from under the cuticle. Drip shellac onto the palette, remove unnecessary inclusions and paint directly from it;
- When sealing the end, work with an almost dry brush. Otherwise, during polymerization in a lamp, an unsightly bead may form on the free tip;
- If you have dried both layers of color coating and found that the pigment of the gel polish has crawled to the center of the nail, then the dispersion layer of the base is to blame. Try removing excess with a dry brush or lightly blot the nail with a lint-free cloth (not all the stickiness, but only partially dry the nail);
- After creating a design, massage the cuticle more often with creams, oils and waxes. This way you will quickly relieve the stress of the back roller control procedure and influence the rate of cuticle growth (in the direction of slowing it down). At the same time, practice carefully moving away the proximal cushion after the massage. Over time, in this way you will not only be able to increase the length of the nail bed, but also improve the elasticity of the skin for subsequent subcuticular manicures.
We hope that we were able to cover all possible questions that you might have about the cuticle manicure technique. In conclusion, we can only wish you to train more and not lose heart from the first mistakes. Experienced nail professionals advise looking for the one that suits you best in terms of ease of use from the available application options. Fantasies in the field of decorating marigolds created in this style are truly limitless.
Without a good polish there won't be a perfect manicure.
You can’t skimp on your beauty. Therefore, when you go for your next bottle of varnish, take its purchase seriously. We do not urge you to overpay for a well-known brand, because many good products are also in the budget category. However, you should definitely avoid buying cosmetics in passages, dubious stores and on trays in the middle of the street. The likelihood that you will be given a very low quality varnish is huge.
- The thick coating lays down unevenly, forming stripes
- The presence of small lumps in the varnish can ruin any manicure.
- If the varnish is expired or has lost its original appearance, feel free to throw it in the trash.
Remember that bad polish will not only leave uneven marks on your nails, but will also significantly deteriorate their condition.
Preparatory stage
- Give your nails the desired shape using scissors and a nail file. Make sure all nails are the same length.
- Now it’s time to take care of the cuticle. We recommend steaming your hands in a warm bath with oil, and then pushing back the cuticles with an orange stick. It is better to do a trim manicure in a salon. If you don't get rid of the cuticle, the varnish will cover it and it will look terrible.
- Using a polishing block, thoroughly polish the surface of the nails.
- Degrease the surface of the nails with a soap solution or nail polish remover.
- Be sure to apply a base coat, because this is the key to an amazing manicure. The base heals nails, protects them from the effects of decorative varnishes and evens out the surface.
Don't forget to make masks for your nails to improve their health and bring them into proper shape.
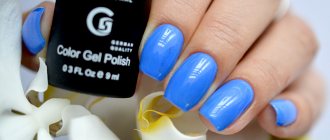
Color selection
Fashion is fleeting. Almost every season the current palette changes from barely noticeable light shades to crazy neon tones or delicate pastels. In order for nail art to look harmonious and as impressive as possible, you should be guided not only by fashion trends, but also by your natural abilities.
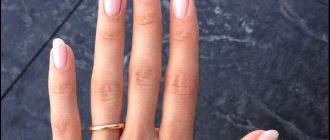
Against the background of dark or tanned skin, golden, bronze tones, the entire palette of burgundy, rich red and deep dark green shades look good. Experiments with light colors are also acceptable: beige, cold blue, soft pink.
For girls with fair skin, the same light, unobtrusive shades are suitable: lilac, pale cornflower blue, pink mother-of-pearl, milky.