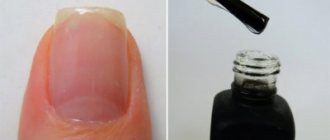
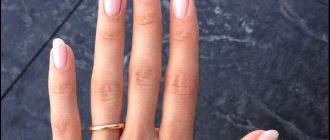
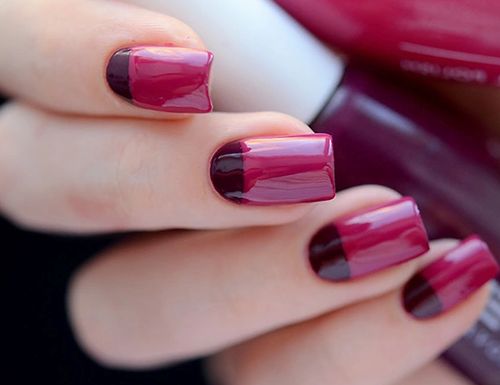
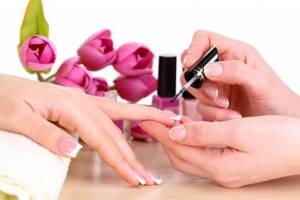
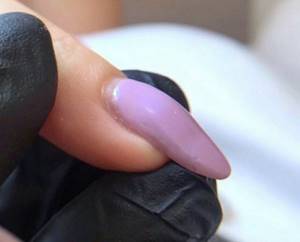
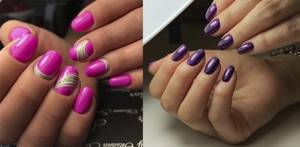
In this article, I propose to analyze one of the most common problems faced by both beginning artists and those who do their own gel polish coating - gel polish runs on the cuticle and side rollers. This usually happens when you try to apply the color as close to the cuticle and side edges of the nail as possible. This can happen not only with colored gel polish, but also with base and top coat, it’s just that with a colored coating it’s more visible and can be corrected before drying in a lamp, which is much easier.
If gel polish flows onto the cuticle
In this article, I propose to analyze one of the most common problems faced by both beginning artists and those who do their own gel polish coating - gel polish runs on the cuticle and side rollers. This usually happens when you try to apply the color as close to the cuticle and side edges of the nail as possible. This can happen not only with colored gel polish, but also with base and top coat, it’s just that with a colored coating it’s more visible and can be corrected before drying in a lamp, which is much easier.
Reasons why gel polish runs dry
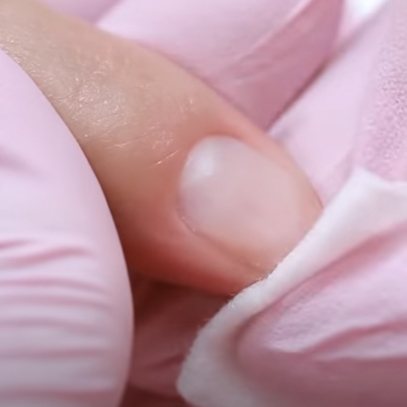
I think you already know that the beauty and ease of applying gel polish is largely determined by the pre-treatment of your nails. To apply gel polish as close to the cuticle as possible without streaking, you need to not only cut the cuticle evenly, but also lift it and clean the space underneath it.
Pterygium is a thin weave that fits quite tightly to the nail, so removing it is not always easy. The most convenient way to clean a pterygium is with a device, but when performing a classic or European manicure, this is a little more complicated.
Usually, dust remains under the skin after processing the cuticle and pterygium using cutters during hardware manicure. It is removed by degreasing the nail plate. Therefore, to prevent it from remaining, do not forget to lift the skin at the cuticle and apply a degreaser there too.
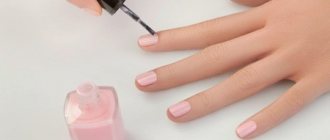
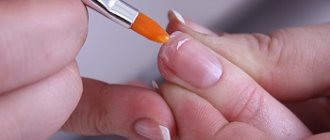
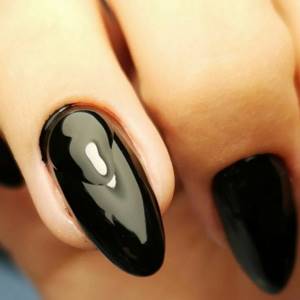
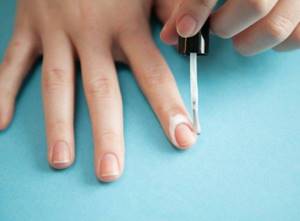
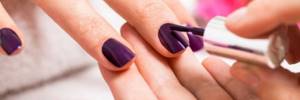
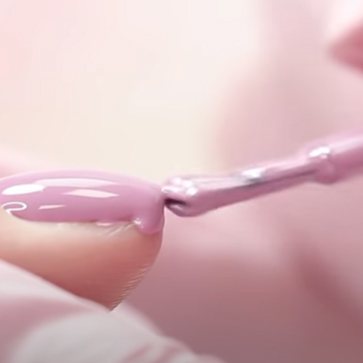
If you take a well-saturated brush from a bottle directly to the cuticle, you will inevitably get streaks. Start applying the gel polish, stepping back slightly so that most of the material remains on the nail, and a semi-dry brush approaches the cuticle.
In addition, with the first layer, it is better not to immediately try to apply gel polish under the cuticle - it is better to do this already on the second layer, or use a thin brush for this.
If you paint under the cuticle with a brush from a bottle, you need to press it so that it lies like a fan against the cuticle, and then push the gel polish as close to the cuticle as possible.
It will also be difficult to apply without streaking the skin. In this case, I can recommend making the layer thinner and applying it with an almost dry brush. The number of layers, of course, will have to be made more.
An interesting property of PVA glue
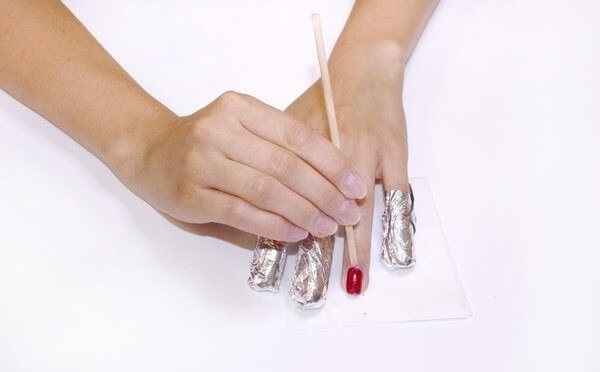
The most unusual method of protecting the cuticle is ordinary resin.
Take a medium-sized brush and carefully apply it to the finger ridges around the nail (we act extremely carefully so that the glue does not get on the nail itself).
When exposed to air, PVA forms a film that adheres tightly to the skin, thereby repelling varnish particles. Any coloring material that gets on the film can be easily removed using a cotton swab dipped in water.
This method is perfect for manicure at home, because it is quite simple and does not require additional costs.
What to do if gel polish gets on the cuticle?
If it so happens that the gel polish does get on the skin - the cuticle or the side ridges - then you can still save the situation, but it is better to do this before placing the numb nail in the lamp.

How to fix streaky cuticles before drying
As you can see, the technology is almost the same as in the case when regular nail polish runs - it is also removed with a brush, only moistened with nail polish remover.
I saw that some people use the sharp tip of an orange stick instead of a brush - this method also has a right to exist.
How to remove gel polish from skin after drying
In this case, the first thing to do is to separate the gel polish from the skin.
If the leakage is small, then you can do without tweezers and immediately remove it with a cutter, for example, a flame.
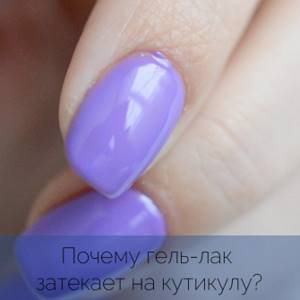
Gel polish runs on the cuticle: what are the reasons and what to do
Manicure salons have not yet opened in all cities, so some girls have to, for example, make their own gel polish. Long, tedious and not without problems.
We've already talked about cuts, now let's move on to streaks - also a common problem when the base, coating or top can flow onto the cuticle and/or periungual fold.
As it grows, the cuticle outline will be unclear and blurred. Many girls begin to pick at the swelling, which will lead to detachments in the future. To prevent this from happening and you don’t have to redo everything all over again, let’s look at the reasons for the formation of streaks.
Poor quality manicure
The presence of pterygium ( these are thin films layered on top of each other, between the cuticle and the socket
) and poorly processed cuticle.
By the way, when a master is told about “removing the cuticle,” they do not mean cutting it off completely (this is dangerous to health), but removing the pterygium.

Due to an insufficiently cleaned pterygium, any base will have streaks.
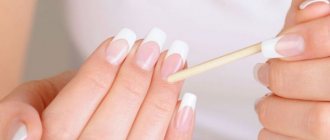
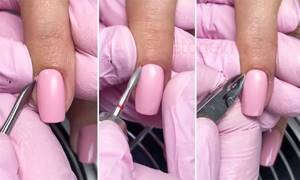
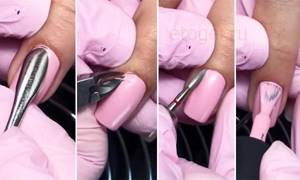
I don’t recommend cutting manicure; it’s better to buy a remover - a product that softens the cuticle. Apply it to the cuticle. You wait until the pterygium gets wet (just don’t let the remover dry out) and simply clean it with an orange stick.
Dust
After you have done your manicure before applying the coating, the dust remains under the cuticle. She also provokes swelling
Don’t just brush over your nails, but carefully remove the dust under the cuticle. This can be done with an orange stick, which is tightly wrapped in a napkin.
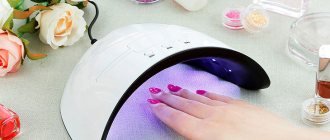
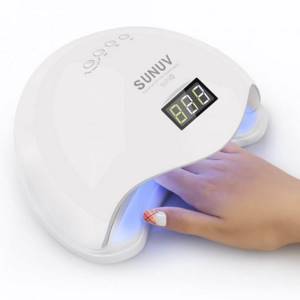
Holding your hand in the lamp incorrectly
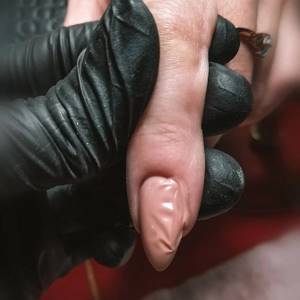
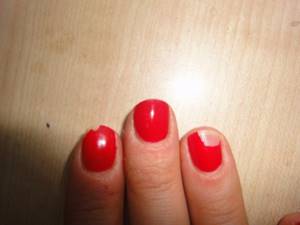
You put your hand under the lamp and accidentally touch the coating. We get something like the one in the photo below.
You can't put your hand down. Drying all your fingers at once is wrong: either 4 at once and the thumb separately, or each nail separately.
If you suddenly touch the coating of the lamp, then remove with a napkin everything that has not dried, then dry the nail completely. Then, in the lateral sinuses, carefully clean the nail with a cutter, sand the surface, degrease and reapply the coating.
Problem with materials
The consistency of the varnish or base is too thin. The problem may also be with a specific shade that constantly flows.
Here are the options:
Why gel polish runs and how to remove smudges
What troubles can happen when working with gel polish, especially for beginners. A frequent request for advice is the question of gel polish running - how to fix it, what’s wrong and how to prevent it in the future.
In this article we will tell you how to avoid smudges of gel polish during application and what to do with existing ones.
Errors at work
Beginners have troubles, and instead of a beautiful coating, the end result is bubbles and chips. Such problems arise due to improperly prepared nail plate. Before coating, it should be a little rough, then the varnish will adhere well to the natural surface.
Chips occur due to improperly processed nail edges. Any irregularities cause uneven layering of the varnish, and then its subsequent peeling.
Bubbles may appear if you have applied too much varnish. This situation also occurs when shaking a bottle of varnish. You can't do that. To mix the contents, allow the vial to be rotated slowly before application.
For reference! If the procedure is performed independently or in a salon, you can check the quality of the work yourself. You need to touch the coating with your fingertips. If it wobbles or falls through, it means the varnish is not completely dry. Without a lamp, it will not dry and will gradually peel off or stain your clothes. It is best to remove such varnish.
Gel polish runs dry
When gel polish leaks, two scenarios can be distinguished:
The root causes of problems lie in application.
Having discovered and solved them, you won’t be afraid of gel polish streaking onto the cuticle in the future:
Summing up the reasons for gel polish flowing onto the skin and cuticles, there is clear advice - practice correct application. Your family members can become wonderful “nail models.”

Use of special protective equipment
Today, there is a fairly large range of special products that help make the process of protecting the cuticle as easy as possible. These components have proven themselves well among professionals.
Priorities of special protective materials:
- The main component of this product is natural rubber, without the admixture of harmful chemicals.
- It has a pleasant pink color and a delicious aroma. Thanks to the special composition of essential oils, it has a positive effect on the skin of the hands.
- It dries quickly, which is a huge plus when used by professionals.
- The bottle is compact and easily fits into a small cosmetic bag.
- A convenient brush makes it easy to apply to the skin, avoiding getting it on the nail.
- It can be stored for a long time and has low consumption.
Now, to apply a neat manicure, you don’t have to peel off the gel polish that gets on the cuticle, just apply a specially designed protection product and enjoy a delightful manicure.
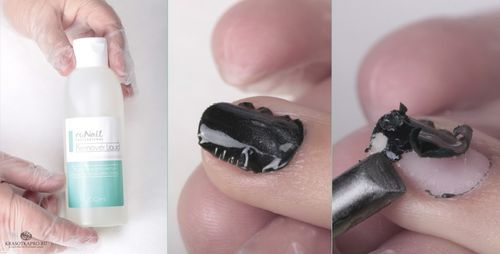
How to remove dried gel polish
Remove the stickiness from the dried gel polish. We separate the coating that has dried to the skin using a scalpel or hatchet-shaped scraper/pusher.
Afterwards, we remove the dust and perform the remaining layers with a slight overlap of the processing area with a milling cutter.
This guide is intended solely to help beginners and occasional problems with pros. It is normal to constantly progress and not allow the coating to bleed.
Source
Important recommendations and nuances
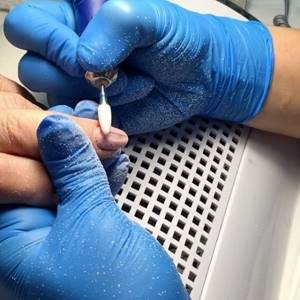
You should not rely on video tutorials and articles from the Internet. To become a professional and perform a flawless manicure with gel polish under the cuticle, practice is required. Don't be afraid to improve yourself and learn new techniques. Hardware manicure courses, which will teach you how to properly remove cuticles using a dry method, will come in handy. A very important nuance is the correct positioning of the hand. The movements must be confident and firm, but this also comes with experience.
Perfectly even coverage and flawless highlights are not always achievable for beginners. There are some secrets that will make your task easier:
- It is not necessary to paint your nails only with a standard base or gel polish brush. You can use a thin design brush to paint a good line butt up to the cuticle. Then you can cover the rest of the space with color;
- the second option is to apply the material in the usual way, retreating a millimeter from the cuticle. After polymerization in the lamp, move it away and paint the pterygium area with a thin brush;
- do not try to remove part of the numb and dried material - you risk injuring the plate and the skin around it. It’s better to redo the work and enjoy a high-quality result, although it will take more time;
- It is recommended to remove excess base, top or gel polish not with a dry orange stick, but with a little dipped in degreaser. This is a guarantee of complete removal of material from the skin without discomfort for the client;
- at the end of the procedure, do not forget to moisturize the cuticle with special oil with vitamins and plant extracts.
The rest depends on the client - you can extend the durability of the coating with home care and regular moisturizing of your hands and nails. A properly performed manicure will remain looking great for up to four weeks without any unpleasant surprises.
What to do if the top is numb and dry
Every girl dreams of a luxurious manicure. Today this is not a problem. In any nearby beauty salon, masters will create a unique manicure design. If desired, you can create beautiful nail decor at home using gel polish and the necessary tools, which are offered in specialized stores. But in addition to the necessary materials, you must have the skills to use helium varnishes. For example, if varnish accidentally gets on the cuticle and skin, how can you remove it without disturbing the beauty of the manicure?
Removing polish residue from cuticles
How to keep the skin around your nails clean?
Masters advise using several of the following secrets in the process of decorating nail plates:

It is recommended to apply any of the above products immediately before starting the artistic part of the work. If you apply Vaseline or glue while treating your nails with a buff or file, small shavings will clog the skin and cuticles, forcing the nail technician to clean the area. When applying petroleum jelly, greasy cream or PVA glue to the periungual surface, you must be careful to ensure that the product does not get on the nails. If a greasy composition gets on the plate, you must immediately remove the product by carefully wiping the surface with clean cotton pads.
Girls who create their own manicure at home note the ease of using PVA glue. It is applied a few minutes before the start of nail art. Apply a small layer of PVA to the periungual surface and wait for it to dry. The glue forms a thin film on the skin, which is easily removed in warm water. After waiting for the adhesive protection to dry, you can begin decorating the plates with gel polish.
Using an orange stick
Note that when performing an Ombre style manicure, it is recommended to use special products to remove excess gel polish after drying under a lamp. Since this technology involves painting the nails and part of the adjacent skin.
From the professional products that professionals use in salons, it is recommended to choose those that have protective properties. Emollient components not only make it easier to remove the sticky layer of gel polish, but also soften the skin and cuticles.
Applying PVA glue
Ways to keep the skin around the nail clean
There are several secret techniques with which the manicure is attractive and the skin around the nail is clean and unharmed.
Some of them:
- Using Vaseline.
- Using PVA glue.
- Applying rich cream.
- Use of special means.
In addition to the above methods of protection, there is one more method - gluing tape. But in the case of water manicure, this product will not be effective at all, since upon contact with water, the tape loses its adhesive properties, as a result of which it simply peels off and the varnish gets on the skin.
Tools to help
To remove gel polish from the skin around the nail at home, it is not enough to choose a suitable composition to protect the cover. For convenience, you will need to use the following tools:
The most convenient device, according to manicurists, is a wooden stick obtained from the wood of an orange bush. You can buy it at your nearest specialty cosmetics store.
How to properly use an orange stick?
Dip the stick into gel polish remover and shake off excess. Carefully, trying not to catch the decorative coating on the nail, collect the sticky layer of shellac from the cuticles and periungual surface. After each time, wipe the stick on a napkin. We repeat the procedure until the excess varnish is completely removed from the skin. This method is the most convenient for removing gel polish, even after drying the manicure under a lamp.
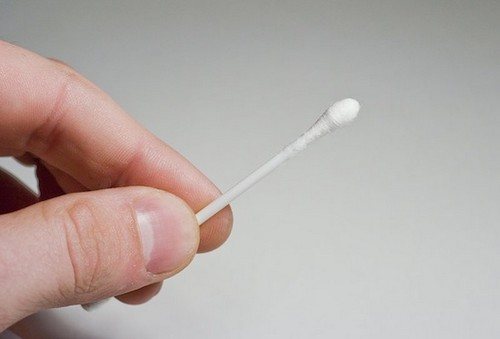
Cotton swab or toothpick
Another common way to remove gel polish from the cuticle is to use a cotton swab or toothpick. Girls claim that the second option is more convenient, since a toothpick removes excess gel polish from both the cuticle and the periungual surface very carefully. You can also use a cotton swab. But it will not be possible to clean the surface in hard-to-reach places. A cotton swab leaves small particles on undried varnish, which are quite difficult to remove.
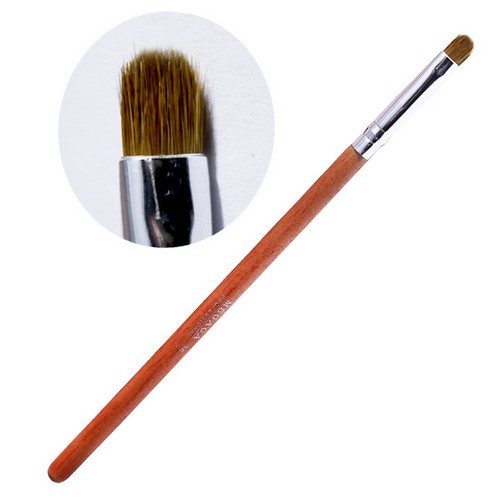
Small brush
This is another tool that allows you to remove gel polish from nails and the periungual surface. The brush is very convenient to use for evenly applying the product to remove the sticky layer from the nail plates, as well as for cleansing the cuticles and skin around the nail. There is absolutely no need to buy a separate brush for home use. For such work, a small artistic brush or a brush from used varnish, previously rinsed from the previous composition, is suitable.
Causes
There are many reasons why gel polish peels off the nail already on the second day after its application or, at most, a week later. And contrary to popular belief, the master is not always to blame for the premature peeling of the gel coating. All the reasons that lead to this problem can be divided into several large groups. Most often, gel polish peels off from a natural nail in the following cases:
- In case of serious health problems, gel polish falls off the nail plate within the first day after its application. If you have diseases such as diabetes, heart or kidney disease, as well as any types of surgical intervention, it is recommended to avoid this coating of marigolds. The same rule applies to taking antibiotics, as well as the period when the menstrual cycle begins. In all these cases, the gel polish will not stay on the nails for long and will begin to peel off from the nail plate after two days.
- Individual characteristics of the body, these include excessive sweating of the palms, too oily skin of the fingers, as well as thin and peeling nails. In all these cases, tight adhesion of the coating to the nail plate is not ensured, which means that the gel polish may begin to chip off both the base and the fixer. Therefore, it is very important to restore health to your nails, as well as get rid of excessive sweating and be sure to use a special degreaser.
- Using low-quality products or products from different manufacturers. Therefore, it is best to purchase primer, base, top coat and gel polish of the same brand. You should not try to save money on purchasing these components; it is better to choose products from well-known manufacturers.
- Violation of manicure technology. This includes incorrectly applying all products to the nail, ignoring the correct treatment of the cuticle, performing a trim manicure immediately before using gel polish, applying the base and the coating itself to the cuticle. So, if the end of the nails is not sealed, the coating comes off at their tips within a day after application.
- Applying a thick layer of product in the cuticle area is also the cause of this defect.
- Perform spa treatments the day before applying gel. This is especially true for various wraps of palms with oil-based mixtures, as well as the use of various masks. In these cases, the nail plates are too moist and greasy, and even the use of a degreaser will not help the base and gel polish adhere tightly to their surface.
- Failure to adhere to the drying time of the nails in the lamp. Not always masters, and especially girls who independently perform such a manicure at home, keep their nails in the lamp for the required time. As a result, the coating may not only peel off prematurely, but also a variety of bubbles and cracks may appear on it.
- Failure to remove the sticky layer from the surface of the nails is also a common cause of premature peeling of the gel coating from their surface.
- Excessively frequent contact with water and aggressive chemicals during the first 24 hours after a gel polish manicure. It often happens that the coating not only peels off from the surface of the nails, but also peels off as a film. This happens in cases where, within several hours after the end of the procedure, the nails have been in contact with water for a long time.
- Lack of professionalism of the specialist, as well as the desire to save time on the procedure. Sometimes, in order to perform a manicure as quickly as possible, some nail technicians ignore the use of any mandatory product, which as a result leads to poor-quality coating and its premature peeling.
But to preserve a beautiful manicure made with gel polish, it is not enough just to know about the reasons for the appearance of such a defect as its premature peeling off from the nail plate. You also need to know how to avoid this.
Problems with nails when gel polish peels off
These reasons include: 1. Thinning nails, prone to splitting. They can peel off along with the coating not because of errors in the application technique, but because they have this feature. Here we can advise you to perform a strengthening procedure, for example, with the IBX system, before applying gel polish.
2. Thin nails may not be natural, but due to the fact that the previous coating was removed mechanically (tearing off by hand) or by soaking and strong pressure from a pusher. This leads to the fact that the gel polish is removed along with a thin layer of the nail, leading to delamination and thinning of natural nails. 3. Over-sawing when removing the natural gloss also leads to thinning of the nail bed. Here you should not be zealous and file away the thickness of your nails. Thin nails become flexible, and the gel polish is not so flexible as to follow all its curves, and begins to peel off at the edges. 4. The cause of detachment on the sides of the nail can be thinning of the nails in this place with a file or cutter. When performing a manicure with a device, the work must be done on the skin, not the nail.5.Hyperhidrosis or increased humidity of the nail plate is one of the reasons not only for nail detachments, but also in general poor wearability of coatings.6.With frequent contact with water or due to the type of activity client (for example, working in a pool or constantly wearing gloves), the coating, as a rule, also wears worse and chips appear. 7. The last reason why gel polish may not stick well to the nails is taking antibiotics, recent surgeries and some diseases (for example, diabetes, hormonal imbalances, etc.).
Gel polish does not last - reasons for technology and materials
First, let's look at the reasons from the first group. 1. Poor processing of the cuticle. If you do not properly remove the pterygium (the fringe-like skin on the nail near the cuticle), it will create detachments in this part of the nail. In 90% of cases of gel polish detachment at the cuticle, this is precisely the cause. 2. When covering your nails with gel polish, do not skip the preparatory stage of removing the gloss with a file. To do this, use a buff or file 180-240 grid. By sanding the nail, we lift small scales on the surface of the nail, thereby helping to strengthen adhesion to the material. 3. If, after sanding the nail, the dust is not removed or is poorly wiped off, then it will not allow you to create a coating that lasts long. Please note that dust can hide under the cuticle or near the side rollers, and these are the most vulnerable places for detachments. To remove dust, it is better to use a brush rather than a brush, and even more so, you should not just blow it off the nail.
4. Another step that can be forgotten, which ultimately leads to gel polish peeling. This is degreasing the nail plate. Problems may arise if you or your client have problematic nails that are prone to oiliness and brittleness. If your nails are dry and hard, then you can immediately rule out the cause of poor degreasing.
5. If you touch your nails with your finger after degreasing, then particles of fatty tissue will appear on them again, hence another reason for detachment. This cannot be done. And if you touch it by accident, the nail will have to be degreased again. 6. A primer can provide additional adhesion to the nail plate, but its incorrect application will cause detachments. First, thoroughly wipe the primer brush on the neck of the bottle so that nothing drips from it, and apply a thin layer to the nail. Be sure to give it time to dry - 10 seconds is enough.
7. Detachments of gel polish can form in places where the material flows under the cuticle or on the lateral sinuses of the nail. This is especially easy to miss with base and top, since they are transparent. Therefore, streaks must be removed before polymerization in the lamp. 8. It is often written that detachments at the tips of the nail are caused by the fact that the end of the nail is not sealed. However, experienced craftsmen have proven that sealing is not necessary: this does not affect the durability of the gel polish. In fact, on the contrary, the reason for detachments at the tip when sealing may be that the gel polish flows under the nail (free edge). And since no one there prepared it for coating, during wear it begins to peel off.
9.Another cause of detachments can be the application of gel polish in a thick layer. Other problems arise from this: uneven distribution and bleeding onto the side rollers, insufficient drying (it is difficult for light to penetrate through a thick layer and dry it evenly), burning in the lamp, shrinking and bubbling of the varnish. Therefore, each layer of gel polish, base and top is applied thinly, even if this means you have to apply one more layer. 10. The reason for poor drying of gel polish in the lamp can be not only a thick layer when applying it, but also insufficient power lamps. Weak and old lamps are already being widely replaced by new hybrid lamps with a power of 48 W or more. For example, Sun 4s Plus .11. Low-quality materials, gel polishes that have expired or are rarely used, that have managed to exfoliate while standing (this is easy to notice by the appearance of a translucent liquid on the surface), can also wear poorly and cause peeling and chipping. 12.When removing the previous coating with a milling cutter, old detached materials may be poorly removed or small pockets may remain when removed to the base. This is the old coating left behind and leads to the appearance of detachments on the nails. 13. Old and over-worn coating also begins to peel off over time. This occurs due to shrinkage of the material and the appearance of unevenness on its surface, as well as due to the movement of the center of gravity closer to the tip of the nail (especially noticeable on long nails). To solve the problem of gel polish peeling off from nails, first evaluate all of the above points from the point of view of your work, materials and try to change something to eliminate this factor. If none of this helps, then it may be the condition of your nails or something inside your body.
Disadvantages of a master's work
No matter how much I would like to say that the master has nothing to do with it, there are times when it is his work that causes the gel polish to quickly peel off from the nail. Let's consider the main nuances that you need to know before going to a nail salon or find out for yourself for those who do their own manicure (pedicure) at home.
- Violation of technology. Violation of the technique may even involve preliminary preparation of nails. For example, poor cleaning of the skin around the nail can cause gel polish to peel off from the cuticle. It is not advisable to apply hybrid coatings immediately after performing a trimmed hygienic manicure. Do not allow the base or top coat to get on the cuticle. Also, non-compliance with the technology is the poor sealing of the end of the nail. This may be one of the main reasons why the gel polish begins to come off from the top edge the very next day.
- Using different materials. In our search for budget-friendly coatings and materials for manicure, we often forget that not all of them are compatible. Some believe that the reason may lie in the low quality of varnish products, and therefore try to give preference to products from well-known trading houses. However, the best solution would be to purchase base, top and pigmented varnishes from one manufacturer. This will reduce the likelihood of detachment.
- Exclusion of one of the means from the technology. You need to understand that the complete technology of covering nails with gel polish takes quite a long time. Unlike ordinary varnishes, which do not need to be dried under a special lamp, here you will have to apply one layer on top of another. Moreover, their total number can be up to 5-6. Considering that each layer needs to be dried in a special device, a lot of time will be spent. Sometimes masters do not treat nails with a primer, do not strengthen them, or do not remove oiliness well enough after generously treating their hands with antiseptic.
- Incorrect drying mode. Hybrid coatings need to dry for a specific time. It depends on the type of lamp used and the type of specific varnish product. It is also impossible not to take into account the fact that the lamps differ in power. Therefore, at low power they will not dry the applied layer well. Detachments may be accompanied by the appearance of cracks. If the coating is supposed to dry for two minutes, then you can’t shorten it. If a slider design is used, the layer underneath will take longer to dry.
- Dense layers of applied materials. Coatings should be applied in thin layers, not forgetting to pass the brush along the end of the nail. A thick layer will spread over the sides and behind the cuticle. In addition to the fact that this will make the nail look flatter, the greater thickness in the cuticle area will cause detachment. It is important to understand that the greater the overall thickness, the less durable the manicure (pedicure). This coating cannot be corrected if necessary; you will have to completely remove it and apply a new one.
- Ignoring the final stage of work. No hybrid product has anything unnecessary or optional. As for the top, it comes with or without a sticky layer. And since they often use the second one in their work, after sealing the gel polish and drying, it is important to remove the dispersion layer or residual stickiness. This should be done approximately 30 seconds after drying.
It is necessary to handle this manicure correctly
So that you no longer have questions about why the gel polish peeled off so quickly, follow the rules. The gel polishes themselves are durable and hard. But they can peel off and chip, and very quickly.
Let's find out the reasons:
- After completing the manicure process, masters advise not to touch the water for 2 hours.
- You cannot take baths or visit saunas after salons for 24 hours. Avoid restorative cosmetic procedures at this time.
- Do not perform housework (washing dishes, cleaning) without gloves.
- If you work with your hands, also wear protective gloves.
- Do not come into contact with caustic substances.
- There is no need to file your nails either.
- Use sharp objects very carefully.
In addition to these main reasons, other factors also influence peeling and chipping;
at:
- stressful conditions;
- problems with hormonal levels;
- physiological characteristics;
- rehabilitation periods;
- use of antibiotics.
To really have a beautiful and long-lasting manicure, you need to use correctly selected, high-quality bases, tops, and gel polishes.
Before the procedure, properly prepare your hands and be very careful when applying all layers.
Natural or extended nails will last a long time with the coating if used correctly:
- Dry each layer thoroughly. Even a primer or other product of your choice.
- Base, varnishes, top gels require a uniform thin layer.
- When the substance is applied, the brush is wrung out using the side of the jar.
- Each product should cover the entire plate.
- Sometimes, to save time, they cover 4 nails in a row at once. It is advisable not to do this. And work with 1-2 nails. The gel will then not flow to the sides.
- The instructions for the polish indicate how long you need to keep your nails under the lamp.
- The ends must be sealed.
- The varnish is very easy to apply. First the central part is covered. The middle and free edge are used. Then it is covered from the roots to the middle. The brush is placed 2 mm above the root, and the space is painted up to the base. And then the zone to the middle of the plate. Then the sides.
If you see bubbling and cracked gel polish on your nail plates, it means your manicure was done incorrectly.
Typical mistakes when applying gel polish
Of course, the first and main reason for peeling and chipping is errors in coating application. It is quite possible that at one of the stages you missed or did not take into account some nuances.
1. The cuticle and pterygium are not completely removed. Before applying the base, you need to carefully push back the cuticle with an orange stick or pusher and completely remove the pterygium. Otherwise, the gel polish will begin to peel off where the nail grows.
2. The nail is not polished enough. Be sure to use a buffer or grinder - this will improve the adhesion of the nail surface to the base.
3. The nail is not degreased. Always wipe your nail plates with a degreaser. If you have “wet” and brittle nails, we recommend using a primer or ultrabond.
4. Coating layer is too thick. Base, gel polish and top coat should always be applied in a thin layer.
5. Coatings are poorly dried. After each layer, you need to dry your nails in a UV/LED lamp until completely dry. The time depends on the power of the lamp. After several years of use, the lamp's power decreases and it takes longer to dry.
6. Layers are not sealed. Such an error is guaranteed to lead to peeling of the gel polish. You need to seal each layer: base, gel polish and top. This will significantly extend the durability of the manicure.
Causes of varnish removal related to the characteristics of the body
Many girls wonder why a manicure with gel polish does not last long if it was done by a professional master. Each organism is individual. This must be taken into account when purchasing and applying coloring agent to nails.
Gel polish may not adhere well due to:
- Increased humidity of hands and nails. The problem can be solved by using a powerful primer. You can even apply it in two layers.
- Brittleness of nails. If a nail breaks, it must be filed or trimmed. The tip of the nail is no longer sealed, and as a result, chips soon appear at the end.
- Softness of nails. Be sure to strengthen before applying gel polish.
- Lumps and other irregularities. These nails must be straightened before applying shellac.
- Internal diseases of the body: changes in hormonal levels, malfunctions of the immune system, diabetes, heart disease.
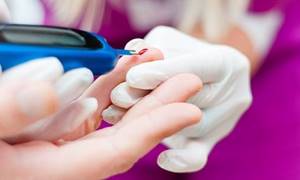
Diabetes mellitus is one of the reasons for gel polish peeling
Often the reasons why gel polish does not stick to the nails are due to exposure to unfavorable conditions. If a woman likes to bite her nails or often uses them to scrape something off, then the polish on them will quickly begin to peel off at the tips of the nails.
If a crack appears in the varnish, it is not recommended to remove the coating yourself using improvised means. As a result, you can not only ruin your manicure, but also scratch the nail itself. You can restore the integrity of your manicure using special glue.
Mistakes when applying gel polish at home
Have you learned how to apply gel polish at home, spent money buying a lamp, tools and a bunch of gel polishes, but the artificial coating does not last for the promised 2-3 weeks and chips after a few days? Don't be upset.
Perhaps, when applying the coating, you simply make mistakes, correcting which you can enjoy a lasting result!
Manicure stages and possible mistakes
Today there are 3 main types of manicure:
Combined and hardware manicure must be done using a special manicure apparatus, but before using it, it is better to undergo training, since improper operation of the apparatus can lead to damage to the nail plate, for example, cuts. For beginners, it is better to do a classic manicure at home.
Stage 1. Shape filing, cuticle processing
Before applying gel polish, you need to put your nails in order: treat the cuticle, file the shape.
What do we do at this stage?
Stage 2. Preparing the nail plate for coating
What do we do at this stage?
Mistakes at the nail plate preparation stage
Mistake #1:
Typically, people with oily skin or those prone to excessive sweating have a moist and oily nail structure. When preparing such nails for coating, it is necessary to use a dehydrator (nail prep) to deeply dry the nail plate, remove excess moisture from it and improve the adhesion of the natural nail to the artificial coating.
Mistake #2:
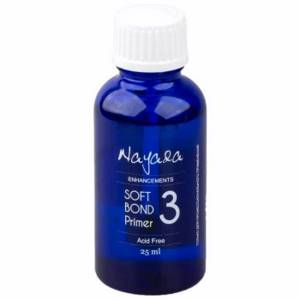
The free edge of the nail is one of the most vulnerable places: if you do not pay proper attention to it, chips and detachments may appear. To improve the adhesion between the nail plate and the artificial material, it is necessary to use a primer. Primer is translated as “primer”. There are acid-free and acidic primers.
The acid-free primer acts as double-sided tape and ensures strong adhesion of the natural nail to the artificial nail.
The acid primer lifts the keratin scales of the nail plate for better adhesion to the artificial material. Since the acid primer contains aggressive components, you must be careful not to get it on the skin and cause a burn. It is recommended to use it before extensions for girls with wet or oily nail texture.
Stage 3. Covering the nail plate
What do we do at this stage?
Errors at the stage of covering the nail plate
Mistake #1:
You used the wrong base for your nails.
The condition of the nail plate is different for everyone: for some it is strong, while for others it is thin, soft and plastic. You cannot use the same base for all nails. It is necessary to analyze the condition of the nail plate and pay special attention to the choice of base coat.
Today there are 3 main types of base coatings: hard, elastic and camouflage. What are their fundamental differences? Which one to choose? Let's figure it out.
Hard bases
Elastic bases
Elastic bases are great for beginners: they are easy to work with, as they do not spread, and the alignment is perfect. Using elastic bases you can extend your nails. Elastic bases are great for soft, highly flexible nails. But on long nails they sag over time, that is, after a while a “dip” appears across the nail.
Why is this happening?
Bases are soft gels, and they, in turn, as we said above, can be elastic or not.
Elastic bases perfectly strengthen the nail plate when leveling, because they are flexible, tenacious, and when the free edge moves, they, like an elastic band, move with it. But this is precisely why shrinkage occurs.
There are bases that contain solid plasticizers. Solid materials do not move with the nail and, accordingly, do not shrink. But keep in mind, UNDER HEAVY LOAD, almost any base will give minimal shrinkage.
What to do?
Strengthening with acrylic or hard gel, but this is a completely different procedure. In addition, the harder the material, the worse it soaks and the more difficult it is to cut.
ADVICE! Sometimes it is not very clear from the name of the base whether it is hard or elastic. To determine the type of base, you can do the following: apply a small drop or strip of base to the surface of a transparent plastic bag and put it in a lamp to polymerize. If after polymerization the drop (strip) bends, it means you have an elastic base in your hands. If you can’t bend the drop and it cracks, then the base is solid.
Mistake #2:
You held your hand in the lamp incorrectly and the coating did not dry well.
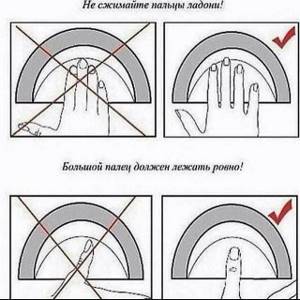
How to hold your hand in the lamp correctly?
Mistake #3:
You stored and transported the gel polish incorrectly, it has thickened or air bubbles have formed in it, which is why the coating does not adhere well and is difficult to work with.
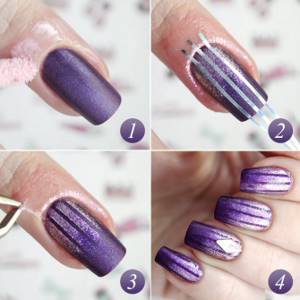
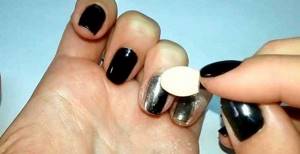
How to paint your nails near the cuticle?
Use a quality finish with a flexible brush. Before purchasing varnish, carefully inspect the brush; it should be hard and elastic. In this case, the product itself in the jar should flow in a thick stream. If the varnish drips in very large drops, refuse to purchase it; you will not be able to paint the areas near the side rollers and lunula with it.
Place a dot at a distance of 2 mm from the cuticle. Press down on the brush and smoothly, in one movement, move the drop down. When pressed, the brush expands and becomes like a fan. In this state, she exactly repeats the roundness of the lunula. Do not put a lot of varnish on the brush, otherwise it will flow down to the side rollers and stain the skin.
Try to apply black, red and other bright shades of coatings without touching the skin. It is better to leave a small space near the cuticle unpainted. Don't try to paint your nails with one thick layer of paint right away. Always add a little varnish so that it does not run or drip from the brush. After the first layer has completely dried, apply the second. You can dry your nails with a hair dryer or a special dryer.
Try to paint your nails in daylight. Sit by the window. If you have a special lamp, turn it on. Try not to rush. If you need to create a design, use stamping or stickers.
What else can cause problems when applying artificial turf?
Have you tried all kinds of bases, but your nails still appear chipped and peeling? There are several explanations for this, for example:
What to do? Do you want to part with your long-lasting, flawless manicure forever?
Of course not! You can take the webinar “Complicated cases in base coating of nails” from the teacher of the ParisNail school Velmitina Zaitseva.
You will receive a detailed algorithm for applying and fixing the material, learn all the secrets of the teacher and be able to avoid material detachments!
How to remove artificial material correctly and why is it important?
You've probably heard that gel polish spoils your nails, making them thin and brittle. It is a myth! It's not the material that ruins your nails! One of the reasons for damage to the nail plate is improper removal of the artificial coating, so this procedure must be approached with special responsibility!
Is it possible to remove gel polish yourself at home without damaging your nails? What materials and tools are needed for this? Let's figure it out.
How long can you wear gel polish?
First, let's figure out what period of wearing the coating is optimal. Often girls wear gel polish for a month, or even longer. However, they do not understand that they can damage the nail plate.
Technologists advise walking with the coating for no more than 2-3 weeks. Prolonged wear puts stress on the tip of the nail plate, its root suffers from the weight of the coating. All this can lead not only to breakage, but also to deformation of the nail plate.
How can you not remove gel polish?
RULE 1: Under no circumstances should you pick at the gel polish or tear it off the surface of the nail plate, because this can cause serious injury! If you are careless, you can remove the top layer of the nail along with the material, and this can lead to thinning and, at a minimum, painful sensations when in contact with water and various surfaces.
RULE 2: do not file away partially peeled off gel polish. In this case, you also risk cutting off the top layer of the nail and ruining it.
What other consequences might arise?
We hope these reasons are enough to convince you not to peel off the coating from the nail plate and do the gel polish removal according to the rules!
By the way, the peeling process itself is quite painful, it’s hardly worth it!
Advantages and disadvantages of subcuticular technique.
- The ability to enjoy the perfect manicure where it is impossible to change the design.
This method of decorating nails is chosen by girls preparing for business trips, seaside holidays, long absences (including to the maternity hospital);
- Beautiful, durable, sleek design with perfect highlights that last over 3 weeks.
Depending on the growth rate of the natural nail plate, you can see a flawless manicure without gaps in the overgrown nail even more than the standard 14 days (for those whose nails grow slowly);
- Pleasant financial savings.
In this design, the fact of its long-term wear is visible much later, when the nails grow, which means you can make an appointment for a visit to the master a week later;
- Expressiveness and aesthetics.
Deep application of gel polish into the subcuticle pocket will create the visual effect of impeccably well-groomed nails, without the unesthetic gaps typical of growing nails. In addition, this design creates an incredibly positive mood. It will seem to others that your nails, already painted with shellac, are growing. Only you and your master will know the secret of a perfect finger outfit.
You can enjoy all these pleasant moments only if your nail artist is familiar with all the subtleties and secrets of cuticle design. Otherwise, you will have to face such annoying moments as:
- sagging and unevenness of the coating line.
If the gel polish under the cuticle is painted unattractively, without the correct bend, a torn and bumpy line at the nail hole can lead to premature detachment of the coating after regrowth. Or you will simply have to change the design in favor of a more aesthetic one;
- low design durability.
If the master has poorly removed the pterygium and eponychium in the subcuticular part of the nail, the water that gets there, coupled with household chemicals, will help reduce the durability of the coating. And instead of saving, you will have to spend twice as much;
- design with aesthetic flaws.
Inexperienced craftsmen, when performing this design, often inadvertently leave droplets of gel polish on the cuticle itself or on the side rollers. This is unacceptable when painting the nail plate deeply. Pigmented skin, at a minimum, looks unsightly, and at maximum, can lead to an allergic reaction to gel polish;
- damage to natural nails.
The “under the cuticle” technique requires very careful preparation of the matrix zone (the root zone of the nail). Excessive cleansing and pressure on the nail can lead to the risk of a fungal infection or even separation of the nail plate.
How can you reduce the risk of negative aspects so that a new type of design brings you only joy? Let's find out...
Gel polish removal methods
There are two ways to remove artificial turf: using sawdust and by soaking it with a special liquid or napkins.
To remove the coating using sawdust, a special apparatus and removal cutters are required. Therefore, this option is suitable only for those girls who are familiar with hardware manicure.
Perhaps someone will have the thought: “Why not try to remove it with a rough file?” But we’ll immediately answer that this method is quite problematic, takes too much time and can damage the natural nail. It is necessary to try very hard to treat the area near the cuticle, and there is a risk of rubbing the skin. Therefore, at home, the easiest way to remove it is by soaking.
If you want to master sawdust removal, then sign up for basic courses at our licensed school “ParisNail”! After training, you will not only do a flawless manicure for yourself, but will become a real professional in the nail industry and will be able to work as a manicurist!
Maceration
This method involves soaking the gel polish with a special acetone-containing liquid. You will find a list of materials required for this procedure and detailed technology for removing gel polish in the article “How to remove gel polish (shellac) at home?”
NOTE! Not all base coats can be soaked, so ask the seller to select the base that is suitable for this type of removal.
Prevention of detachment and protection
Any varnish has a negative effect on the nail plate, so after 3-4 manicure sessions with gel polish, you need to take a break for about 1-3 weeks. During this period, you need to use special medications. If the nails are very weakened, then special procedures need to be carried out to strengthen them. It is advisable to take a course of vitamins.
Under the influence of alcohol and detergents, the coating may lose its former shine, scratches or chips may appear. Therefore, when cleaning and washing dishes, you should wear rubber gloves. In addition, you need to lubricate your hands with nourishing cream every day.
Sources
- https://imkosmetik.com/journal/prichiny-otsloeniya-gel-laka-kak-prodl/
- https://infoklan.ru/chto-delat-esli-gel-lak-ne-derzhitsya-na-nogtyah.html
- https://wlooks.ru/lak/dlya-nogtej/pochemu-gel-bystro-otslaivaetsya/
- https://royal-manicure.ru/pochemu-gel-lak-otslaivaetsja-ot-nogtej-20-prichin/
- https://vplate.ru/gel-lak/otslaivaetsya/
- https://1gellak.com/problemy/otslaivaetsya-gel-lak
- https://imkosmetik.com/journal/pochemu-gel-lak-ne-derzhitsya-na-nogtyah/
- https://1gellak.com/problemy/pochemu-ne-derzhitsya-gel
- https://www.syl.ru/article/354553/pochemu-ne-derjitsya-gel-lak-na-nogtyah-obzor-prichin-i-rekomendatsii
[collapse]