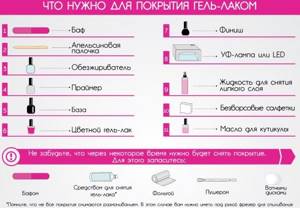
Gel polish came into fashion several years ago, displacing the previously popular extensions. Fashionistas liked the coating, but not everyone is ready to visit the salon for various reasons. Fortunately, today there are enough free master classes online that teach you how to do nail art yourself. Applying gel polish is somewhat more difficult than painting nails with regular polish. If you decide to learn how to paint your nails with gel polish yourself, you need to take care of purchasing a starter manicure kit.
Traditional winter pattern - snowflakes
Peculiarities
All girls want to look well-groomed, spending a minimum of time and money. Well-groomed hands are the responsibility of any self-respecting lady. Gel polish provides nails with beauty and care and has a number of advantages:
- Easy to use. If you know how to apply regular polish, applying gel polish does not cause problems.
- Durability of the coating. There is no need to renew your manicure every 3-4 days. If you follow the technique, gel polish will last 2-3 weeks.
- Large selection of colors and designs.
- Glossy shine and visual volume. A real salvation for women with weak nails.
- Does not injure the nail plate, as extensions do.
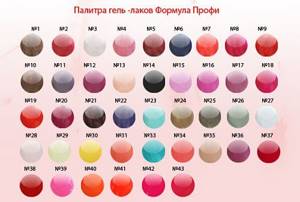
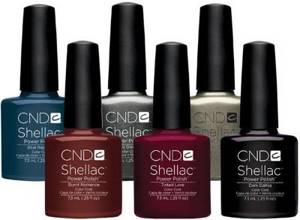
Gel polish palette
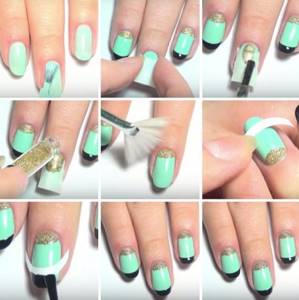
Technology for applying gel polish at home
If you have already had a manicure done by a professional, then visually the technology is already familiar to you, all that remains is to hone the practice.
So, the stages of applying gel polish at home:
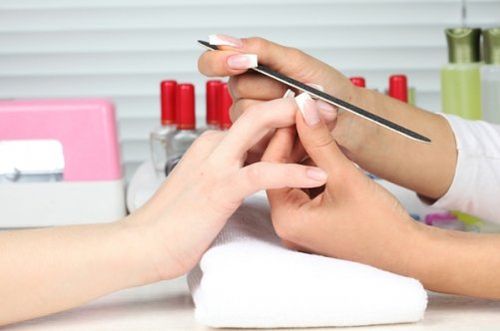
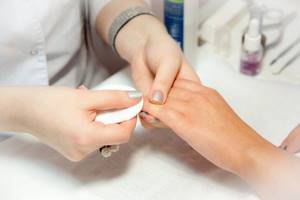
- We do a hygienic manicure. You can't go anywhere without him. The stability of the gel coating depends on how well the nail plate is prepared. So we cut off the cuticle and lateral ridges as much as possible, and remove the pterygium. Shape the free edge.
The procedure for performing a hygienic manicure
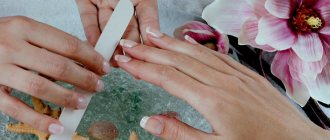
- We prepare the nail plate. If necessary, remove the gloss from the nail using a soft buff. Some gel polishes do not require filing of the nail, for example, shellac brand gel polishes. We carefully degrease the nails and apply primer, especially paying attention to the end parts of the free edge of the nail. It is important that the time between applying the primer and coating does not exceed 15 minutes; if you do not meet the deadline, apply the layer again.
Preparing the nail plate: shaping the free edge of the nail
Preparation of the nail plate: degreasing
Preparing the nail plate: applying primer
- Applying the base layer. Apply a very thin layer of base to the entire surface of the nail, not forgetting the end parts. The main thing is to ensure that the top does not leak onto the cuticle and side rollers. If necessary, correct leaked varnish.
Applying the base
Important
We follow the rules for applying gel polish: first apply the coating to four fingers of one hand, except the thumb. After which the varnish is dried in a lamp. The same is done with the other hand. Thumbs are painted and dried separately! If you apply varnish to your entire palm at once, there is a risk that the varnish will run off your thumb.
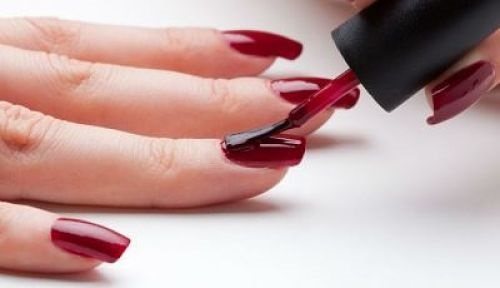
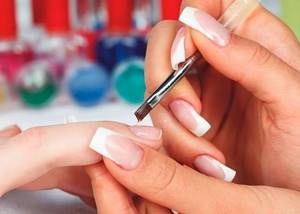
- Applying color. It is applied in two layers and each one is baked in turn in a lamp. The first one is very thin. Don't be afraid that it will turn out uneven, the second layer will fix everything. We also apply it very thinly. It happens that the second layer also colors the plate unevenly. Then apply the third one. It is better to dry the varnish three times in a lamp than to get a deformed or bubbling coating, as happens with a thick layer. We also make sure that the varnish does not leak onto the border of the skin. It is not necessary to paint the ends at this stage, but it is not forbidden.
Applying color
It is important to follow the technique of applying varnish. Pay attention to the diagram:
Scheme for applying gel polish to the nail surface
- Applying decor. There is complete freedom of imagination here. You can use glitter, stickers, sliders, rhinestones.
Important
We reduce the sticky layer only in the final phase. Because it is precisely this that ensures the adhesion of each subsequent layer.
- Consolidation. Top coat is applied. The layer is applied quite densely. After all, consolidation of the entire result depends on it. Don't forget to seal the ends. If you miss this moment, the manicure will come off your nails.
Applying top coat
- Removing the sticky layer. Everything here is elementary. Apply degreaser to a napkin and thoroughly wipe each nail.
Removing the sticky layer
- Apply moisturizer to the cuticle.
Moisturizing the cuticle
This is the sequence of applying gel polish at home.
You can learn more about the procedure for applying gel polish at home in the video.
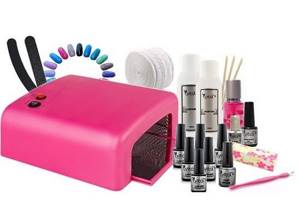
Required tools and materials
Masters charge a lot of money for a manicure service in a salon. A decent amount accumulates in a year. If you still doubt the advisability of purchasing a set, you should not. Within a year, everything will pay off, including time.
Applying gel polish
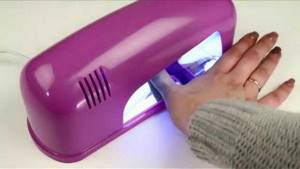
The most important and expensive is the special lamp required to polymerize the coating. There are UV, LED, gas and hybrid lamps. At home, the first two types are used. To begin with, it is better to think about a UV lamp; its price starts from 700 rubles. The main thing to pay attention to is power. It varies from 9 to 54 W.
Experts recommend choosing a device from 18 W, but to get acquainted with the technology, 9 W will do. The higher the power, the shorter the coating polymerization time. LED (light emitting diode) lamp is a more modern option. The device spends less energy, drying the varnish much faster. And you will have to pay from 2000-2500 rubles.
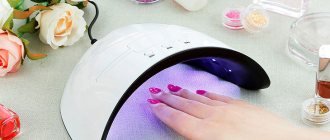
Drying nails
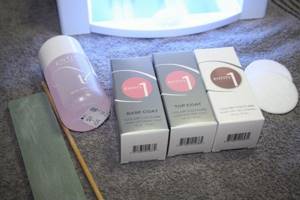
- Degreaser - designed to remove fat and other substances invisible to the naked eye on the surface of the nail. Provides adhesion of the nail to the base coat. It is purchased in specialized stores; some make do with pharmaceutical alcohol.
- Base coat is the basis of a quality manicure. Fills unevenness and cracks of the nail plate, provides better adhesion to the varnish. The lifespan of the manicure and the final result depend on the quality of the base. When choosing, pay attention to the composition - the presence of vitamins and hydrolyzed keratin is welcome. It is recommended to buy gel polish and base of the same brand.
- A set of files of different roughness. It’s better not to save on this and purchase high-quality sets from trusted companies.
- Buff is a rectangular file for polishing and leveling the nail plate.
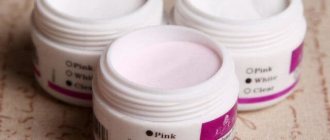
- Colored gel polishes. Manufacturers offer a wide range of coatings of any color and with additional effects.
- Top coat (aka fixer) - used to fix colored varnish and give nails a glossy effect. There is a top with and without a sticky layer. The first option requires removing the film. The same product is often used as for degreasing the nail plate.
- Decorative elements - rhinestones, stickers, stones. This is not on the must-have list. Decorative items can be purchased separately after gaining experience working with coatings.
Manicure products
Best Starter Kits
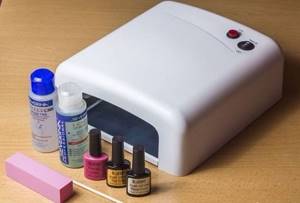
An inexpensive “For Beginners” kit is offered by Masura. It includes:
- LED lamp 18 W, white;
- base, top, colored varnish in the shade Petals of red;
- sticky layer remover, Dadi Oil and accessories.
All products are optimally suited to each other, easy to apply and polymerize with high quality. Cuticle oil will provide additional care.
If you plan to do not only a manicure, but also a pedicure yourself, then choose the “Optimal for Home NEW” set, which includes:
- UV lamp ruNail with a power of 36 Watt RU 818, which has a convenient shape and large size;
- Bluesky base and top;
- degreaser and Artificial Nail Remover from In'Garden;
- Dadi Oil cuticle oil, cleansing gel for hands and feet.
The set does not include colored gel polishes or accessories; you can purchase them additionally. Protecting the skin from aging and disease - sunscreen for the face against age spots.
Girls who prefer maximum durability of their manicure are recommended to use rubber-based gel polishes, for example, the Cody brand.
The Kodi Beginner Basic Set includes:
- UV 36 W or LED 9 W lamp;
- base, top, colored varnish Kodi 7 ml;
- degreaser and coating remover from Severina;
- accessories: universal abrasive file, sander, 5 orange sticks, pack of lint-free wipes 100 pcs., adhesive foil tape for designs and stencils.
With this set you can perform manicure and pedicure without leaving home.
Price – from 5000 rub.
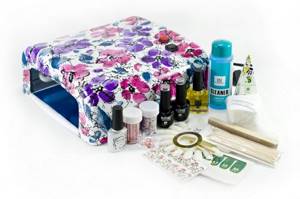
Ready-made sets
Girls who are only planning to master the technique of applying gel polish are recommended to purchase ready-made kits. They can be ordered online or bought in a specialty store. It includes items necessary to learn the basics of manicure.
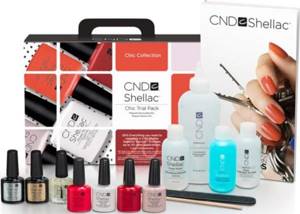
The starter kit from Kodi has good reviews. It has an adequate price and good quality.
Applying the base
The kit includes:
- Base coat.
- Liquid for removing gel polish.
- Several gel polishes.
- Top (fixer) for colored varnish.
- Drying lamp.
The cost of the set quickly pays for itself. Over time, the list of what you need for a manicure with gel polish will be replenished. At first, a ready-made kit, in which the materials were selected by professionals and are safe for health, will be enough.
Nail care products
What gel polish kits exist?
Many manufacturers produce ready-made, fully equipped starter kits for working with gel polishes, complete with or without a lamp (in this case, it must be purchased separately).
Our online store also offers the purchase of ready-made shellac kits, collected by us according to all criteria of quality and convenience of goods:
- mini (without a lamp and with a minimum amount of products necessary for manicure);
- maxi (with a lamp included, with the maximum possible amount of all the products necessary for manicure).
- base + top
Additional materials
- Dehydrator - works on the same principle as a degreaser, only it costs more. Recommended for women with oily skin and prone to excessive sweating. It is used mainly in salons; a degreaser is suitable for home use.
- Primer - works on the principle of double-sided tape, providing good adhesion between the nail and the base. The cost varies from 200 rubles.
- The acid-free primer acts as both a degreaser and a base coat. In addition, it protects nails from fungal infections. Recommended for those who have naturally brittle and thin nails.
- The acid primer ensures strong adhesion of the nail to the coating due to methacrylic acid, which softens the nail scales. Frequent use can lead to damage to the nail plate. This product should not be used on weakened nails.
Filing nails
What do you need to work with gel polish?
To work with gels and shellacs, you need to prepare in advance. In order for the material to stay on your nails for a long time, you need to thoroughly prepare them, and this will require additional tools and materials.
How to choose a UV lamp for drying gel polish, rating of the best, characteristics and prices
An ultraviolet lamp is the main equipment needed to create a gel or shellac coating. The lamp is a small box with built-in ultraviolet rays, without which the gel does not harden. There are a huge number of models and manufacturers producing high-quality equipment for any budget.
There are several types of lamps:
- Classic lamps were among the first. They are bulky, but at the same time roomy. They are inferior to new inventions only in drying time. For high-quality polymerization of materials, you need to hold your hands in the lamp for 3-6 minutes, depending on the density of the gel. This is the best option for home use because they dry all types of nail extension materials. Moreover, they are inexpensive.
- LED lamps differ in the type of radiation; they contain not UV lamps, but LEDs. They only dry shellac, gel polishes, and biogel. That is, such lamps are not suitable for extensions and are used mainly in salons.
- LED + UV are combined devices that use both ultraviolet lamps and LEDs. They dry all materials and are widely used in salons.
- CCFL + LED are also combination lamps, equipped with LEDs and a spiral ultraviolet lamp. It contains gas inside, so it consumes minimal energy and lasts for many years.
Top 5 UV lamps:
| brand, model | Characteristics | Price |
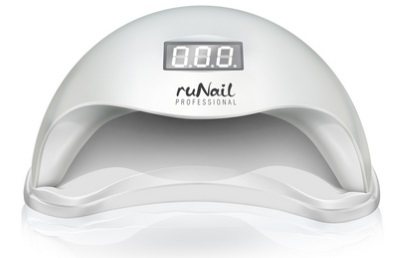
| UV-LED 48 Watt Runail | This is a model used for professional and home manicure. The lamp has several functions and is capable of drying gel, LED gel, shellac and gel polish. Built-in 36 LEDs. The panel has a screen and a timer for 10, 30, 60 and 90 seconds. Touch control. | Average price 4 thousand rubles. By purchasing in online stores, you can save a little or get a discount when ordering several units. |
| Professional Nail 18K 48 W CCFL+LED | Hybrid lamp with power 12, 36 and 48 W. Touch control helps you quickly turn on the LEDs for drying. The lamp is spacious and comfortable. Thanks to its removable bottom, it can be used for pedicures. High power allows you to quickly and efficiently dry long and dense nail extensions. | In stores the cost is 3 thousand rubles, on the Internet 2700-2800. When purchasing online, you need to carefully read the delivery terms. |
| Soline Charms SUN 9X plus UV/LED 36 W | A lightweight and compact hybrid lamp for polymerizing all types of gels and decorative coatings has become a real favorite among craftsmen. Convenient for pedicure, as the model is open and has no bottom. Equipped with 1 diodes and timer. The manufacturer claims 5000 hours of operation, but in practice this model lasts longer. Available in pink, blue and green colors. | Price 1400-1600 rub. Depends on the point of implementation. |
| JessNail KUKLA UV Lamp 36 W | Ideal model for home use. Presented in bright yellow color. Has a built-in timer for 2 minutes and infinity mode. For better polymerization inside, all surfaces are mirrored, which enhances the effect of the lamps. | Cost 1200-1300 rubles. |
| Diamond Quick 36 W CCFL+LED with sensor | The hybrid lamp is used for polymerization of all types of gels and shellacs. The device is equipped with touch controls and a timer. The model is presented in different colors. This lamp is perfect for salons and home use. | Average cost 1400 rub. |
Each of them has advantages and disadvantages. It is better to give preference to universal models that polymerize all types of gels and acrylics.
Nail clippers/scissors
Scissors and forceps are used to remove cuticles and rough ridges around the perimeter of the nail plate. Scissors perform 2 main functions - cutting the free edge of the plate and removing the overgrown skin. For the second purpose, you need to choose thin blades with rounded blades, since they are more convenient for cutting the cuticle, especially for beginners.
It is better to choose utensils made of steel, because models with plastic handles will not last long. It is also important that the free edge is perfectly smooth, without jagged edges. Nippers are used to remove cuticles during manual water manicure. They come in different sizes and shapes.
Here you need to choose based on personal preferences: for some it is more convenient to trim the skin with large tongs, for others with small ones. The shorter and sharper the blade, the easier it is to work with it, especially for a beginner. Dull blades can injure and tear the skin around the hole.
The key to a long tool life is proper storage and operation. After performing a manicure, they need to be disinfected (you can use Peroxide or Chlorhexidine and dry them before hiding them in a cosmetic bag.
The best gel polishes. Review and prices
Due to the popularity of gel polishes, there are many fakes for them, and low-quality material applies unevenly, dries poorly and does not last.
The main criteria for choosing a quality gel polish:
- Duration of preservation of the coating without chipping and loss of color saturation;
- quality of application without streaks or gaps;
- thickness and length of the brush for ease of application;
- nice smell;
- wide range of colors.
Top 5 best gel polishes:
| Manufacturer | Review | Price |
| Gel polish Akzentz Luxio | This is a line of professional nail cosmetics. Produced by the Canadian manufacturer for more than 30 years. Gel polishes have been produced since 2014. A special feature of the line is black bottles that protect the product from direct sunlight. Before application, you do not need to wash down the nail plate, just cover it with a base and finally with a top coat. Palette – about 100 shades. | 1200 rub. |
| Shellac CND gel polish | The manufacturer is considered one of the most popular due to the many advantages of its products:
| 1000 rub. |
| Gel polish Kodi Professional | Kodi products are widely used in salons and at home. This is the “golden mean”, that is, a compromise between price and quality. This is a budget series with high quality materials. The manufacturer produces several series of gel polishes differing in shade, density and effect (mirror, hologram, matte, glossy) | 450-500 rub. |
| Gel polish FOX Professional Gel Polish | American gel polishes. Easy to apply and dries in 30 seconds in an LED lamp. Great for beginners and home use. do not spread when applied. A wide range allows you to choose a color to suit every taste. | 350-370 rub. |
| Gel polish Bluesky | Bluesky is a line of budget nail cosmetics. It is not suitable for professional use, but for home use it is a good option. The downside is that when applied in 1 layer, the color is not saturated, so 2-3 layers are required. Lasts up to 14 days without chipping. | 100-120 rub. |
In order for the manicure to last a long time, it is recommended that the tinted gel polish be of the same brand as the top and base coat. Thanks to this, the materials hold better and are fastened together efficiently, while products from different companies may not be compatible and may chip when worn.
Files, pushers, buffs
Manicure for beginners at home should begin with the selection of materials. Files, buffs and pushers are necessary tools for giving shape and texture to your nails. Files differ in shape and abrasiveness (hardness). For a natural nail and to file down the free edge, you need to choose the softest files possible.
Pushers and buffs are used to smooth the surface of a natural or extended plate.
When using some gel polishes, you need to slightly ruffle the natural plate to remove the glossy layer to improve adhesion. To do this, it is better to use a file with an abrasiveness of 240-600 grit.
Degreaser
This is a product that must be used to clean and degrease the nail plate. In addition to disinfection, the degreaser increases the level of adhesion of the base layer to the natural nail. You can also remove the sticky layer from the top with it.
Primer
This is a liquid for cleansing, degreasing and drying the nail plate.
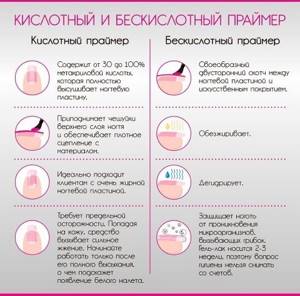
There are two types of primers:
- acid;
- acid-free.
It is used mainly by professionals, and at home you can do without a primer. Although professionals call it “double-sided tape” for nails. It serves as a primer, dries the plate and ensures the fixation of the base layer, on which the beauty and durability of shellac braids or extended nails depends.
Base, top
The base is called gel polish, which in appearance resembles a thick transparent varnish. It can be beige, nude, pink or peach. Its main task is to provide bonding and the main tone. In addition, the base layer evens out the nail plate, strengthens it and gives it density. The base has a sticky layer that does not need to be removed before applying the tone.

The article contains photo and video tutorials with step-by-step gel polish manicure for beginners.
The top is the finishing coat. It fixes colored gel polish, provides matte or glossy shine, and guarantees the wear of the polish for the next 2-3 weeks. The top is much thinner than the base, easy to apply and dries quickly in the lamp. Some varnishes have a sticky layer that needs to be wiped off with a degreaser.
Aids
There are many aids and materials that you can do without at home, but they are used in salons:
- disinfectants for treating cuts, the master’s hands and the client’s nails (at home you can replace them with Chlorhexidine or medical alcohol);
- cuticle oils are used to soften the skin before a manicure and moisturize it after, because files and materials dry out the cuticles;
- remover - liquid for removing gel polish (acetone can be used, but it dries the nail plate and disrupts intracellular metabolism);
- gel polish thinner is used if it thickens a little and lumps appear in it;
- a product for cleaning gel polish brushes (you can use a remover).
Manicure before gel polish: step-by-step instructions and varieties
A properly performed manicure is the key to ensuring that gel polish will last a long time on your nails.
A manicure before gel polish is usually carried out using special tools.
Namely: manicure scissors, pusher, buff, file for natural nails, nippers.
Let's look at each of them below.
- Nail scissors . Used to correct the free edge of the nail.
- Pusher . Helps remove overgrown skin at the base of the nail.
- Buff . Allows you to grind and remove the keratin layer.
- File . Used to straighten the free edge of the nail.
- Wire cutters . Used to remove excess cuticle.
- Orange sticks . Used to push back cuticles.
What manicure option should you choose before applying gel polish to your nails? Here everything depends on the initial condition of the nails; recently, preference has been given to unedged manicure, it is atraumatic, fast and safe, does not cause pain, allows you to get rid of only dead cuticle cells and prevent damage to its living part.
Useful tips
Experts advise practicing on artificial nails first before experimenting with your own hands. In addition, preparing your nails for the shellac application procedure is very important. The fact is that a poorly processed cuticle or insufficient nail preparation can lead to peeling of the finished manicure.
You should also monitor the thinness of the applied coating. A layer that is too thick may not dry out in the required time under the lamp. This will lead to damage to the coating and its fragility.
Jaay - Mobile - Content - 250*360 - 8
note
To soften the cuticle, you can use hand baths.
But it is worth considering that they can be used several days before applying gel polish to avoid its detachment. We recommend: How to extend nails using tips correctly
Stages of unedged manicure:
| Step 1 Use a nail file to file and shape your nails into the desired shape. If you decide to adjust your nails using scissors, then do it in one motion. |
| Step 2 Apply remover to the cuticle area and wait a couple of minutes. |
| Step 3 Remove the product using a cotton swab. |
| Step 4 Take an orange stick and carefully push away the excess skin. |
| Step 5 If necessary, use cuticle nippers. |
| Step 6 Treat the surface of the nail with a buff. |
Conclusion
So, we figured out how to make the perfect manicure with long-lasting nail polish. Using the techniques described, you can easily get your nails in order without resorting to the services of salon specialists.
In the video in this article, you can visually study the entire process step by step to make it easier to repeat it yourself. If you have any questions or comments, write in the comments and also do not forget to share your experience.
Did you like the article? Subscribe to our Yandex.Zen channel
Text \ Photo Victoria BOLSHOVA Posted 12/17/2018
+8
share:
To favorites
To print
If you want to thank, add clarification or objection to the author - add a comment!
Currently being discussed:
- Lyubov Burkina
20.08.2018
What hair color should I choose? Please give me some advice. I don't know which one I have...
- I
19.08.2018
I had eyelash extensions for 6 months and took a break. After 3 months I increased it again...
- Vasilisa
18.08.2018
Cool hairstyle
18.08.2018
Hi, can I dye my bleached hair (currently red) bright purple...
16.08.2018
Hello! I am a dark girl with black eyes. I want to dye my hair dark...
15.08.2018
The photo shows young beauties. Can older ladies have their eyebrows done? Age...
Comments »
Advice
Of all the materials listed, a beginner should definitely acquire: a dehydrator, a disinfector, a liquid for removing the sticky layer, one base, several colors of gel polish and a top coat.
Well, now about the lamp for drying gel polish. Which one to choose? There are 3 main types of lamps: UV lamps, LED lamps, hybrid.
UV lamps . Their main advantage is their budget price. The power of such a lamp varies from 9 to 54 Watts.
The higher it is, the shorter the polymerization time; such a lamp can also be equipped with a timer, motion sensor or fan. For a beginner, it would be optimal to purchase a 36-watt UV lamp. This gadget is ideal for home use; it allows you to polymerize gel polishes of any density and other types of coatings.
We recommend: How to dry gel polish without a lamp: tools and materials
LED lamps . They are specially designed for accelerated and highly efficient drying of gel coating and auxiliary materials. The polymerization time in such a lamp is 30-120 seconds, but they are an order of magnitude more expensive than UV lamps.
Hybrid lamps . They are created for the polymerization of gels, gel polishes, permanent varnishes, and biogels. The combined technology used in such lamps can significantly reduce the polymerization time of materials. More suitable for professional use.
When purchasing materials and tools, you should give preference to well-known and well-established companies, such as: Runail, Bluesky, CDN, Jessnail, Kodi Professional, Konad, Lianail, Masura, TNL Professional. A beginner should pay attention to budget brands, the quality and range of which is not inferior to more expensive brands. After you have purchased a starter kit for applying gel polish, you need to clearly determine the place where to store it.
To do this, you can purchase a special box or container; in such a gadget, all materials will be protected from direct sunlight and dust. After using gel polish, carefully wipe the neck of the bottle with a lint-free cloth and close the cap tightly. Do not leave gel polishes near a working lamp; these simple tips will help keep your tools and materials in good condition for a long time.