Summer has come; boots and warm boots with fur finally went into boxes for storage, giving way to light sandals and open-toed shoes on the shoe shelves. This means it’s time to seriously take care of your pedicure, because in the summer you can no longer hide minor imperfections in your heels under thick socks. Plus, bare feet are so sexy! It’s worth taking advantage of the moment and once again showing your chosen one your graceful feet. But first, you need to make sure that you have all the necessary tools to keep them in perfect order.
- 2 How to choose quality tools
- 3 How to store
- 4 User reviews
4.1 Video: tools for manicure and pedicure
What you need for a pedicure
In the arsenal of a professional nail service technician there will always be a whole battery of nippers and tweezers sharpened at different angles; a bunch of files for all occasions; curettes to combat ingrown toenails; tripod stands and even safety glasses to protect your eyes from minor injuries while working. At home, you won't need most of this. But you won’t be able to get by with just nail scissors. You will have to seriously equip yourself, so be prepared to shell out quite a significant amount of money to get everything you need. However, this is exactly the case when it ’s not worth saving, because you will be investing in the beauty and health of your legs .
So, what should be in your home foot care kit?
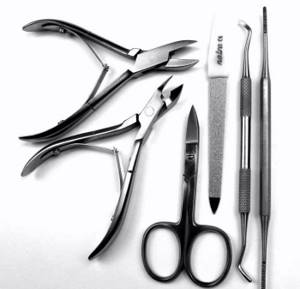
- Scissors for shortening and trimming the free edge of the nail plate.
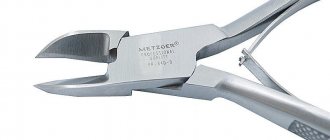
In most cases, this tool can be successfully replaced by nippers, but scissors are still useful to have on hand, especially for working with thin and flaky nails. Pedicure scissors are usually thicker than manicure scissors, although this is not a fundamental condition - Nippers with sharp tips of a specific triangular shape. They are convenient because they fit as closely as possible to the skin and allow you to efficiently cut off hangnails, remove cuticles, and, if necessary, trim your nails - in short, this purchase certainly won’t have to gather dust in your kit without use. If possible, buy a pair of nippers at once: a larger one for nails, a smaller one for hangnails and cuticles.
Nippers with notches on the handles are more comfortable to hold - Tweezers.
You can consider them as a type of wire cutters, or you can consider them an independent tool, which in some cases is much more convenient to operate. Tweezers will help you deal with both nails and hangnails - Files. Here it is better not to skimp and get a complete set: a coarse 100 grit file for processing the roughest areas of the foot; a delicate file of 240 grit for filing the free edge of the nail and a soft polisher with an abrasiveness of 320 to 1500 grit. A good purchase would be a double-sided file, the surface of which combines several types of spraying. Important: for delicate natural nails, experts recommend files with a paper or rubber base, for extended nails - metal and ceramic tools.
Calluses are removed from steamed skin, nails are filed strictly dry - Scraper.
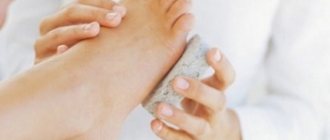
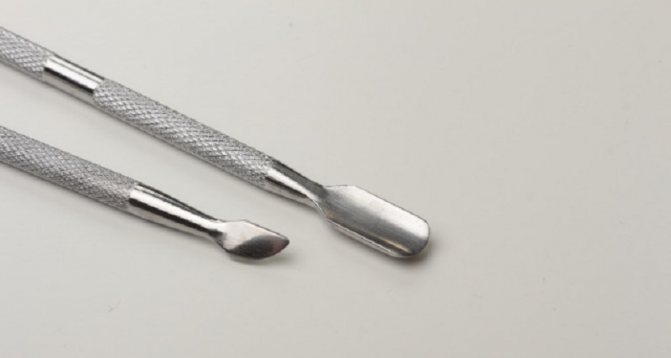
Where the roughest file fails, a razor comes into play. And so that beauty enhancement does not end in cuts and lameness, it is packaged in a neat attachment for the machine, which allows you to quickly scrape off dead skin from the heels. However, keep in mind that even such a “safe” tool must be used with extreme caution, or injuries cannot be avoided. However, if you are used to regularly caring for your feet, you won't need a razor. Using a scraper you can remove any calluses - Pusher.
It is desirable that it be double-sided, with a spatula for moving the cuticle at one end and a sharp tooth for removing pterygium from the nail plate at the other. Prefer soft wooden sticks? No problem, they will do too. A wooden stick is safer for the nail, but a metal pusher is more effective - Bath.
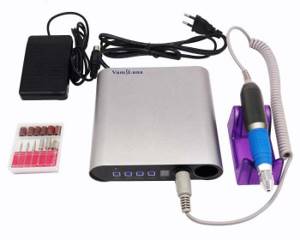
A very useful tool that will allow you to steam calluses, soften cuticles, and at the same time relax properly. Girls who prefer to save extra money can use a regular basin for this purpose. And for young ladies who are accustomed to pampering themselves, there are baths with hydro and vibration massage, ultraviolet lamps against fungus and even magnetic radiation. Not just a bath, but a real relaxation session! - The pinnacle of home nail care is a grinding machine with a set of replaceable cutters.
She will trim the edge of the nail plate, remove the cuticle, and polish the nail itself. True, this miracle of technology is not cheap, and in order to use it effectively, you will have to take special courses. The pedicure machine is expensive and difficult to use, but it is effective
This is the minimum set required for complete foot care. But if you are one of the perfectionists who are used to doing everything especially well, or you just like to pamper and cherish your feet, it won’t hurt to supplement it with a few more items. What else will you need?
- Liquid for removing corns is an optional, but also useful helper in the fight against particularly stubborn calluses.
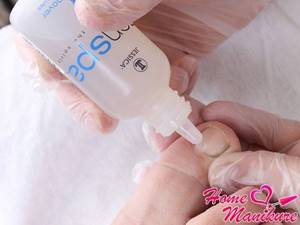
Tough measures are needed against hard calluses - Cuticle softener.
Again, you can do without it by thoroughly steaming your feet in the bath and removing the excess skin with a pusher. But the result of these manipulations will not be comparable to the effect of a professional product. The cuticles on your feet also require attention. - Foot scrub, store-bought or homemade from sugar, salt and coffee grounds.
Sugar will remove dry skin flakes and make foot care easier. - Softening foot cream.
Feet will appreciate your care - Finger pads for hassle-free nail polish application.
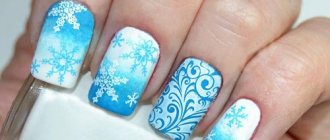
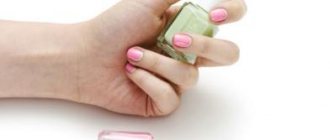
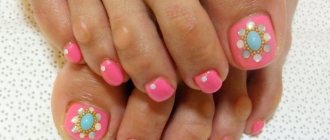
Applying varnish will be convenient and easy - By the way, about varnishes!
If you can’t imagine a pedicure without this bright detail, it makes sense to have, in addition to regular house slippers, another one, akin to salon disposable ones. They will give you the opportunity to quietly go about your business while the varnish dries, but at the same time they will not allow your bare feet to freeze on the bare floor. Salon invention can be used at home
Combined method
It will not be possible to completely perform a pedicure using only one method in difficult cases where there are ingrown toenails, cracked heels and other problems. Therefore, a universal set of pedicure tools will include both types of tools in order to use a combined technology if necessary. In addition to the standard set, the following items are purchased:
- Ball-shaped burs for drilling calluses of different diameters.
- Metal file for ingrown toenails.
- Curettes, left and right.
- Nippers for ingrown toenails.
Professional pedicure tools of this specific nature can only be purchased in specialized stores.
How to choose quality tools
The abundance that reigns in cosmetic stores today has one significant drawback: it can be difficult for a beginner to understand it. How to choose the highest quality and most convenient tools from a variety of tools and not make a mistake?
- Don't save money. It’s not for nothing that people say “a cheap fish is a filthy fish”! Choose tweezers and scissors made from high-strength medical steel: it may cost you more, but it will serve you faithfully for many years without rusting or becoming dull.
- Look for a hand-sharpened tool. A mechanical processing method will never make the cutting surface so perfectly sharp, but it is the sharpness that often determines the quality of the future pedicure.
- Don’t be lazy to “try on” the chosen item for yourself. Check how it fits in your hand, whether it is comfortable to use, whether the spring in the tweezers moves too tightly and whether the attachment is loose in the machine.
Of course, the best option would be to buy professional tools - in every sense, they are “tailored” specifically to the needs of pedicure. For example, toenail clippers typically have thicker blades than those designed for the hands, and the tool for trimming the side ridges of the skin is slightly curved for greater comfort. But it makes no sense for beginners to buy a complete professional set; the tools already listed will be enough for them.
Hardware method
Performing a pedicure using the trimmed method is contraindicated for some diseases. One of them is diabetes mellitus. In this case, the feet are processed only with a milling cutter. The use of various attachments helps to carefully drill out the usual dry calluses, corns, polish the plantar area and remove cuticles.
There are many of them. Each master selects nozzles for himself. The main thing is to purchase them in stores that sell professional pedicure tools. The minimum set includes the following cutters:
- Cylindrical, which reduces the length of nails.
- A diamond nozzle in the form of a truncated cone, which is used to process the edge and end of the nail.
- Cylindrical with notches for removing excess volume in case of hyperkeratosis.
- Ball-shaped diamond nozzle for processing cuticles.
- Needle-shaped carbide for processing nail folds.
- Rubber nozzles with replaceable abrasive caps.
- Carbide titanium attachment for working with the plantar part of the foot.
A professional device may be supplied with a set of cutters supplied by the manufacturer. They have a standard size suitable for all devices.
How to store
Even medical steel will quickly lose its ground if handled inappropriately. Do you want your “basic beginner’s kit” to last as long as possible? Always follow a few simple rules.
- You should store your little helpers in a case specially designed for this purpose. Moreover , each of them must be assigned its own compartment , otherwise the scissors and wire cutters will become dull or leave scratches on each other’s blades .
- Handle any item from the set with care: do not throw it on the table, do not drop it, do not shake the case.
- Make sure your scissors and wire cutters are sharp.
The use of blunt instruments is strictly prohibited! Tools dumped in disarray are more likely to become unusable - If the blades do become dull, do not try to sharpen them yourself. The cutting surface has a certain angle of inclination, which you can violate with your inept actions. Entrust this task to a specialist.
- Of course, only dry and clean tools should be put into the case.
- Disinfect your pedicure kit regularly.
Does this last requirement seem strange? Indeed, you are not a beauty salon, where the same tweezers bite the cuticles of a dozen or two visitors every day. Perhaps the requirement for sterilization does not apply to household instruments? Let's think about it.
Firstly, your scissors can be used by someone at home at any time - and where is the guarantee that this person did not catch a fungus or something worse a week or two ago, say, in a bathhouse or the same beauty salon? Symptoms of such diseases appear very late, when the disease itself is already in full bloom and smells.
Secondly, if you travel often and carry the set with you, infection can get on it without outside help - for example, from a shelf in the bathroom poorly wiped by a sloppy maid.
Thirdly, on surfaces that are not properly treated, bacteria themselves flourish, which can easily penetrate into a wound accidentally caused during a pedicure. Of course, you won’t get herpes and HIV this way, but you can easily get inflammation.
How to avoid this?
- Tools from a personal set that are constantly stored at home, it is enough to wipe them with an alcohol solution immediately before use and mechanically clean them after work, brushing off the dust of filed nails and other accidental dirt - this is enough to protect yourself.
- If your set has been through fire, water and a cheap hostel, or you have recently suffered from a fungal disease and want to thoroughly clean your tools, you should resort to “deep” disinfection.
In the salon, a sterilizer is used for this purpose - thermal, infrared, ultraviolet. At home, you can use a regular saucepan or oven. The role of a professional device for home sterilization will be taken over by the oven.
First option:
- wash your tools with soap;
- place on a wire rack so that they do not touch and place in an oven preheated to 200°C;
- After a quarter of an hour, the instruments will need to be removed from the oven and allowed to cool completely.
Second option:
- Place the items from the pedicure kit in a saucepan with hot water;
- boil them for 15–20 minutes;
- Carefully remove the water and dry on a towel.
It is worth considering that sterilization using high temperatures can damage poor steel. If you doubt the quality of your instruments, you will have to limit yourself to treating them with an alcohol solution.
Consumables
Every pedicurist needs a large number of consumables in their daily work. These include:
- Baths made of materials that are resistant to chemical coatings and do not come into contact with them.
- Cloth napkins.
- Disposable lint-free wipes.
These materials must always be purchased in reserve, that is, there should be twice as many consumables as the number of clients you plan to receive that day.
User reviews
the reward for your efforts will be well-groomed beautiful legs
Lately I haven’t soaked my feet separately; they get quite wet in the bathroom when I bathe. While the nails are steamed and soft, I remove the length with scissors and work on the sides. Next I move on to processing the cuticle. First, I push it away at the base with a pusher, remove it with tweezers, and then with the same tweezers I trim off all the excess skin around the nail. If I hurt my skin in the process, I treat everything with vodka. I use a file to give my nails the desired shape, polish them and the skin around them with a buff. When my nails are sparkling, I move on to my feet. I use a foot file to process all the rough parts, and on the fingers too. I have a double-sided file, so I use the rougher side first and then buff the leather with the reverse side. To complete the procedure, I apply foot cream to my feet. Naturally, I do not encourage anyone to do exactly this, I just shared my experience.
Yulianna Yuzhnaya
https://irecommend.ru/content/pochemu-ya-delayu-pedikyur-s-9-let-zachem-mne-vodka-i-trimmer-dlya-brovei-kak-sdelat-pedikyu
Try not to use razors or blades! I know that many cannot imagine their life without them. This has happened to me since school! The skin on my feet just became rough instantly, these “layers” of excess skin hurt terribly, itched and itched somewhere inside... A disgusting sensation. If you can’t give up surgical instruments right away, then try to first switch to a hardware pedicure, and then even come to the point of removing excess skin on your feet using a grater. Even when I get a pedicure in a salon, they only treat my feet with a grater, and now I no longer know what pain from corns is! Also, drink more water, wear cotton socks at home, and don’t forget to regularly moisturize the skin of your feet.
grafinia
https://irecommend.ru/content/pedikyurchik-po-bystromu-bez-zamachivaniya-v-tazike
The stages of my pedicure: foot bath with salt, pumice stone, scrubbing with a cosmetic product, nourishing the skin with lavender ointment. After all the procedures, the peeling disappeared and the heels began to look more well-groomed, the skin became very soft and pleasant. I actually start the pedicure by removing the cuticles using Sally Hansen product and an orange stick. Next, I start trimming my nails, then file the corners to avoid ingrown nails, and cover my nails with regular polish or gel polish. After a pedicure, I always apply cuticle oil to my cuticles.
Queen_Carolina
https://irecommend.ru/content/vashi-pyatochki-kak-u-mladentsa-u-menya-da-kak-ya-ukhazhivayu-za-nimi-i-kak-ya-delayu-pediky
Advice from a familiar master: use a grater on dry skin. So the increase then occurs more slowly. Therefore, the first thing I do is take a newspaper and scrub my feet well with a ceramic grater. Without fanaticism. A couple of minutes for each, I don’t press too hard. The second advice of the master: trim softened nails with pliers, this way they are more flexible and there is less risk of cracks and delamination. I've come across the exact opposite opinion, but my dry nails are actually more difficult to trim and may crack.
Briony
https://irecommend.ru/content/pyat-nebanalnykh-prichin-domashnego-ukhoda-bez-professionalnykh-instrumentov-i-sredstv-mnogo
IMPORTANT! All tools used must be disinfected. I use chlorhexidine, it has antiseptic properties and copes well with this task, especially since I use the tools alone.
Tatiana
https://irecommend.ru/content/pedikyur-dlya-nachinayushchikh-v-domashnikh-usloviyakh-poshagovaya-instruktsiya-s-foto-kazhd
Trim method
Tools for pedicures performed using the classic trimming method have remained virtually unchanged for thousands of years. They perform cutting, abrasive and auxiliary functions during the procedure. There are a large number of their types, but they can all be divided into three groups.
Cutting instruments have a blade (or two), with which the master removes keratinized areas of the skin, shortens the length of nails, cuts out calluses and keratinization, and removes cuticles. These are the following items:
- Pedicure nail clippers. They have straight blades and can handle the toughest nail plates.
- Knipser - miniature tweezers. It has a beautiful cut shape, works on the guillotine principle and preserves the structure of the nail as much as possible when cutting.
- Pedicure knife. Now it is not a medieval frightening instrument, but quite harmless. It resembles a safety razor: it is also designed to use removable blades. May be completely metal, but may also have plastic parts.
- Removable blades. They are special, suitable only for a pedicure knife. They have a standard size and can be used with any brand of tool.
- Abrasive devices are various pedicure graters of various shapes. The amount of abrasive per square centimeter is measured in grits. To work, you need at least two files: 180 and 240 grit. They are usually produced double-sided, which is very convenient.
Tools that have auxiliary functions are orange sticks, curettes, pushers/scrapers and a universal foot block that can be used to file nails and polish heels. This is a block coated with abrasive. It can have edges of different grit or the same.
What is a pusher for?
So, a pusher, also known as a scraper, is needed primarily to push back the cuticle and clean off the pterygium. The tool has a convenient shape, optimal for freeing the nail plate from excess skin, for maximum “opening” of the working space.
No other tool will move the skin film so carefully and effectively. And this must be done, because the skin:
The hatchet, most often adjacent to the spatula on the same instrument, is also important. With its help, you can get rid of dirt under the nail, side ridges, pry off an ingrown nail, and remove the thinnest pterygium.
Removing rough skin using a remover
A good alternative to a pedicure bath is such a wonderful cosmetic product as remover. If cutting off the skin after steaming fills you with fear, then in the absence of contraindications, you can completely painlessly complete the procedure of getting rid of rough skin using this drug. Pedicure remover is an alkaline-based product containing glycolic or hydroxyacetic acid, which will perfectly cope with unwanted skin without the help of water. You don't need a bath or a stand - everything is extremely simple.
- Pedicure remover is an ideal product for you if you are afraid of getting an infection, or if a trimmed pedicure is contraindicated for you.
- The absolute painlessness of the procedure is another plus of this wonderful product.
- Pedicure remover will easily get rid of corns and calluses in just one step and will help slow down the growth of rough skin.
Dear girls, before using the remover, be sure to check your body’s reaction to this product ! Otherwise, instead of beautiful heels and feet, you will get allergies and irritation. Agree, you don’t need this at all. Be careful before turning on such a product. Perhaps you should use more classic pedicure tools.
Pedicure bath for unparalleled relaxation
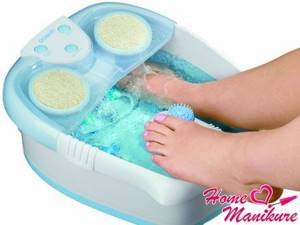
The first step of the procedure is to cleanse your feet. A pedicure bath is a necessary thing for getting your feet in order. It is simply irreplaceable if you want to properly relax after a long and hard day. It is easy to replace the bath with a regular basin, but it will not be an ideal assistant for you, and is unlikely to bring pleasure during the procedure. If you decide to purchase such a wonderful item, you can easily receive, in addition to the warming effect, a foot massage that will completely relax your legs.
Nowadays, pedicure baths have many additional properties and are real “masters of relaxation.” Their versatility will not leave even the most demanding beauty connoisseurs indifferent.
- Naturally, the first on the list will be hydromassage. Thin streams of water in a pedicure bath help you relax as much as possible due to their pressure.
- Vibromassage. It can be done even without water to relieve fatigue.
- Automatic heating allows you to forget about constantly adding hot water and maintains one comfortable temperature in your pedicure bath.
- Antifungal treatment for feet. At the initial stage of development of the disease, ultraviolet lamps will help get rid of the scourge.
- Magnetic radiation in a pedicure bath is a wonderful way to get rid of joint pain. It saves you from having to go to the physical therapy office after illness. Now you can sit comfortably at home, and the effect will be the same.
We have considered the advantages of such an item as a pedicure bath. This list of advantages, of course, can be continued. It all depends on the modification, price and what kind of pedicure bath you want. A stand for your “relaxation master” will also contribute to the greatest comfort during the pedicure process. Such an object helps to securely fix the bath itself and eliminates the possibility that it will move to the side or tip over.
Manicure items you may need
Often, special care is required when treating toes. This happens, for example, when preparing nails for applying gel polish. To file nails and give them a beautiful shape, use 180/240 grit manicure files. After filing the nails with the rougher side, the file is turned over and the end of the nail is sealed with the 240 grit side. With the same side you can remove detachments from the nail. Pterygium - the lower layer of the cuticle - can be removed by pushers (from the English “push” - push) and scrapers (manicure hatchets).

When the trimming method is used, manicure tweezers are used. It is convenient to choose a blade length of 5 mm. Some people remove the cuticle with nail scissors. They are available for skin, with thin blades, and for trimming nails, with wider blades. Experts do not recommend shortening your nails with scissors - the keratin layers become wrinkled and the nails begin to peel.
These are universal tools for manicure and pedicure, which can be sold in specialized departments. When purchasing them, they are guided by the choice of a brand from a well-known manufacturer of quality products.