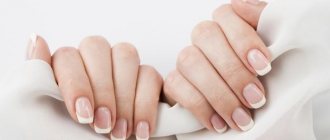
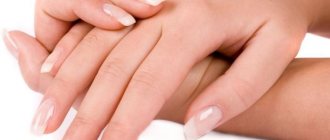
The most beautiful coating has to be removed from your nails sooner or later. While ordinary polishes are quite easy to deal with, removing gel polish often causes difficulties for manicure lovers. We asked beauty school professionals and teachers whether it is possible to remove gel polish yourself and how to do it.
In this article we will tell you:
- How to remove gel polish with liquid and foil?
- How to remove gel polish without foil?
- How to remove gel polish without liquid?
- How to remove gel polish using a machine with a cutter?
- What is the best way to remove gel polish?
Are you afraid of nuclear chemical compounds in special liquids, but have no experience working with a gel polish remover? Sign up for proven manicure training courses in St. Petersburg, Nizhny Novgorod and Moscow . In the catalog you will find inexpensive intensive courses where you will be taught how to remove gel polish using a special machine with a cutter.
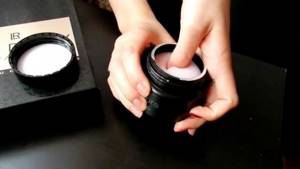
Professional products for removing gel polish from nails
Professional means for removing any gel polish are:
- Beautix is an excellent product that quickly and efficiently removes gel polish.
Apply the product to the sponge, place the sponge on the nail and wait 10 minutes. According to the instructions, this time is enough to soften the gel polish. We remove all residues using a pusher or a stick.
- TNL is also a budget option compared to others.
The liquid will allow you to remove gel polish in just 10-15 minutes. The method of application is similar to that described earlier.
- Nano Professional is a very high-quality professional product that will allow you to remove gel polish not only quickly, but also relatively safely for your nails. The method of application is similar to that described earlier.
- Masura is a very popular remedy.
However, the effect period of the product is slightly longer - 15-20 minutes. The method of application is similar to that described earlier.
- Severina is perhaps the most affordable gel polish remover. Despite its availability, the product is quite effective and is in demand.
Nail polish removers
Of course, these are not all gel polish removers, there are a lot of them. They all differ in quality and cost. When choosing a product, we recommend that you pay attention first of all to its safety and effectiveness, and only then to all other factors.
Removing gel polish without foil using caps

Removing gel polish with caps
Modern manicure tools are wide. To “fight” the gel, not only foil is used, but also special caps, clamps, clothespins or clips. The functions of the devices differ little. So, various kinds of clamps hold the cotton tightly, preventing it from falling out. The purpose of the caps is a little broader. They replace not only foil, but also cotton swabs. That is, nail polish remover is poured directly into the cap, after which it is put on the tip of the finger.
The product gains direct access to the nail plate, which means it begins to act faster. On average, the coating can be dealt with in 10-15 minutes. Moreover, you no longer have to work additionally as a pusher. When the procedure is completed, do not forget to clean the caps themselves. Next, pour cuticle oil into them and put them on again, leaving for 5 minutes. At the end of all actions, be sure to clean the caps.
Shellac, Cody varnish: how to remove it at home yourself?
The question regarding removing shellac and Cody polish at home is quite common. So, let's start with shellac. Professional removal of shellac requires the following things:
- Of course, a special liquid that is designed to remove such coating
- Special sponges
- Orange wooden sticks
- Suitable nail file
- Cuticle oil
However, when carrying out this procedure at home , the following products are perfect for us:
- Take nail polish remover
- We replace special sponges with what every home has - cotton wool (cotton pads)
- Instead of a stick, we take a special tool that is designed to push back the cuticle (any young lady definitely has such a tool in her house, because a pusher, that’s the name of this tool, is in any manicure set)
- We also need foil
Well, let's proceed directly to the process of removing shellac:
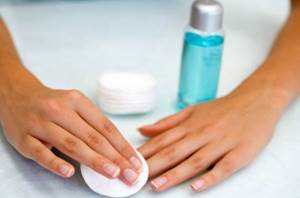
- In order for the shellac to be removed efficiently, we initially need to thoroughly wash our hands with soap, this way we will degrease them and allow the acetone to effectively act on the coating.
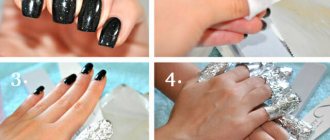
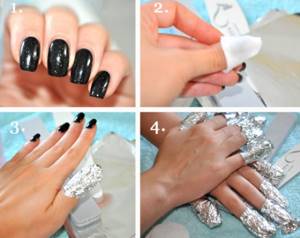
- If we use cotton wool, then we need to make sponges from it that will completely cover our entire nail.
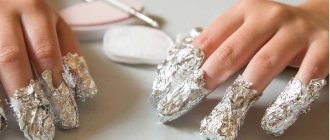
- The sponge you make must be moistened in nail polish remover, then applied to the nail and carefully wrapped in foil.
- Having done similar manipulations on all nails, leave them for about 10-20 minutes.
- After the time has passed, we remove the foil and cotton wool from our nails and evaluate the result.
- Don't worry about the shellac not being completely removed - this is quite possible. If everything happened exactly like this, then we will need the help of that same wooden stick or pusher. It is with these devices that we remove shellac residues.
- All is ready. Remember, after any such manipulations, your nails need care and restoration, so it would not be superfluous to use a cream or, if possible, a special oil or Smart Enamel.
Removal with foil
Now let's move on to the next method of removing shellac - without foil:
- This method is more harmful to nails, however, less time-consuming. What is more important for you is, of course, up to you to decide. We take a container that will fit two hands
- acetone
- the same wooden stick or pusher
- polishing file (bafik)
- hand cream
Let's start the removal procedure again with washing your hands, which you already know for:
- carefully cut off the top layer with buff
- Apply cream to fingers first
- pour acetone into the container
- Dip your fingers into the liquid for about 10 minutes. You do not need to lower all your fingers, but only the tips
- After the time has passed, it is necessary to remove the coating from the nails. We do this using a pusher or an orange stick.
- Now you need to thoroughly wash your hands and apply cream
Removing without foil
Cody varnish is also very easy to remove at home, and there are no big differences from removing shellac:
- Cody polish can be removed with almost any product that contains acetone, the only difference will be in the duration of the procedure.
- Many people say that this varnish can only be removed with a special liquid, but girls who have tried other methods on themselves say otherwise. Also, according to some reviews, such nail polish can be removed even with a nail polish remover that does not contain acetone.
- So, let's start: soak the sponge in any liquid that can remove gel polish, then apply it to the nail and wrap it in foil.
- This procedure differs in its duration. To achieve maximum effect, keep your nails in this state for about 20 minutes.
- Be prepared to see remnants of the coating on the nail: remove them with a wooden stick or a metal spatula. This should be done from the cuticle to the edge of the nail.
- It is strictly prohibited to cut or saw down the remaining coating.
How to remove shellac from nails at home
Didn't have time to make an appointment with a specialist and want to know how to remove shellac from nails at home? It's easy to do. You will need a special liquid that can be used to remove shellac at home, a polishing file, foil and an orange stick. Read the instructions - everything is clear and detailed, especially with the video!
If the master works with conventional gel polishes, the coating can be removed without filing. Source: Flickr (sfcmichelle)
How and how to remove shellac at home
You can remove shellac from nails at home, but not always. If your nail technician uses a rubber base and top coat for manicure, you will not be able to remove them yourself. To remove such a coating, a special apparatus is needed - it is used to cut the varnish down to the base.
Important! It is better not to use cutters yourself. You may accidentally damage the plate and then have to wait for the unevenness to heal.
If the master works with conventional gel polishes, the coating can be removed without filing. You will need the following tools:
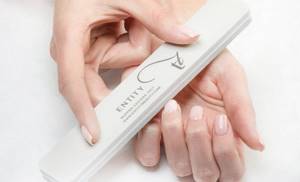
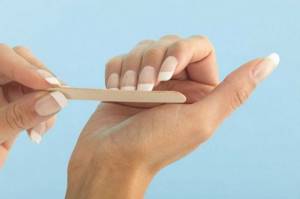
- Buff or polishing file. Buff is a rectangular block of soft material with a hard surface. The polishing file is not as hard as a regular file. This item is needed to remove the gloss (finish coating, top) from the surface of the nail. The hardness of the file/buff should not exceed 180 grit.
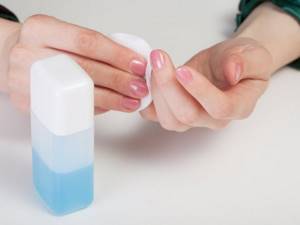
- Gel polish remover. Contains acetone, which dissolves paint.
- Foil. You can buy a special one in professional stores, it is convenient to use - it is already divided into pieces. But you can also replace it with regular food: you will have to cut it into 10 pieces of such a size that you can wrap your finger.
- Cotton pads. 2 pieces are enough. Each disk must be cut into 4 parts, and then divided in half.
Next, we will analyze step by step how to remove shellac from nails correctly and safely.
Removing old coating
First you need to “buff” the topcoat. Run a polisher over your nails and remove the glossy layer. Brush off the resulting dust with a brush and check that there are no shiny areas left. If there are rhinestones or decorations in the manicure, they must first be carefully removed with sharp nippers.
How is shellac removed from nails? Soak a piece of cotton pad in nail polish remover and apply it to the nail plate to cover it completely. Then wrap the nail tightly with foil - it will ensure better penetration of the liquid into the gel polish and its dissolution. Foil is necessary to prevent the product from evaporating.
Repeat the procedure on the remaining nine nails, wait ten minutes. Remove the foil and cotton wool, you will see that the gel polish has shrunk and turned into a thin peeling film. Take an orange stick or metal pusher and carefully remove any remaining polish. It’s better to use a stick - it injures the cuticle less and does not harm the nail plate.
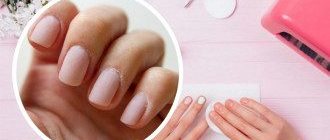
After removing the old coating, go over your nails with a buff. It will remove irregularities and make the plate smooth. Ready! Now you know how to remove shellac from nails at home.
Note! Acetone-containing liquid dries the skin very much, so after removing the coating, lubricate the cuticle and side rollers with a rich cream or oil.
If the manicurist used rubber base and top coats, it is better to remove the gel polish in a salon. Source: Flickr (Claw_of_Cthulhu)
How do you remove shellac in salons?
It’s clear how to remove shellac from nails at home. How is this procedure done in salons? Similar! We shared the only correct, classic method. But recently, craftsmen have been using rubber base and topcoats, which cannot be removed by soaking. How to remove such shellac from nails?
Cutting with cutters is the safest method. Because the skin does not dry out, and the plate itself is not exposed to any impact - a thick layer of base coat remains on it. Therefore, try to get to a good master, and do not look for ways to remove shellac from nails yourself.
Nail care
It is believed that shellac is harmful to nails. It is a myth. The nail plate is a keratinized, dead layer of skin. Damage is possible only as a result of mechanical impact. If you do your manicure and remove the coating correctly, you can wear gel polish without interruption. Only extensions are harmful.
But if you get an incompetent nail technician, your nails may suffer. In this case, it is worth removing the coating and rubbing strengthening agents into the nail plate for 2-3 weeks. These are almond, burdock or castor oil, vitamins A and E. For greater effect, you can add ylang-ylang or lemon ether to the oil - they strengthen, whiten nails and promote their rapid growth.
Conclusion: if the manicurist used rubber base and top coats, it is better to remove the gel polish in a salon. In other cases, you can easily remove the old design from your nails by soaking. Use liquid with acetone, foil and do not forget to remove the top glossy layer with a file. With careful work, natural nails will remain intact and unharmed.
Video on the topic
anutkina.info
Recommendations and tips for removing gel polish at home
Since removing the gel outside the salon is becoming increasingly popular, advice on how to do this procedure in the most efficient manner will certainly be very helpful.
- It is strictly forbidden to use technical acetone. It can easily ruin the skin on your hands and definitely injure the cuticle.
- To better remove the coating from your nails, remove the foil with all the other contents in a circular motion.
- If you know that you are allergic to acetone or your skin is too delicate and sensitive, contact a specialist.
Removing gel polish at home
- You must understand that such manipulations will definitely harm your hands. Therefore, after the procedures, you need to give yourself a little time and make a hand mask or at least use a cream.
- To reduce the aggressive effects of products on the skin, hands and fingers themselves, apply a rich cream to the necessary areas before removing.
- All such products dry out the cuticle. To prevent this from happening, apply special oil to it.
By following these easy-to-follow recommendations, you can easily, and most importantly, without damaging your nails, remove gel polish without outside help.
We remove gel polish at home without using a special liquid
We have already figured out how to remove gel polish using professional products, but what to do if you don’t have the necessary products, but there is a need to remove the gel? There is one very interesting way that can help you get rid of old coating.
- We will need a regular clear varnish. Yes, don’t be surprised, it is a kind of substitute for professional products. Of course, we will not talk about the quality of the procedure - this is already clear: the effectiveness of such a method may be much less than expected, although not always.
Removing nail polish without liquid
- So, coat your nails with varnish and don’t let them dry. Take a damp cloth and wipe your nails.
- You need to understand that this method is not professional, so due to certain factors it may not bring you the desired result. If this is exactly what happens, then you still need to use special means.
Removing gel polish with alcohol: myth or reality
Can alcohol remove gel polish? Yes, it is quite possible, but the procedure time will increase. Please know that when choosing this method you need to be extremely careful.
- Wash your hands thoroughly.
- We will need isopropyl alcohol. By the way, this liquid is widely used in cosmetics, perfumes, household chemicals and medicine.
- So, take a cotton pad (cotton pad, sponge) and moisten it with alcohol, then apply the cotton wool to your nails and carefully wrap them in foil. This process is already well known to you.
- We wait about 15 minutes.
Removing nail polish at home
- For a better result, you can massage the nail a little in the foil, then remove the cotton wool and foil from the nail.
- We remove all residues with the already known pusher or stick.
- Removing gel polish with alcohol is completed. Be aware that this method may be much less effective than you expected.
Removing gel polish at home: without foil, using caps
Foil is a substitute for modern devices, namely: caps, clips and clothespins; you can also add clips to this list. Both foil and all other devices perform the same function, the only question is the ease of use.
- Clamps, clips, clothespins are used to hold the fleece. They hold it tightly and prevent it from falling out.
- But we need to talk about the caps in more detail. This is an interesting invention, very easy to use, but so convenient - any woman will appreciate it.
- When using caps, we do not need any cotton wool or foil. We take the liquid that we will use to remove the coating and pour it directly into the cap, and then we put it on the nail.

Removal with caps
- Due to the fact that the liquid acts directly on the nail plate, the gel will come off faster and with better quality. Keep the marigolds in the caps for about 15 minutes.
- After completing the procedure, the caps must be cleaned of possible residues and liquid. Then fill the device with cuticle oil and put it on your fingers again. Leave the handles for about 7 minutes.
- With the help of such devices, the procedure is much faster and more interesting, so we recommend that you take advantage of these new technologies.
Rules for applying and leveling nails with a rubber base
Please note that the rubber base is applied differently than a regular base. It all depends on what purpose you use it for. In any case, nail treatment is carried out in the classical way:
- The pterygium is removed, the area of the cuticle and lateral ridges is treated
- After this, the natural shine is removed using a polisher or a soft file with a coarseness of 180/240 grit.
- Next, treatment is carried out with a degreaser, dehydrator, and primer.
- Only then the base is applied
The application method depends on what you are going to do next. If this is extension or correction of already done nails, then the base is applied in a very thin layer, using rubbing movements. If you are leveling, it is best to do this in several stages.
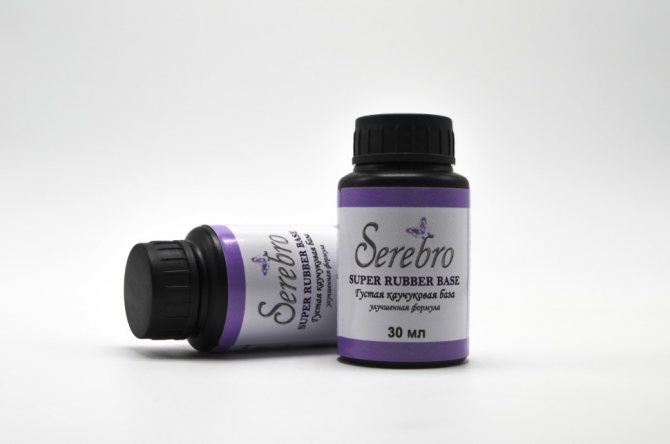
Rubber base
Instructions for applying rubber base:
- At the very beginning, the first layer is applied very thinly. To do this, directly at the base and at the tip of the brush, you need to remove as much material as possible. So that there is very little of it left on the brush. After this, rubbing into the nails is carried out.
- This layer is auscultated. If you use a rubber base for leveling, the application technique is significantly different. It is necessary to apply a thin layer with rubbing movements and do not dry in a lamp. A drop is placed on top of this not completely dried layer in the center.
- After this, the brush is pulled into the cuticle area, and then evenly transferred directly to the free edge of the nail, with its obligatory sealing.
- If there is a lot of material on the plate, we recommend drying one nail at a time. The ideal option would be to use a powerful 48 W lamp, because it can dry a thick layer of material in just 30 seconds.
- If you want your nail to be perfectly shaped, we recommend turning it down. In order for the drop to form a tubercle, that is, an apex directly in the stress zone.
- Immediately after this, the nail is turned over to its normal position and dried in a lamp. This manipulation allows you to achieve a perfectly flat surface, as well as glare, and avoid the appearance of tubercles and irregularities.
Rubber base
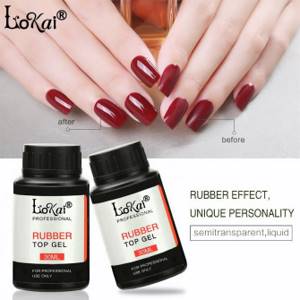
In addition, this base wears well due to the fact that it is springy. Gel polish on it can last up to 5 weeks and not chip off the ends if you do the manicure correctly and seal the free edge. This base is ideal for girls with naturally brittle nails who cannot grow them to a decent length precisely because of their weakness. In this case, after just a few corrections, you can grow your nails to a decent length. A thick layer of base protects the gel polish from chipping. The nails will not bend and will remain quite strong and hard.
Nail polish remover and acetone are the best tools for removing gel polish.
Previously, we described the procedure for removing shellac with both acetone and liquid. So, removing gel polish with the same means is no different. We will also use sponges, a pusher, the liquids themselves, cream and oil, as well as foil or special caps, clips, etc. that we already know.
We will not tell you the same procedure again, but we will still tell you some useful tips.
- Never remove gel polish from your nails, no matter how much you want to. With such actions you can easily damage the nail plate, which will be extremely bad.
- Always think not only about your nails, but also the skin of your hands and fingers. You must understand that liquid, and even more so acetone, is harmful to the skin. Therefore, before starting the procedure, always lubricate your fingers generously with cream or at least Vaseline.
Nail polish removers
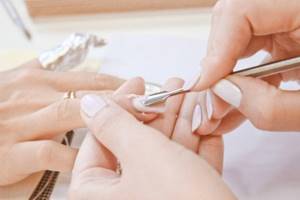
- We need to push back the cuticle very carefully. It cannot be cut.
- Even if you endured all 15 minutes, and the gel polish still does not want to dissolve, do not despair and extend the procedure for at least another 7 minutes. But you cannot mercilessly rip off the remains from the nail - this will definitely harm your plate.
- Don't forget to spend time on your hands and nails after the procedure. Strengthening vitamin complexes will come in handy.
How to remove gel polish from nails with remover?
Remover – in other words, a product designed to remove gel coatings. Experts recommend using a remover from the same company as the gel polish.
- So, we will need a file with which we can polish the nail - with it we will remove the gloss, as well as all the rhinestones, beads and other decorations.
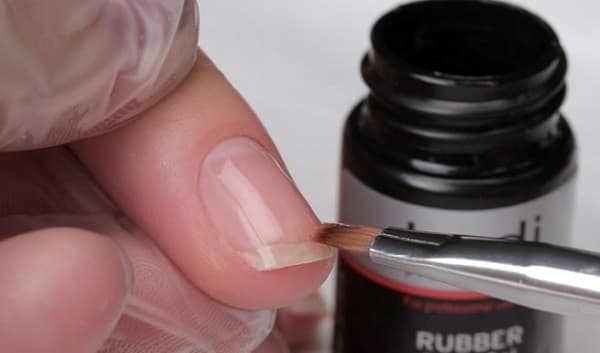
- Then we take a sponge and soak it with remover, after which we put it on the nail according to the usual pattern and wrap it in foil. We hold the marigolds for 10 minutes, but you can do more - 15.
- Now we remove the gel polish along with a sponge or cotton wool and remove all unnecessary residues with a stick.
Removal with remover
Using remover does not require any special skills, buy it and make your nails happy.
How to apply rubber base
First of all, you should initially prepare the nail plate for work, for this:
Using a file, adjust the desired shape and length of the nail;
Use a pusher to push back the cuticle;
Use buff to get rid of shine;
Use degreasing liquid or disinfectant;
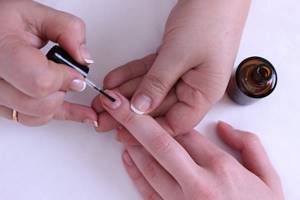
Apply base coat.
As for applying the rubber base, get rid of any excess material on the brush to avoid getting a large drop on the nail. Apply the coating in the thinnest layer, without sharp or rough movements from the center to the cuticle. Do not immediately dry your nails in the lamp; wait until the rubber evens out on the nails. Thanks to the sticky layer, the adhesion of the base to the color coating improves, so we do not recommend removing the sticky layer.
Next, we would like to share our impressions of the Kodi Professional rubber base.
Why Cody? This brand is the best-selling in Russia, Kazakhstan and Ukraine. Many positive reviews prompted us to write a short review.
How to remove gel polish from nails with a file?
We want to warn you right away and warn you. Fileing off the gel is far from the best idea. This method is the least gentle because when cutting off the gel with a file or a special cutter, you can seriously damage the nail.
- In beauty salons, gel polish is most often removed using a special device, but for people who don’t know how, it’s better to give preference to a good old nail file.
- First we need to remove the free edge of the nail. This can be done using a file or tweezers. You need to act carefully and without haste so as not to damage the nail.
- Let's start cutting off the gel. We also do this carefully: from the cuticle to the edge of the nail.
Removal with a nail file
- We remove accumulated dust with a brush. To make it easier for us to see the remaining gel, we can periodically wipe the nail with a sponge moistened with alcohol.
- After these manipulations you need to polish the nail. We make it a buff.
- When the entire procedure is completed, lubricate the nail with cream or oil.
- Recommendation from experts: after such manipulations, give your nails a rest. Do not paint your nails or apply gel polish for the next week. Make all kinds of baths, pamper them with vitamins and oils.
Top 10 best rubber bases on Aliexpress
Now on AliExpress you can choose a huge number of rubber bases, which differ significantly in quality, as well as in cost.
To make your first order on Aliexpress, read the instructions for registering and searching for goods, payment and delivery on the official website here, or read the article on our website “First order on Aliexpress”.
You can view the catalog of rubber bases on Aliexpress here .
Below we provide the TOP 10 rubber bases from Aliexpress:
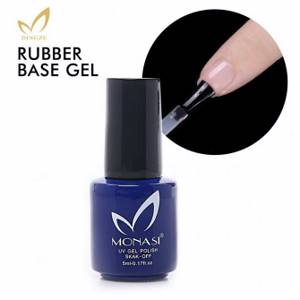
- Monasi. An excellent base, sold in a white or blue bottle. The price is not low, but the bottle is large, 15 ml. The texture is transparent, without additional shades. Easy to apply, ideal for leveling, does not flow into the cuticle area and side ridges. The drop stands in the place where it was placed. Accordingly, it allows you to perform alignment on all nails, and only then place it in a lamp, which significantly saves time for manicurists.
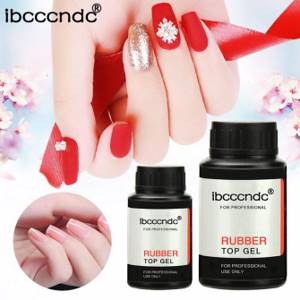
Monasi - IBCCCNDC The base is of fairly good quality; many nail technicians note its similarity to the kodi base, which is known to everyone. It is very thick, but takes longer to dry than all other bases. Dry in an LED lamp for 2 minutes. Excellent for leveling, sold in 14 and 30 ml bottles. These bottles do not contain brushes, which is not very convenient for home use. Best suited for manicures in a salon or for nail technicians who work at home. For the price, the base is excellent, it has a pleasant rubbery smell. Doesn't run off the edges, keeps its shape and alignment well. The cost of the base is low; many note that this is one of the best bases in this price range. Sold paired with a top or separately.
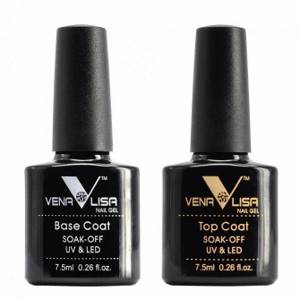
IBCCCNDC - Venalisa — rubber camouflage base. Many girls rushed to buy this base because it is very convenient to use under a French jacket, but later they were somewhat disappointed. The fact is that the texture of this base is very liquid, so leveling cannot be done with it. It must be applied exclusively in thin layers. The fact is that the product is very pigmented, which is why it dries poorly even in a powerful 48 W lamp. Therefore, when applying a sufficiently thick layer, it wrinkles and runs away from the edges towards the center. Therefore, it is necessary to carry out the overlap several times. If you have thin, problematic nails, then this base cannot be recommended due to its liquid texture and the impossibility of applying a thin layer for leveling. But this is a great option for those who love French style and wear extended nails. It does not last long on natural nails, up to two weeks. Since the nail remains flexible and soft, the varnish chips off from the ends. The wear time is short.
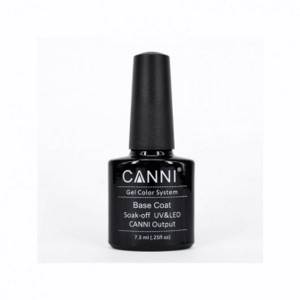
Venalisa - Canni. An affordable option, a convenient jar with a brush, small volume, which is ideal for home use. Many people note that the base is quite liquid, so alignment and application have to be done one nail at a time, which is not very suitable if you are a master or want to do a manicure quickly enough. You will have to spend a lot of time in order to dry the material and apply it perfectly evenly. The price is affordable, the base smells like rubber. But many note the liquid consistency and doubt that it is really a rubber base. After two weeks, chips begin to appear due to the fact that the free edge of the nail remains quite soft. Therefore, the gel polish on it cracks.
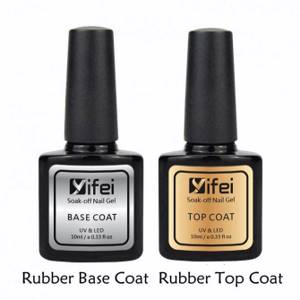
Canni - Yifei. This base is sold in 8 ml bottles with a brush. They note that the base really smells like rubber, quite thick, but not like Michey. It is possible to straighten the nail plate. They note that the base bakes in a lamp, which is not suitable for everyone. The wearability is very good, you can wear the coating for more than 3 weeks. It is worth noting that the price is very budget-friendly.
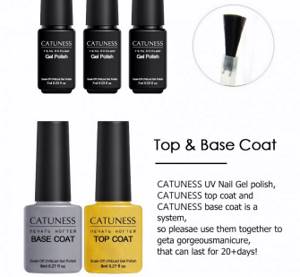
Yifei - Catuness. The base is sold in small plastic bottles, while many buyers note that the seller does not add the product to the bottle. Therefore, there is a small amount of base in the bottle. Buyers also note that the base is quite liquid, so it is not suitable for leveling. Doesn't smell like rubber, applies very thinly, runs off the edges, and bakes very well in the lamp. It cannot be recommended for very thin and brittle nails, because the gel polish will chip at the ends, which will lead to cracking.
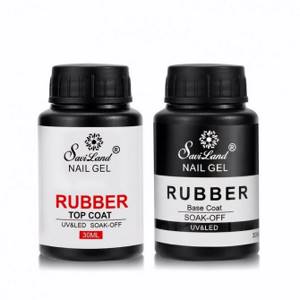
Catuness - Saviland. This base in a 30 ml bottle has been on sale for a very short period of time, but the product has become incredibly popular. The fact is that the price is mega affordable; a bottle of base and top can be bought for $5. It is worth noting that the bottles are large and do not have brushes, so you will have to purchase them separately or pour them into another jar for constant use. The base is very thick and sticky, does not run off the ends, and holds a drop perfectly. It is easy to level even in one layer. It is also worth noting that the base has a yellowish tint after drying in a lamp. Therefore, if you plan to apply a French coat on top, we recommend applying a camouflage base or pink varnish. Because the transparent color itself will give off a yellow tint. There are no complaints about the quality of the base; it wears well for 3 weeks. Does not chip if properly prepared and applied base to the nail.
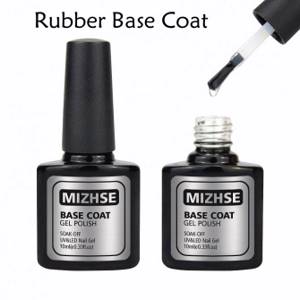
Saviland - MIZHSE. The price is in the middle price category, not to say that it is very cheap. Absolutely transparent, without yellow tints. It levels out very well and lays flat. At the same time it is quite thick. Many people note that the brush is very soft, so it is not suitable for applying base. Dries well in an LED lamp, even if applied in a thick layer. Doesn't run off the edges, seals the ends of the gel polish well. Excellent wear for up to 4 weeks, does not chip. The perfect highlight.
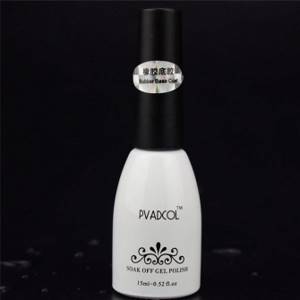
MIZHSE - Pvadkol. Great base in a big jar. Really rubbery, smells like rubber, transparent, without any extraneous yellow tints. Works great on prepared nails. Apply in an even, fairly thick layer. The drops do not flow from the brush, but are drawn by a thin thread. Ideal for strengthening and smoothing natural nails. It is not very suitable for covering artificial nails, because such a layer will thicken an already thick artificial nail. The wearability is excellent; many note that gel polish with this base lasts more than one month. At the same time, it does not run away from the edges, does not flow into the area of the cuticle and side ridges.
Pvadkol - Loka.i Sold in a large bottle of 14 or 30 ml. Thick, smells like rubber, no yellow tint. The main inconvenience is that there is no brush in the jar, so you need to buy it separately. It is applied without bald spots, does not run off the edges, and stretches very well from the cuticle area to the very tip. It can be applied either in a thin layer or leveled. In addition, this base is excellent for filling stickers, as well as a convex design that clings under the top. You can extend a broken tip if the length is no more than 2 mm. The price is affordable, the jar is well packed, sealed with foil and covered with thick laminated cardboard. Which reduces to zero the risk of base leakage during transportation.
Lokai
As you can see, AliExpress has a huge selection of rubber bases that will do an excellent job of leveling the nail plate and are suitable for performing manicures with convex decor.
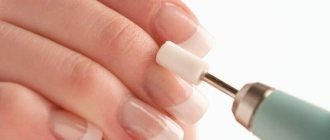
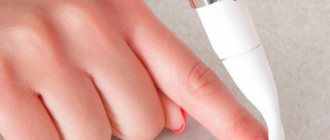
How to remove gel polish from nails with a manicure machine?
Removing gel with a device has its advantages and disadvantages. Of course, hardware removal is done much faster and does not cause pain.
- You can remove the gel with the device using a carbide and ceramic cutter. According to experts, it is much better to use the latter.
- So, if you decide to remove gel polish yourself using a device, then follow these recommendations:
- First of all, don't rush into anything. This procedure will take a minimum of time
- Your hand must be well fixed, otherwise you may accidentally jerk your hand and remove something unnecessary.
- There is no need to press the cutter on the nail. You should only lightly touch your nail with it.
- All movements are performed only in the direction of movement of the cutter
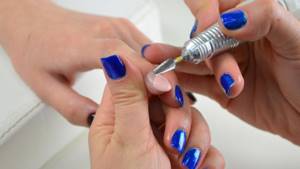
Removal by device
- To remove the gel, you only need to use a special cutter, that is, one that is designed for this
- After all the manipulations with the cutter, go over the nails with a buff.
- If the removal is done by an experienced technician, a professional in his field, then you will never feel any pain. This is something you should build on as well.
- When doing the removal yourself, monitor your sensations: if you are in pain, you feel a burning sensation, or there are any signs of damage to the nail, stop the procedure immediately and seek help from a specialist.
As you can see, there are a huge number of ways to remove gel polish at home without any outside help. All methods have their advantages and disadvantages, so the choice is, of course, up to you. However, now you know for sure that you can remove gel polish yourself easily and quickly.
If possible, choose the most gentle methods and means for the procedure and then your nails will not only remain healthy, but will also delight you with their beauty.