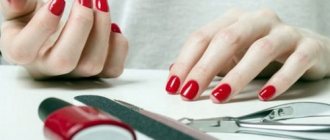
It’s already difficult to surprise anyone with extended nails. It’s a rare girl who doesn’t want to have a beautiful and impeccable manicure on her hands, emphasizing her elegance and sense of style. But sometimes there are situations when removing manicure extensions in a salon is impossible. In this case, you have to look for options on how to remove extended nails at home. Read further in the article about how to do this.
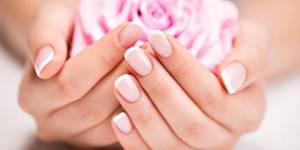
Removing extended nails
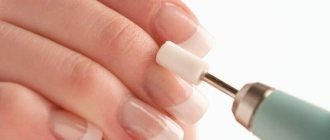
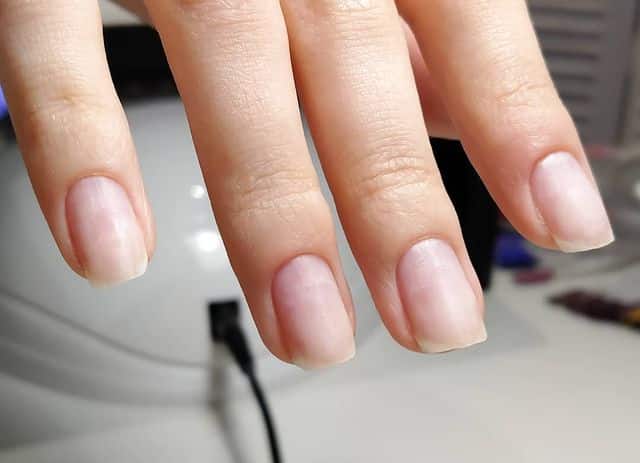
@fine.line_studio
General recommendations
Removing extended nails has its own specifics, which depend on the material used. First of all, you should understand that the glass and metal files familiar to many will not cope with the task.
In any case, regardless of the material, do not cut the extended and natural nails to the very root. Leave a length of 0.5-1 mm so that you can make a correction without damaging the natural nail.
When filing excess material, a very large amount of dust gets into the air. It’s good if you have a special hood at home that is used by manicurists. Otherwise, it is better to open the window, wear safety glasses and a mask.
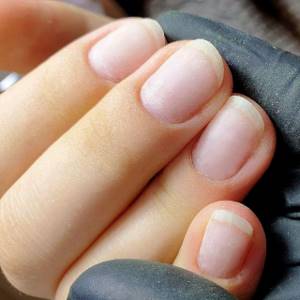
@medprofessionalmsk
How to remove acrylic nails at home?
Contrary to popular belief, filming such material on your own is very difficult. Firstly, this requires a special liquid. It can be purchased only in specialized stores. It is best to choose a liquid from the same brand as acrylic. Then the withdrawal process will be as fast as possible.
If it is not possible to purchase just such a liquid or you do not know the name of the company, then you can use nail polish remover. However, it must be with acetone. Please note that this method is very harmful to nails and cuticles, so you should only choose it as a last resort.
You will also need foil and good cotton pads for this. The foil must be cut in advance into rectangles of such a size that you can wrap each finger.
But before using the liquid, be sure to thoroughly prepare your nails. Using a coarse file, work the surface of each nail to remove as much acrylic as possible. This is quite difficult, but still try to do everything efficiently.
After all the nails have been processed, we proceed to the next stage. To do this, apply the liquid to a cotton pad and apply it to the nail. We wrap it with a piece of foil so that air does not penetrate inside. We repeat the same with each nail and leave them for no less than forty minutes. During this time, the coating will become as soft as possible and visually similar to jelly.
Remove the cotton pad with foil from one nail and carefully remove the remaining coating using an orange stick. This must be done very quickly so that the acrylic does not have time to harden. Repeat the same with each nail.
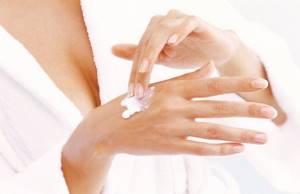
After completing the nail removal procedure, be sure to wash your hands in warm water and soap. Also apply nourishing cream or oil for cuticles and nails. Remember that no matter how hard you try to do everything well, your nails must be restored after such a procedure. Therefore, do not extend or color them for at least one month.
Preparation
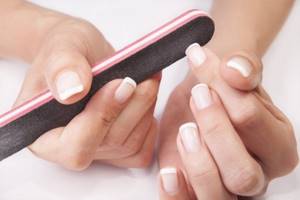
Preparation is the very first stage of removing manicure extensions. In this case, the free edge of each nail is removed. But, as written above, you should not make the cut too short. Leave a length of about a millimeter to avoid damaging your natural nails and the skin around them.
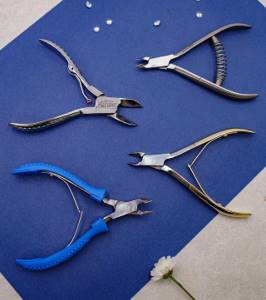
The easiest option for trimming the free edge is to use a tip cutter . This is a special tool used by manicurists, similar to nail clippers for trimming pet nails.
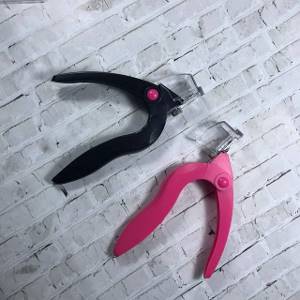
@mastershop_kz
If you don’t have a tip cutter in your arsenal, you can use regular tongs (nippers) included in a standard manicure set.
@artstilopt.ru
Carry out the procedure very carefully and carefully so as not to damage the natural nail. The coating is removed only after each nail has been trimmed to its minimum length.
Features of materials for nail extensions
Acrylic and gel coatings are especially popular. Their compositions differ slightly. Both products are a mixture of monomer and polymer.
Plates made of different materials are removed in different ways and have the following characteristics:
| Type of coverage | Material characteristics |
| Acrylic | The advantage of acrylic nails is that they can be easily removed, even at home. All you need is a solution that softens this composition, for example, containing acetone. The material is resistant to any household chemicals, does not scratch or crack |
| Gel | A special feature of the composition is the maximum similarity of the base artificial product with the natural nail plate. The shape and thickness of the nail is given by a second transparent modeling layer of gel. These nails are less toxic than acrylic nails. The air-permeable property has a positive effect on the condition of the extended plates. Gel pads need to be filed off |
| Gel polish | Gel polish combines the properties of nail polish and gel. It is elastic, durable, applied in a thin layer, but does not lengthen the nail plates or mask large defects. To remove it, you must use a special nail polish remover solution or an acetone-containing liquid. |
| Shellac | Gel polish, which has a durable composition that combines the properties of gel and varnish, makes the manicure durable. The structure of the nail plate does not crack or delaminate. It does not contain dangerous components, so it does not harm the nails. To remove shellac you need a special solution |
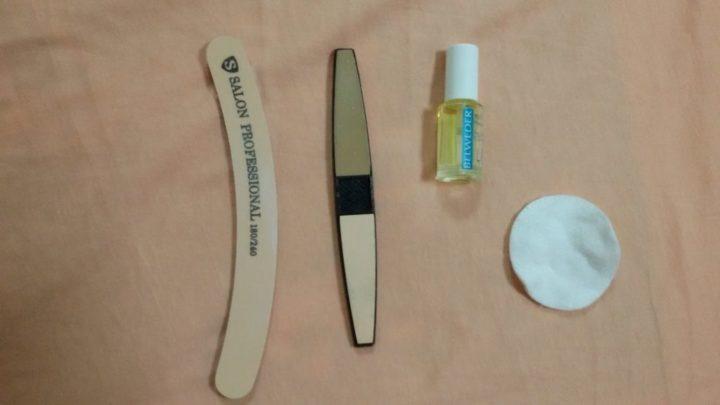
Required tools and materials
To carry out the preparatory stage, several types of tools can be used:
- Tip cutter (boat).
- Nail clippers.
- Files with varying degrees of abrasiveness.
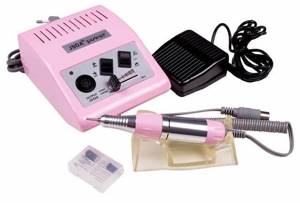
- Manicure cutter with different attachments.
During the process, you will need a special acetone-based liquid, which helps soften the extended base and make it easier to separate from the natural nail.
Don't forget to prepare square pieces of foil, an orange stick and cotton pads.
If you use a manicure cutter to remove extended nails, then all of the above materials and tools will not be needed.
@nailsmania_ua
Removing extended nails with a milling cutter or mechanical filing is suitable for manicure with any base. But acetone liquid will only help remove acrylic coating or biogel.
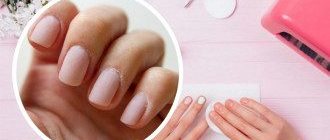
How to care for damaged nails after removing extensions
After you remove your gel nail extensions, you will find that your own nails are in very poor condition. That’s why they need treatment and recovery. The best way to ensure this is to go to a beauty salon, where you will receive professional care. It has an undoubted advantage over home methods, primarily due to the availability of a professional range of care products and tools, as well as the experience and knowledge of a specialist.
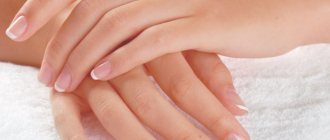
Oil baths to restore and strengthen nails
However, if for some reason this is not possible, you can treat damaged nails yourself at home. Once a week or even every other day, make a hand bath with olive or flaxseed oil. Nails are damaged, and the fastest and most effective way to return them to their proper condition is through oil treatments. During the treatment bath, you should gently massage the area around the nail to stimulate its growth. Due to frequent contact with oils, creams and other cosmetics, you should forget about varnishes at first.
Eating vitamins and other beneficial substances is an important part of nail care. You can purchase special medicinal preparations for nails, or buy vitamins in ampoules and rub them into the nail plate. Don't forget about your diet. Care should be taken that it includes a sufficient dose of all substances necessary for the body. This will speed up the process of restoring damaged nails after removing the extensions.
The speed at which damaged nails return to their proper condition depends on the intensity of their care and adherence to a proper diet, including all the necessary vitamins and minerals. It is especially important to pay them as much attention as possible at the initial stage of treatment.
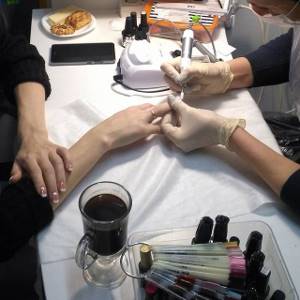
Description of the procedure
Since the router is mainly bought by manicurists, and you need to have enough experience to work with it, let’s look at how to remove extended nails using an acetone-based nail polish remover.
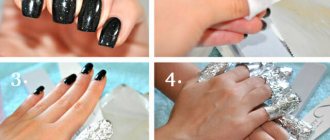
- First of all, remove the topcoat with a special liquid. You can file it down, but softening it is one of the safest options for nail health.
- In the second stage, soak cotton pads (10 pieces) in acrylic or gel polish remover, place them on your nails, and secure them on top with pre-cut squares of foil. Side size 8*8 or 10*10, etc. Make sure that the liquid does not come into contact with the skin, otherwise irritation and allergic reactions may occur.
@n_nails_vilnius
- It will take from 20 to 40 minutes to soften, so it is recommended to check each product yourself and not leave it longer than indicated in the instructions.
- Over time, the extended nail will soften and become loose. Remove it carefully with a cotton swab. Be careful not to damage the natural plate and skin of your fingers.
- Act quickly so that the material does not have time to harden again.
- Then soak a couple more cotton pads in the liquid and wipe each nail.
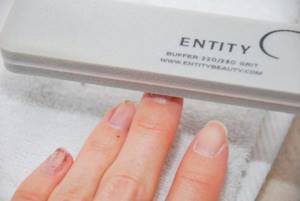
- Finally, run a finely abrasive buff over your nails several times to make their surface more well-groomed and shiny.
@nails_paradise_n
From gel
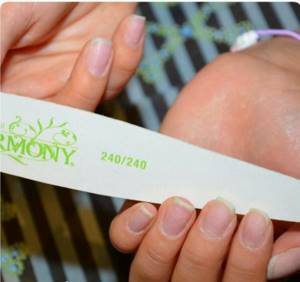
To remove the gel coating, the free edge of the nail is first trimmed. Then the entire surface must be removed using careful movements with a file, the abrasiveness of which is 80 * 100 grit.
Remove sawdust crumbs and dust using a special fluffy brush or also with a cotton pad soaked in the solution.
In order not to get carried away and to easily distinguish a natural nail from an artificial one, tap the nail several times. If the sound is dull and the coating is still hard, then the gel coating is still in place.
Do not create too much pressure on the plate, otherwise there is a high risk of cutting through your nails, which can have serious consequences. If the procedure is unsuccessful, take care of the issue of restoring your nails after extensions.
Continue filing the extensions until you reach the natural nails, and then buff them with a buff.
@manikur_irkutsk
Reasons for deletion
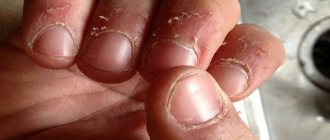
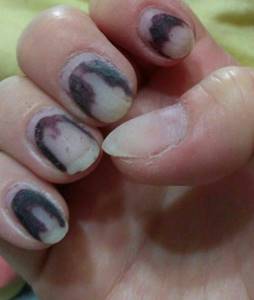
Gel, acrylic or other artificial nails must be removed periodically to allow regeneration and restoration of the natural nail plate. It happens that cosmetics manufacturers do not take this need into account, but if you neglect it, you will soon see that the extended nails no longer look attractive, and your own nails are very damaged. Subsequently, several weeks of intensive medical therapy may be required to restore and strengthen them.
Sometimes it happens that gel nails are subject to mechanical damage, which can cause them to break or peel off along with the natural nail plate.
Peeling gel nails
There are several important reasons why you have to get rid of them:
- Suspicion of significant destruction of the native nail due to continuous wearing of gel nails for months.
- Pregnancy and hormonal disorders that cause too high levels of moisture in the nail plate.
- Nail diseases, such as fungus.
Pregnancy, disorders and hormonal imbalances in the body can cause poor adhesion of the gel mass to the surface of the nail plate. The gel applies and sticks very poorly if it is too wet or oily. In turn, applying it if you have nail diseases will, for obvious reasons, harm them even more.
You can remove gel nails yourself at home, or by contacting a specialist in a beauty salon. In the second case, you will have to pay a decent amount for the procedure, so if you do not want to waste time and money, then you can get rid of the gel yourself. How to do this correctly and how to then care for your nails in order to restore them, we will look a little further.
Treatment with hot manicure and paraffin baths
A hot manicure helps you quickly restore your own nails after you have removed your extensions. When the nail plate is exposed to a hot nutrient composition, it becomes more permeable. This allows you to quickly enrich it with a variety of minerals and vitamins. But with the help of a paraffin bath you will additionally restore the water balance of your nails. It is recommended to do them immediately after you have removed your artificial nails. You can also do them after, once every 2 weeks. Before the procedure, first wash your hands well and apply cream to them. After this, dip them in special pre-prepared cosmetic paraffin. After a while, wrap your hands in cellophane and put on warm mittens. Walk like this for about twenty minutes and wash the paraffin off your hands. Apply cream.
Errors when removing the coating
Incorrect removal technique can quickly damage the natural nail. Common mistakes when removing artificial turf that can cause harm:
- Biting and picking at extended nails.
- Strong pressure on the router handle when using hardware removal.
- Using low-quality cutters for the machine.
- Filing the coating together with the natural nail.
- Using highly abrasive files when processing natural nails.
- Elimination of further care.
When should you remove extended nails?
There are several main reasons to remove your nails - besides the fact that you are simply tired of them:
- The nails began to come off on their own. No one is immune from the fact that the work of a manicurist or consumables for extensions turn out to be of poor quality. Then the artificial plate may move away from the natural one. In this case, the nails need to be removed, otherwise you can get caught in the detached edge and tear the nail off the pad. Even if you are extremely careful, dirt can get into the space between your nails and the polymer, which will have a bad effect on your health.
- The nails are very strong and it has become noticeable. In addition to the purely aesthetic side of the issue, you need to remember that a natural nail, as a rule, is thinner and more flexible than the artificial part. In the event of a sudden movement or a blow to the fingers, the nail may simply bend along the line where the extended plate is attached. Typically, it bends about halfway down the natural nail. It is very painful and can injure you.
- Protrusions or depressions have formed; nails simply began to look unnatural; you don’t feel comfortable and confident with your nails, you’re afraid of catching them, etc. There is no need for explanations here - it’s time to take off your nails, beauty should not be at odds with convenience.
Sawing
Filing is suitable for both gel and acrylic nails. Only in the second case will you have to tinker longer, since acrylic is much stronger than gel.
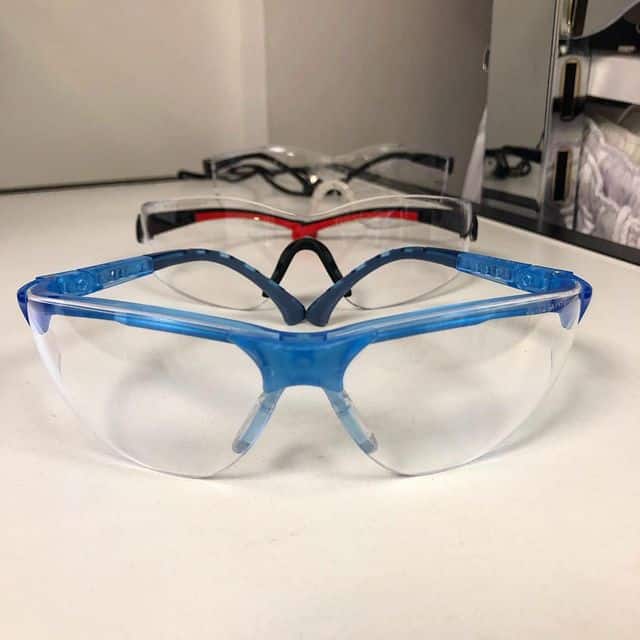
- You will need files with an abrasiveness of 80-100 and 150-240 grit, a tip cutter, cotton pads, a primer, a buff, a pusher, and a mask.
- Put on a mask before starting the procedure, because there will be a lot of dust. First use a type cutter. Trim the entire length of the extended nail, taking care to cut the length right below the root. Take a stiff file and start filing away the gel. Your movements should only be in one direction. File off the gel carefully, in layers, periodically brushing off the dust.
- When there is little gel left, be on the lookout, because your natural nail is already nearby. Try not to damage it with a hard file, so file away the gel with calmer movements. When you definitely see part of your nail, change the file to a softer one and continue filing.
- Do not pick up the gel, but file it away with calm, smooth movements. When the gel is finished, it’s time to do a trim manicure and be sure to buff your nails in the process. And then you should apply cosmetic oil or moisturizer to the nail.
Products needed to remove gel nails
If you have done your nail extensions with gel and don’t know how to remove them, then you need to first decide on the choice of products that will help you with this. So, you will need to purchase:
- Special manicure tweezers.
- A fairly wide file that is highly abrasive.
- Another file with super-high abrasiveness.
- A brush that removes gel dust.
- A buff file designed for polishing the nail plate.
- Discs made of cotton wool.
- Acetone solvent.
- Goggles for eye protection.