The article answers possible questions from those who are removing extended nails at home for the first time. Before you start removing gel or acrylic nails, you should find out what and how to do, evaluate the result, and analyze the pros and cons of existing methods.
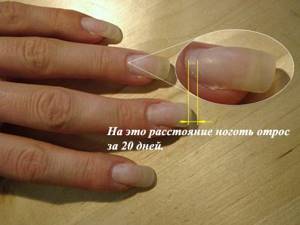
IMPORTANT: Manicurists recommend removing artificial nails two to three weeks after extensions to avoid disrupting the natural process of nail growth.
Removing extended nails does not require special knowledge, skills, tools, or materials. The process is quite simple and does not require the participation of a specialist.
IMPORTANT : Before you start removing artificially extended nails, remember what material the master used. The removal methods for gel and acrylic are different!
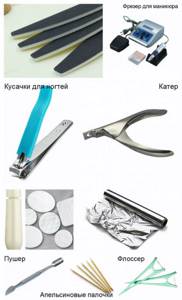
Nail Remover Tools
To remove gel nails, you need the following tools:
• nail clippers or crankcase; • a rough nail file (abrasiveness (grit) - 80/80, 80/100) or a manicure cutter.
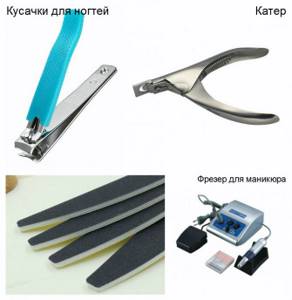
To remove acrylic mass from the nail plate you will need:
• manicure nail clippers or cutters; • acrylic remover or any acetone-based product (acetone); • cotton sponges; • aluminum foil, cut into squares 8x8 cm. Number of squares - 10 pcs; • pusher, orange stick or flosser.
How to remove gel nails yourself? Removal instructions
IMPORTANT : Gel overlays do not soften under the influence of solvents! They need to be cut down. It may take 5-10 minutes to treat one nail plate.
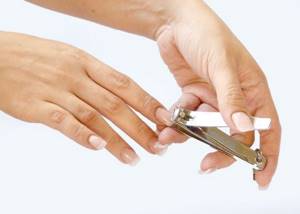
1. To reduce the area of cutting, nails must be shortened with nail clippers or a nail clipper. This must be done very carefully so that the gel does not crack or injure the natural nail plate.
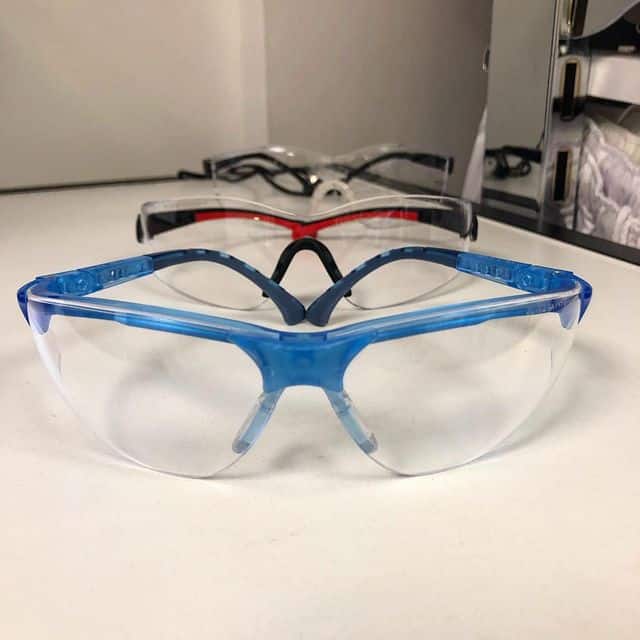
IMPORTANT : When shortening artificial nails, be extremely careful. When removed, the free edges of artificial nails can shoot off, injuring the eyes. To protect yourself, place your hands in a clear plastic bag or use safety glasses.
If the gel layer is thick enough, first cut it down to the desired thickness as shown in the diagram.
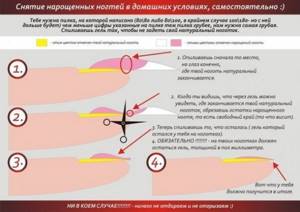
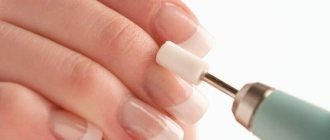
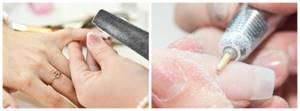
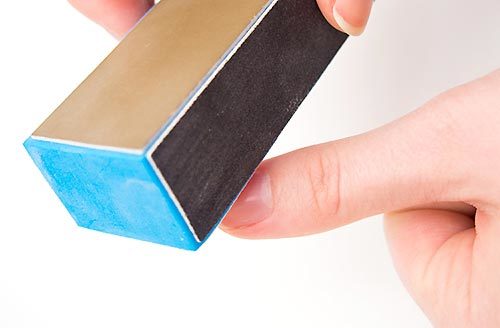
2. Using a coarse file with large grain or a manicure router, file off the gel material from the nail.
IMPORTANT: To remove the gel, glass files, a metal tool with a notch, European stone, or a buff are not used.
IMPORTANT: When cutting, a lot of dust is generated. It is worth taking care to protect the respiratory tract.
Rules for filing the gel coating (for filing): • start with your left hand (for right-handers); • hold the nail file between your middle and thumb; • pressure on the file is applied with the index finger; • protect your fingers in contact with the file with adhesive tape. Fingers will not slip and get injured; • the finger from which the gel is cut off is held or fixed; • From time to time, the removal of the gel must be controlled so as not to damage the natural nail plate.
IMPORTANT: A 0.5 mm thick layer of gel should remain on the original nail plate.
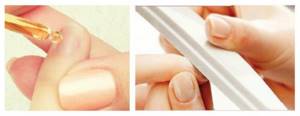
3. After removing the nails, polish the nail plate with a buff or polishing file. Before starting sanding, it is recommended to apply olive oil to the nail.
IMPORTANT: While polishing the nail, move the tool in one direction so that the nail does not heat up.
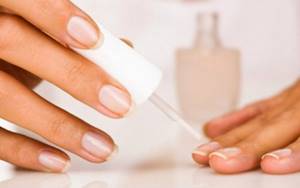
4. At the end of the procedure, it is recommended to cover the nails with strengthening varnish.
General recommendations
Removing extended nails has its own specifics, which depend on the material used. First of all, you should understand that the glass and metal files familiar to many will not cope with the task.
In any case, regardless of the material, do not cut the extended and natural nails to the very root. Leave a length of 0.5-1 mm so that you can make a correction without damaging the natural nail.
When filing excess material, a very large amount of dust gets into the air. It’s good if you have a special hood at home that is used by manicurists. Otherwise, it is better to open the window, wear safety glasses and a mask.
@medprofessionalmsk
How to remove acrylic nails without consequences? Removal instructions
Method I: Using nail remover or acetone-based product.
1. Remove the free edge of the base with nail clippers or a carpenter.
2. When adding extensions, acrylic overlays are coated with a special compound that needs to be cut off, otherwise it will prevent the base material from softening during the removal process.
3. Apply a sponge soaked in acrylic remover or acetone-based nail polish remover to each nail. The sponge can be cut to the size of your nail.

IMPORTANT: Before treating the nail with liquid, it is recommended to lubricate the cuticle with Vaseline.
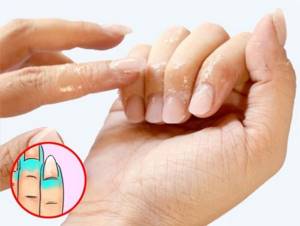
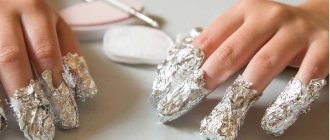
4. Secure the sponges to the nail plates by tightly wrapping them with foil. This prevents the liquid from evaporating and retains the heat necessary for the chemical reaction to begin.

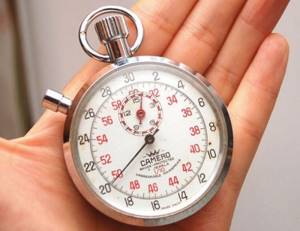
5. Remove the foil with sponges after 30-40 minutes. If the acrylic continues to hold, repeat the procedure (10 min.)
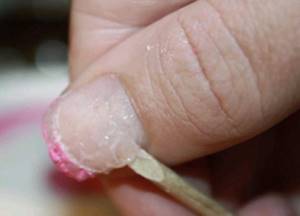
6. Remove any remaining coating using a pusher or an orange stick.
7. Polish your nails with a polishing file or buff. Apply healing varnish.
Method II. Sawing off the acrylic layer.
The process is identical to removing gel nails.
Method III. Using dental floss.
1. Using a pusher or wooden stick, lift the entire lower edge of the acrylic plate (from the cuticle).
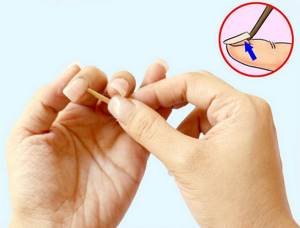
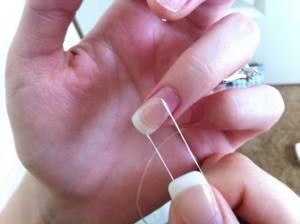
2. Place dental floss under the bottom edge of the nail.
3. Slowly and carefully advance the thread while slightly lifting the acrylic plate.
4. After removing the artificial coating, the natural nail plates are polished.
IMPORTANT: Regardless of the method of removing artificial nails, the natural nail plate requires close attention and care during the recovery period.
What is the difference between gel and acrylic?
When applying nail extensions, gel coating, unlike acrylic, cannot harden on its own: exposure to ultraviolet radiation is required. Therefore, the master uses a special lamp. The gel composition is easy to distribute and level on the surface of the nail using a brush. Acrylic must be cut out to obtain a perfectly even coating. If you need to achieve pronounced shine or transparency, it is better to use a gel. Acrylic does not give a similar effect: the nails will be more matte than shiny. The service life of gel and acrylic is the same. Corrections are made approximately once every 3-4 weeks.
The technologies for gel and acrylic extensions are somewhat different, which is why gel and acrylic nails are removed in different ways.
Cuticle oil: effect on nails
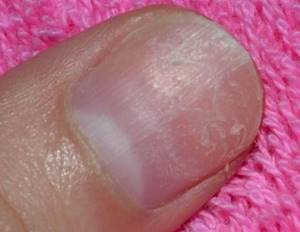
In the process of removing artificial coating, in addition to the native nail, the cuticle also suffers. The skin around the nail plate dries out and cracks.
Cuticle oil is a nourishing agent that • moisturizes, • saturates with vitamins, • prevents peeling of the skin around the nail, • activates the growth of the nail plate, • improves blood circulation.
Cuticle oil is used every evening until the nails are completely restored. The product is rubbed into each nail in turn. Remains on hands until completely absorbed. The nail restoration process takes several weeks.
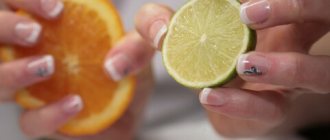
You can make your own cuticle oil. The basis of any product for caring for the nail plate and surrounding skin is essential oils. To eliminate thinning and splitting of the nail plate, bergamot, patchouli, and ylang-ylang are used. General strengthening of nails will be ensured by the use of lemon, eucalyptus, chamomile, lavender, rosemary, thyme, and tea tree. An alternative to essential oils can be 5-6 drops of lemon juice.
Use essential oils in combination (2-3 types). This will speed up the recovery process.
Add a few drops of your favorite essential oils to vegetable oil (olive, hemp). The required amount of vegetable oil is 25-30 ml. Vegetable oils can be mixed, for example 15 ml of grape seed oil and 10 ml of jojoba.
It is advisable to add 1 capsule of vitamin E to the oil mixture.
Features of professional products
In stores there is a special product for removing extended nails. The remover is produced by such brands as CND, OPI, Harmony, etc. They will provide reliable protection of the plates and cuticles from drying out, making the manicure removal procedure harmless.
Liquid for removing extended nails is used similarly to acetone. It is also applied to a cotton pad and secured with foil. However, it gently and carefully removes the gel. Many of them contain vitamin E and oils, which have a moisturizing effect, prevent drying of the plate and cuticle, and prevent the appearance of white spots on the natural plate.
Removing nails: tips and reviews
Ekaterina, 25 years old, Rostov-on-Don
A friend uses foil with already fixed sponge squares to remove the acrylic coating. Very comfortably.
Anna, 30 years old, Moscow
At the dacha I had to remove the gel myself. The process is quite labor-intensive. Requires attention, strength, patience. But everything went well! If you can’t get to the master, you can work hard.
Anastasia, 22 years old, Pavlovsky Posad
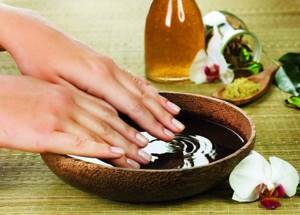
I removed acrylic nails using an acetone bath (on the advice of a friend). Horror! The pungent smell of acetone and dry hand skin.
The next experiment was with sponges and foil. Simple and accessible. The main thing is not to forget to cut off the top coating from the acrylic.
The layers came off quickly, the nails practically did not need restoration.
An interesting method with dental floss - you have to try it!
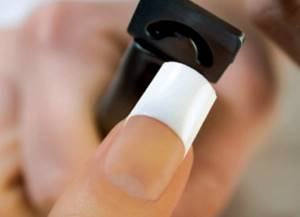
Is it worth getting a special device?
The process of removing nail polish can be tedious. You have to remove the gel manually with a file. To reduce time and your efforts, you can purchase a special device. As a rule, lovers of home procedures purchase non-professional devices for these purposes, which are available in any specialized online stores. It all depends on you and your capabilities, including financial ones. It is not recommended to buy a professional device for the home; the point here is not only the high price, but also the ability to use it, since without the appropriate qualifications, you can harm natural nails without calculating your strength.