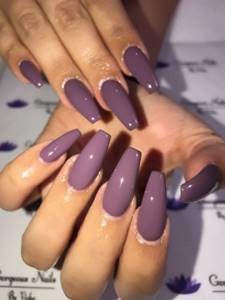
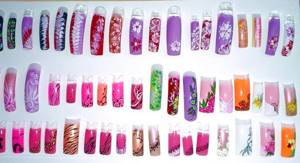
Anyone who has ever had their nails extended knows that tips are special plastic tips for nails that make your nails longer. They are also used to practice painting the nail with complex patterns and interesting prints on it. And famous manicurists use such sets of tips to demonstrate their skills in nail coloring, show their clients the patterns that they can get from them, or simply demonstrate sets of available color palettes of nail coloring products.
Short story
Previously, such nail tips were made from all kinds of materials. People paid attention to plastic as an object for creating tips only in 1970. At the same time, many problems arose with tips, since they were created with their own hands, and the tips themselves were too thick and hard. Mass production of tips began only in 1974, when a new technology for their creation was invented. And at that time their price was very high; their service life reached up to seven months.
Method number 1. Orange stylus and acetone
- Dip an orange stick into pure acetone. Pry the edge of the artificial plate in the cuticle area. Using a pipette, scoop up a little liquid to remove nail polish and pour the contents under the false nail.
- Wait 5 minutes, then perform the steps again. When the substance takes effect, it will be very easy to remove unnatural attributes of beauty.
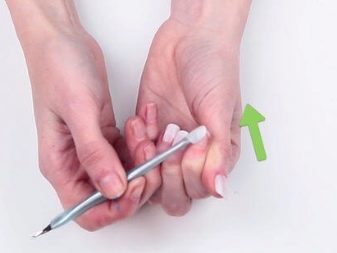
- You need to pry the edge of the nail with the sharp corner of the stylus, then try to remove the accompanying object from its plate. Do the steps with each nail one at a time.
- When all the tips are removed, soak a cosmetic sponge in nail polish remover and wipe your nails. In this way, you will clean the plates from any remaining glue.
Remove nail polish without acetone: 3 effective ways
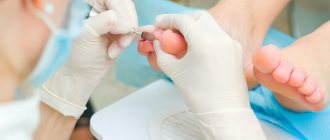
Preparing for the process of growing beautiful nails
The first step is to treat the hands of the client and the master with an antiseptic, and don’t forget about the tools. They also need to be disinfected. Surely everyone already understands why this is being done, but it is worth clarifying that all this is to avoid any infection of the client’s nails and skin. A person who never neglects this point of action looks in the eyes of his client as a more responsible and professional master of his craft. Never think too highly of the cleanliness of your tools and hands. Remember that this is always fraught with negative reviews about you, and, accordingly, a decrease in the number of your clients and their payment for your work. Nobody wants to harm the health of their nails and hands.
Method number 2. Hot bath
- This technology is deservedly the safest. To remove artificial nails using glue on your own, prepare a basin and chamomile.
- Pour boiling water over 100 g. plants, pour 100-150 ml. any real oil (olive, sunflower). Leave until partially cooled.
- When the mixture reaches the optimal temperature, dip your fingertips into it. Leave the hand bath until the plates become soft.
- Prepare a wooden stick and try to pry the edge of the unnatural nail with it. If the tip comes off partially, pour nail polish remover under it.
- Detach the artificial attributes from the real plate. Remove the glue using a cotton swab soaked in acetone. After the procedure, wash your hands and rub vegetable oil into your nails.
Remove nail polish without acetone: 3 effective ways
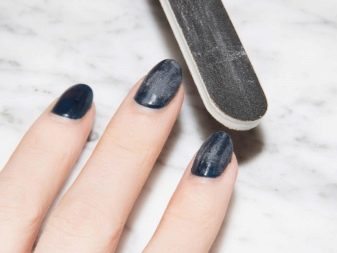
Creating the required form
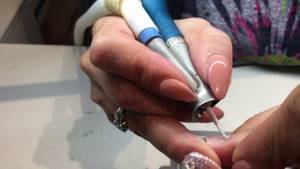
Now take a cutter (in other words, a tip cutter) in your hands and shorten the tip to the length that your client desires, create the desired shape of the extended nail.
If you adhere to the acrylic technique of creating a manicure, then at this stage cover your work with acrylic. Once the nail is shaped, sand it down and polish it using buff.
Or are you a fan of “gel” works? In this case, the resulting form should be coated with a bronzer so that the gel adheres even better to the natural nail and does not peel off. Only after this can you apply gel polish in two stages.
Your work is ready!
Recovery after the procedure

Any manipulation with the use of solvents cannot but affect the health of natural nails. Therefore, great attention must be paid to restorative care. Here are some useful options:
- professional products (firming creams, coatings, oils), each of which solves a specific problem (flaking, darkening, thinning);
- nutrition, taking synthetic multivitamins (with sufficient calcium, B vitamins) and supplements (omega-3 or fish oil);
- salon services: paraffin therapy, baths with medicinal compounds, “sealing”;
- homemade baths (salt, oil, with the addition of iodine) also give an excellent effect when used in combination.
If there is no serious damage, it is enough to cover your nails with a layer of fortified varnish and give them time to recover on their own.
How to remove tips from nails?
A beautiful manicure is happiness for any girl. But we all know that, unfortunately, you can’t live with this happiness all your life. Either the nail will grow back, or you will simply get tired of the monotonous manicure, and your nails simply need a break from such a “heavy burden” in the form of tips with acrylic or gel. How to remove extended nails on tips? It’s a pity that some ladies don’t ask this question prematurely and don’t consult their master. Well, that’s no problem! After all, in this article you can learn how to properly remove tips from your nails and not damage any of your nails!
Nail care after removing glue
It is important to note that the procedure for removing false nails using glue greatly spoils the appearance of the nail plate. After removing tips, nails become weak and dull. Therefore, immediately after the procedure, it is recommended to apply a nourishing mask or cream to them. You can buy a mask in a store or make it yourself. For example, a mask made from mashed potatoes will quickly restore a damaged nail plate and return a neat appearance to your manicure. To do this, simply put mashed potatoes on your fingers, wrap them in cling film, and after 20 minutes, rinse with warm water. After using the mask, you should use hand moisturizer. Vitamins A and E, which should be added to cosmetic formulations, will help increase the effectiveness of a mask or cream. These vitamins are sold at any pharmacy in capsule form.
We also recommend that you purchase antifungal nail creams at the pharmacy and use them at least once a week. This will serve as an excellent prevention of fungal infection, which often affects women who use artificial tips.
And do not forget that at least two weeks must pass between the procedure of removing nails and re-gluing new tips.
Getting rid of tips without leaving home
Now is the time to thank the beauty industry! After all, she took care in advance of how to remove the extended tips. It's quite simple. So simple that now you can even learn how to remove tips at home. First you need to purchase a special liquid at a cosmetics store. Don't worry about how to remove tips anymore, just apply this product to your nails and wait a while. But after this, you must rub nutritious oil into the plate.
If such a product is not available in your stores and you still don’t know how to remove tips, then don’t despair! After all, there are other ways... Firstly, you can use regular acetone. And this method will cost you much less. But, in this case, don’t forget about the nourishing oil!
When pseudo-manicurists are asked how to remove tips, they may advise you to simply tear them off. This is because over time your nail grows and the damaged area grows back, but it is still not recommended to resort to this method! It's quite easy and fast, but what harm can it do to you!
Another way. Determine by eye where your natural nail ends and file that area. Trim off any remaining “growth.” After this, cut off the remains from your own plate. Experts recommend leaving half a millimeter of the gel untouched. Under no circumstances should you tear off or chew something off.
Have you settled on the acetone method? Then here are some more tips for you. Instead of immersing your nails in acetone, you can moisten a cotton pad with it and place it on your manicure. To speed up the process of removing nails, wrap your tips with cotton pads soaked in acetone and regular foil.
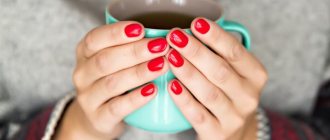
You can get rid of an artificial nail by taking a hot bath or simply immersing your manicure in a container of warm water for a while. The “growth” just has to fall off on its own. But keep in mind, this process can take quite a long time! In most cases, it all depends on the quality of the glue used.
Now you know how to remove tips!
Basic withdrawal rules
For professional or home removal of extended nails, there are basic rules for completing the task.
Gel based
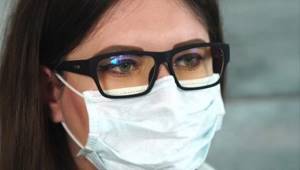
Unlike acrylic material, gel tips will be more difficult to remove from the nail. The main reason for this is the specificity of the material itself, because the gel is quite durable and durable, so it cannot be dissolved in anything or chipped. Removing tips yourself will require not only some effort, but also time. The main work will concern the use of a nail file, and since the process itself will be very dusty, it is worth taking care in advance to protect the eyes and respiratory tract. Therefore, work must be performed wearing a mask and goggles.
Technology of work.
- First of all, you need to deal with the top layer if the length of the nail has already been previously removed. To prevent pain on the fingers that will hold the instrument, it is recommended to put a finger guard on them or temporarily cover them with a plaster. When removing material, you should regularly remove dust from the plate in order to visually determine at what stage the work is: for this you should use a brush and also acetone.
- After the material has been completely removed, you should polish the plate with a buff, push back the cuticle with a stick, and apply a moisturizer to your fingers.
Some experts recommend leaving a small layer of gel on the nail plate to further strengthen it, however, this is not mandatory.
Acrylic based
Acrylic is a fairly popular material for nail extensions. To remove it, one set of nail files will not be enough. As a rule, the effectiveness of the removal procedure will increase many times if you use a special composition that can dissolve the material. If such a product is not available, you can resort to using your usual nail polish remover, but the product must contain acetone, otherwise the product will be useless.
Removing acrylic requires the following steps.
- First, you need to make small plates from food foil yourself; their size should correspond to the phalanx of the finger with the extended nail. In addition to the foil, you will need 10 cotton pads. This material will be useful after working with a nail file.
- Use the rough abrasive side of the nail file to remove the acrylic layer. Typically, the top layer is the toughest, so removing it can take a lot of effort and patience. But the top composition must be completely removed from the nail plate.
After the removal task is completed, you need to moisten the discs with acetone or another suitable product and cover the entire nail with them, then wrap them with a piece of foil. A covering layer of foil will help retain volatile substances that are responsible for the dissolution of acrylic. Nails should be kept in this state for about half an hour. Over time, the acrylic will change its consistency and become jelly-like.
It is not difficult to remove the substance in this form from the nail, however, during this procedure it is very important to act quickly so that the material does not become hard again. After contact with the above substances and final removal of acrylic, it is necessary to thoroughly wash your hands with soap, and also apply a softening and nourishing agent to the nail plate and skin.
Shellac based
It is most convenient to remove shellac from each hand separately. The material removal procedure requires the following steps.
- Regular cotton pads can be used whole or divided in half. Each disc must be moistened in nail polish remover, then placed on the nail plate and covered with foil, as is the case with acrylic. Keep the product on your nails for 20–30 minutes.
- After contact with the product, shellac can be removed from the finger with an orange stick.
- Most often, after removing gel polish from a nail, its surface will become rough and bumpy. Therefore, the plate will need additional grinding. For these purposes, you should use a manicure buff.
Another way to get rid of gel coating without foil is to use a water bath. For this method, you need to take two small plastic containers: pour hot water into one, and pour the contents of a bottle of acetone-based nail polish remover into the second.
It is important that the container with water has a larger diameter in order for the bowl of acetone to fit into it
You should wait until the acetone warms up, then leave it on your nails for about 15 minutes.
When the material begins to move away from the nail plate, it can be carefully removed from the nail with your fingers or a stick.
Method No. 5. Bath of nail polish remover
- Wipe your fingers with an antiseptic (peroxide, miramistin, chlorhexidine, vodka, medical alcohol, etc.). Rub olive oil into your nail plates and do the same with your skin. Leave the mixture for fifteen minutes, repeat the steps 2-3 times.
- Such a move will make it possible to reduce the impact on sensitive areas, because the fingers will descend into the acetone-containing composition. Next, lubricate the skin around the nails with baby (very greasy!) cream, making a thick layer.
- Prepare a small bowl. Pour 1 bottle of nail polish remover into it. Dip the ends of your fingers into the product; it would be a good idea to trim the edge of the tips in advance.
- Wait 5-10 minutes, then pry up the artificial covering with a stylus in the cuticle area. Remove your nails and immediately wash your hands with antibacterial soap.
- Soak the sponge in nail polish remover and remove the remaining adhesive base. Disinfect the plate with hydrogen peroxide and rub in olive oil.
- Extreme caution must be exercised during the procedure. If you feel even the slightest burning sensation, remove your fingers immediately. Wash them and disinfect them with miramistin.
How to glue false nail tips with super glue at home???
Remove nail polish without acetone: 3 effective ways
How to glue false nail tips with super glue at home???
Professional products
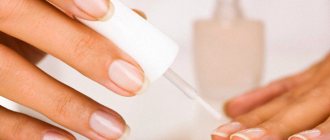
If you decide to remove extended nails, you can use a special remover. This is a professional product that can deal with tips without much harm. But first, you still have to work a little with a nail file. It is necessary to cut off all the gel or acrylic and shorten the tip itself. Then you should moisten cotton wool with this product and apply it to the nail for about 1 minute. The artificial material must dissolve. Before the procedure, prepare the skin and cuticles by lubricating them with special oil. Of course, if you don’t constantly injure your hands like this, then buying such a product is expensive. It is better to contact a professional or use our instructions.
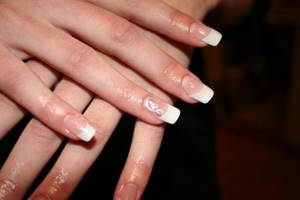
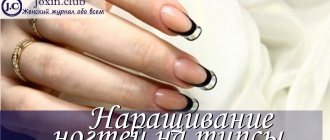
A small excursion - what are tips?
These are the tips, you can click on the photo to enlarge it.
Perhaps for someone to know what tips are and what they are made of is unnecessary, and yet I repeat, those who don’t know, read, let the rest skip this section.
A tip, translated as a tip, is a synthetic template that has the shape of a nail, is very similar in composition and, most importantly, is easily glued, adheres well to the nails and is easily removed, practically without damaging the nail.
It can be easily processed using a file or a tip cutter - but I still advise you to select tips in the shape of your own nails as closely as possible, the choice is now wide. Tips are sold in packs of 10 pieces. You should always take it with a reserve, in case it gets ruined; not at first, this happens often among novice masters.
Buy tips of the shape you like and the right size, at least a little more (well, why tell me, you need extra work with filing). The appropriate size is when the tips fit tightly, without adjustment, on your nail, and do not protrude beyond its edges. And also pay attention to their elasticity; tips, like natural nails, tend to break.
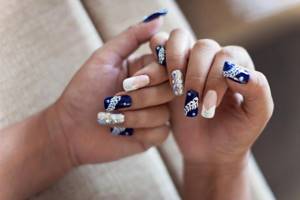
Overview of false nails
Kiss, Hard gel polish “Impress”
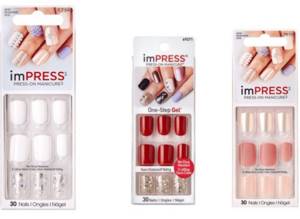
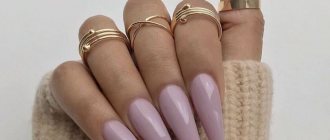
False nails with the mysterious name “hard gel polishes” are the same tips, but with an adhesive composition applied to them, activated by the heat of the hands. There are short and long options with different designs - plain, with sparkles, various abstract patterns.
The set includes:
- 24 or 30 records;
- file;
- orange stick;
- degreasing wipe.
Wearing period is up to 10 days.
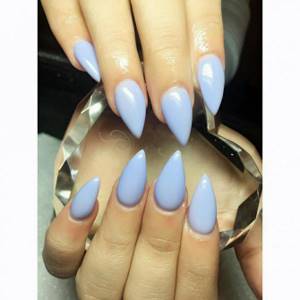
Miami Tattoos
Miami Tattoos false nails are attached with the included adhesive. The kit also includes a small file and a plastic pusher to prepare the fingers for gluing. Each package includes 24 records of different sizes. If worn carefully, apply several times.
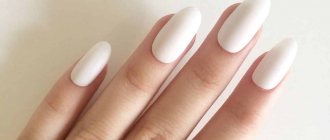
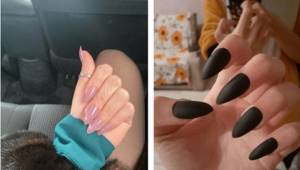
There are different minimalist designs and shapes, as well as lengths. Matte plates are especially popular.
Wearing period is up to 14 days.
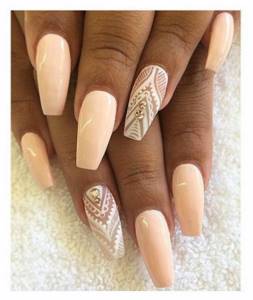
Touching Nature
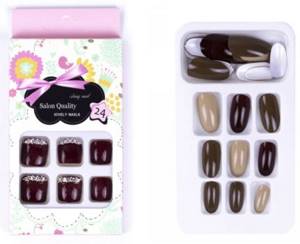
Touching Nature has overlays for both manicures and pedicures. The kit includes glue in a separate bottle, as well as 24 plates of different sizes. Repeated use is acceptable, but as practice shows, during wear the design wears off and using them a second time is simply pointless.
Wear up to 15 days.
Blumery
Blumery false nails for express manicure are tips with an elastic coating that, when exposed to the heat of the fingers, takes the shape of the nail plate. The adhesive base has an unusual format - the adhesive parts come separately from the tips - they need to be inserted inside and then pressed against the nail plate. The glue works on the principle of double-sided tape. There are 24 pieces in the set.
Wearing period is 7 days.
Extensions on top forms with examples and instructions