Rating: 5/5 (5)
There are situations in life when you simply need to turn into a prom queen in a short time, so that no one has any doubts about it. An ideal manicure is one of the components of transformation, which not only complements your image, but also helps you gain confidence in your own charm.
It's no secret that real design masterpieces are achieved on long nails, but growing them naturally often lacks the patience and desire. In addition, nails often peel and break, and manicure turns into a terrible sight . Fortunately, modern cosmetology offers an alternative to tedious nail growing - artificial nail extensions. There are different extension technologies, but the technology of nail extension with tips is the simplest procedure in terms of technique.
give their nails a presentable and impeccable appearance in just a few hours . Let's take a closer look at what extension tips are and what they come in, and together we will look at step-by-step instructions with video training on how to properly do nail extensions with tips.
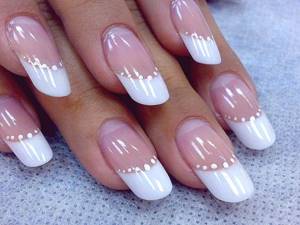
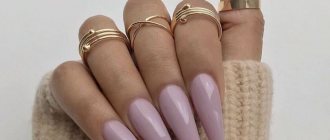
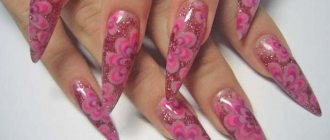
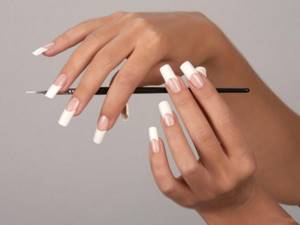
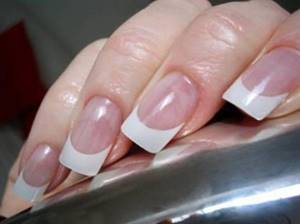
Photo of the final result after nail extensions using tips
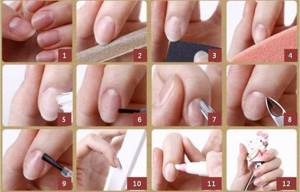
Preparing nails for extensions
- Use nail polish remover to remove old manicure from nails.
- Wash your hands thoroughly or gel and rinse off the foam with tap water.
- We dip our fingers into a bath of hot water - this will allow us to painlessly remove cuticles and hangnails.
- After six to ten minutes, remove your hands from the water and dry them with a towel.
- Using nail scissors with rounded ends, carefully remove cuticles and hangnails. If you feel that your cuticles have hardened again , dip your fingers in warm water for a short time.
- After treating your fingers, rub a few drops of essential oil into the areas where you cleaned. In addition, I advise you to additionally use a moisturizer, which will make your hands soft and give them a pleasant smell.
- Finally, use a nail file to trim your nails and give them the desired shape.
Nail extension on tips with acrylic
The technology of nail extension with acrylic tips is considered accessible to everyone and does not require any skills at all.
We will need:
- tips;
- nail file;
- glue for gluing tips;
- tip cutter for correcting the shape of the tip;
- brush for applying acrylic;
- primer - a means for preparing the nail before directly applying acrylic;
- acrylic and acrylic powder;
- fixative
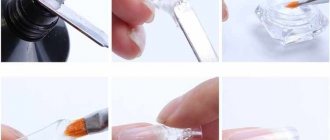
Nail extension process:
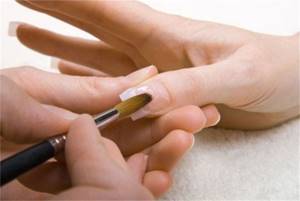
- We treat the surface of the natural nail with a nail file, polish it and degrease it. This procedure promotes better bonding of tips with natural nails.
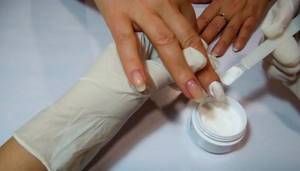
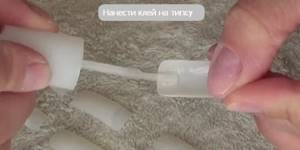
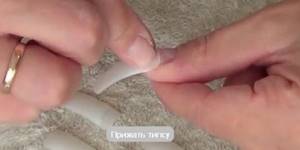
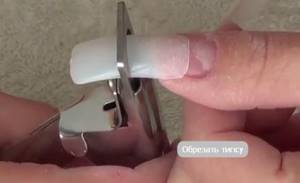
- We select corresponding to the width of a natural nail tips and glue them to the nail surface using glue: apply glue to the part of the tip where it will stick to the nail, then press it to the nail surface and hold it in this position for 8-10 seconds. Remove excess glue with a napkin. If the length of the nail does not satisfy you, you can adjust its length with a tip cutter.

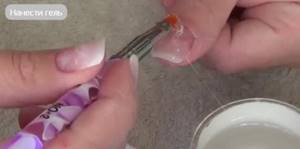
- Using a brush, cover each nail with a thin layer of primer.

- Gently apply acrylic to the prepared nail: in the center of the nail apply more acrylic, then, moving to the edge of the nail, reduce the layer of applied material.
- After the acrylic has completely dried, we remove all errors and inaccuracies using a nail file.
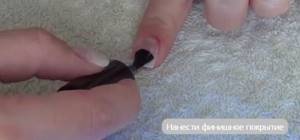
- Finally seal the result finishing coat - fixer.
Nail extension with gel tips
We will need:
- modeling gel;
- tips;
- brush for applying gel;
- type cutter;
- glue for gluing tips;
- nail file;
- UV lamp for extensions;
- degreaser.
Nail extension process:
- Thoroughly polish the surface of the natural nail and degrease it.
- For each nail we select tips of the appropriate size .
- Apply a drop of glue to the part of the tips that will lie on the nail surface.
- Apply the tips to the nails and press firmly for a few seconds.
- Extra remove glue with a napkin or cotton pads, using a tip cutter we adjust the shape and length of the tips.
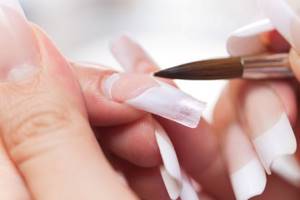
- Using a brush, place the gel in the middle of the nail and carefully distribute it evenly over the entire surface, being careful not to catch the skin and cuticles.
- To harden the gel, place the nails under an ultraviolet lamp for 3-5 minutes.
- After this, apply a second layer of modeling gel and also dry it under the lamp.
- Using a napkin or degreaser, remove the sticky fatty layer that remains after drying under the lamp.
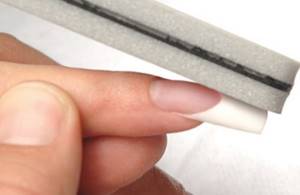
- Using a nail file, we level and polish the surface of the nail , and remove the remaining dust after sanding with a damp cloth.
- Finally, we cover the nails with colorless gel polish or any other topcoat.
Features of the method
Tip extensions are a common procedure. The free ends of a natural nail are lengthened using a plastic template, which is subsequently given the selected shape and color. The material is selected taking into account the individual anatomical shapes of the fingers and nail rim. The plastic blank consists of two parts:
- a refined contact zone that is glued to the natural nail;
- compacted free edge.
The two surfaces are fixed with gel or acrylic.
Artificial plates are produced transparent, colored or with ready-made artistic painting, which significantly reduces the time to complete a manicure. Colored plates fixed on natural nails simply need to be covered with a topcoat.
Fashionable ideas for nail extensions using tips
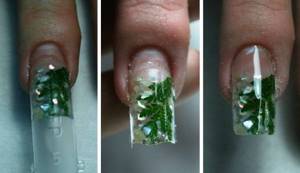
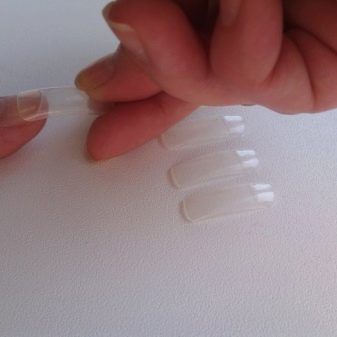
Liquid tips
Liquid tips are reusable plastic forms that are used to create the base of an artificial nail. Liquid tips are used for nail extension in both acrylic and gel technologies . Their shelf life is up to two years. Liquid tips are often used to create an arched jacket for the smiley line, and you can also lay out an aquarium design. Liquid tips can also be used on problem nails.
Sharp tips
This shape of the tips visually lengthens your fingers and makes them especially sophisticated . Pointed nails are associated with passion, maybe even a little aggressiveness and courage of the person wearing such nails. However, nail extensions with sharp tips are absolutely not suitable for owners of thin and long fingers - the result will look stupid and ridiculous.

There is one more nuance, the low strength of the pointed edges of the nails, so that with an awkward and careless movement, a crack instantly appears , which is practically impossible to correct.
Square tips
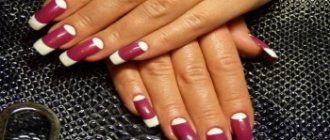
Extension of square tips looks very natural and harmonious , making the shape of the nails more sophisticated. The special popularity of square-shaped nails became established after masters released the “French manicure” style into the world. However, it is worth remembering that owners of short and chubby fingers are not recommended to use such extensions - the appearance will be inappropriate and prim. The square shape of the tips is practical and versatile, and also does not require any restrictions during use.
Oval tips
The oval nail shape is the most popular and is considered a traditional and classic shape. If you follow all the rules when applying extensions, the free edge of the nails mirrors the contour of the cuticle, which allows you to create an ideal balance between them, which suits almost all ladies.
This type of extension is especially recommended for owners of short and chubby fingers. It is worth drawing your attention to the fact that people with long and thin fingers should not use square tips - they will visually lengthen the nail and finger, which will seem very ugly to observers.
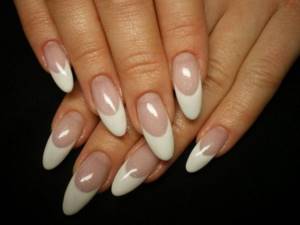
Almond tips
The almond shape will give your fingers extra elegance and grace. This form always looks very natural and natural , because it most accurately follows the natural contours of the shape of a natural nail. Acrylic extensions on almond tips look natural and are considered more durable, and the nails will retain their freshness and last up to four weeks.

Types of tips and tips for choosing
Tips translated means “tip”. These are plastic blanks in the shape of a nail, which differ in size and shape. In essence, these are peculiar templates that will give the desired shape to the modeling agent in the process of increasing the length. They will also correct the convexity of the nail plate, preventing the effect of pecking nails and excessively large convexity.
By purpose
It is a mistake to believe that all tips are the same. In fact, they may differ in color and purpose, because they are selected in accordance with what the final manicure technique will be. Transparent options and templates of natural color are intended for building up and further covering the created base with gel polish. If a French design is planned, they differ in thickness. Compared to other varieties, they are thinner.
The line also includes varieties with colored backgrounds and ready-made designs. These are, in fact, ready-made solutions, although if desired, the former can be decorated with some kind of print, and the latter can simply be coated with transparent varnish. In addition, the options can be universal, with sufficient bending and large bend. The bending of the frame is necessary to ensure that the extended nails look beautiful and natural.
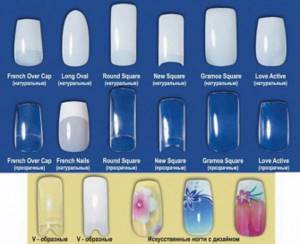
By shape
The shape of modern tips is variable. On the shelves of brands you can find different options for every taste. Today there are 5 types of tip shapes.
- In the classic version, these are blanks with a natural and smooth bending shape. As a rule, they are sold in sets at affordable prices. Such varieties are often used by nail service professionals when performing nail extensions on clients.
- Other options include straight tips that do not have a contract zone. For this feature they are called non-contact, they are extremely convenient for performing French. These varieties are also inexpensive, and buying them today is not difficult. On average, a package of one hundred pieces will cost 150 rubles.
- When you need to create a special narrowed shape, you buy tapered tips. They can be used in building and shaping stilettos, bridgette shapes and cat nails.
- Many people want to make an “American” uniform. In this case, you need to buy curved tips.
- The last variety is tips for the shape of almonds. These products allow you to build the correct almond shape in a short time. They are characterized by different lengths and may or may not have a contact zone. Their cost is approximately the same as the cost of blanks for stilettos (about 150 rubles for 50 pieces).
According to manufacturing materials
Nail extension tips are made from different materials. For example, one of the quite popular solutions today are the so-called liquid varieties. These are reusable options that are made from special polymer raw materials and are characterized by a flexible structure. For beginners, this is the most convenient and easiest way to do nail extensions. It does not require a large number of tools and materials, although it does not do without a special drying lamp, which is usually used when working with gel polish and gel.
Tips are made from plastic, nylon and polyflex. Each type of material has its own nuances. For example, plastic products are considered quite durable and preferable for work. Plastic is temperature resistant, easy to clean, and convenient during the extension process. If you need to extend your nails with gel, then it is better to choose options from polyflex. Such solutions are quite flexible and resistant to acetone. As for nylon varieties, they are not suitable for beginners, since they can be problematic in fixation, but it is worth noting that nylon holds its shape well.
Video tutorials on nail extensions using tips
In the modern world, manicure can safely be called an integral part of a complete elegant look. It often happens that our nails are so brittle that this does not allow us to grow them to the desired length and give them the required shape. To solve all these and many other problems comes nail extensions using tips. Extended nails not only protect the natural plates from external harmful influences, but also allow you to create a deep design without any damage.
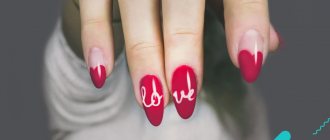
It's no secret that the French nail design is at the top of popularity among all nail designs. Extended nails for French manicure can be of various shapes. I bring to your attention videos with step-by-step instructions for nail extensions using French style tips.
Video tutorial “Gel extension technique”
Video tutorial “Acrylic extension technique”
I'll probably end here. It seems that I told you about everything and forgot nothing. Use the information for your health! If you have any questions while reading the article, feel free to ask them, I will definitely answer. Share your successes with me and show your results in photographs, if possible - I will be glad to see that you succeeded. Good luck to you!
Advantages of purchasing from the FRENCHnails online store
We offer you to buy a type cutter inexpensively in our store. Such an affordable cost is explained by direct purchases from manufacturing companies. We have completely refused to cooperate with intermediaries, which allows us to guarantee 100% originality of the products presented in the catalog.
Immediately after your first purchase you will receive a cumulative discount card. Initially the discount will be 10%. But if you often purchase products from the store, it will increase to twenty percent!
We offer free delivery for those who order products worth over 1000 rubles. This offer is available not only to Moscow residents. It can be used by residents throughout Russia. Couriers handle your parcel with care and precision.
FRENCHNails is an excellent solution for those who want to save money without losing the quality of their nail products!