Rating: 4/5 (2)
Manicure forms have become the salvation of many girls. With their help, you can lengthen your nails, create a beautiful shape and hide imperfections in the nail plate . You can purchase forms for nail extensions or make them yourself. The main thing is to choose the right material so as not to damage the nail plate. The base of the nail, and therefore the entire subsequent manicure, depends on the shape, which is why it is important to pay a lot of attention to them.
The specifics of this type of nail extension
The nail plate is very delicate, and it is almost impossible to do gel extensions without a base. You can purchase such stencils at any store that specializes in nail aesthetics . Experienced craftsmen know that frequent use of ready-made forms can be unprofitable in material terms.
If you are looking for something to replace your nail extension mold with, purchasing soft cardboard is a good idea. It is important that the edges are not sharp, as this could damage the skin . Dexterous hand movements and scissors will allow you to make a stencil, but you need to take into account that it will not look aesthetically pleasing in the eyes of the client if you plan to do manicures for other people.
Universal materials that significantly save procedure time are top forms for nail extensions. They are silicone stencils into which a covering layer of gel or acrylic is poured. After hardening, the form is removed; you do not need to saw the nail plate to remove irregularities. The only downside is that you cannot adjust the angle of the nail directly on the stencil.
Care activities
Before you start filing your nails, giving them the desired shape, you should take care of the health of the plates, because painful, thin nails are very difficult to file correctly and then maintain their shape, as they quickly break. You can give strength and breathe life into your nails with the help of home care measures, for example:
- Hand hygiene should be maintained. Do not allow dirt to appear under the nail plates.
- A mandatory procedure is the application of a cream that nourishes the dermis and plates.
- The cuticle area is treated with oil several times a day. Thanks to this, the skin on the periungual ridges will not dry out or crack.
- Cosmetologists advise getting into the habit of giving your hands salt baths with lemon several times a week. Place your fingers in a bowl with diluted salt and 10 drops of lemon for 30-60 minutes. You can do this while watching your favorite movie.
Important! If you follow these recommendations, the result will appear in 20-30 days. The nail plates will thicken, become strong and healthy.
The beauty salon also offers several services for healthy hands and nails. Effective beauty sessions for hands:
- paraffin treatment;
- SPA treatments;
- Brazilian manicure, etc.
What is needed for this procedure
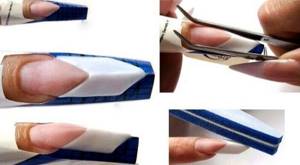
In addition to the basic tools in the form of a lamp and gel, you need to have a supply of forms. The fact is that there is no point in buying several stencils , because they may crack, and you will have to look for a way out of the situation. But this is the case when we are talking about paper forms.
Manicure technology is developing rapidly, and now you can find stencils that can be used several times. To understand how to use reusable nail extension molds, read the package insert. If it is not there, then carefully examine the form and determine the model of the device. Usually they are attached to or under the nail, and then carefully removed. The main thing is not to injure your hands, because the form may have metal bases.
There are several variations of the shape for nail extensions , the names may differ, but they perform the same function:
- Top and bottom forms. These types of forms for nail extensions are very convenient, because they are easily attached to the nail and quickly removed.
- Disposable and reusable stencils. The manufacturing material for conventional forms is cardboard with a special coating. It allows you to easily manipulate the nail and create the desired length. Reusable stencils are not as convenient, but they are more financially beneficial.

- The type of tip of the extended nail divides the shapes into round, oval, sharp, square, stencils in stiletto and pipe style. If you want to make nail extensions with an edgy shape, use age forms. They are pointed and visually stretch the plate.
If you don't know which extension shapes will look best on your nails, try making test stencils and putting them on the plates. This way you can imagine the end result.
Important Rules
In order for your extension to be successful, you should definitely follow the rules below:
- Do not cut your nails at the root, because for full extension they must be at least a millimeter in length.
- Before applying extensions, you should always treat your nails and remove cuticles. To learn how to do a trim manicure, you can read about it here.
- Refrain from taking baths, showers, swimming pools, or traveling to bodies of water approximately half a day before the procedure.
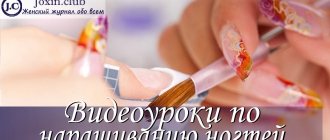
Step-by-step instructions with photos
1. The first step is choosing a stencil. As you know, the choice of nail shape for extensions depends on the size of the hand and the client’s desire; the photo below shows an age-style shape. It is also called a “business” stencil, because it makes a manicure not only stylish, but also strict.
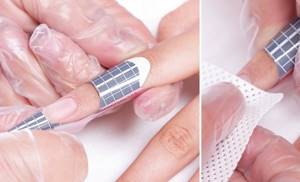
2. Many girls are interested in the question of how to properly put on a form for nail extensions .
- To do this, you need to make a cut in the middle of the material so that you can place it on your finger.
- Once you have secured the stencil under your nail, check to see if it is loose.
- If there is a noticeable gap between the form and the nail, then the gel can get there, and the final result of the manicure will be ruined.
- The stencil should be in maximum contact with the skin.
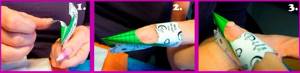
3. Setting the shape for nail extensions also depends on the size of the nail . Owners of long nails do not have to worry about fixing the stencil; the situation is different with short nails. There you need to set the form as accurately and reliably as possible.
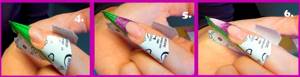
4. The next step will be the necessary manipulations with gel or acrylic . The stencil must be removed after the first layer has completely dried. Do this carefully so as not to damage the coating.

If the gel has flowed under the mold, you may have difficulty removing the mold. In this case, you need to file the problem area, but without affecting the base of the plate.
Detailed instructions for extensions
First stage
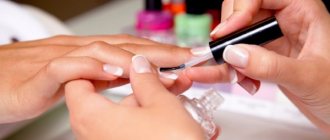
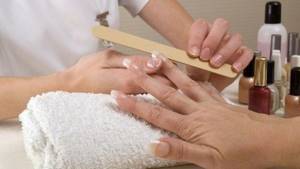
- After disinfecting the palms and fingers with an antiseptic, we treat the nail plates. Use a wooden stick to push back the cuticle. It is advisable to trim off the excess using special nippers or sharpened nail scissors.
- Carefully file the nails, leaving approximately 1-5 mm. Use an orange stick to remove dirt under your nails.
- The top glossy layer is removed with a buff and unevenness is removed. Use a brush or brush to shake off the dust.
- We degrease the nail plate using a special product. At home, you can use alcohol to soak a napkin.
- A primer is applied, it ensures adhesion of the material to the nail plate and protects against microbes.
Second phase
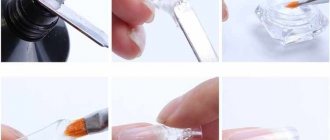
- After the nails are processed, we select the upper forms of a suitable size, one by one applying them to the nail plate. The blank should be slightly smaller than the nail plate. The free space will be filled with excess gel.
- The nail is covered with a thin base layer of gel. It should not be dried out.
- The inside of the workpiece is carefully filled with a denser layer of material in the area of the free edge, which should be dried after application (20 seconds). The gel is then applied to the area intended to adhere to the nail plate.
- The procedure can be simplified. A thin layer of gel covers the part of the plate that comes into contact with the nails. The free edge of the workpiece is compacted more tightly (0.5-1mm). At this stage of modeling, you can also determine the approximate desired length of the nail.
- The gel-filled blank is carefully pressed against the nail. There is no need to put pressure on the plate. Turning your palm over, you need to see how the gel lays down; its excess is removed with a pusher.
- Fingers with applied tips are placed under a UV lamp for about five minutes and wait for the material to polymerize. Manufacturers indicate on the packaging how long it takes for the material to harden.
- Once the gel has hardened, the top molds are carefully removed. We wipe the tip and put it back in the box. The nail is degreased. The free edge is processed with a file, which is given a neat appearance.
- To consolidate the result, this extension technology provides the possibility of applying a finishing coating. It is advisable to do this, but there is no particular need. This layer is polymerized for about two minutes.
- Degrease the nail plate. Lubricate the cuticle with special oil.
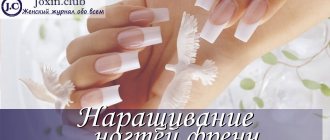
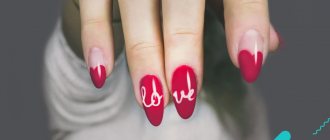
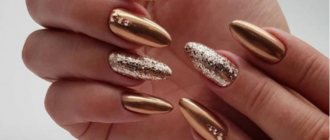
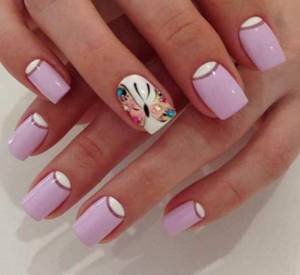
Fashionable ideas for nail extensions on forms at home with photos
Feel like a French woman
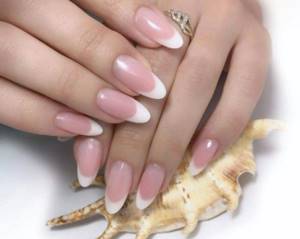
French manicure is always relevant, if you decide to get nail extensions, then French manicure on forms can be done very quickly. You can draw the rim directly on the stencil. This makes it much easier to make a straight line.

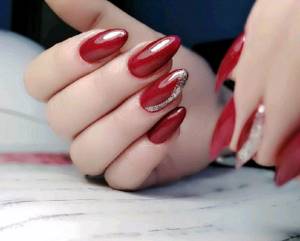
Long nails
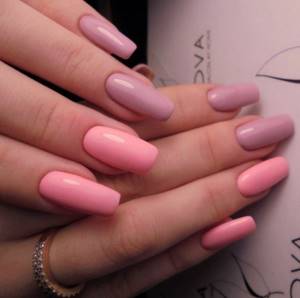
This manicure will always attract attention. Whatever color you choose, it will look beautiful on long nails. It is important that in order to make such nail extensions, you need any shape: an oval, a square or an acute angle, you can cut it out yourself later. Of course, it is much more convenient to have a ready-made stencil, but its absence will not be a problem for you.
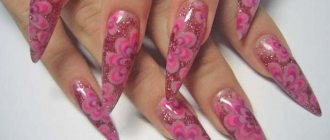
Square manicure
Nowadays it is very fashionable to make designs on nails in the style of geometry; this trend has not bypassed the outer edges of the plate. Even if your nail is a decent length, you need a stencil to make a perfect square. But you need to think about how to properly place the form for nail extensions in this style. Choose wide stencils so you can paint on both sides.
Gentle colors
This manicure needs to be done in several layers . This is the case when you don’t have to remove the mold after the first coat, but do it after applying the color.
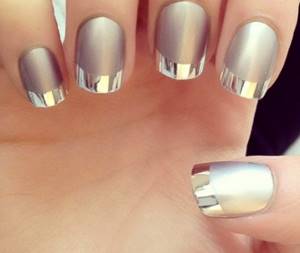
Foil on nails
You've probably seen photos of manicures on the Internet more than once, where the nails are covered with a shiny gray coating. This is ordinary foil, and we’ll tell you a secret: it’s also made using molds . You need to securely secure it to the plate, apply a protective layer, dry it, and then remove the mold.
Recommendations from professionals
- Do not file wet plates. This will lead to their delamination. Work is carried out only on dry material. Therefore, before a classic manicure, the free edge is first filed, and after that the hands are lowered into a bath of liquid.
- The abrasiveness of the file for working with natural plates should not be lower than 180 grit and higher than 300 grit. The abrasiveness of the buff starts at 900 grit.
- After all manipulations, instruments (scissors, file) are disinfected. They can be wiped with alcohol.
How to choose your nail shape
There is a whole science to creating beauty in your hands. It is not difficult to master it yourself. The main thing is to learn how to use a nail file and not neglect the advice of professionals.
Video on how to do nail extensions on forms at home
To learn how to do nail extensions on forms yourself, watch thematic videos; many masters post their lessons on the Internet. This way you can clearly see the entire technique and repeat the manicure on your own hands . This is very convenient for beginners, because you do not need to attend special courses and trainings.
The manicure technique requires the master to use special materials to properly design the nail. These also include stencils. These can be reusable, paper, or even homemade forms for nail extensions. You choose the type yourself, but the main thing is that it is convenient for you to use. If you are planning to work with other people, be sure to ask the client if he or she likes the selected stencils. Have you already done your first manicure on forms?
Popular mistakes made by beginners when carrying out the extension procedure
There are a number of common mistakes that beginners in manicure make most often. Among them:
- Rough sawing;
- Using too hard buffs and files;
- The mold does not fit tightly (causes the gel to get under the template);
- Poorly performed degreasing;
- Insufficient complete removal of the gel layer remaining from the previous procedure;
- Insufficient gel polymerization.
Using the instructions above, relying on the tips provided and avoiding common mistakes, most fashionistas will be able to carry out a full-fledged nail extension procedure using gel and forms on their own at home.
We recommend visiting our Manicurist Forum , where you can ask questions or chat about interesting topics!
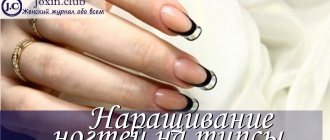
How to extend nails with gel on tips?
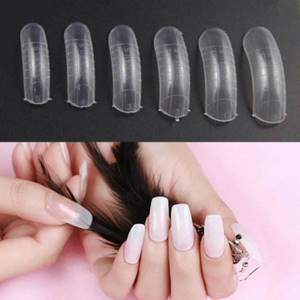
Extension tips are special polymer plates that are attached to the native nail and form an ideal coating.
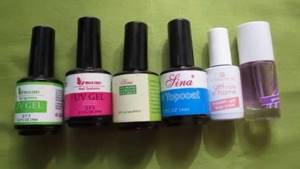
What you will need to apply gel extensions to tips:
- Set of tips;
- Tip cutter;
- UV/LED lamp;
- Glue for tips;
- Primer;
- Base;
- Acrylic Powder;
- Gel for extensions.
To apply gel extensions to tips you will need: a set of tips, a tip cutter, a UV or LED lamp, glue for tips, primer, base, acrylic powder, extension gel.
Materials for extensions
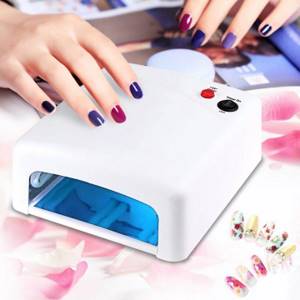
First of all, you will need an ultraviolet lamp, without which you simply cannot dry your nails.
You will also need a cuticle shovel, a file with an abrasiveness of 180 grit, tips (these are the forms on which nails will be extended), special glue, gel brushes, and tweezers.
You will also need an antiseptic, a dehydrator (dries out the nail plate), a primer (allows you to create better adhesion of the gel to your nail), a bonder, the gel itself, a finishing top, a remedy for the sticky layer that always remains after nail extensions, as well as scissors for tips .
Nail shape
Now it's time for you to think about the shape of your future nails. First, what length do you want, and then select the shape. There are not many forms, of which two types are distinguished: classic and original.
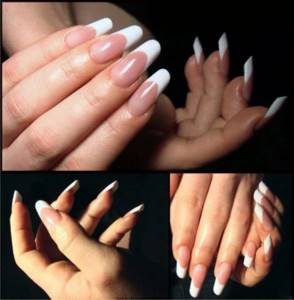
Classic
- Square, rectangle, soft square, oval, almond, round, mountain top.
Original
Edge, stiletto, pike, lipstick, ballerina, bell-bottom, arrow