Greetings, dear readers! If you are already quite tired of the usual monochromatic coating on your nails and want to dilute it with something unusual, try doing the so-called smoky manicure. The smoke effect on nails looks very elegant, and it is not difficult to create. This does not require extensive experience or special artistic skills. In this article we will tell you in detail how to do a manicure with stains yourself in various ways.
Features of smoky design
The smoke effect looks great on both glossy and matte finishes. Theoretically, you can use gel polish of any color for the background, but it is recommended to use black or white, as well as beige and pastel colors. Smoky stains also look good on camouflage gel, which imitates the natural color of the nail.
To create a smoke effect, not only gel polish, but also gel paint is well suited. The patterns can be made in one color, or you can use several colors on each nail. For example, if you carefully and smoothly blur two colors, you will get a kind of smoky ombre. And of course, a smoky manicure is perfectly complemented by any decorative elements, for example, rhinestones or broths.
Note: this design can be easily made even more impressive using acrylic powder or pigment. In this case, gel polish for smoke must be selected with residual stickiness.
Of course, gel paste is also quite suitable for such patterns. But this material has a much denser consistency, so it will have to be diluted.
Many craftsmen use stained glass gel varnishes of various colors to create stains. This translucent material creates a very beautiful colored smoke effect. It is better to distribute the stained glass in a thin layer over the smoke at the final stage.
Note: if you don’t have stained glass gel, you can easily get it by mixing stained glass paint and modeling gel.
Classic technique
Don't be afraid to experiment - you will definitely succeed! Despite the external complexity of the design, this manicure is quite simple to do, so be patient and tune in to the result. Let's look at the first implementation option.
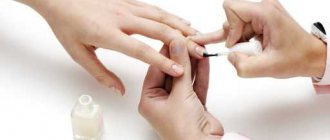
- Perform a standard hygienic manicure. Remember that well-prepared nails are already half the success. We remove the old coating, carefully work on the cuticle area, removing it in any way convenient for you - by cutting or using a remover and an orange stick. We give the nails the desired shape and lightly sand their surface with a manicure buff. Evaluate the results: if you think that your nails look perfect, then proceed to apply a decorative coating.
- Cover your nails with a base coat for a neater manicure that lasts longer. Dry it in a lamp.
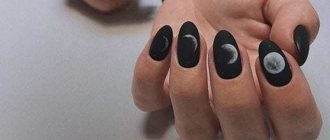
- A smoky manicure looks incredibly beautiful on a black background, so that’s what we’ll use. Paint your nails with black gel polish, dry in a lamp and remove the sticky layer. This can be done using a special product or regular alcohol applied to a napkin.
- Now take white gel polish. Its brand does not matter - you can use the decorative coating of your favorite company. Dip a thin brush into it and draw a random line diagonally on the nail. It should be a little thicker on top and thinner on the bottom. Don't draw too carefully - it simply indicates the direction of the future "smoke".
- Dip the brush into gel polish remover and begin to blur the line with light movements. Do not erase, but rather wash away. You will see how the design takes on the shape of smoke flowing over the nail.
- Dry the gel polish in a lamp.
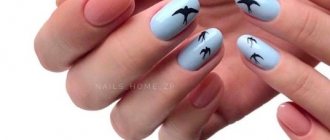
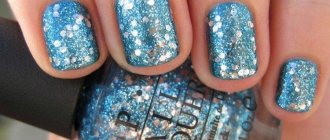
- If desired, the manicure can be left in this form, simply covering it with a top coat. But we will make the design more interesting. For this we will need stained glass gels in blue and green colors. Using a brush, cover the lower part of the “smoke” with a very thin layer of green stained glass gel, and make the upper part blue.
That's all - all that remains is to cover it with topcoat and put it in a UV lamp for 30 seconds.
Photo gallery
A series of photos with examples of smoky manicure:
Nail art with acrylic powder
We looked at the first option, but the manicure can be made even more expressive if you use acrylic gel powder.
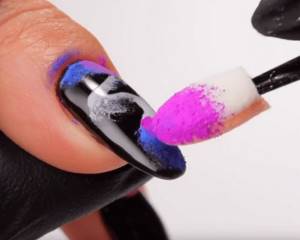
- Repeat all the procedures described above until the white line is blurred, but this time you do not need to remove the sticky layer.
- We'll experiment with pink and orange acrylic powder. Using a brush, rub orange powder into the lower part of the “smoke” stream, and pink powder into the upper part.
- If there is any pigment left on the black background, carefully remove it with liquid to remove the sticky layer.
- We fix the result with a top layer and dry it in a lamp.
With acrylic powder, the “smoke” takes on even greater volume and expressiveness. Be sure to try this design - it will not disappoint you.
Elegant gray-pink manicure
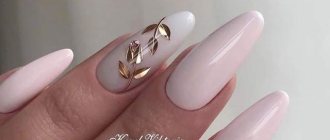
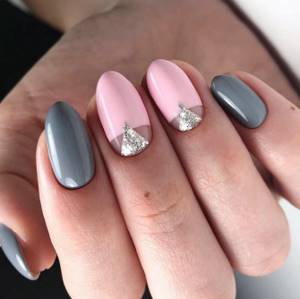
The combination of gray and pink in one manicure can be called one of the most harmonious and popular tandems in manicure art. These two colors are simply made to complement each other. At the same time, light ash, smoky or French gray go wonderfully with delicate pink, and rich wet asphalt or graphite get along well with raspberry or fuchsia.
Among the current types of design are the French style and lunar design, stretching flowers and stunning ideas for a single-color manicure in the “different hands” style.
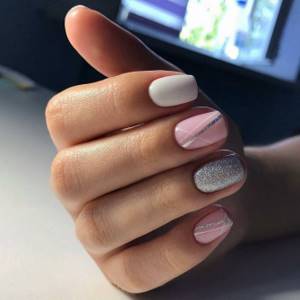
And what possibilities open up in such a combination when creating drawings! Dots and stripes, geometry and marble patterns, floristry and abstraction. Everything is just for you, beautiful ladies. Three-dimensional images look very impressive, for example, a “knitted” design in a matte design, with pearl inlay or on a shiny silver backing. It is especially popular in the cool season and is perfect for completing a New Year's look. As well as drawings with acrylic powder with colored pigment to match the overall design or “fluffy” compositions made of flock, which will perfectly decorate both all nail plates and a couple of accent fingers.
Design with colored gel polishes
A beautiful design can be achieved using additional colors of gel polishes. We will not describe the initial procedures, since they are completely identical in both the first and second cases. Let's start making a new design right away.
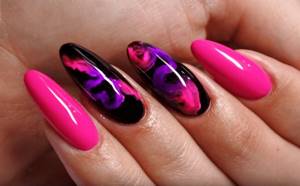
- Use yellow gel polish to carefully paint the upper part of the “smoke.” Decorate the bottom in blue. It is better if gel polishes are liquid. If they are too thick, it is better to add a little topcoat to get a more sheer coverage.
- Dry in a lamp.
- Apply top coat, dry again in the lamp and remove the sticky layer.
As you can see, this design can be done in many different ways, none of which can be considered complicated. Smoke effect nail art is very easy to learn and looks amazing. You can see this for yourself by watching a useful video that discusses all three described methods of execution.
Fashion trends in combining gray with other colors
Despite the fact that the gray palette does not have the same content of tones and halftones as, for example, red or yellow, gray manicure can be very diverse. Charcoal, graphite, dove, the color of wet asphalt, French gray, ash, Gainsborough - all these are shades of the gray palette and many fashionistas did not even know about the existence of some of them. The shades can be interestingly combined on the nails with each other, while varying the saturation in an original way from the darkest to the lightest. You can additionally use white, pink, deep black and other colors, thereby creating original design ideas. Combinations with silver and gold look no less attractive. It all depends on your mood and personal preference. The main feature of the harmonious combination of gray manicure is that all shades that are simultaneously used in nail art must correspond to either cold or warm colors.
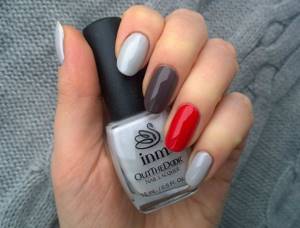
Photo gallery of nail art with smoke effect
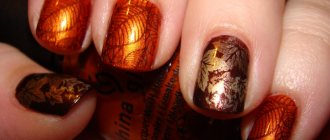
Enormous scope for creativity is given by the fact that smoke itself tends to take on the most bizarre shapes. That's why you can fantasize as much as you like. In any case, the manicure will definitely be successful. And now we invite you to look at a few photos that will give you fresh ideas and help you understand how multifaceted this design can be.
Let us repeat once again that you should not be afraid of experiments ! Each design is unique in its own way. When doing a manicure, you put into it not only your skill, but also a little bit of your soul. If you still don’t quite understand the technique of performing a smoky manicure, we invite you to watch an interesting video in which you will find a master class on creating smoke on nails.
Halloween Manicure No. 2: Black and Red Gradient
Ombre effect, degrade, gradient manicure, you name it, but the essence remains the same. The color transition effect can be created by mixing two shades on a sponge or using a fashionable new product - a gradient brush. The manicure turns out to be universal. It will suit almost any Halloween look.
How to make a gradient on nails: step-by-step photos
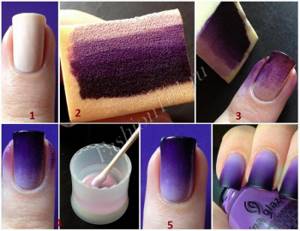
- Cover your nails with base color gel polish.
- Apply strips of gel polishes on a sponge in the form of a gradient (shades can be mixed on the palette).
- You print it on your finger, remove excess paint from the side rollers, dry it, and cover it with topcoat.