Manicure art is currently present in the life of literally every modern girl. In other words, we can say that professional care for our hands and nails requires time and financial investments, and there is no escape from these procedures. But there is a way to significantly reduce these financial investments and at the same time expand your knowledge and skills. But in order to master this difficult task, you need to at least watch a video with a lesson on gel nail extensions for beginners.
Therefore, I suggest that today you read the article about nail extensions, watch some very useful videos and decide for yourself whether you want to do this professionally. Spend your time learning - and you will never regret it. After all, this is not only a way to save on visiting salons, but also a way to earn money.
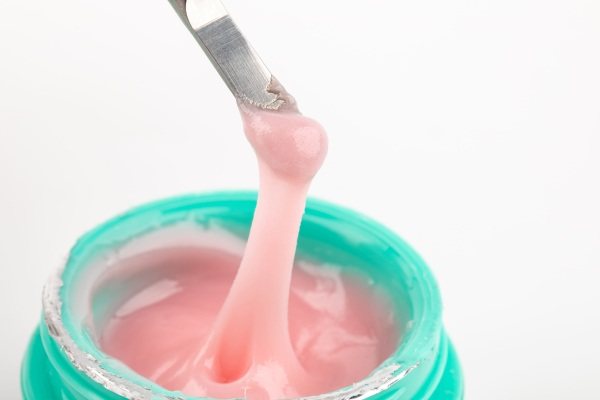
What is acrylic gel?
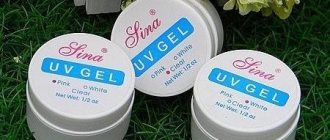
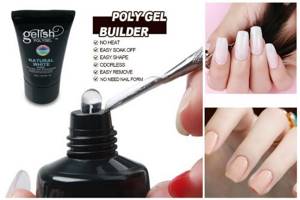
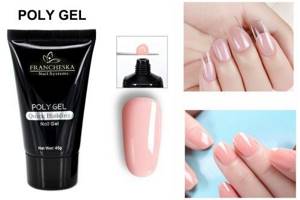
Acrylic gel (also known as acrygel, combigel or polygel - each manufacturer has its own names) combines the advantages of basic products for nail extensions, their modeling, strengthening, repairing chipped edges and design - durable like acrylic, but plastic and pliable like regular gel. Available in soft tubes and jars of various volumes (usually 5 - 30 ml).
Polygel is easy to use, hypoallergenic and suitable even for pregnant girls. It does not require the purchase of additional tools other than those the master used to work with ordinary acrylic or gel. Synthetic brushes or brushes with natural bristles are suitable for applying the coating.
The material consumption is small - taking into account the length of the future nail, a drop of polygel from 5 mm may be required. When removing extended nails, acrylic gel is not dissolved by gel removers and acetone.
Step-by-step extension technology
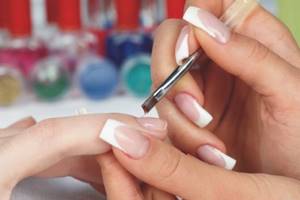
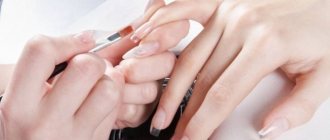
- We cut the nails with clippers as short as possible and push back the cuticle with a spatula. There is no need to cut it off immediately, since during the extension process acid will get onto the damaged skin, which will cause very unpleasant sensations. And not just acid. The skin will become very vulnerable and the slightest snag with a nail file when filing acrylic will lead to redness of the fingers. As a result, instead of beautiful hands, you will end up with an unsightly picture and sore fingertips.
- Remove the shiny layer with a soft nail file. There is no need to be very zealous and try to cut it down too much. It must be cut down carefully, without leaving a single shiny piece, but not too deep. Deep cutting leads to deformation of the natural plate and it then grows not smooth, but in “waves” and scars. After filing, carefully brush off the dust with a brush.
- We put forms on the nails or glue tips. If you use tips, then immediately cut the length.
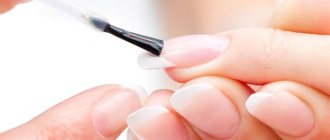
- Apply primer and wait for it to dry
- We apply bonder - it dries instantly, literally before our eyes. After this, you cannot touch the nails, since there is dirt and grease on the fingertips, and we have already completely prepared the plate for extensions.
- We put two glasses on the table, pour monomer into one, about half a glass, and pour acrylic powder into the second. Ideally, the nail should be formed with three balls, and with the fourth layer it should be finally smoothed and the risk zone should be formed (the middle of the nail, closer to the end)
- Rinse the brush in monomer, remove excess liquid by wiping the brush on the edge of the glass. Then dip the tip into acrylic powder. A round ball should form on the brush, approximately 0.7 centimeters in diameter. Neither more nor less is recommended, since applying the material will be inconvenient.
- Place the ball in the middle of the nail (where the cut is) and pressing down with a brush, distribute the material, leveling and smoothing it as best as possible.
- We take the second ball and use it to form a free edge.
- We take the third ball and put the material on the part closer to the cuticle. Here you need to act carefully and pick up the ball thinner than the previous ones, that is, the brush should be wetter. If the material gets on your skin and hardens, filing it away can help you lift the material. In general, you need to immediately lay the material so that there is practically no filing in this area, but only a slight “grinding”. That is, near the cuticle this layer should be as thin as possible.
- We take the 4th ball and place it just below the risk point, that is, between the free edge and it. Using stroking movements, we distribute the material so that the nail begins to look natural, and for this you need to form a small hump in this place, and reduce it to nothing at the end of the free edge. We finally smooth the nail with a brush, removing any unevenness.
- We wait for the nails to harden and remove the forms.
- We file the finished acrylic nails and give them their final shape, constantly brushing away the resulting dust with a brush. If you don’t do this, it will be difficult to see whether you have smoothed the nail enough or not.
- Cover them with sealer, dry them in a lamp for 2 minutes, and then remove the sticky layer.
OK it's all over Now. Now we need to talk about the correction procedure, since being able to do this is no less important than being able to build it up.
Advantages and differences of the material
Acrylic gel for nail extensions, which nail industry professionals prefer to work with because of its convenience and lack of need for special tools, has a number of advantages over the usual acrylic or gel, such as:
- no harm to health - most polygel manufacturers do not contain methyl alcohol, acrylic gel does not emit fumes during polymerization, it does not have a pungent odor like gel or acrylic, dust after filing a nail extended with polygel does not float in the air, but falls on surface. This property reduces the risks of allergies and respiratory diseases.
- ease – polygel, in comparison with gel or acrylic, is lighter, it is almost not felt on natural nails when worn. Because of this property, polygel is suitable for extensions for girls with thin or brittle nails;
The advantage of acrylic gel for extensions is its consistency - minimal contact of acrylic gel with the skin - during work, acrylic gel does not flow and can be easily controlled with a brush, which allows the master to bring it close to the cuticle and side ridges, but not touch them. After hardening, unlike conventional liquid gel, no additional cutting out of excess material is required;
- polymerization – acrylic gel does not dry out in air or sunlight; when using hybrid lamps, polymerization takes about 30 seconds. The master can spend more time working on modeling or design without fear that the coating will harden;
- no burning sensation when drying in a lamp - no discomfort for the client during the procedure;
- application technique – the stages of nail preparation, extension or correction, and design execution coincide with working with acrylic powder or gel, so additional training in technique is not required. Polygel does not flow, this gives the master the opportunity to control the amount of material for work.
Read the popular article in the category: Nail fungus: treatment, inexpensive but effective drugs
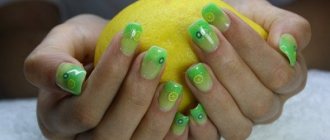
How to dry a thick layer of nail polish?
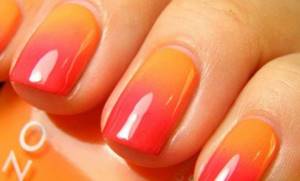
beautiful colored manicure dried in a lamp
The best solution to this problem is to avoid applying a thick layer of varnish, replacing it with two passes with a thin application after two to three minutes.
If you don’t have time to repaint your fingernails, then use:
- a plate with cold water and ice cubes, where to dip your fingers for 5 minutes. Then shake off and let the water dry on its own.
- a flow of cold air from a fan or hair dryer
- the ability to reschedule time by allocating the legal half hour for natural drying of the varnish
Avoid using fixative varnishes, as they will smear the varnish during application and cause unevenness to form on the surface of your painted nails.
Pros and cons of acrylic gel nail extensions
Acrylic gel for nail extensions has many advantages noted when working with it by nail industry professionals and their clients:
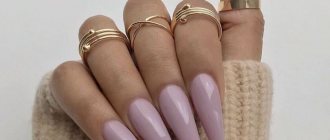
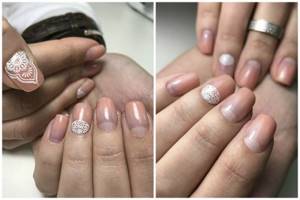
- naturalness - nails extended with polygel look more natural, in contrast to those extended with gel, which makes the nail plate larger and more voluminous;
- convenience - strengthening with polygel, designing or extending nails does not require additional actions to eliminate possible defects of the nail plate;
- strength - the material is quite elastic and has high durability, so it is not afraid of chips and scratches, and its lightness, in comparison with gels, adds comfort to wear;
- economical consumption - the material can be applied in one layer, while such qualities as texture density and color saturation are preserved;
- no peeling – acrylic gel is compatible with any other materials (bases, decorative coatings or regular varnishes);
- modeling options - the polygel does not flow during operation, allowing the master to create the required shape, dome-shaped or flat;
- no prohibitions on use - since the polygel has no odor, to comply with sanitary hygiene standards, a nail specialist in the salon does not need a separate room, as when applying acrylic or gel extensions.
The disadvantages include:
- drying – longer polymerization of polygel in a lamp, when compared with acrylic or gel;
- cost - the price of the material can exceed 5 thousand rubles. per packaging;
- removal - due to the fact that most polygels are not soluble in liquids, they only need to be cut off with a ceramic cutter or files;
- liquid for wetting the brush - depending on the manufacturer of the acrylic gel, a regular cleaner for moisturizing brushes may not be enough and you will need to purchase a specialized product;
Acrygel application technique
Preparatory manipulations boil down to hygienic manicure and cleansing the nail plate of excess moisture and fat. There is no need to apply an acrygel base. It is enough to use a high-quality acid-free primer.
The technology for applying acrylic is as follows:
- glue the form for modeling the nail;
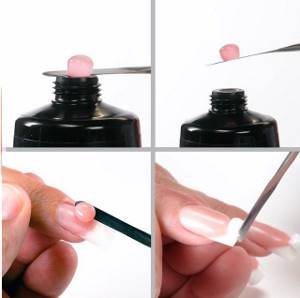
- put a drop of material on the primer using a scraper, pusher or brush (the tool must first be dipped in a degreaser);
- dip the brush in a solution for working with acrylic gel and use it to form the required surface architecture;
- stretching of acrylic is carried out with a brush, gently pressing on the material and leading it in the required direction;
- upon completion of work, dry the coating in a manicure lamp;
- Bring your nails to perfection using a nail file.
Particular attention should be paid to the area adjacent to the cuticle. Insufficient adhesion of the acrylic gel can cause peeling of the coating in the future.
The finishing touch can be applied to any gel polish and decor.
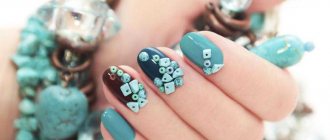
Possibilities of manicure and nail design using acrylic gel
Combining the advantages of other polymers for nail extensions and manicure (varnish, acrylic, gel) in polygel has made it possible to expand the number of services provided in the nail field.
Acrylic gel nail extensions can be done on special forms or tips. This material can be used to strengthen the nail plate, level it, or correct a chip.
Acrylic gel for nail extensions, which specialists can work with even without the use of forms, makes it possible to prosthetize weakened or problematic nails (fungal disease, detachment).
The peeling part of the nail plate is removed, the remaining part is processed, filed and degreased. Then, polygel is applied directly to the skin. The specialist models the desired shape and polymerizes the coating.
Polygel can be applied to protect natural nails from the aggressive effects of household chemical solutions, or for further application of varnish coatings. When creating various designs, the material can be mixed with any color of gel polish to obtain the desired shade.
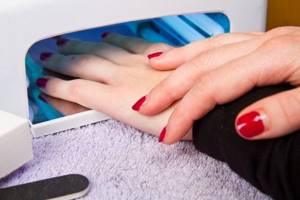
Does gel polish dry without a lamp?
It certainly dries, because it’s not for nothing that gel polish bottles are not made transparent and are recommended to be closed well. Any gel polish can dry in direct sunlight, but this may take several DAYS! That’s why when applying gel polish to your nails, you can’t do without a special lamp!
Recently, you can find on sale “gel polishes without a lamp” or hybrids of polish and gel polish, which have the properties of gel polish and do not require an expensive lamp for drying. However, there are nuances here. These materials still belong to ordinary varnishes, and the gel-varnish component in them is minimal. Due to this, such varnishes are a little more durable and shiny than regular ones, but they are far from the properties of gel polish!
How to use acrylic gel?
When working with polygel, the brush should be damp, but not wet, so that the material does not stick to it. To do this, the instrument is periodically dipped in a special liquid or degreaser and blotted on a lint-free cloth.
If the material is packaged in a tube, the required volume of the drop is squeezed out and removed with a spatula or other sharp object. During the formation of the nail, slapping movements are made, as when applying acrylic. The remaining polygel is pulled to the free edge of the nail plate and removed with a brush.
Acrylic gel for nail extensions, which experts recommend working with on each finger separately, so as not to touch the modeled nail when forming the next one, allows for leveling and laying out until polymerization
In what cases is it possible to use polygel?
You can meet people who suffer from various types of fungal diseases of the nail plates and cannot wear shoes that reveal their toes. This disease causes the formation of voids, disrupts the growth rate of nails and contributes to their detachment from the base.
Acrylic gel is used quite often for strengthening nails and prosthetics. To apply the corrective substance, you do not need to use additional forms and materials.
- To carry out the procedure, it is necessary to remove the exfoliated parts of the nail, clean it from dirt, file the edges and surface, treat it and degrease it.
- The instructions for using the polygel are simple. After preparing the surface, the skin is cleaned and disinfected. This procedure is carried out to reduce the risk of developing pathogenic microflora.
- Then the required amount of acrygel is laid out, distributed over the surface and dried under a lamp.
Replacing part of a lost nail as a result of illness allows a person to wear open-type shoes in the warm season.
You can learn how to apply polygel on nails in nail manicure courses or in the video under the articles. Courses allow you to get acquainted with all the intricacies of the procedure for strengthening, building, restoration and design. The master tells you how to properly apply the crystallizing material. Some people prefer to study on their own, involving family and friends. With the help of models, a novice specialist not only develops his skills, but also creates a portfolio with high-quality works placed in it.
The cost of such materials varies and depends on the quality of the elements involved and the manufacturing company. On average, the price varies between 400-500 rubles for one jar of polygel with a volume of about 20 milliliters.
If you have a bad nail plate, these services will come in handy, as they do not have a negative effect on the legs and strengthen them.
Tools for work
To extend your nails with acrylic gel you will need:
- a router for hardware manicure or tools for trimming manicure;
- buff (special file, in the form of a rectangle, for polishing artificial and natural nails);
- files, abrasiveness 180-240 grit;
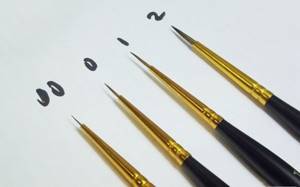
- brushes;
- clinser, primer or dehydrator (degreaser that removes excess moisture from the nail);
- base (special for acrylic gel or any top);
- acrylic gel (and the necessary liquid for wetting the brush, if included);
- top
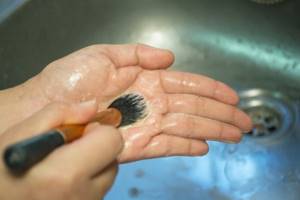
How to properly dilute acrylic powder?
Powder of the type you need. Liquid used to dilute acrylic powder
. It is called liquid and is a monomer containing plasticizers. The liquid does not change the original shade of the substance.
Interesting materials:
How can I find out what I visited in VKontakte? How do I find out that I have been blacklisted in contact? How to find out that you have been blacklisted in contact? How to find out that you have been blacklisted in contact? How to find out someone else's contact list? How to find out the date of birth of a friend in contact? How to find out the date of birth in a contact if it is hidden? How to find out if you are on the Viber contact list? How to find out groups of friends in VKontakte? How to find out the user ID in a contact?
Step-by-step instructions for beginners on how to work with acrylic gel
Polygel nail extension technique:
1. Manicure.
The cuticles are removed, the nails are filed, and polished with a buff. After which they are wiped with a cleanser, including the side rollers and hard-to-reach places near the cuticle.
2. Primer.
After degreasing, a primer is applied to the nail. A dry nail plate does not require the application of a primer to enhance adhesion (adhesion) to the future coating. And an acid-free primer is applied to a damp nail and dried in air for 60-120 seconds.
3. Base.
Apply with rubbing movements over the entire surface of the nail, including the end, and dry in a lamp.
4. Acrylic gel.
- The material is distributed using a brush. Before work, it is moistened with a clinser to moisten it a little to prevent the acrylic gel from sticking.
- If necessary, a form for extension is installed.
- Take a drop of polygel onto the brush and apply it to the beginning of the nail, close to the cuticle, with slight pressure. After which, with short movements, the master lowers the brush to the free edge of the nail, removing excess material.
- After polymerization of the extended nail, the acrylic gel may have a slightly rough appearance. This can be corrected by brushing over the material without pressure, with a slightly damp brush, to achieve an even coating.
- Before drying, it is recommended to wait a little and let the polygel smooth out onto the nail.
5. Polymerization.
The extended nail is dried in an LED lamp for about 30-60 seconds, and in a UV lamp for 60-120 seconds. If, after hardening, the surface of the nail plate is uneven or “grainy”, it is necessary to file, give the desired shape and treat it with a buff.
6. Top.
After applying the top, the manicure with acrylic gel nail extensions can be completed or supplemented with gel polish.
Read the popular article in the category: An effective drug - Mikoderil varnish for nail fungus. Reviews, price.
How realistic is it to learn this using videos?
It's no secret that in order to learn how to skillfully do such a manicure, you need not only drawing skills, but also a great desire and enough time. You can’t learn how to grow nail plates in one day, so be prepared that all your free time will be spent on learning. But if you still have some basic skills, then you can easily master this wonderful type of manicure art.
But it is important to remember that advanced training is always necessary. But in this case, not only video master classes will help you, but also real master classes, conferences and workshops. After all, it is real meetings with professionals that can give answers to all your questions, introduce you to all the new trends in this area and reveal their secrets, which you definitely won’t see on video.
If we evaluate it realistically, then, in principle, watching video lessons may well replace professional courses. But do not forget that if you attend courses, at the end you will receive a diploma that will confirm your qualifications and real skills. In this case, with this diploma, you will be able to take a position in some salon, when self-taught via video does not give you such an opportunity, and you do not have confirmation that you know how to do nail extensions. If you still decide to train yourself, then search the Internet for step-by-step videos in which the actions of the master are clearly visible. This way you can practice alongside it.
The second way to learn is to attend special master classes, which are periodically held in almost any city. You can find out their time and location from local newspapers, as well as search on the Internet with a specific request for the location of the courses. In this case, you will learn more information and secrets of the masters, but you will also have to pay for it.
You can also find a lot of videos that show not only the technique itself or the extension process, but also all kinds of designs. With their help, you will be able to expand your skills and ultimately become a true master of this difficult but fascinating task.
Precautions during operation
Despite the fact that the dust from acrylic gel sawdust is 30% heavier than from gel or acrylic sawdust, the master needs to use a vacuum cleaner to collect it. And also use a protective mask, glasses and a screen when doing polygel nail extensions.
Do not neglect the antiseptic treatment of the natural nail before applying an artificial coating. Acrylic gel is designed for long-term wear. By covering the entire nail plate, it disrupts the natural circulation of air, resulting in an increased risk of the proliferation of pathogenic bacteria.
Individual intolerance to the components of acrylic gel by the client is possible.
How to dry nail polish quickly in cold water?
open tap with cold water to dry nail polish
Cold acts as a catalyst to speed up the drying process of regular nail polish.
Therefore, this method has been tested in practice by more than one generation of women.
The only disagreements are in the method of cooling a fresh manicure on your hands:
- with immersion in a container of ice water
- placing your fingers under a stream of cold water in the sink
Regarding the first method, representatives of the fair half of humanity note the peeling of the varnish from the nail plate, its spreading over it.
Regarding the second method, the opinion is more clear - 5-7 minutes under running cold water and the varnish dries so much that it is fashionable to safely move on with business.
Care of the finished coating
To ensure that nails extended with acrylic gel last longer, do not neglect the basic rules of care:
- refrain from water procedures 2 hours before and 2 hours after nail extensions, and also do not visit the sauna or solarium on the first day - this will help avoid possible detachments;

- You should be careful when working with the keyboard, buttoning clothes and opening various doors without sudden movements, so as not to accidentally damage the extended nail;
- experts recommend using a soft file and buff for maintenance, instead of metal tools and nail clippers - they can damage the artificial turf and lead to chipping;
- refuse trimmed or hardware manicures - remove dry skin and overgrown cuticles with a remover;
- the space under the free edge of the nail should be cleaned regularly with a brush or orange stick;
- Correction of extended nails, on average, is required every three weeks. During wear, the natural nail opens more and more and air can get under the coating, which will lead to chipping or injury to the nail plate.
How to dry nail polish faster?

a girl speeds up the drying process of nail polish by blowing on her fingers
Speeding up the drying process of nail polish is the cherished desire of those ladies who are limited by time frames and a to-do list before the end of the day.
We discussed the main methods for this task in the previous sections. Let's add a few others:
- “smart enamel” or any other oil-based drying varnish
- cold water running under the tap
- a minute in the freezer or in the window if it’s winter outside
- special lamps for drying varnish
So, we looked at various ways to speed up the drying process of nail polish. We noted methods that work well even with gel polish.
A beautiful manicure is not just a woman’s calling card, but an everyday necessity and a component of her look.
Of course, the pace of life can be very fast. But for yourself, your beloved, still plan time with reserve so that you can enjoy all the procedures and get the desired result.
How to remove acrylic gel
Acrylic gel for nail extensions, which most nail professionals prefer to work with, cannot be soaked with acetone or special liquids for removing gel and acrylic polymers.
The material requires cutting with 100-150 grit abrasive files or a cutter for artificial nails. It is recommended to leave about 10% polygel on the nail plates as a protective layer.
Nails extended with polygel are removed step by step:
- The length is removed with a file.
- Using a router or file, the polygel is gradually and evenly cut off. Sudden movements can damage the natural nail.
- After removing the material, the surface of the nail plate is polished with a soft buff - it seals unevenness and scratches.
- At the end of the procedure, cuticle oil or any essential oil is applied to the nail and cuticles.
Tips from professionals: Nail rub - what it is, how to use it. Instructions
Instructions
Using biogel for nail design requires careful implementation of all stages of this procedure. Attentiveness and accuracy of actions will ensure their beauty and dry the gel , preserving its quality for a long time.
The only way to dry the gel No matter how long you expose your nails to the sun, no matter how long you wait, the coating cannot be fixed except with the help of a UV lamp. It can be freely purchased at a specialized beauty salon.
The procedure for nail extension using biogel lasts about one to one and a half hours. And the coating is fixed in a matter of seconds. It is worth noting that previously used acrylic gels required longer exposure to ultraviolet radiation. Of course, this was in some way detrimental to the health of the skin.
A varnish should be applied over the biogel, which dries naturally within a few minutes. Thanks to the high adhesion that the gel , the varnish stays on the surface for a long time.
Bio gel lasts on nails for about two to three weeks. This largely depends on the fragility and health of the nail plate. You can remove the coating using an ethereal solvent that strengthens your nails.
Helpful advice The uniqueness of biogel lies not only in its beauty, but also in its composition that strengthens the nail plate. The creators of the material excluded a number of harmful components from its composition, such as acrylic acids, methacrylates and plasticides. The newest biogel contains about sixty percent proteins.
Nail extension and design with biogel for women with nail problems is an ideal option. Their fingers will now not only be beautiful, but also healthy.
The best brands of acrylic gels
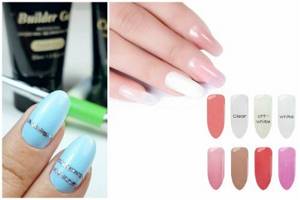
Today, polygel is produced in various colors, price categories and packaging formats.
Nail service specialists recommend several brands:
| Brand | Advantages | Minuses | Compound | Price |
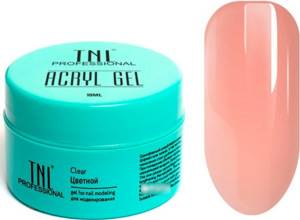
| TNL Professional is mainly produced in cans |
|
Before applying the topcoat, it is recommended to sand the coating with a buffer to avoid the appearance of spots after sawing. |
| from 350 rub. for 18 ml. |
| IriskProfessional is available in both tube and can | excellent strength and plasticity consistency |
|
| from 250 rub. for 8ml |
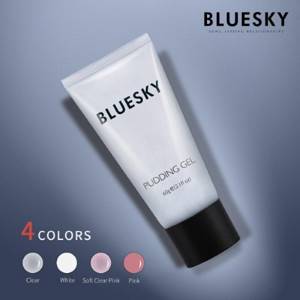
| Pudding Gel from Bluesky Released only in tube |
|
|
| from 250 rub. for 8 ml. |
| Elpaza |
| small color range |
| from 350 rub. for 30 ml. |
| Tertio |
|
|
| from 350 rub. for 30ml. |
Acrylic gel, which is convenient, simple and safe to work with, has allowed nail extension artists to expand the range of services they offer. Girls choose polygel nail extensions because of its durability, ease of manicure creation and natural appearance when worn.
Author: Svetlana Novikova
Article design: Mila Friedan
How to quickly dry acrylic nail polish?
beautiful acrylic nails on a girl's hands
The acrylic coating is quite strong to wear, but finicky when drying.
Therefore, to dry the acrylic as quickly as possible, use the heat of a special lamp. In other cases, there is no guarantee that it will harden well and not lose its shape.
How can acrylic be applied?
Extension is carried out in two ways:
- For tips. pros
procedures: speed.
Cons :
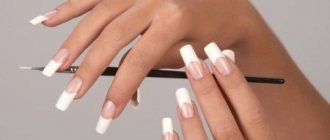
nails cannot be made thin and pointed. Of course, if you spare no time and effort, the tips can be given the desired shape. However, cutting them out is quite difficult, so tips are most often used to obtain wide square nails with soft corners. - On the forms. They are top
and
lower
. When using top forms, acrylic must be secured to the recess of the base and then pressed firmly onto the prepared nail plate. When using lower forms, the substrate should be immediately fixed under the nail plate.