Date updated: 09/09/2019 14:10:02 7681 Share:
Author: Anna Etkind
*Review of the best according to the editors of simplerule.ru. About the selection criteria. This material is subjective in nature, does not constitute advertising and does not serve as a purchase guide. Before purchasing, consultation with a specialist is required.
Speaking about high-quality manicure, one cannot fail to take into account extensions as one of the most popular options. A very easy-to-use material for creating luxurious nails is gel. It allows you not to worry about broken nails (which simply won’t happen) and forget about the need to constantly renew your nail polish. This type of extension makes it possible to create ideally shaped nails and at the same time strengthen the natural nail plate. Single-phase and three-phase gels are usually used in work. How are they different from each other and what are their advantages? Our experts have the answer.
What are one-, two- and three-phase gels
The gel nail extension procedure involves applying 3 layers:
- Basic, creating the basis for subsequent layers, correcting unevenness of the nail plate;
- Modeling, or sculptural, determining the strength, thickness and shape of the extended material;
- The final (finishing) one, responsible for protecting the manicure from aggressive factors and its appearance.
“Phasity” refers to the number of layers (phases) the polymer creates. This means that a single-phase nail gel forms all 3 layers, and a three-phase system is represented by 3 different products, each of which is responsible for a separate layer.
What is single-phase gel for nail extensions
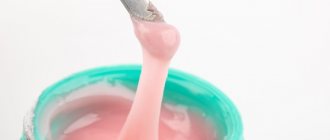
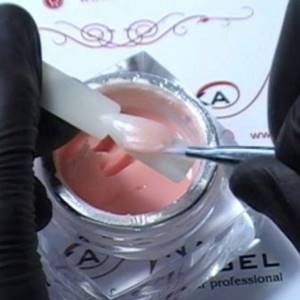
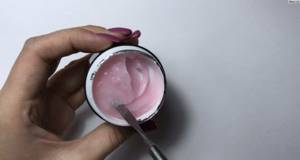
A single-phase product means using the same product to apply all 3 layers. It is presented as a 3-in-1 mixture, which carries the characteristics of each individual polymer: base, sculpture and finishing.
The mass is not applied in a single layer; with single-phase nail extensions, the principle of layer-by-layer application is also observed.
Two-phase
This nail modeling system is represented by 2 means. One of them is applied as a base layer, the other forms a sculptural and finishing layer. Each of the 3 layers is dried separately.
Three-phase
For a three-phase manicure, a system of 3 polymers of different composition and consistency is used:
- Flowable base gel with priming properties;
- Viscous sculptural substance;
- The most durable gloss after polymerization.
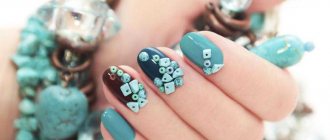
The modeling gel can be camouflage (imitating a natural nail plate), colorless, sculptural or pigmented.
Thanks to this, three-phase nail extensions provide a large number of designs (French with camouflage, volumetric figures, stickers). Single- and two-phase gels lack this advantage due to the fact that they do not provide a separate container with a sculptural component.
About technology in general
The extension procedure is carried out in stages. First, the first, or base, layer of the substance is applied to the prepared nail. It smoothes out existing unevenness and subsequently ensures a high-quality connection of the entire decorative coating with the base surface. At the second stage, using the gel, the nail plate is formed.
The entire work is completed by applying a finishing layer, which performs a fixing function and allows you to create the desired visual effect, for example, to give the coating an intense shine. The material applied sequentially hardens under the light of a special lamp.
Single-phase gel: distinctive features
The difference between a single-phase gel and a two-phase and three-phase one is that all 3 polymer components are in a common container. The contents of the jar contain all the necessary coating functions: adhesive, modeling, protective. This means that with the help of one substance the adhesion of the polymer to the surface, strength, glossy shine and resistance to chipping are created.
Advantages of single-phase gels
- Due to its liquid consistency, the polymer is easier to distribute over the nail plate. Thicker two- and three-phase gels require more painstaking application and careful leveling.
- 3-in-1 products are cheaper than multi-component gel nail extension systems.
- Better tolerated by people with sensitive skin.
- The total thickness of the single-phase acrylic system is smaller, which reduces the load on the natural nail.
Minuses
- The wearing period of a single-phase manicure is shorter than that of two- and three-phase manicures due to the absence of a separate glossy layer.
- A low-viscosity polymer creates difficulties for novice artists: it flows onto the cuticle, under the side ridges, and spreads when forming the apex.
- It is impossible to create designs that use camouflage, colored gel, three-dimensional figures, or stickers.
Can a three-phase gel be used as a single-phase one?
The sculpting gel included in the three-phase nail extension system cannot be used as a single-phase product. It performs only a modeling function and requires an adhesive substrate and finishing coating.
But a single-phase product can be included in a three-phase application system as a 2nd layer, especially if the single-phase gel is from the same company as the base and glossy ones.
Comparison
Above we talked about the three stages of the extension procedure. Sometimes each of them uses its own product, in other cases you can get by with just one composition. The difference between a single-phase gel and a two-phase one is that the first drug is intended to carry out the entire procedure. In other words, all layers: the one in contact with the nail plate, the modeling one, and the top one are applied with the substance contained in one bottle.
In turn, the name “two-phase gel” refers to a set of a pair of jars. Their contents allow you to perform extensions in two steps. One of the bottles usually contains a more liquid composition. Often it serves to apply both primer and top coat. And the constructive layer is laid out using a more dense and viscous substance contained in the second container.
It is not difficult to guess that there is also the concept of “three-phase gel”. Here we are already talking about the use of three bottles. The composition of each of them is used at a certain stage of the procedure. It is believed that extensions performed using this technology have the highest quality results. It is usually done by professionals.
But there are also situations when the simplest of the above options becomes the most suitable. What is the difference between single-phase, two-phase or three-phase gel? The fact is that just one jar costs less than two or three. At the same time, the work of creating a beautiful manicure is noticeably simplified.
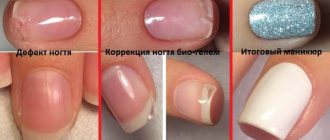
Nail extensions are extremely popular in the modern fashion industry. This allows girls not to worry about broken nails and to calmly do any housework. At the same time, there is no need to constantly cover your own nails with varnish, which wears off very quickly when actively working with your hands. The nail plate of natural nails does not get wet, does not flake, and does not require constant moisturizing and care with oils and medicated varnishes. Nails do not absorb harmful substances, as when coated with varnish, and also do not turn yellow, as happens when using brightly colored varnishes.
The extension procedure allows the master to create the ideal shape and length of nails, strengthen the natural nail plate, and restore a broken nail. Under a layer of hard coating, your own nails grow very quickly and are not subject to mechanical and chemical influences from the outside.
How to apply single-phase gel at home
The system is applicable for modeling nails on forms or tips.
How to extend nails with single-phase gel using a form
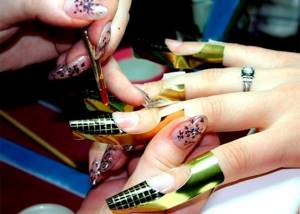
- Treat the cuticle with special oil, remove it with a trimmer or push it back with a pusher.
- File the free edge of the nail, round off any existing irregularities so that they do not interfere with the installation of the form.
- Use a buff to create roughness on the glossy layer of the nail, moving it in the longitudinal direction from the pterygium to the free edge.
- Place the extension form under the free edge of the nail so that it fits snugly against the nail plate and serves as an extension of it.
- Degrease the nail, treat it with a primer to enhance the adhesive properties of the first layer of polymer.
- Apply a thin layer of single-phase gel using a brush along the entire nail plate, retreating 0.5-0.75 mm from the cuticle.
- Place it in the lamp. Wait for it to polymerize for 60 seconds.
- Using a modeling brush, apply a drop of gel to the form, create an artificial free edge, and spread evenly over the previous layer.
- Place in the lamp for 2-3 minutes.
- Remove the sticky layer, give the nail the desired length, align the side edges, cut off excess polymer. Remove sawdust with a brush.
- Degrease before applying the topcoat.
- Apply a final thin layer over the entire surface of the resulting nail.
- Place in the lamp for 60 seconds.
- Remove the sticky layer from the finished work.
Extension on tips
- Treat the cuticle with special oil, remove it with a trimmer or push it back with a pusher.
- Choose a tip that suits your shape and try it on. Make sure it follows the curve of the nail and is completely adjacent to it.
- File the free edge of the nail so that it follows the shape of the tip's hole.
- Treat the glossy layer of the nail with a buff, moving it in the longitudinal direction.
- Distribute a drop of special glue on the inside of the tip hole. Place it just below the mid-length of your natural nail. Press it onto the nail plate and wait until it sticks.
- Using special cutters, cut the material to the required length. File down the free edge of the tip.
- Using a buff or a soft file, process the seam of the tip and its surface to create roughness.
- Apply degreaser to the work surface, then primer.
- Apply a thin layer of single-phase polymer over the natural part of the nail. Place in the lamp for 60 seconds.
- Apply the 2nd layer of gel to the natural nail and tips along the entire length. Place in the lamp for 60 seconds.
- Remove the sticky layer.
- If the gel lays down unevenly, after removing the sticky layer, cut off the excess polymer. Apply the 3rd layer of gel, place the nail in the lamp for 60 seconds. Remove the final sticky layer.
Step-by-step application technique
Not all girls and women know how to properly create a manicure based on three-phase products. That is why you can find negative reviews in which representatives of the fair half of humanity say that the varnish does not last long, the coating quickly chips and cracks.
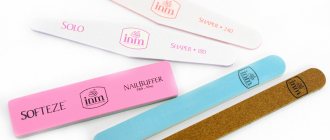
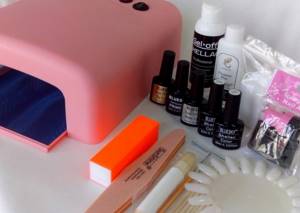
For proper use you will need:
- file for natural nails;
- buff or sanding file;
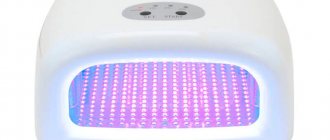
- LED, UV lamp (any of these options will do);
- orange sticks;
- cuticle oil;
- base, color and top coat;
- lint-free wipes for removing the sticky layer;
- primer and remover (degreaser).
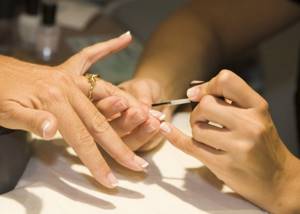
First you need to do a trimmed or hardware manicure, trim or push back the cuticle with an orange stick. After this, give the desired shape to the free edge of the nail. Now you can start creating a durable coating.
The sequence will be like this:
- Sand the nail with a buff;
- Degrease the nail plate with a special product;
- Apply primer (if necessary). The composition dries quickly in air without the use of a lamp;
- Cover the nail plate with base, dry in an LED or ultraviolet lamp for 1 and 2 minutes, respectively;
- Apply the selected shade to your nails. Dry the coating in a lamp;
- If you want to get a dense color, you can repeat the procedure by applying the color composition 1-2 more times. Each layer must be thoroughly dried;
- Apply top coat. When distributing, be sure to seal the nail cut. This action will avoid chips and cracks in the coating during wear;
- The last step is to use a special cuticle oil.
The technique of applying gel polish is shown in more detail and clearly in the video below.
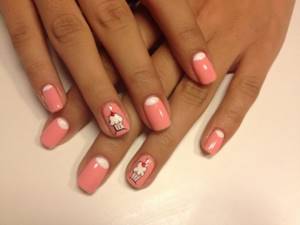
By following the step-by-step technique presented above, every girl will be able to create an attractive manicure in the shortest possible time. Many women do not know how to tell if the coating is completely dry. It is enough to strictly adhere to the manufacturer’s recommendations regarding the drying time of the varnish in the lamp. In this case, you will receive a durable coating that will last up to two weeks without chipping or cracking.
The best single-phase gels for nail extensions
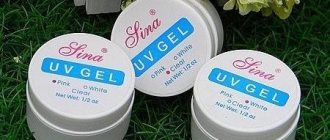
Single-phase transparent gel Jess Neil
- Self-leveling;
- When applied correctly, does not require filing;
- Easy to model due to its liquid consistency;
- Maximum polymerization time in a UV lamp is 3 minutes;
- Volume 15ml;
- Average price – 300 rubles.
Single-phase gel Masura
- A wide range of colored biogels with deep warm shades;
- Contains a vitamin complex, calcium and protein to strengthen the nail plate;
- Hypoallergenic;
- Volume 15 ml;
- Price from 670 rub.
Single-phase gel Runeil
- Available as a single-phase and three-phase camouflage agent;
- It has medium viscosity and is easy to level;
- Suitable for aquarium decoration;
- Maximum polymerization time in a UV lamp is 3 minutes;
- Volume 30 ml;
- Price from 550 rub.
TNL extension gel
- Biogel, which strengthens the nail plate, adds shine to natural nails;
- A wide range of transparent and camouflage single-phase classic and premium gels;
- They have high wear resistance;
- Volume 15 or 18 ml;
- Price from 210 rub.
Global
- Strengthening inexpensive UV gel;
- Sheer or neutral pink or light pink shade;
- Average wear resistance;
- Requires leveling, filing;
- Volume 15 ml;
- Price 400 rub.
Kinds
Nail extension materials come in different types and systems. What is the difference? Gels are available in various volumes, differ in consistency and method of application. To date, innovative types have been added to the classic hard gel. They should be taken a closer look.
- Modeling gel (constructing) is the first type of gel invented. A clear, thick, self-leveling product designed to form the desired nail length and shape. They only work on forms. Polymerization occurs in a UV lamp.

- Gel chewing gum is an innovative product for high-speed nail modeling. The consistency is very plastic, reminiscent of soft plasticine. With it you can create both simple and complex original shapes. A small portion of the product is first distributed in the center of the nail, and then gradually, using a brush or pusher, the product is stretched in the desired directions. Working with such a gel is quick; polymerization in a lamp takes no more than ten seconds. This product is great for creating 3D designs in nail art.
- Jelly gel is a relatively new product. The product has a dense consistency, reminiscent of jelly, which is where its name comes from. This product is presented in natural shades that imitate the color of natural nails. It can be used to lengthen the nail plate, create a French manicure, perform aquarium design, correct and repair nails. Gel jelly is a universal product that allows you to speed up the process of nail extensions.
Three-phase nail gels Led and UV
Formula Profi
- Odorless, with a neutral pH level;
- Polymerization time in a UV lamp is 90 seconds, in a LED lamp – 60 seconds;
- Includes base, clear builder gel and topcoat;
- Volume 10 ml;
- Price from 600 rub.
All season
- Modeling tinting gel, with glitter or hologram effect;
- Long polymerization time;
- High wear resistance;
- Volume 28 ml;
- The price of the construction gel is more than 1000 rubles.
IBD
- The base coat is acid-free, self-leveling, odorless, volume 14 ml;
- Sculpting gel is transparent, odorless, volume 14 ml;
- Polymerizes only in UV rays for 30 seconds;
- The cost of a three-phase line is more than 2000 rubles.
Runeil three-phase
- Camouflage or colored firming sculpting gel;
- Optimal ratio between price and quality;
- Self-leveling, medium viscosity;
- Polymerizes only in UV rays;
- Colored gels mix well;
- The volume of camouflage agent is 15 ml, color 7.5 ml;
- Price from 200 rub. for colored, from 350 rub. at the camouflage one.
Severina
- Three-phase system with camouflage sculpting gel;
- Consistency of medium-high viscosity;
- Allows air to pass through and does not overload the nail;
- Polymerizes in a UV lamp;
- Volume 15 ml;
- Price from 700 rub.
Application: step-by-step instructions
The strengthening process takes more than one hour of work. Necessary equipment and tools for this:
- UV/LED lamp for drying material;
- primer/ultrabond;
- gel/polygel;
- color coating (gel, gel polish);
- finishing coating;
- manicure machine (milling cutter);
- set of manicure tools, brushes;
- degreasing/disinfecting products;
- napkins (lint-free).
Preparation for strengthening coating
This is an important stage on which the wear life of the material depends.
First, the nail plate is completely cleaned of the old coating (if there was any).
Next, the manicure begins, where the cuticle is carefully removed and the pterygium is cleaned. Manicure should be performed cleanly, using a device with cutters or manicure scissors.
Important. There is no need to make cuts both on the skin and on the nail itself, otherwise an allergy may occur when drying the material.
Using a soft file, the gloss is removed from the natural nail and given shape.
After a manicure, dust is removed from hands and fingers are disinfected
If your nails are naturally wet, use a dehydrator. The plate itself must be dry before coating.
Application of material
At this stage it is important to do everything correctly so that you don’t have to redo it
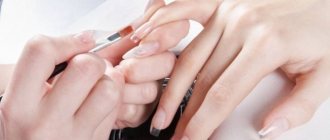
- Primer is applied to the prepared nail. It provides adhesion between the surface of the plate and the gel. It is preferable to use acid-free compounds so as not to damage the natural nail. The primer air dries for about 1 minute. After this, you should not touch your skin or hair with your fingers, because the nail plate is degreased.
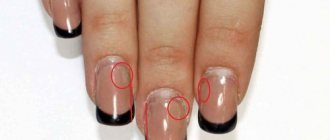
- Then the base coat is applied in a thin, rubbing layer. If the system is single-phase, then you can do without a base. The gel is placed on the plate in a small drop. Then, using a brush, the distribution begins with smooth movements. Applying the gel requires knowledge of the architecture of the nail plate. There should not be a lot of material near the cuticle.
It smoothly, from thin, moves to dense, near the middle. At the tip of the nail the layer becomes smaller and the end is sealed. The same result is obtained if you turn the nail over, then the gel itself takes the desired shape. - When everything is lined up, the hand goes into the lamp to dry. The time is set differently: in UV - about 2 minutes, in LED - about 50 seconds. But here the power of the lamp itself is also taken into account. With this distribution, a durable structure is built; this coating can be worn for a long time. Correct technique eliminates detachments and chips.
- If unevenness is visible after drying, you can make a small filing to make the surface of the nail more even.
- Further, if desired, you can apply a color coating and create a design. The final step is to apply the finishing coat. It can be glossy or matte. All layers are dried in a lamp.
- At the end of the process, the coated nail is wiped with a cloth soaked in a special liquid to remove stickiness. In general, the handles are ready. The manicure is forgotten for several weeks.
Contact with water must be limited on the day of application (minimum 2 hours), the gel does not handle moisture.
Master class “Strengthening natural nails with gel”: