The article contains information useful for women who want to make their hands beautiful and well-groomed. This is information about what acrylic is, how it has become an essential element of the beauty industry and why acrylic nail extensions are optimal, highly effective and suitable for almost any woman. It also explains why acrylic nails have a number of advantages over gel nails, how an acrylic manicure is done, what a French manicure is, how to apply acrylic nails at home and how to remove them.
History of acrylic use
In the 30s of the last century, the “father” of acrylic, polymethyl methacrylate, was developed in Germany. This is a durable, lightweight, transparent material designed to replace heavy, fragile and quickly heating glass. Polymethyl methacrylate has low thermal conductivity, it is durable, easy to process and remelt. The so-called plexiglass appeared; in Russia for many years it decorated the desktops of schoolchildren, students, scientists, and administrators.
In the 50s, acrylic was developed in the United States - a strong-smelling, colorless, transparent liquid obtained from natural gas production. It can be easily dissolved in ethers, chloroform and water. Acrylic is environmentally friendly, wear-resistant, cheap, practical, and can withstand temperature changes. Therefore, the new material was widely used and began to be in demand.
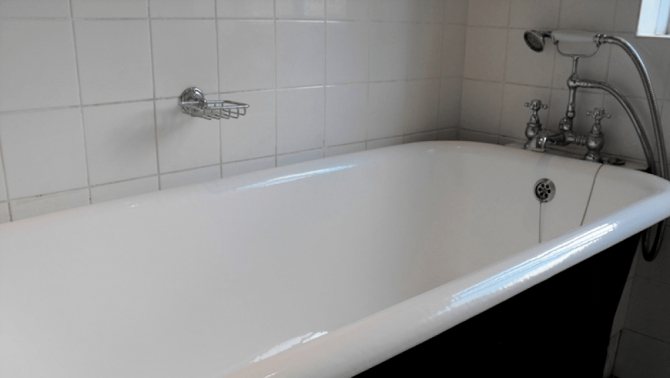
Today, acrylic bathtubs are popular, lightweight, easy to clean, comfortable, as well as acrylic coatings for cast iron bathtubs, hygienic and beautiful. Acrylic is used to make lampshades, display cases, suspended ceilings, and to make threads and fabrics called artificial wool. Several decades ago, almost all fillings and dental crowns in dentistry were made from acrylic.
Acrylic varnishes are widely used in industry. Postmodernist artists paint with bright and rich acrylic paints - impressionists would certainly appreciate them! Images on canvases painted with acrylic paints, unlike oil paintings, will never fade or fade. Acrylic can be used to paint wooden, glass, metal and plastic surfaces.
Acrylic has also found a place in the beauty industry: it is indispensable for nail extensions. Like all great inventions, acrylic nail coating was invented completely by accident. Its creator, dentist M. Lapp, tried to wean his wife from the habit of biting her nails. To do this, he covered her nails with the material from which he made dentures for his clients. Lapp's wife, who liked the updated nails, introduced a new fashion. Manicurists began using acrylic, purchasing it from dentists.
Bath drying conditions and times
Acrylic dries for about two days.
After pouring, the mass on the surface begins to set. At this time, the errors cannot be removed; it is better to do this later using a repair kit. You can work for 60 – 70 minutes (a little over an hour).
Time for complete curing of the film (average value):
- Ambient air temperature +25°С - 36 hours;
- at +20°C - 42 hours;
- at +17°C - 48 hours.
During the polymerization of acrylic, animals and people are not allowed near the bathtub so that hair or fur, as well as other debris, does not get in.
Acrylic and gel nail extensions
In addition to acrylic, gel is used for nail extensions. Both of these materials are synthetic and have a lot in common. But a gel is a jelly made from a polymer using the right temperatures. And acrylic is a liquid and a fine powder; they are also obtained from a polymer, but using different temperatures and under different pressure. The liquid (monomer) is mixed with the powder, achieving a material with a liquid consistency, which hardens in a few seconds under the influence of oxygen.
Gel came into use later; it is a derivative of acrylic. Manicurists, having started working with acrylic and gradually changing technology, achieved a gel that hardened when exposed to sunlight. This simplified the technology: the gel is easier to apply; once on the nail, it immediately takes its shape. That's why some people prefer gel. But most masters still use acrylic.
Differences between acrylic and gel false nails
- Acrylic nail extensions are convenient because they correct imperfect (weak, broken) nails. Under acrylic coating, your own nails become stronger, grow, and take on a beautiful shape. If nails are extended with gel, then it is desirable that they are smooth and healthy: the gel does not hide obvious defects.
- Acrylic nails are stronger than gel nails and do not react to temperature changes. The gel does not withstand temperature changes. In cold weather, such nails can crack or break.
- Matte acrylic, glossy gel. Transparent and clear, like glass, the gel allows you to apply more complex and sophisticated painting to your nails. Acrylic helps create a three-dimensional design.
- When removing gel nails, you can only file them down. When sawing, tiny dust is released, which is harmful to health, constantly settling in the lungs. Of course, craftsmen are at greater risk than clients. Acrylic is removed using a special solution. Acetone can also remove it, but this is undesirable because it can turn your own nails yellow. True, the flexibility of acrylic to acetone does not allow you to immediately apply varnish to acrylic nails, because when removing the varnish from the nails, the acrylic will also come off. Those who love acrylic nails have to cover their nails with a special base. But acrylic nails don’t need to be varnished at all, they look so natural.
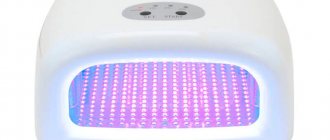
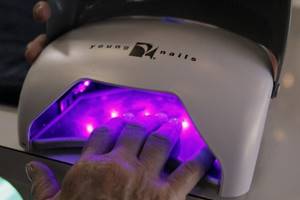
- Acrylic hardens on its own in a few seconds. In order for the gel to harden, a special ultraviolet lamp is used. When drying gel nails, there may be strong, albeit short-term, painful sensations.
- Sometimes they say that gel is healthier than acrylic (ultraviolet light, which is used to dry gel nails, protects your nails from fungus, under the gel layer the nails “breathe”), and that acrylic violates the integrity of the nail plates. These misconceptions are spread by craftsmen who do not know how to work with acrylic, the application of which requires greater skill. Gel is no healthier than acrylic, and acrylic is no more harmful than gel. Both materials have the same chemical composition.
Ideally, you should use both materials, covering acrylic nails with gel. Then your nails will be super strong and shiny.
Both acrylic and gel nails last up to four months. True, every two weeks you need to make adjustments (adjust the border between false nails and your own, change polish and designs) so that your nails continue to look natural.
About acrylic powder
Acrylic nail powder is a powder made of tiny crystals. Acrylic is not a natural product. It is made from polymer compounds, that is, plastic. Previously, this substance was used for dental purposes. Then it became widespread in the manicure industry.
Strengthening nails with acrylic powder
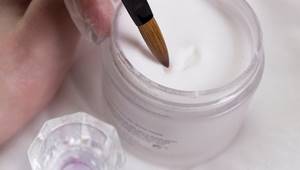
Acrylic nail powder how to use? Using acrylic is quite simple. The main thing is to have on hand the powder itself and a special liquid monomer (another name is liquid). Acrylic is a polymer; to make it work, that is, turn it into a plastic material, you need a monomer. When these substances are combined, a viscous, delicate mass is obtained, which is convenient for nail extensions. The resulting composition dries quickly when exposed to air, so you need to work with it quickly.
Note! Acrylic is characterized by increased wear resistance. It is stronger than gel coating. You can walk with it without correction for up to 4-5 weeks. Materials for this type of extension are cheaper than for working with gel polish.
There are quite a few varieties of acrylic powder.
For a novice craftswoman, ordinary transparent polymer will be enough. There are also the following types of acrylic:
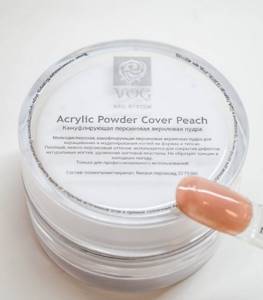
- Camouflage natural powder. It resembles the normal color of the nail plate. That's why it looks like a natural coating. Its camouflaging properties lie in the fact that, due to its dense composition, it hides nail imperfections (for example, a yellow tint, inclusions, etc.)
- Pink and white types. These colors are basic. They are ideal for creating a French jacket.
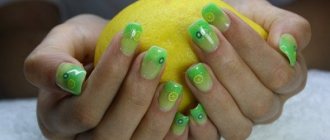
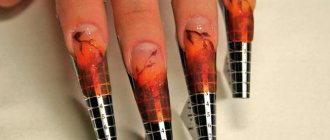
- Multi-colored and with sparkles. This option is often used by nail art specialists who create unusual designs and voluminous compositions on the nails.
- Neon. These powders are new. A manicure using such a polymer looks “screaming”, since all the colors are very saturated, pungent, and bright. Neon acrylic is also used for design ideas.
Acrylic powder is a synthetic powder
Pros and cons of acrylic nail extensions
Like any technology, acrylic nail extensions have their advantages and disadvantages. The customer of the procedure needs to have an idea about them in order to choose what suits him best: acrylic or gel.
Advantages of acrylic technology:
- Exceptional strength compared to gel nails, the breakage of which under stress can injure your nails.
- The ability to correct your own nail and hide its flaws. Acrylic nails camouflage a small nail bed or an unattractive nail shape. Acrylic applied to the nail does not spread immediately, the nail can be “sculpted”.
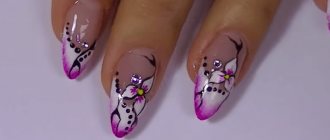
- A French manicure done with acrylic looks more natural than one done with gel.
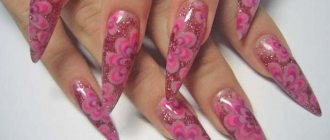
- Acrylic manicure, unlike gel manicure, can be made voluminous (the so-called 3D manicure).
- You can apply glitter in any quantity.
- Nails are easier to remove, can be treated with a special solution, and do not require filing with the release of harmful fine dust.
- Acrylic does not contain allergens.
Disadvantages of acrylic technology:
- It has an unpleasant pungent odor that irritates the nasopharynx. True, now manicurists use special extracts that soften the smell, but it is impossible to completely get rid of it.
- After removing the polish from acrylic nails, they appear yellowed. And if you remove acrylic with an acetone-containing solution, your own nails will turn yellow. Therefore, it is important to strictly follow the technology and not remove nails with an unrecommended product.
- It is impossible to achieve the ideal shine of nails, which is inherent in gel nails.
- Acrylic hardens very quickly, and after hardening, errors in the master’s work can only be filed away.
- It is difficult to find a good craftsman who is fluent in acrylic technology.
Gel modeling
Gel technology includes modeling materials and decorative coatings. Three-phase systems of both modeling gels and gel polishes are considered professional.
Products for gel nail extensions by phases:
- Base gel.
- Modeling gel.
- Top.
The second phase is represented by a wide variety of colors and consistency. Clear, camouflage and white gels are popular. There are also colored gels that are applied in a thin layer to the formed nail for design.
There are single-phase gels that are usually used to strengthen nails under a colored coating. They are used for emergency lengthening of nails or for repair in case of breakage of one or two natural nails. They stick well only to naturally strong nails. Weak nails give rise to detachments.
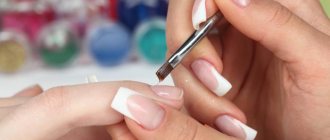
The process of nail extension using acrylic
Nail extension with acrylic is a long and high-tech process. There are several steps to this process that must be followed.
Step-by-step acrylic nail extensions:
- Thorough hand washing.
- Preparing the nail for the procedure. The nail is treated with a special disinfectant that kills bacteria on the nails and protects against fungus.
- Getting rid of cuticles. The cuticle at the nail bed is pushed back with a pusher and then removed with tweezers or scissors.
- Processing and polishing the nail plate with a polisher, giving it evenness and smoothness. The smoother the nail, the better the adhesion to the acrylic mass.
- Degreasing, applying primer to the nail. This is required to dry the nail.
- Form overlay. A false nail form is put on the nail or a tip is glued. If you use a tip (a plastic base in the shape of a nail), then it is put on the nail while the primer dries. You may have to work with a special type cutter. With its help, the length of the nail plate is also adjusted. The acrylic is then applied inside the mold, applied to the plate and quickly hardens. After this, the tip is removed and the nail is given the desired look. If you use a form (made of paper or other suitable material), then you need to apply a primer so that the nail shines. Then put the form on the end of your finger, carefully bend it, being careful not to break or damage the nail. The form is pressed tightly, securing it in the center of the nail. After application to the mold, acrylic is distributed over the entire surface, and the mold is removed after the composition has dried.
- Preparation of acrylic composition. An acrylic brush is first dipped into liquid (monomer), then into powder.
- Applying acrylic to the nail. The ball, which is formed from liquid with powder, is carefully distributed over the entire nail. The coating is modeled before it has dried.
- Giving the nail shape. After the acrylic coating has dried, the ideal shape is created using a set of nail files. First, a large file is used, then smaller files for jewelry work.
- Oil treatment. You can polish the oiled nail again. This will completely level it, removing minor scratches.
- Covering the finished nail. For a glossy shine, the artificial nail is coated with gel.
The entire procedure takes from one and a half to four hours. The duration depends on the condition of the nails. Purchasing equipment for making acrylic nails is a special task for every master. The equipment with which you can achieve high quality is not cheap. An acrylic brush can cost 2-5 thousand rubles. Masters say that you should not skimp on brushes, as well as on other materials.
What brands of acrylic gels are present in imkosmetik?
- Artex, Bluesky, Canni
- Elsa Professional, Grattol, Lunail
- Masura, Monami, Nail Passion
- Nail Republic OXXI
- RIO Profi, TNL Professional, Vogue Nails
Vogue Nails
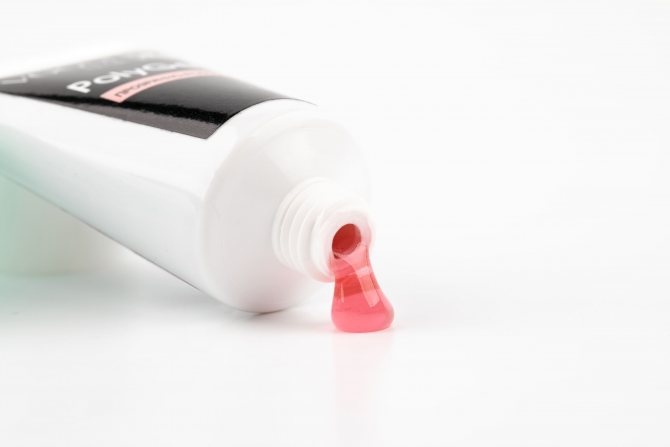
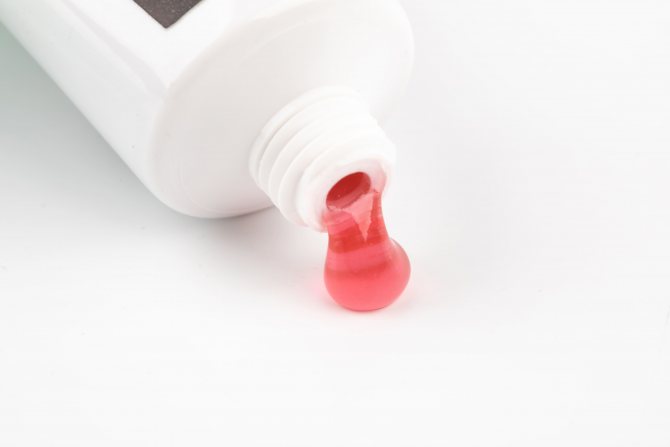
Polygel from this brand is available in tubes of 10 and 20 ml. The color of the polygel chosen for the photo is transparent pink and has a medium-thick consistency. Squeeze a small drop from the tube and use a spatula to apply the material to the nail plate. To form a short nail, a drop of about 5 mm is enough.
– The material has no odor, it is elastic, plastic and easy to model. The color is close to the natural nail. Based on experience in use, it turned out that it is better to apply the polygel over the base coat, since when applied to the primer, detachments are possible. This is an excellent material for nail repair, extensions, extensions and is well suited for beginners and those who are just trying their hand at nail modeling, advises Ekaterina Volosnikova, nail service master and imkosmetik live broadcast host.

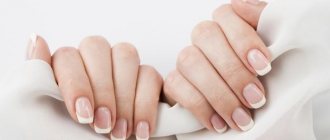
What is French acrylic manicure?
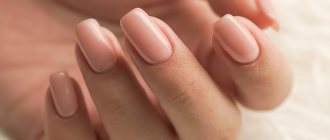
French manicure is a design option in which the protruding edge of the nail is highlighted in a different color. The tip of the nail, short and neat, is painted a bright white color, which naturally occurs only on the very healthy nails of very young women. The rest of the nail may be a soft pink.
Some argue that French nails were brought into fashion by the great Coco Chanel. Others say that the American Pinch. Originating in the 70s of the last century, French manicure continues to be popular. Probably due to the fact that “French” nails resemble natural, healthy and well-groomed ones.
French manicure is universal, it suits any dress, any lady’s style. And, of course, it makes her feel younger – almost like a schoolgirl.
In the 21st century, unlike the 20th, French manicure began to be done on long nails. There are also lovers of false “French” nails.
Now in every beauty salon where acrylic nails are made, you can see the word “French” in the first line of the manicurist’s price list.
Acrylic pouring technology
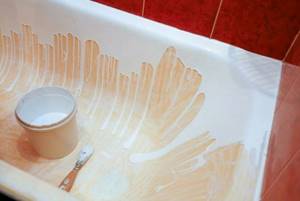
Experts do not recommend pouring the mixture onto the board directly from the container where the mixing took place. It is so difficult to track the amount of solution and get rid of random drops that lead to drips on the walls. Usually they take a disposable glass made of hard plastic.
Operating procedure:
- Place a large jar on the bottom so you can pour from it if necessary.
- Fill the far side, gradually move to the sides, then process the front.
- It is advisable to pour the material so that it covers the entire wall with a strip from the top of the side to the middle of the bottom. If this does not work out, add acrylic, but not from the side, but from the part where the gaps in the solution began.
- Distribute the mass using a hard spatula.
It is not advisable to remove all acrylic residues from the general container - there will always be some substance left that reacted poorly with the hardener.
Use a flashlight to check the thoroughness of the application. Once again, pour a little acrylic onto the drips so that the protrusion spreads on its own. All operations are done quickly.
Manicure with acrylic paints at home
Acrylic manicure is quite easy to do at home. To do this you need to have good brushes, files and other tools, as well as good lighting.
Acrylic dries quickly and does not require a special lamp for drying. This will allow any woman who knows the basics of manicure and is knowledgeable in the field of acrylic nail extensions to carry out the procedure herself with high quality.
It is important to free the brush from paint in time, without allowing it to dry, otherwise the brush will be destroyed and soaking it in a solvent will not restore it.
Special paints should be used for extended nails. It is desirable that they be water-based.
For home manicure, it is better to use tips rather than forms, since it is easier to grow nails with tips.
A set of good nail files (several, not just one) will allow you to polish your nails to an ideal surface, giving them a flawless look.
It is necessary to strictly observe the hygiene of the procedure at all stages (washing hands, thorough disinfection, degreasing), otherwise the nails will not take root: they will lag behind, forming sloppy pockets.
And, of course, it is important that no one distracts you while doing nail extensions. The phone should be turned off. If you have household members, it is worth warning them about your plans in advance. You should also ensure that they have their own set of keys and do not disturb you when coming or going, or enter your room during the entire procedure.
Tips from cosmetologists
To keep your hands always soft and well-groomed, and your nails strong, long and beautiful, experts advise:
- In winter, be sure to wear mittens or gloves;
- In hot weather, you need to apply a moisturizer or protective cream to the skin of your hands and nails. A film will be formed on the nails that will protect them from drying out and from unfavorable environmental factors. It is advisable to apply this cream 3-4 times during the day to avoid the uncomfortable feeling of dry skin;
- if any changes in the skin of your hands occur due to cold or, conversely, heat, you need to apply a nourishing cream at night and wear thin cotton gloves;
- all housework should be done with rubber gloves;
- Healthy food. It is useful to include more cottage cheese, dairy products, fresh vegetables and fruits in your diet. In winter, courses of taking multivitamins containing calcium and vitamins A and E are very useful;
- do a manicure correctly. Nails should not be cut with scissors; it is better to file them with special files;
- Always use a base coat before applying decorative varnish.
You can get beautiful nails in different ways. The main thing is to do this regularly. After all, well-groomed hands always leave a pleasant impression of their owner.
How to remove acrylic paint from nails
Acrylic paint can only be removed with a special solution. This can be nail polish remover without acetone. This will remove the nail polish along with the acrylic coating.
You can also remove the acrylic coating with an acetone solution, but this is undesirable as it may turn natural nails yellow.
You cannot tear off artificial nails or rudely tear them off, even if they partially come off and form “pockets.” Your nails are seriously injured, and then you can’t apply acrylic or gel to them for a long time.
Even if you have good nail polish removers, it is advisable to have your acrylic nails done by a professional. Only a master will be able to do this correctly, without causing harm to real nails. The process of removing acrylic coating can be long, labor-intensive and require a lot of solvent.
Cost of the procedure in salons
If the procedure seems complicated or you don’t have the complete kit needed to do it at home, then it’s easier to do it in the salon. After all, the master will be able to perform a professional manicure, strengthen your nails, and give a pleasant hand massage. Also in the salon you can learn about the latest in the nail industry and choose a design from a large selection.
The cost of strengthening nails using acrylic powder ranges from 500 to 2000 rubles. It all depends on the region, quality of materials and level of craftsmanship. In addition, many salons offer a low cost for the procedure, and you will additionally need to pay for a manicure, base coat, shellac and design.
For example, a nail strengthening service will cost 800 rubles, and together with a manicure and shellac coating it will cost 1,800 rubles.
What are the possible contraindications?
Since sharp-smelling acrylic is not a highly toxic substance, it will not cause negative health effects. However, there are contraindications, or factors that can reduce the effectiveness of the extension procedure. There will be no harm, but detachments will occur and the nails will not “take root.” Contraindications for acrylic nail extensions:
- Diabetes mellitus, coronary heart disease and other cardiovascular diseases, cirrhosis of the liver - this is a list of the main diseases that can cause artificial nails to peel off, forming pockets.
- Pregnancy.
- A course of treatment with antibiotics, or in more severe cases, chemotherapy. If treatment is started after the nails have been done, this does not mean that they will immediately fall off, but peeling is possible.
- Allergies, individual intolerance to acrylic. Although rare, there are clients who react acutely to volatile chemicals. As a rule, they are aware of their peculiarities and do not extend their nails with acrylic.
- Skin diseases, herpes (with rashes on hands).
- Fungal diseases, viral and bacterial infections of the nails and skin around them.
- Traumatic lesions of the nails, panaritium or hematoma under the nail, as well as serious injuries to the nails after artisanal removal of the nail covering.
Acrylic nail extensions in themselves do not harm clients. Acrylic is recommended for all women who want to achieve beauty and well-groomed hands.
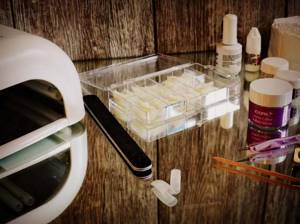
Required materials and tools
Whatever nail procedures you perform, you cannot do without auxiliary products. It is advisable to purchase all materials from trusted sellers so as not to waste time and money.
- Acrylic Powder. Can be purchased immediately as a set.
- Liquid. It may also be called liquidity. Needed to dilute dry powder. It does not change the shade of acrylic. The composition contains plasticizers that add stickiness and remove dust.
- Flat brush.
- Degreasing agent. Needed to clean your nails and increase adhesion to the material.
- Buffs and files. Useful for grinding.
It must be said that acrylic powder is not cheap. This can be intimidating for newbies. However, by purchasing just one jar of dry acrylic, you can complete not one, but several coatings. In the end it will be quite economical.