Currently, there are no girls who do not take care of their appearance. After all, a well-groomed appearance is of great importance in society. This is reflected in everything: original hairstyle, fashionable and beautiful clothes, light make-up. All this creates a beautiful and unusual image. However, the most important element that attracts most of the attention of others are the handles. It is the well-groomed hands that are considered the calling card of every girl. Therefore, a carefully executed manicure is an integral part of a girl’s attractive appearance. Despite the fleeting fashion trends that dictate new and stylish solutions for length, color, patterns, possible decor and coating textures, the main requirement of any nail art remains a neat manicure.
Rules for applying varnish
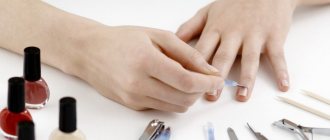
We present step-by-step recommendations on how to carefully paint your nails yourself. To do this, we will consider the procedure, by performing which you can even avoid the need to get rid of excess varnish on the cuticle and skin of the fingers.
Preparing the nail surface
The very first step is to remove the old nail polish, for which you will need a cotton pad or roller and nail polish remover. To keep your nails healthy, you should choose a product without acetone. It will cost more, but will not affect the nail plate in any way.

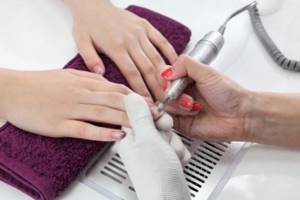
Before carefully painting your nails with varnish, it is advisable to do a hygienic manicure. This can be a trimmed, untrimmed or hardware procedure. During such a manicure, you need to remove or push back the cuticle, as well as align the nail plate as best as possible. This is done by sanding with a special nail file. Also at this stage, the nails are given the desired shape and length. Now remove any remaining dust from the nails and wipe them thoroughly.
If your nails are even slightly damp, there is a risk of the polish coating peeling off. For the same reason, it is advisable not to come into contact with water at least a couple of hours before the procedure. Additionally, you can treat the plates with a degreaser.
Varnish application process
You should start decorating with a base transparent coating, which additionally levels the plate. Strengthening agents are good as such a base, because... They not only protect, but also treat nails. In addition, the base polish prevents the nail plate from yellowing and prevents dark and rich polishes from seeping into the nail. The last point is very important, because it is quite difficult to completely remove old varnish in dark shades.
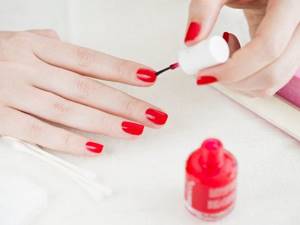
After this, the actual application of colored varnish begins:
- Lightly heat the bottle with the selected varnish and roll it between your palms. Under no circumstances should you shake it, because... the resulting air bubbles will affect the appearance of the coating.
- Using a brush, apply enough polish to cover exactly one nail. If there is a lot of product, it will be more difficult to distribute it evenly over the surface, and it will take longer to dry.
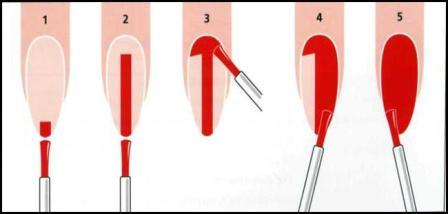
- Now we begin to cover the nails, starting with the little finger. To do this, place a drop approximately in the center of the nail, a little closer to the cuticle, and use a brush to reach it. Then we move the brush from the center to the free edge, after which we paint the side parts. If desired, we can first move to the edge of the nail, and only then to the cuticle. At the end, be sure to seal the free edge with a gentle movement of the brush and let the nails dry.
- To get a more saturated color and avoid pale streaks, you need to apply a second coat of varnish.
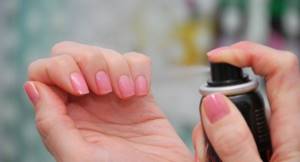
- To ensure your nails are completely dry, you can use a hairdryer at low speed or an ultraviolet lamp. However, the best way is to dry it naturally, which will retain all the shine. When all the decorating work has been completed, all that remains is to coat the nails with a fixative. It will also need time to dry, although you can use a special spray to speed up this process. This spray can be slightly oily, thereby helping to moisturize and soften the cuticle.
Tricks for a neat manicure
It’s not enough to know how to carefully paint your nails yourself; there are tricks here:
- to cover nails, it is advisable to use high-quality varnishes that have a general structure;
- It is not at all necessary to buy expensive degreasers - regular alcohol will do;
- to check whether the coating has dried, you can lightly tap your nails against each other or lightly touch them with your lips;
- between uses, varnishes should be stored in dark, cool places;
- Do not move on to the next nail without dipping the brush into the varnish again;
- if you are not satisfied with the result, you should remove it immediately and repeat the procedure;
- To ensure that the polish lasts as long as possible, do not wet your hands for several hours after application.
Mechanical damage
Damage to nails when removing gel polish or extension materials is one of the most common nail problems, which further leads to brittleness, splitting and peeling nails.
Causes of damage to nails with extension materials:
- Intensive cutting of artificial material with removal of part of the natural plate;
- Excessive removal of the natural shine of nails before extensions;
- The use of metal cutters for removing gel polish and gel. It is better to use ceramics, especially for beginners in hardware manicure;
- Tearing off gel polish and artificial nails from a natural plate;
- Incorrectly selected files and cutters for natural nails in terms of abrasiveness and size.
In salon conditions, the problem of nails that have been sawed and slightly damaged by abrasives is solved with the help of a leveling and strengthening coating - a rubber base, biogel, gel or acrylic.
Hardware manicure - answering frequently asked questions
Craftsmen should follow the manufacturers' recommendations for each material and tool used to avoid possible damage to the plates. It is better to remove artificial coating and gel polish by soaking or filing with ceramic cutters with a blue notch. This should be done with smooth movements without intense pressure, at speeds of 6,000-10,000.
At home, damaged or filed nails are treated with restorative oils and strengthening coatings.
Hand baths: 30 recipes for different purposes
How to keep cuticles and skin clean
Even with professional skills, you can make a mistake and smear your skin or cuticles with varnish. There are several methods, the preliminary use of which will avoid such awkwardness.
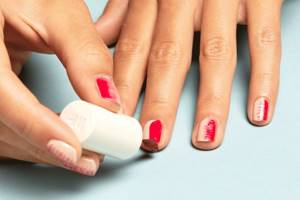
Using tape or adhesive tape
To prevent the varnish from getting on the skin, the girl can stick ordinary stationery tape or electrical tape on the skin before drawing. After all the necessary procedures have been carried out, the adhesive tape and varnish smears on it are removed from the fingers. There is a small drawback to this method - it will be difficult to protect the cuticle, and therefore you cannot do without a trimmed manicure.
Applying hand cream
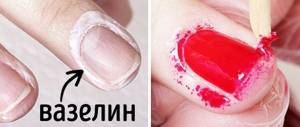
To prevent the polish from sticking to the skin, you can pre-coat it with a rich hand cream or even Vaseline. At the end of the entire process, your fingers will be cleaned with cotton pads. You need to use such products carefully, trying not to get them on the nail itself. Otherwise, there is a risk of rapid peeling of the coating or chipping.
Application of PVA glue
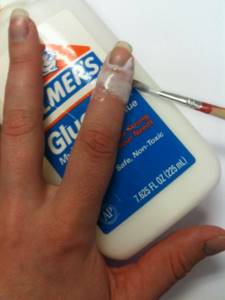
Stationery glue works on the same principle as duct tape. To protect the skin of your fingers, you need to cover it with glue and wait until it dries, turning into a transparent film. It can also be easily removed once the nails are dry.
Use of corrector and special liquids
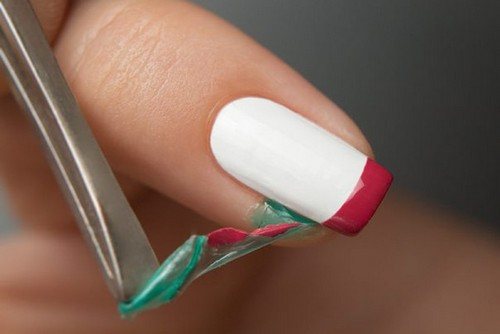
This method is practically no different from those discussed above. The only difference is that the means used will be much more expensive. Special liquids are also applied before painting on the nails, turning into a film. It can later be removed by grabbing the free edge with tweezers.
Correctors can be applied before coloring, but there are also those that will remove varnish that has smeared the skin or cuticles. They have replaceable rods and are filled with nail polish remover.
You can see some of the correctors in the table.
| Name | Application | Image |
| Mavala | After application | |
| Stylo Correcteur | After application | |
| Nail Polish Removal Pen | After application | |
| RIO Profi (tape) | Before application | |
| Ibcccndc | Before application |
Peeling
There are external and internal factors that provoke nail detachment. The medical name of the disease is onycholysis. When affected by an infectious genesis, the nail becomes cloudy and rough. It is possible to completely get rid of onycholysis only in 30-40% of cases.
Causes of onycholysis:
- Damage, explosion;
- Incorrectly selected shoes;
- Cuts;
- Peeling and chipping of extended materials, which “pull” the natural plate along with them;
- Failure to comply with the technology of extensions and coating with gel polish and other long-term materials;
- Excessive wear of artificial turf, untimely correction;
- Human papillomavirus;
- Cardiovascular and endocrine diseases;
- Fungus and bacterial infections;
- Psoriasis;
- Eczema;
- Allergy.
In a nail salon, the master corrects the peeling by removing the free edge and performing extensions with artificial material (if the reason is that the coating is worn out).
The edge of the detachment cannot be undermined further. If the condition is severe, refer the client to a doctor. He must select medications, including those for internal correction of the balance of vitamins and minerals. In case of severe detachment, surgical intervention and the use of dressings with antibacterial and antiseptic solutions are required. Long-term use of gelatin solutions of various concentrations has proven itself to be effective in nail restoration.
The client may need to undergo treatment for fungal and bacterial infections, which should not be sealed under a layer of artificial turf to avoid exacerbating the problem. At home, you should not undermine the source of exfoliation; you should consult a doctor if there is a hint of fungus or infection, cut your nails short and wear protective gloves when working at home. For feet - choose comfortable shoes.
Nail polish on the right hand
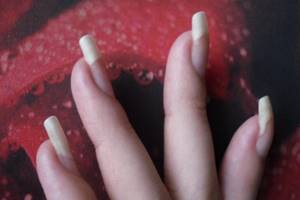
Probably every girl faces the problem of coloring her working hand, i.e. right in the case of right-handers. The strokes are sloppy and often the fingers themselves become coated with varnish. However, you don't have to ask for help. You just need to learn some secrets of how to carefully paint the nails on your right hand.
First of all, you should learn how to hold your hands correctly while applying varnish. The non-working hand should be relaxed and rest on the little finger side. The little finger itself must be straightened, and the ring finger must be tucked under the rest. Next, the brush is pressed with the thumb to the index finger. The position of the hand will allow it to be more stable.
Now let’s reveal a few tricks for applying varnish with your non-working hand:
- there should be slightly less varnish on the brush than is required for one nail, it should not drip;
- you can try to move not your hand with a brush, but control it with your finger on which the varnish is applied;
- in order not to attract the attention of others to a sloppy manicure, it is better to use varnishes of lighter colors;
- If the painting hand often touches the other, it is worth working on each nail separately, allowing it to dry completely.
And most importantly, don’t be disappointed in your skills. The more training you have, the better the process of applying polish with your left hand will be in the future.
Toe nail polish
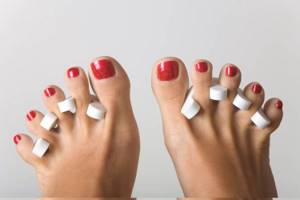
Now let's figure out how to carefully paint your toenails. Let's not talk again about the need for a trimmed pedicure and complete degreasing of the nail plates. Let us immediately point out the most important points for those who do not know how to carefully paint their toenails on their own:
- before starting the procedure, you should take the most comfortable position;
- hands should not hang in the air at the time of staining;
- Separators should be put on the fingers so that they do not touch;
- all movements must be smooth;
- You shouldn’t paint your toenails if you need to run somewhere soon, much less go to bed.
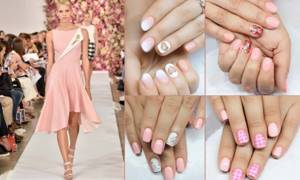
Color selection. Delicate tones
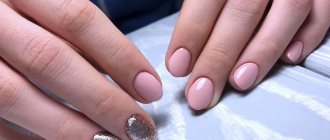
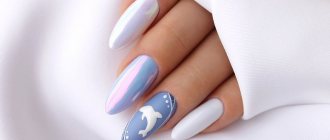
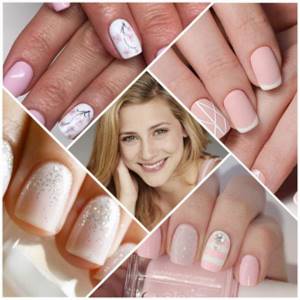
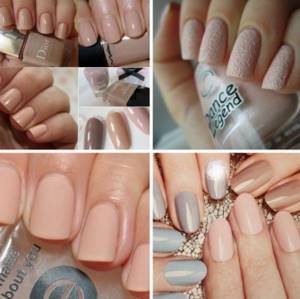
Among the new manicure products of the coming year, you can find many examples of nail designs in delicate colors. Small, neat nail plates with a light finish are considered a universal option for women of all ages. The coating is ideal for work on weekdays, and for parties, and for special occasions or going to the theater.
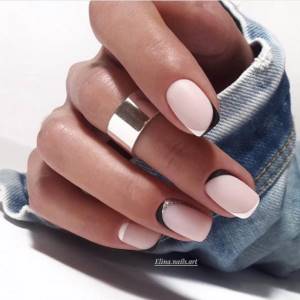
A classic version of nail design in light colors can be called a French manicure. It's good for any length. But when decorating small nails, the reverse French effect will look interesting.
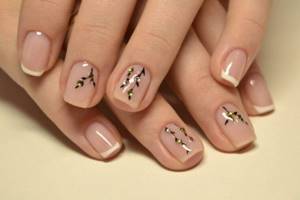
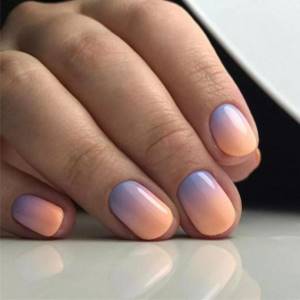
An example of the most popular delicate manicure of 2022 is a light gradient or delicate ombre of beautiful shades flowing into one another.
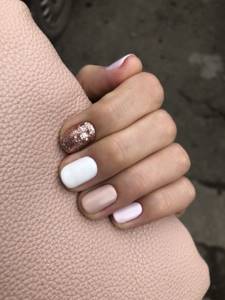
Neat manicure with several polishes
If a girl wants to create a pattern on her nails using two or more colors, she needs to be even more careful. Now an additional problem arises - one color should not overlap another. There are two ways to solve this issue:
- The use of stencils and stickers that will cover a certain part of the nail or become part of the design.
- The choice of nail design is a gradient, in which it is not at all necessary to maintain clear boundaries between different colors.
Fashion trends 2022
This year the following nail shapes will be popular:
- Soft square.
- Classic square.
- Almond shape.
- Oval shape.
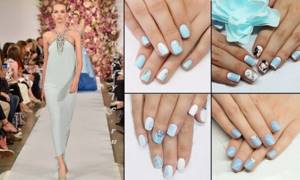
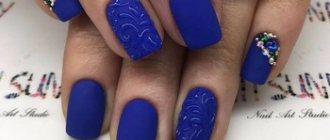
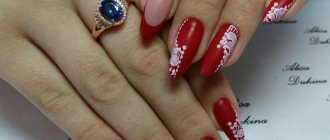
In the color scheme, fashion gives preference to bright colors. For example:
- Orange and yellow shades.
- Purple, coral and raspberry shades.
- Shades of blue, mint and gray.
- All shades of brown.
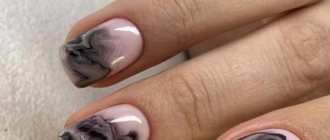
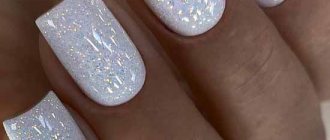
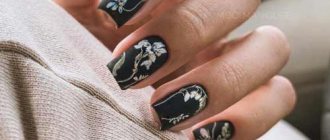
In general, this year the trend will be to combine several materials in manicure at once. This is a combination of a shiny and matte finish.
Rub in powder along with a classic French coat. Predatory print and classic ombre. The most popular now are matte shades, which combine perfectly with gloss.
But when choosing manicure nail polish ideas, the last word remains with you. Use your imagination and create, especially since in our time there are more than enough resources on the market for this.