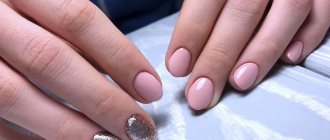
Any self-respecting woman takes care of her hands and tries to give them a beautiful and neat look. But careful nail care can not always cope with such a task. For example, if your nails are soft and brittle, caring for them can become much more difficult. Acrylic nail extensions will help solve this problem; in addition, you can lengthen short plates and create an unusual and unique nail design.
Nowadays, nail extensions using acrylic are done in most beauty salons. Professional manicurists will be able to give your nails any look, as well as create any design on them. However, this procedure can also be carried out at home on your own.
Nail extensions with acrylic
To perform various designs in the nail service, such popular materials as gel, acrylic and shellac are used.
Any of these compositions has both pros and cons. It is worth noting that acrylic is the basis for creating gel and shellac.
Any of the presented products can be used as a material for nail extensions and manicures.
Moreover, it can be done in the salon or at home. Representatives of the fair sex can give preference to any of these compositions.
The extension process is performed in the following ways:
- on forms;
- for tips;
- on your nails.
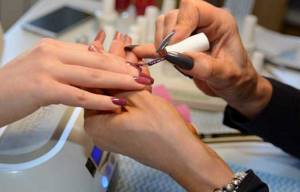
Let's look at how nail extensions are done using acrylic:
- first we treat the nails with a manicure tool;
- We polish the surface of the nail for better adhesion to the material;
- degrease the nail plates;
- mix acrylic, cover the nails with it in accordance with the selected extension model;
- We grind the nail plate and remove unnecessary material from it with a file.
Once the shape of the nails is prepared, you can begin to design.
Benefits of using acrylic paints
Nail designs with acrylic paints are very popular. They are made by both professional craftsmen and amateurs. These paints make it possible to work on various surfaces and combine patterns and colors.
Advantages of colorful acrylic coating:
- wide color palette;
- paints can be mixed until the desired shade is obtained;
- has no smell;
- non-toxic;
- economical (low material consumption);
- both natural nails and extensions are used as a basis for drawing;
- if flaws arise during work, they can be removed with plain water;
- inexpensive - a set of excellent quality paints will cost 400-690 rubles.
Any girl can purchase such paints and paint her nails on her own.
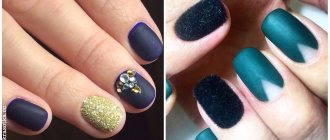
Knitted manicure with acrylic powder
The demand for its design increases with the onset of spring and autumn.
A characteristic feature of this design is the presence of patterns reminiscent of sweater knitting. In the photo you can see what a similar acrylic manicure design looks like.
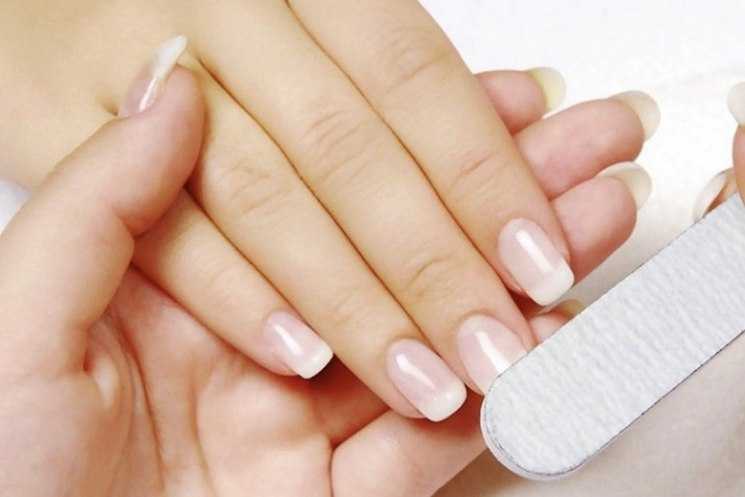
Further nail care
Nail plates do not require special care after manipulation due to the strength of the composition.
To preserve your manicure for a long time, follow these rules:
- High humidity is the reason for artificial nails to peel off. Hand washing is accompanied by diligent drying with a towel, especially the nail plates.
- When handling household chemicals, use gloves.
- To give acrylic nails a natural gloss, they are coated with colorless varnish.
- Use preparations to remove varnish without adding acetone.
- Sometimes an allergy to a synthetic material – acrylic – manifests itself. In case of peeling, redness, itching of the epidermis of the hands, urgently visit a specialist and remove the acrylic coating.
- To maintain the flexibility of the nail, resort to oil baths daily.
Oil baths - healthy nails
- A balanced diet and quality sleep are important for healthy nails.
If you want to grow your nails, they prefer acrylic. The material is responsible for the strength, beauty and durability of the manicure. A beginner can handle the job. To get an impeccable manicure, the main thing is to follow the sequence of actions and accuracy.
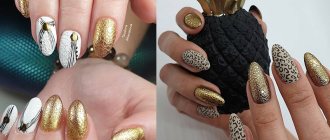
Monograms with acrylic powder
Monograms are also a popular option for manicures. This design looks impressive. In this case, the powder can have a different shade, allowing you to complement the effect of the manicure.
Advantages and disadvantages
Many experts consider acrylic extensions to be an outdated procedure and advise using gel materials.
However, using acrylic has its positive aspects, which are as follows:
- High level of elasticity, making artificial coatings similar to natural nails.
- Resistant to temperature changes.
- Significant strength with low plate thickness.
- Providing protection from aggressive external factors.
- Ease of carrying out the procedure for removing the artificial layer.
- Preservation of the natural shape of the growing nail.
At the same time, acrylic coatings also have certain disadvantages that they are endowed with in contrast to gel extensions. The main similar features are given below:
- The presence of a persistent odor, which is not pleasant to all people.
- Disorders of the respiratory processes of the nail plate.
- When painting, it is necessary to first use a colorless base varnish.
- There is a risk of an allergic reaction.
- Loss of natural shine of the nail.
Aquarium manicure with acrylic
On the flat surface of the nails, under the transparent acrylic layer, colorful designs and patterns are visible.
How to do aquarium nail design? The following is the execution technique.
- The first stage is the treatment of nails with special tools.
- Using a nail oil remover.
- Apply an initial layer of acrylic.
- Modeling and design of the nail plate using sculpting or appliqué.
- Covering the finished design with a second layer of acrylic, under which all the decorative elements (glitter, rhinestones, shiny sand) are visible. This is a great option for creating a New Year's manicure.
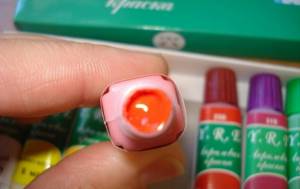
Types of paint
Acrylic dyes come in matte and glossy.
They are also divided into two types:
- Thick. They go on sale in jars. Before use, they need to be diluted with water.
- Liquid. Immediately ready to use. Sold in tubes. They are more convenient - they can be mixed. It is best to purchase tubes individually and periodically replenish stocks of flowers, which are used up faster.
Designers, using a variety of shades, matte or gloss, create real masterpieces on the fingers of their clients.
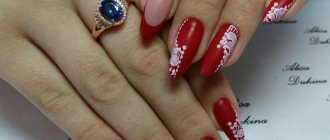
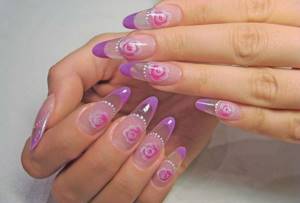
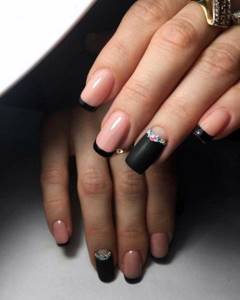
French acrylic design
French acrylic manicure is in great demand among women and girls. Due to the fact that acrylic nails will have to be worn for 3-4 months, the chosen design must match any outfit.
We recommend reading:
- Minimalist manicure: 145 photos of top ideas for fashionable and beautiful manicure designs
- Shellac manicure: design options, design features and application technology (140 photos)
Classic manicure: application technology, types and video lessons for beginners (100 photos)
What is needed for acrylic extensions?
Continuing our training, we invite you to familiarize yourself with the list of items needed for professional modeling of artificial nails using acrylic. All materials and a set of tools can be purchased at a specialized store. You will need:
- Acrylic powder for nail extension.
- Liquid (or monomer) is the solution needed to mix with acrylic.
- A set of regular, grinding and polishing files.
- A brush or set of manicure brushes for applying acrylic to the surface of the nail plate and creating designs.
- Liquid for removing acrylic nails, which can also be used to wash brushes.
- Dihydrate for degreasing the nail plate.
- Primer for stronger adhesion of nails to acrylic.
- Cuticle oil.
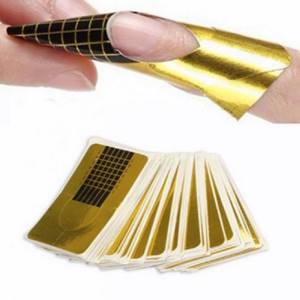
- Paper forms.
- Tips, glue, pliers and scissors - this set is necessary if modeling will take place using artificial plates, which are fixed with glue and secured with acrylic.
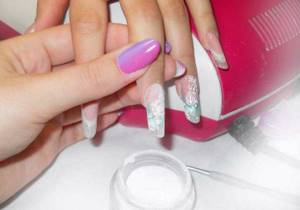
How to use acrylic powder to strengthen your nails
Nail design masters use acrylic powder not only to design nails. This material also serves to strengthen and strengthen nails, and also affects rapid growth.
If you want to improve the condition of your nails in this way, you will need information on how to strengthen nails using acrylic powder so as not to use extension services.
In addition, nail art experts advise covering your nails with acrylic under a layer of gel polish. This way your nails will become durable and beautiful for a long time.
Let us describe a step-by-step sequence of actions with which you will be able to properly strengthen the structure of your nails:
- thorough treatment of nails with a degreasing agent;
- applying a primer: if your nails are not weak, the free edge and side ridges are allowed to be treated with the product, sore nails are treated completely;
- Apply a base coat on the nails over the primer, then carefully sprinkle acrylic powder on them without drying;
- we send the nails under a UV lamp to dry thoroughly;
- remove excess material from the surface of the nails with a special brush;
- Finally, we apply a decorative varnish of a suitable color or any top coat to the nails.
So, acrylic manicure has been trending for a long time. And for good reason, because acrylic has many advantages. After it, the nails become firm and at the same time elastic.
The coating on the nail plate does not look dense, but looks neat and elegant.
If the acrylic layer is damaged, there is no need to remove the entire extended nail; it can be restored at home. Below is video material on this topic.
Basics for beginners
How to hold a brush
In this part of the article we will try to answer the question of how to properly paint with acrylic paints on nails. First of all, you need to get used to how to hold the brush. It's worth practicing a little on cardboard or plastic.
It is best to cover any surface with colored nail polish and, after it has completely dried, start painting with acrylic. The technique of painting with acrylic paints on nails is quite simple. Pay special attention to the pressure applied to the brush, the required amount of paint, the intensity of the color and the result of mixing shades. It is more convenient to take the paint not directly from the bottle, but to apply a few large drops to the palette.
After training, we learn how to paint on nails with acrylic paints. Draw a nail plate on cardboard, cover it with varnish and try to apply the selected design. Once you get it quite clearly and neatly, you can start performing an acrylic manicure, a photo of which you can add to your portfolio as a nail service master.
Photo of acrylic manicure
Please repost
0
2
Advantages and disadvantages
Acrylic extensions allow you to create natural-looking nails due to the elasticity of the material used. They will be thin, but at the same time persistent and able to last quite longer than the same gel. Acrylic extensions can be removed independently using a certain solution and any damage can be restored. In addition, this type of coating does not limit the possibility of using various techniques and implementing designs. Finally, it is worth mentioning that acrylic nails are not subject to temperature fluctuations, so there is no need to worry about them breaking when moving from a warm room to a cold one.
Unfortunately, acrylic also has some disadvantages. The nail does not reach the nail at all, but together with the extended edge it acquires a specific smell that is unpleasant to many clients. During the procedure, it may cause discomfort, but after a few hours the nails stop smelling. An allergic reaction is likely to occur; in addition, the natural healthy shine of the plate may temporarily disappear. Finally, the acrylic extension procedure is quite complex.

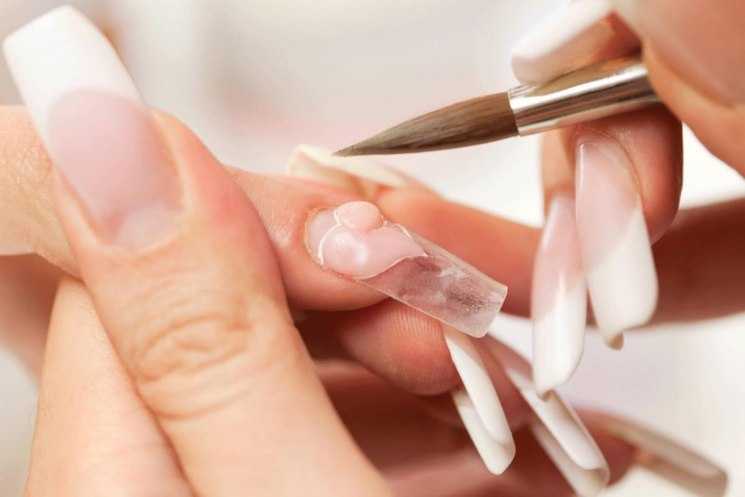
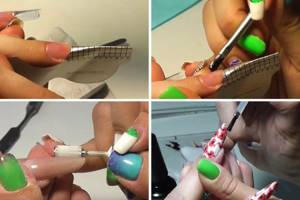
Step-by-step description of extensions using tips
The specifics of the extension directly depend on the chosen technique, so it makes sense to consider all methods separately.
The first will describe in detail the method used to carry out the procedure using tips:
Initially, hand disinfection is carried out, as before any other manicure procedures.
The cuticle is removed, and the thin film underneath it is also removed. For these purposes, orange sticks or a pusher are usually used.
With light movements of the file directed in one direction, the glossy coating of the nail plate is removed.
Tips of the appropriate size are selected depending on the individual characteristics of the nails.
The inside of the tips is covered with glue, after which they are glued to the nails. It is important to use only a special cosmetic type of adhesive, since household or household options are toxic and can cause serious harm to health.
The edges of the workpiece remaining in a free position are corrected.
The type prosthesis is processed with files until it acquires a matte structure
After this, the resulting dust must be carefully removed using brush movements.
The nail plates are treated with degreasers and primers.
Mixing the working materials is done by dipping the brush into the working monomer and then dipping it into acrylic powder.
The resulting mass should have a spherical shape and be laid out in the center of the plate, after which a nail of the required size will be created from it using a brush.
The filing of the surface begins: first the side parts are subject to processing, and then the upper and lower areas. Such manipulations should continue until the necessary bends are obtained.
Small scratches, if they have formed, can be removed using a buff. The polishing process should be carried out until
To treat the cuticle, oil is applied to it and rubbed in with your fingers.
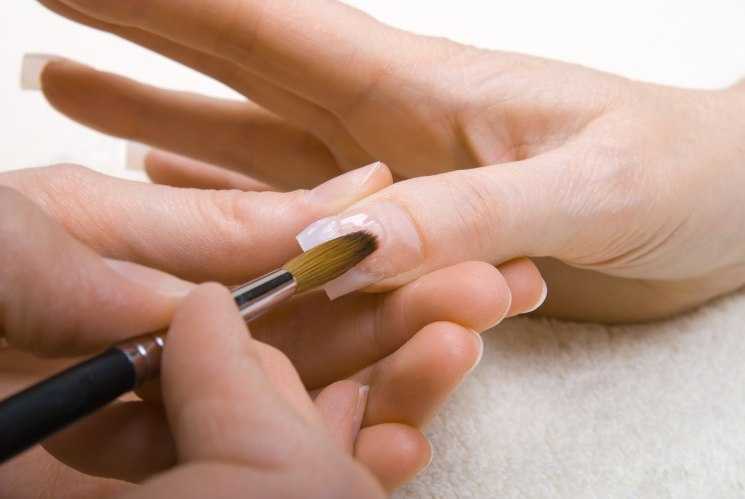
Step-by-step description of extensions to lower forms
The implementation of this technique requires much more dexterity and the presence of certain skills; its main advantage is the opportunity to express your own imagination and experiment with artificial manicure. Detailed instructions are given below:
- The process of disinfection, removal of the cuticle, removal of the top layer from the plate and treatment with a primer is carried out in the same order as when applying extensions using tips.
- After completing these steps, you need to put a special form on the tip of your finger, and then give it the shape and the desired bend.
- After the action has been completed, the surface must be treated again with a primer.
- Acrylic material is prepared in the same way by mixing powder and monomer. The blank can be of several colors, for example, if the artificial plates are to imitate a French manicure.
- It is necessary to wait until the mass dries completely naturally, after which the form is removed from the finger.
- Using files, the created nails need to be sharpened, removing excess along the edges and giving the end of the plate the desired shape.
- The procedure is completed by sanding the surface and applying oil.
Step-by-step description of extensions to upper forms
This technique is more suitable for people who do not have significant experience in DIY extensions, since the procedure is simpler than in the previous version, and the created surface will have an even structure and smoothness. Detailed instructions for carrying out are given below:
- The preparatory process is identical to the previous two extension options.
- Forms of suitable size are selected, after which acrylic balls are placed in them. The quantity depends on the desired length of the nail being created.
- The form is fixed on the nail and pressed firmly, allowing excess material to come out.
- You need to hold the form in this position for about 7 seconds; after the specified period, you can set the shape of the future plate from the inside, for this you will need to use a brush.
- It is necessary to wait for the material to dry naturally, after which the used form can be removed.
- The edges of the created nail are corrected using a file, after which the final treatment can be carried out with oil.
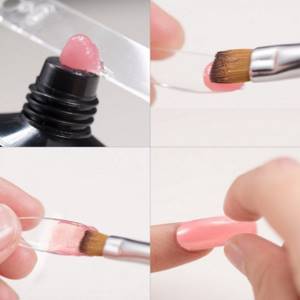
Tips for using acrygel
We recommend using the products as follows:
- Acrigel is applied only to the prepared nail. It is necessary to pre-treat the surface with a buff, degrease, cover with primer and base for gel polish.
- Acrigel does not level out on its own like a gel; it must be applied to the nail with a special brush.
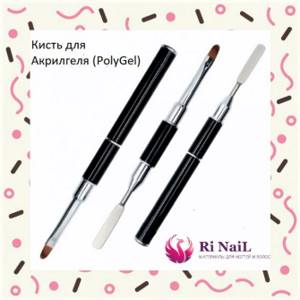
- A ball of small diameter is placed on the nail, then using a flat brush it is given the required shape. The brush must be dipped in a degreaser, a means to remove the sticky layer.
- Acrylic gel can be used as on conventional standard forms
- and on the upper forms

The material is polymerized in an LED or UV lamp with a power of 36 W or more. This takes up to 2 minutes.
! An important point: in lamps up to 36 W, acrygel does not polymerize.
The final stage of applying the polygel is smoothing the surface using a file. We finish forming the nail with it.