Hello, dear readers! Do you think there is a manicure that will suit any time of year? Neil specialists say that it exists, its name is drip. On nails it looks unusual, interesting, bold and always attracts attention.
Are you still sure that this is a complex design and only top masters can do it? Today I will dispel all your fears and doubts! You will learn how to make drops on your nails with gel polish and get acquainted with a simple technique for applying such a manicure. I’ll also give you several design options that even a beginner can handle.
"Water splashes" on nails
A manicure with imitation of water droplets is a real trend in modern nail art. It refers to 3D design, because the “irregularities” on the nail look three-dimensional.
Professionals say that it is suitable for all girls in any season. It looks beautiful on both short and long nails. Are you heading out for a romantic evening? Business dinner? To work? On vacation? “Water splashes” on your nails will become your ideal companions for the next 2-4 weeks.
Water manicure with shellac
The situation with shellac is the same as with gel polish - unfortunately, fans of this product are better off abandoning it in the case of water manicure. Not only does shellac not spread properly, but it also dries very quickly.
This means that you won’t be able to go through all the stages of applying a marble pattern with it. You can use shellac, perhaps, to cover the finished manicure so that it lasts longer. In this case, take transparent or translucent shellac, maybe with glitter.
Shellac neutral
Design Benefits
The advantages of drip manicure are obvious:
- Simplicity and ease of execution. Mastering the technique of applying drops on nails is not difficult at all, even for a beginner.
- Beautiful and original look. Covering with “splashes” is suitable for ladies of any age, with any style of clothing.
- Budget. The materials and tools for creating such a manicure are standard. No need to purchase special equipment.
- Quick application. Making a gel drop is very simple, because there is no need to draw individual elements.
You are definitely guaranteed a positive mood with drops of water on your nails. Otherwise, why do you need to make such a simple and at the same time elegant coating?
Advantages and disadvantages
Before the development of the production of modern materials for watercolor painting, images were painted using ordinary artistic paints. Disputes often arise among craftsmen about the ease of using paints and drops. The table below provides comparative characteristics.
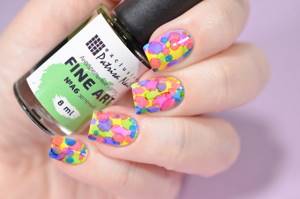
Table of characteristics of watercolor drops and paints:
| Index | Dye | Drops |
| Price | The cost of one cuvette is 100-550 rubles. | The price of one bottle varies between 150-500 rubles. |
| Compound | Pigment, plasticizers, gum arabic. | Pigment, alcohol solution. |
| Drying speed | Average | High |
| Palette | Has a wide palette from the manufacturer. | As a rule, a series includes no more than 10-15 colors. |
| Preparation | ||
| Note | Water is used for activation and washing. | Does not require activation, erosion is carried out with a special alcohol solvent. |
Watercolor drops for nails (which you can use even at home) have a number of advantages over regular artistic watercolors. Their chemical formula is alcohol-based, which allows the liquid to dry faster than regular art watercolors. When evaporated, only the coloring pigment remains on the surface.
This indicator significantly saves time when designing. However, this same factor requires the speed and precision of the master’s work.
Before using paints, they must be activated and a working solution must be prepared with a sufficient amount of pigment and water on the palette. For beginners, this procedure can be difficult.
Manufacturers of drops have already taken care of the correct proportion, so they are ready for use immediately after opening the bottle. The exception is when the solution needs to be made more transparent.
Bottles with drops are hermetically sealed, protecting the liquid from dust and lint; they are convenient to store and transport. Paint ditches require maintenance.
They must be dried first, as in a humid environment the risk of developing harmful bacteria increases. It is preferable to store in containers or boxes that protect from dust and other debris. After completing the drawing, the palette needs to be cleaned of paint.
The downside of the product is its rather limited palette compared to art paints. And also the need to use an alcohol solution for blurring.
"Raindrops": a modern approach
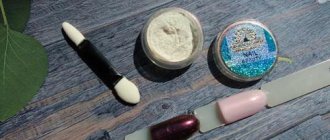
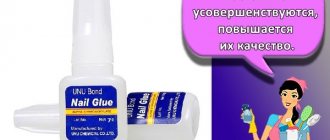
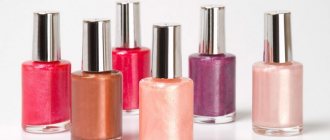
Drip nail art requires virtually no additional costs. You will need the following set of materials and tools:
- any gel polish or regular polish that is used as a base coat;
- "base";
- "finish";
- dehydrator or degreaser;
- brush or dots (from improvised means - a toothpick);
- Ultraviolet lamp;
- liquid for safe removal of coating from nails;
- cotton pads or cotton swabs.
Depending on what you plan to do with your nails, you may need other materials. For example, rhinestones, foil, matte coating, etc.
Before applying the “spray”, you must perform a standard manicure. The preparatory stage is as follows:
- Treat your handles with antiseptic.
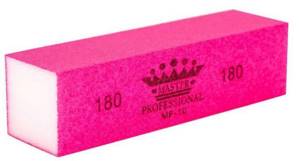
- Use a nail file to give your nails the desired shape. Trim the cuticle and sand the surface.
- Apply a dehydrator to the nail plate.
- Spread the base layer.
- Dry your nails well.
Not difficult, right? I’m sure any of you can handle this on your own, without the help of a professional.
Liquid manicure techniques
The technique for performing this manicure is very simple. You can easily make it at home without any extra effort. To do this you will need a base coat for nails, a buff, a file, a special dots tool and colored polish or rhinestones.
First, you wipe the nail well with nail polish remover. Then cover the nail with a base coat and start drying it in a lamp. It takes about 2 minutes to dry the nails.
Then we proceed to cover the nail with colored varnish or gel. And after drying, we proceed to applying liquid droplets.
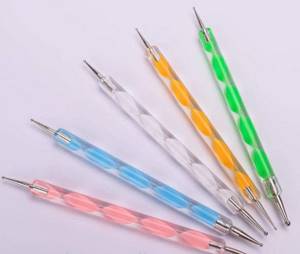
For this we need the dots tool. A dot is a stick that looks like a thick marker. At the end of which there is a metal pin with a round ball. Dots can be metal or plastic.
With it, you apply droplets to your nail in random order. The most interesting thing about such a tool is that you can adjust the size of the droplets. The main thing here is to dip into the varnish harder and grab more varnish, or a little bit and there will be less varnish.
Making “dewdrops”: four methods
Did you know that there are several ways to apply “rain spray” to your nails? Which one to choose depends on your experience, taste preferences and the time you are willing to spend on a manicure.
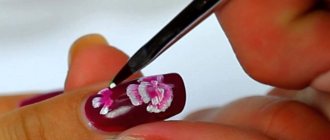
No. 1: Painting with a brush
- Before moving on to artistic painting with a brush, you need to perform a classic manicure. This is the basis. The further process step by step:
- Choose the gel polish you like and cover your nails well with it. Dry in a UV lamp.
- Take a thin brush and paint a few small circles on your nail with dark polish. Blend them to create a hazy effect. Dry well in a lamp.
- Apply droplets of gel or top coat on top of the circles. Dry again.
The application technique is quite simple. Thanks to it, a shadow effect is created. It is this that gives the “splashes” natural volume.
No. 2: Use dots
In nail art there is a special tool with which you can apply perfectly even circles on your nails - dots. It is an elongated plastic cylinder (like a regular fountain pen), with balls of different diameters at both ends.
Tip: It doesn’t matter if you don’t have this tool on hand. It can easily be replaced by a safety pin or a regular toothpick.
The application technique using dots is almost the same as with a brush. It is advisable to correctly select the color of the gel polish and the tone of the polish for the circles so that they match well with each other. And then everything depends on your imagination.
In this video, the master shows what a spectacular design can be created using dots.
No. 3: Volumetric stickers
This is the easiest option for creating a drip manicure. There are many varieties of “splashes”: from transparent to pearlescent.
Before purchasing such stickers, take a look at the photo and choose the option you like best. Drop stickers can be either the main design element or a secondary one.
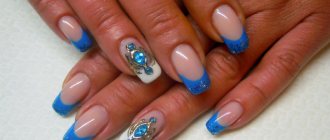
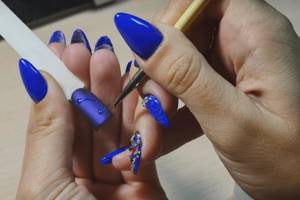
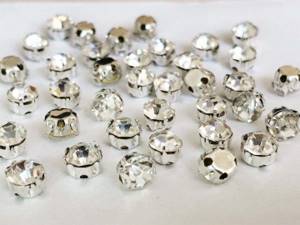
No. 4: Beautiful rhinestones
In order to create a shining drip manicure, some top nail artists resort to rhinestones. Sparkling beads come in a variety of shades and sizes, and you can easily make various combinations of them, including with droplets.
Nail experts do not advise getting carried away with rhinestones, generously strewing the surface of the nail with sparkling inlay. Everything is good in moderation. For example, like in this video:
Matte manicure with gel polish
This year, matte manicure is on the list of the most fashionable trends. The secret of popularity lies in the ease of application and the achievement of an incredibly effective combination with other textures. Matte manicure looks very unusual and impressive.
A manicure with a matte finish will suit every girl and will go with any image. The coating can be done in a single color or try to complement it with glossy varnishes. Make various patterns, geometric shapes, decorate with sparkles and rhinestones ─ just use a little imagination. In any case, the tone of the coating should depend on the event for which it is being performed.
Whatever pattern or application method is chosen, it is important to remember that the matte finish is very easily soiled. Due to the rough surface, dirt gets on it, which looks like worn suede leather
Therefore, you need to take into account that on a light manicure, the stained areas will be very noticeable. To avoid this effect, choose dark shades of coating.
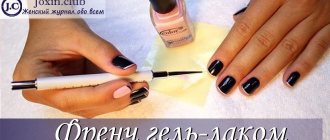
If you really want to do a matte French manicure using a pale pink shade, then buy more liquid to remove the matte gel coating; you should always have it on hand. If your nail is dirty, you just need to wipe it a little with the product and everything will be perfect again.
Design options
Top masters say that the droplet effect can be used in a variety of types of manicure. It also looks beautiful and elegant in the following options:
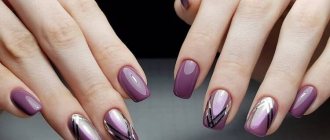
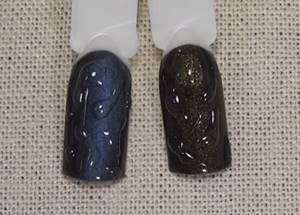
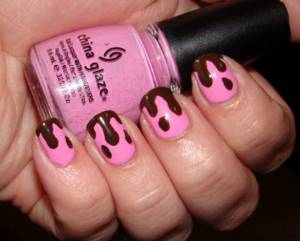
Plain
Perhaps there is nothing simpler than making your nails one color and “placing” splashes of water on top. This glossy decor looks impressive, especially on a matte finish. This design option produces a very impressive play of textures.
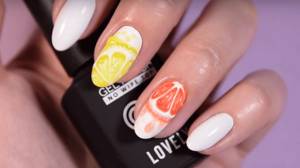
Fruit
The image of exotic fruits on her nails will give a girl a special charm in the summer. And if you decorate them with droplets of water, then such an unusual manicure will look even prettier and will certainly lift your spirits.
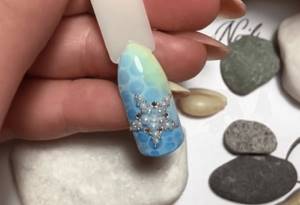
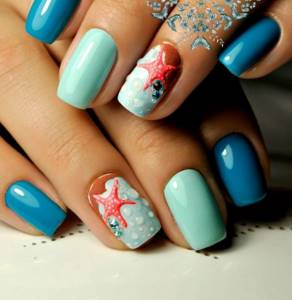
Nautical
This type of manicure is unthinkable without water droplets. Do you agree?
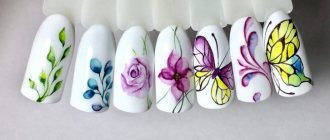
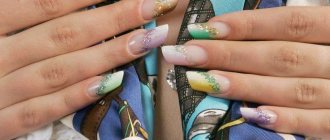
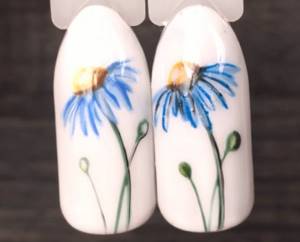
Floral
Drops of dew on beautiful flowers will add femininity and tenderness to your cover.
"Kitty"
Glass drops are the perfect complement to the cat eye technique. Your nails will shine in a special, more festive way.
Autumn
This theme is relevant in rainy weather. Drawings in the form of raindrops on top of painted umbrellas or yellow leaves will be very appropriate.
Professionals quite often apply “dew drops” to painted nails. This way they visually expand the image on the surface and give the picture a 3D effect.
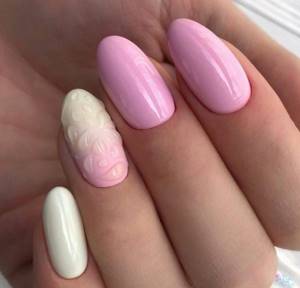
Light coating with liquid drops
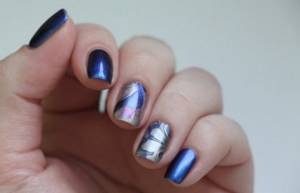
Light coatings include varnishes of soft pink, beige, light green and other not too bright shades. Many girls choose a plain coating and apply liquid droplets on top. You can also apply droplets to one or two nails, which is a very fashionable solution.
Often, fashionistas cover their ring finger with a design and apply droplets on top of it. In this case, your drawing can be anything. Starting from abstraction to real works of art.
You can also perform a liquid manicure in another variation. This is to paint a couple of drops of varnish in the smile area and move them down to the nail hole. This will help create the impression of flowing varnish, as if liquid drops are flowing down.
Pro recommendations
Nail artists say that it is important to use drip design correctly when performing a manicure. Follow the following tips and then you will definitely be satisfied with your new nails.
- Decorate several nail plates with “rain” decor. A too flashy manicure does not cause much delight, but rather draws too much attention to your person.
- Combine droplets with dark shades of varnish - this way you can make them as deep and rich as possible.
- Use the opportunity to lengthen the “dew drops” with a brush and you will get a more striking effect.
- Don't be afraid to combine drip designs with different manicure techniques. For example, it will add even more tenderness to a French coat, while “chameleon” or “metallic” will make it more peaceful and softening.
Nail design is a matter of taste and style of every girl. Don't neglect ideas, experiment! What if you create a new product for the season?!
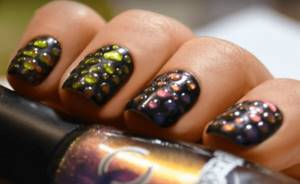
Bright coating with liquid drops
A super great solution for the summer, choose bright shades of nail polish with liquid droplets. All varnish colors that can be classified as poisonous are bright shades. They are perfect for summer, where you should wear something bright and flashy. After all, summer is a game of colors and flowers.
Often in bright shades, girls choose a summer theme as a cover. It could be a sea manicure, a beach landscape, a floral print, summer fruits and others. And all these designs are decorated with liquid droplets, which adds an amazing look to the design.
What to remember
We can summarize:
- The “dewdrops” on the nails are a real work of art. You can create them yourself without the help of a professional. You can watch step-by-step photos or study video tutorials on the Internet.
- Drip manicure is popular among girls. It is always relevant, suitable for any time of year, any length of nails, it is easy to create an individual design for any look.
- This is a fairly budget-friendly type of nail plate decor. You just need a standard manicure set, a UV lamp, as well as dots, brushes, stickers or rhinestones - your choice.
- There are many drip design options. You can be guided by pictures on the Internet or create the decor yourself. It all depends on your creative abilities.
Have you ever worn drop-shaped decor on your nails? No? Then try it! And you will certainly see how beautiful the volumetric design is. Do you still have any questions? Then feel free to ask them in the comments. See you again in the next article!
How to do a blood splatter manicure for Halloween: 3 options
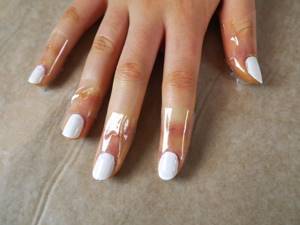
A manicure can be a great themed and/or fancy addition to a Halloween costume, especially when the first one is a scary splatter of blood. Each of the three techniques below starts with a two-coat base of white nail polish. And despite the fact that each of these techniques is more than achievable on your own, it’s worth inviting friends to help, and at the same time have fun before the scary-fun holiday.
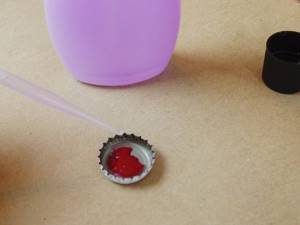
For all three designs you will need : - Wax paper (you can take culinary paper) or newspapers, - White opaque or at most translucent nail polish, - Blood red nail polish, - Transparent tape, - Bottle cap, - Eyedropper or any similar ( or any replacement tool convenient for you), – Nail polish remover, – Cocktail straw, – Cotton pads and/or swabs, – A pin with a ball at the end.
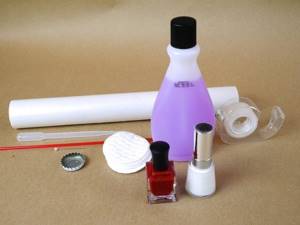
Before starting work, cover the work surface with wax paper or newspaper.
Option 1: Naturalistic “Maniac Splashes”
1. Layers of white varnish must be completely dry before starting work. We cover the skin around each nail with clear adhesive tape to protect it from splashes of red polish, which is often very difficult to completely remove from the fingers, especially from the cuticles. Start with a small strip of tape just above the cuticle, across the nail. We glue the second strip - and then move it from the bottom up, grabbing the side skin near the nail, then from above under the nail, then onto the skin near the nail from the second side - and down. That is, we cover all accessible skin around and under the nail.
2. Make the red nail polish less dense by first dripping 5 drops of nail polish into a clean, dry bottle cap, then using a pipette to add 2-3 drops of nail polish remover there. Stir with a cocktail straw. It is much easier to obtain sprays of the required format with this diluted varnish.
3. Dip the tip of the cocktail stick into the diluted varnish in the lid, completely covering the first one with varnish. We place the tip with varnish at a distance of 2.5 cm from the next horizontally lying nail and simply blow the varnish from the tip of the tube with our mouth, like bubbles in a milkshake. The varnish will apply very naturally in splashes of varying thicknesses.
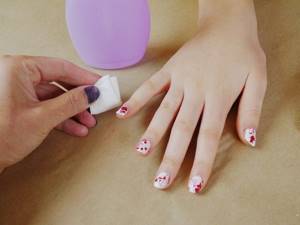
4. When your nails are splattered, remove the tape and remove any excess splatter by touching it with cleanser-soaked cotton swabs or cotton pads. After this, let the nails dry.
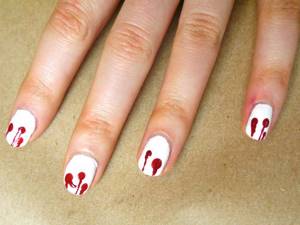
Option 2: A single missed drop of blood
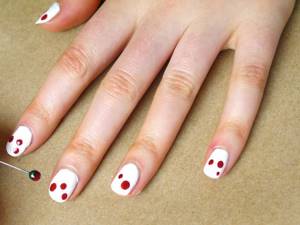
1. On dry white nails (or 1 nail out of all white nails - as if you forgot to erase or didn’t notice the only drop after the murder) put 1-2 separate drops of red varnish. To do this, pour a few drops of varnish into a clean bottle cap and dip the round tip of a pin into it. And then just use this ball to place one point on the nail where you need it. At the same time, do less pattern and symmetry on your nails.
2. Take a clean pin and, with its sharp tip, begin to pull the red varnish from each drop - always from its center - to the sides, getting several thin lines like splashes from a fallen drop.
3. We continue by analogy on the remaining nails: one drop - immediately pull it apart, 1 drop - immediately make splashes, otherwise the varnish will dry out and the design will not work. The drops should be made in different sizes!
4. Around large drops with splashes, you can use the tip of a pin from the cap with varnish to place very small drops for a more naturalistic manicure.
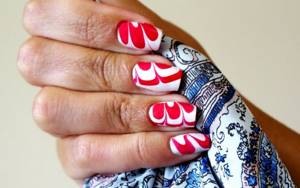
Option 3: Flowing and dripping blood
1. Completely dry white legs, a few drops of red varnish into a new clean and dry cap. In the same way as described above, with a ball on the end of a pin we place 2-3 drops of different sizes on each nail, closer to the tips of the nails, but at different levels. We decorate 1 nail at a time, otherwise the drops will dry out and the design will again not work.
2. Dip the sharp tip of a pin into red polish and draw vertical lines from the tip of each nail to the center of each drop! Some lines may well be thicker than others.
3. Finish the design using a regular brush mounted in a nail polish cap - drawing a straight line of red polish around the entire perimeter of the tip of each nail. Let your nails dry.
Umbrellas and leaves
Drawings that directly indicate autumn rain are in demand. To do this, bright autumn foliage is depicted on the marigolds. The umbrella can also be used for tropical motifs. It looks great at any time of the year.
When it's raining and slushy outside, a flawless manicure will help lift your spirits. Bright yellow and red leaves, umbrellas and raindrops on your nails will bring only positive emotions.
Images with an umbrella on one finger look laconic. You can apply decor to all nails to get an interesting and attractive option. Beginners usually draw the outline of an umbrella, while more experienced craftsmen are able to create beautiful compositions. They fit umbrellas, people and nature into a small space.
In summer, girls choose openwork umbrellas with bright shiny drops. This manicure will complement a light dress or shorts with a T-shirt. If you use decor in the form of sparkles or rhinestones, then with this manicure you can go on a romantic date or a fun party.
Matte finish
You can diversify your nail design with a flowing manicure when the monochromatic coating is already a little boring. This method allows you to achieve amazing depth. Water appears on the leaves after warm summer rain. It can be seen on the grass in the early morning in the form of dew. It shimmers in the sun like precious stones.

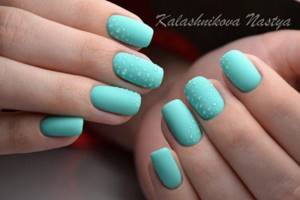
Today fashionistas get a natural effect on their nails. A matte manicure with droplets is suitable for any look. Small transparent elements will act as stylish accents on the colored coating.
Water manicure ideas
Since water manicure is quite complicated to apply and requires special care, it is recommended to start simple - do an accent manicure, that is, paint one or two nails on each hand with patterns.
It’s also worth not trying too many colors at once—it’s most convenient for a beginner to work with two shades. Believe me, you can create a fantastic and unique picture from them.
Accent manicure Two colors Excellent combination of two shades Classic - black and white Graceful lilac shades Pink and green Green shades - simple and elegant
Bright red and white design And green again
In general, marble manicure is a real art. Feel like an artist who can create real canvases on your nails.
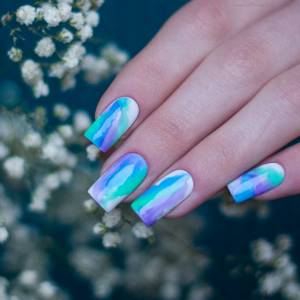
This means that the design is practically unlimited. Transitions of contrasting colors look especially stylish - such patterns will fit perfectly into your spring or summer look.
Emerald and black - charming brightness
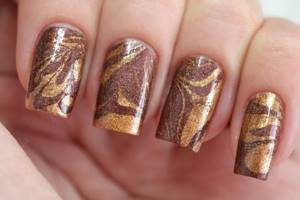
Summer variegation
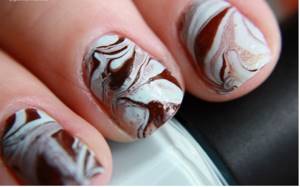
On a white background, even coffee shades look contrastingly bright. Bright summer colors
If you want to try something unusual, it is recommended to use varnishes with shimmer, that is, with tiny shiny particles. This coating will look quite interesting when exposed to sunlight.
The situation is the same with holographic materials. And what can we say about varnishes with a thermal effect, in which exposure to heat changes the color of the coating!
Water jacket with shimmer Hologram
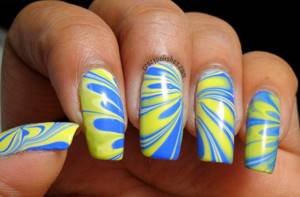
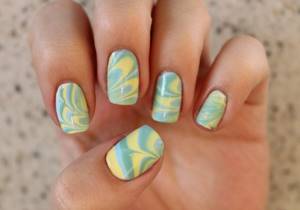
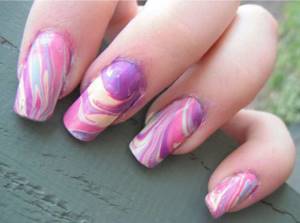
What shades should be combined? Experiment and don't be afraid. The most popular combinations are white and black, yellow and blue, purple and red, pink and white.
The combination of pastel colors is incredibly beautiful - it makes the nail plate look like marble, and such a manicure would not be considered flashy for the office. It is also possible to visually recreate the surface of agate and malachite.
Agate Malachite
Delicate pastel colors Accent manicure in muted colors
Light colors
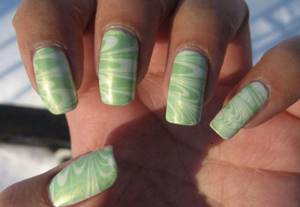
Pleasant herbal tones
Soothing water design
Texture can also be combined in a wide variety of ways. Enamel, metallic, and mother-of-pearl look good.
IMPORTANT: The most important thing is that the varnishes are of the same brand. Otherwise, the manicure may simply not work out.
Matte enamel mother of pearl
The shades can be anything, but the brand must be the same.
It should be said that water manicure itself is already quite bright and unusual, so additional decorations in the form of rhinestones do not need to be used, but sometimes they look quite interesting.
Such brightness does not require additional decorations. But even a bright manicure can be decorated with rhinestones. Pastel can also be with rhinestones.
Application
Almost any style direction allows you to complement it with drops. The image of plants and flowers looks harmonious if dew appears on them. The marble version looks natural in combination with this technique, as if the stone was in the rain.
You can verify this by looking at a photo of a manicure with droplets. Water splashes may appear on glossy rubs. This technique is also suitable for fruit manicure. The design is complemented by drops of flowing juice.