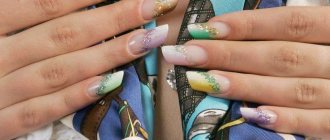
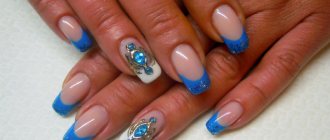
There are many techniques and tricks for creating simple and original designs on your nails, thanks to which you can create a stunning manicure at home - learn them by reading the article!
The beauty of a woman is, first of all, her well-groomed appearance, and what speaks most about a woman’s well-groomed appearance is her hands.
A bad manicure, rough skin, and lack of jewelry speak of untidiness and a desire to look not like a woman who turns heads and breaks hearts, but like a gray woman who doesn’t care about how others perceive her.
Well, if you want to look good, but don’t have the money for a salon manicure, then it doesn’t matter - this article will tell you how to create a stunning design on your nails without spending any extra money or time.
The simplest nail designs for beginners
Even those who do not have artistic talent can create an original and aesthetic design on their own nails. This does not require professional varnishes or any special tools - all you need is imagination and some available tools that are found in any home.
An unusual drawing is easy
To create a simple drawing you will need:
- varnishes of various colors
- needle
- cotton swab
- nail polish remover (in case things don't go as planned)
With the help of multi-colored varnishes, the manicure will become colorful and unique.
Before starting the creative process, you need to prepare your hands: put them in a hand bath with sea salt for 15-20 minutes, tidy up the cuticles and the shape of your nails. After this, you can lubricate your hands with nourishing cream and wait until it is completely absorbed.
But you should not apply cream to your nails - this can harm the future design.
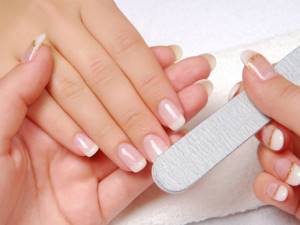
The simplest nail design is to create various lines, dots, geometric shapes in a chaotic or orderly manner. To do this, the nails are painted in the main color, and after the varnish has completely dried, dots are applied with a needle or lines are made with a brush (but this already requires some skill).
It would also be useful for beginners to use various stencils. After the design has dried, a fixative is applied on top - this way the beauty of your manicure will last for a long time.
Introduction
Every modern and well-groomed girl today will not allow herself to leave the house with unkempt hands.
Masters are ready to offer clients a lot of ideas for manicure - from classic options to colorful designs. The most popular technique is applying gel polish. This coating can last on a girl’s hands for about three to four weeks, but to avoid nail disease, it is better to make corrections once every 15 days.
To be different, you can experiment with shapes, colors and patterns. In this article we will look at nail design options for beginning artists, because this type of income is quite good, and you can independently regulate the degree of your own workload.
Simple nail designs step by step
You can quickly and easily create a design on your nails using stationery tape. Stencils are made from it, and then glued to the nail and painted over with varnish.
When the tape is removed, they get the perfect design, which, after covering with a fixative, will delight its owner for many days.
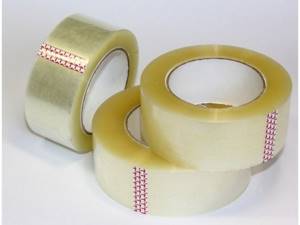
Scotch
Most often, various lines and geometric shapes are created on nails using tape, but experienced craftswomen have gotten used to creating entire masterpieces of painting on their nails with the help of such a simple device. And for beginners, imitation of a chessboard on nails is perfect.
To get a beautiful chess manicure you need:
- Prepare your hands: salt bath, trimming the cuticles, giving the nails the desired shape (in our case, a square or rounded square shape is relevant) 2. Cut the tape into convenient strips 0.5 cm wide 3. Cover the nails with a base, and then, after it has completely dried, paint your nails with white, gold or silver varnish 4. After the varnish has completely dried, stick a strip of tape on the bottom of the nail, and stick the other one crosswise so that a small even square is formed in the upper right corner of the nail 5. Paint the entire free part of the nail with varnish so that it overlapped the line of the stencil 6. After drying, peel off the strips and stick the others in the same way in a mirror manner 7. Paint with varnish and peel off the stencil after the varnish has completely dried 8. The finished drawing is covered with a fixative
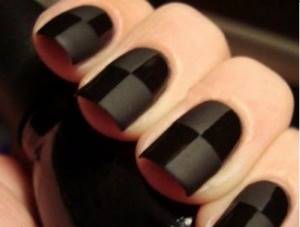
An excellent and stylish idea would be to combine matte and glossy squares
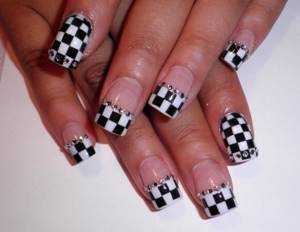
By cutting the tape into thin strips and using them as stencils, you can create an unusual manicure - it will only take a few minutes. To achieve the desired result, you need to follow simple instructions:
- Paint your nails sequentially with stripes of any three colors (you can choose either contrasting or harmoniously combined with each other) 2. After drying, stick thin strips of tape on your nails 3. Apply black polish to the entire surface of the nail 4. Wait until the polish dries and remove the strips 5 Apply sealer
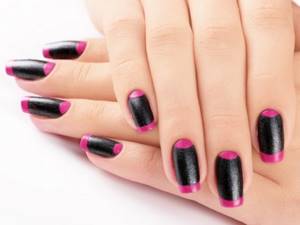
Manicure created using tape
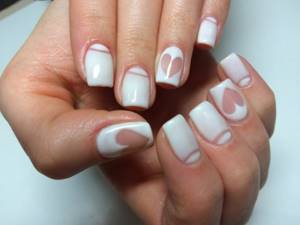
Using a tape stencil you can create more intricate designs.
Schemes of simple and beautiful designs on nails
Using a needle and varnishes of various colors, you can create original designs on your nails even for those who do not have a talent for drawing or experience in creating a manicure.
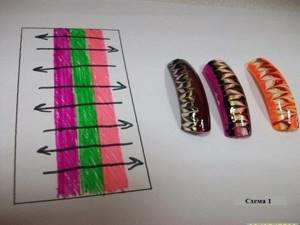
Draw versatile horizontal stripes along the length of the nail.
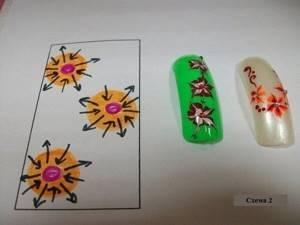
Interesting floral design
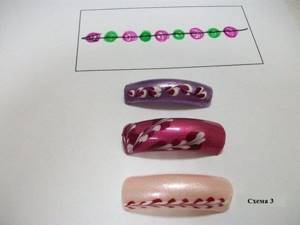
With one movement of a needle you can create an intricate design.
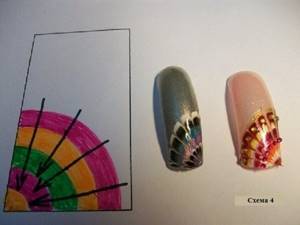
Multicolor pattern
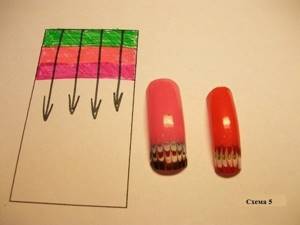
Wave pattern
Lace painting
It is done with a thin brush using small strokes from large strokes to smaller ones. A background of a neutral or bright shade is first applied, the sticky layer is removed, and then the drawing is done. After drying, it is secured with a top coat. Beginners should consider using the stamping technique, which allows you to create a beautiful lace design on your nails in a matter of minutes.
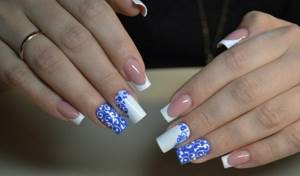
Openwork manicure - lace on nails
How to make simple designs on nails with gel polish
Creating a design on your nails is a painstaking task and it is very disappointing if the painted flowers or lines begin to wear off and peel off after the first wash.
But this problem can also be solved: for those who want to see their manicure for two weeks, there is a wonderful manicure product - gel polish. Its composition provides durability that cannot be compared with the durability of conventional varnish.
Manicure with gel polish
To create a beautiful design with gel polish you need:
- degreasing agent
- the basis
- several multi-colored gel polishes
- ultraviolet lamp
- dots
- a sheet of cardboard that will be used as a palette
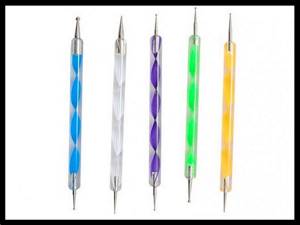
Step-by-step creation of dotted manicure:
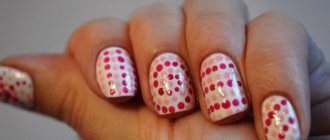
- Before creating a design with gel polish, the surface of the nail must be degreased and a vitamin base applied 2. Select a base shade (preferably a light color), apply it to the nails and dry under a lamp 3. Pour a small amount of gel polish of other bright colors onto the palette 4. With using a small dot, apply dots of different colors on your nails, placing them close to each other 5. Dry the design under the lamp and apply a shiny coating
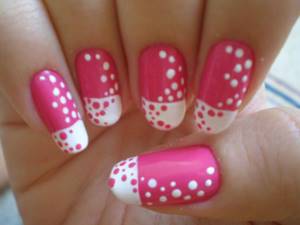
Using different dots you can create a fun dotted pattern
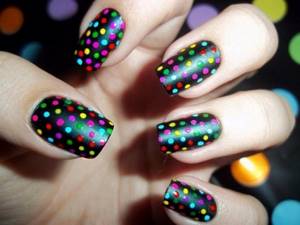
If you combine a dot pattern with the technique of the famous French manicure, you will be able to create sophisticated nails that will be the envy of all your friends!
Design for the more experienced
Complex patterns are suitable for those who have experience in creating nail art.
Before starting the main work, you will need to prepare the nail plates. For this purpose, you can apply a stencil with the desired image option on them or cover them with a base color and let it dry completely.
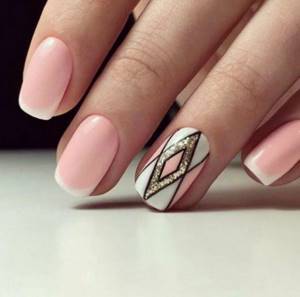
Depending on what you have in mind, you can apply up to 2-3 different colors and shades, but each of them must be dried until completely hardened. Then, if stencils were used, you need to carefully peel them off, then paint over the empty spaces with varnish of a different shade; if not, apply the desired pattern with a toothpick.
In any case, the final stage will be the application of a fixing layer. It is recommended to use regular clear varnish for this purpose.
Drawing monograms. Master class on video:
Gel polish
The technique of working with gel polish requires attention and accuracy. This coating option will allow you to create designs of any complexity, suitable for summer or winter manicure.
If you don’t have enough experience or you have chosen a complex pattern, you can use glitter - they will correct mistakes and make your nails attractive.
It is important to apply them no less carefully than the main coating, since a mistake at this stage can ruin everything.
Techniques for working with gel polish for beginners. Video:
Some manicure options with a pattern can be done simply and easily.
For painting you will need:
- gel of desired shades;
- glitter (optional);
- lamp (UV);
- base coat;
- protective covering.
You will also need a toothpick or a thin needle for application, a tool that allows you to remove the sticky layer. At the initial stage, you need to prepare the nail plates - the work involves removing the cuticle and polishing.
Then a base coat is applied to the prepared plates (it must dry completely before further work; there is a special UV lamp for this purpose). Then a colored gel is applied - the shade is selected as desired or to match clothes and accessories.
It is important to remember that it does not need to be dried. Using a needle or toothpick, collect the required amount of glitter. They need to be carefully distributed over the surface, but not pressed against it. Excess glitter must be carefully removed so as not to visually spoil the manicure.
The next step is to dry your nails under a UV lamp. To complete the work, you will need to apply a final protective coating, which also needs to be completely dry. You can then use a stick remover.
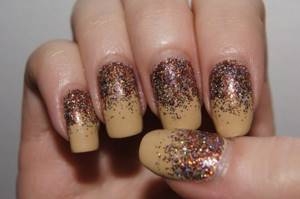
This option is suitable for any season. It can be used for both daily and holiday use.
Acrylic paints
An excellent design and manicure option is delicate pink and white.
Stages of work:
- Cover the plate with a colorless coating (you can use a beige base, which is used for French manicure).

- You need to drop a little varnish onto the sponge and then press it onto the nail for 5-7 seconds.
- Using a thin brush, you need to apply white acrylic paint and draw any designs along the edges (this could be waves, curls).
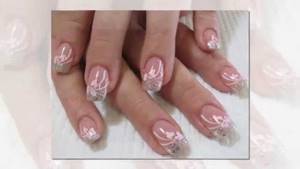
Then you need to apply the finishing coat. Additionally, you can use a small amount of glitter.
Painting with acrylic paints. Video:
How to make simple designs on nails with a needle (diagrams)
Floral patterns on nails look original. It is not difficult to complete such a drawing, but it is a painstaking task that requires patience and perseverance. But the result will please both you and those around you - such a pattern will suit any event and style of clothing, it is only important to choose the right color scheme and not go too far with variegation.
Step by step drawing of flowers
For a flower manicure you will need:
- light-colored base varnish
- red, pink, blue colors to create petals
- a contrasting color to create the center of the flower (if the petals are pink, then the center can be yellow or silver)
- needle
- cotton swab and nail polish remover
Sequencing:
- Paint your nails with a light-colored varnish and wait until it dries completely 2. Dip a needle or toothpick into the varnish and put a dot on the nail, marking the middle of the flower 3. Wipe the needle from traces of varnish and put dots in a circle from the base of the flower to imitate petals 4. With flowers like this you can decorate the entire nail or paint several pieces along one edge of the nail
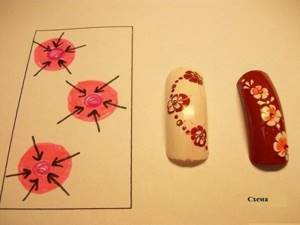
Scheme for drawing flowers with a needle
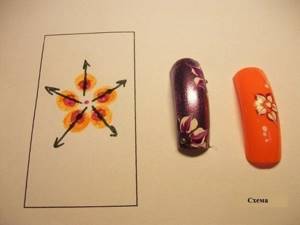
After the design has dried, the nails must be coated with a nail polish fixer. For greater decorativeness, you can draw leaves: to do this, you need to put a dot and draw a needle along it in the direction from the flower, forming a sharp leaf.
Schemes of simple designs on nails with a toothpick
Using polishes of various colors and a toothpick, you can create an elegant design on your nails called “butterfly wings”. For this you need:
- varnishes of different colors
- toothpicks
- napkin
- varnish fixer
- the basis
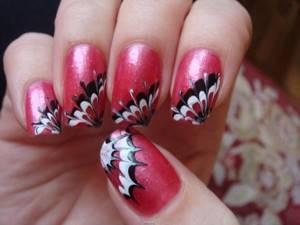
Sequence of creating a drawing:
- Apply the base to your nails and wait for it to dry completely 2. Paint your nails with the base color 3. Without waiting for it to dry, apply three different colors in stripes from the top corner of the nail to the middle diagonally 4. Using a toothpick, immediately draw lines from the middle to the corner as shown in photo
Schemes of simple designs on nails with a brush
With the help of a special manicure brush, even a beginner can create a simple and aesthetic design. The instructions and techniques described below will allow you to independently transform your nails no worse than salon nail art.
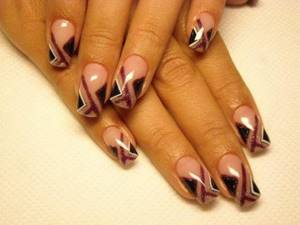
Drawing created with a brush and varnish
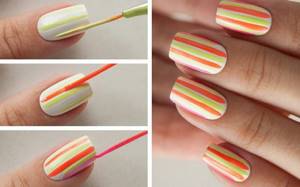
Vertical stripes
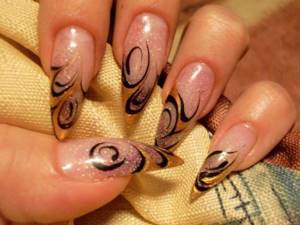
Magic ornament
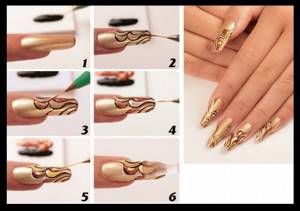
Step-by-step creation of an ornament
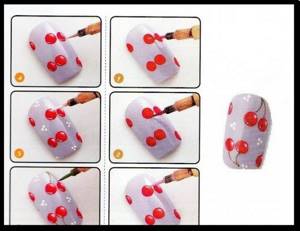
Manicure with a thin brush
How to make simple designs on nails with acrylic paints?
You can feel like a real artist when painting with acrylic paints on a “canvas” like your own nail. A wide range of colors and ease of use will allow you to create a wide variety of designs that will inspire your imagination and creativity.
But working with acrylic has its own characteristics that you need to know in order for the drawing to be aesthetic and preserved for a long time.
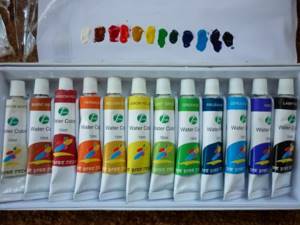
Acrylic paints
Before you begin the artistic process, you should prepare all the tools necessary for this:
- acrylic paints (they can be purchased at any craft store, stationery store, or even at the market)
- thin brush
- fixative varnish
- dots
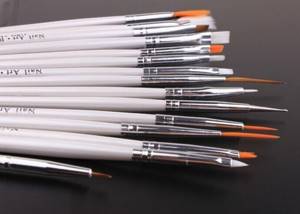
Having prepared your nails for manicure (removing cuticles and giving the desired shape), they need to be covered with a base coat. After it has completely dried, you can start painting with a brush.
You can draw on your nails both various dots and wavy lines, and by arranging these elements you can create entire inflorescences and enchanting designs.
If your imagination doesn’t suggest anything, then you can be inspired by the works of novice masters:
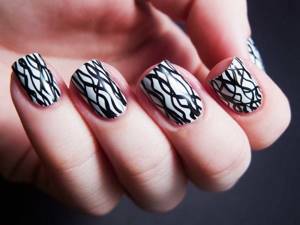
Drawing created by wave-like movements of the brush
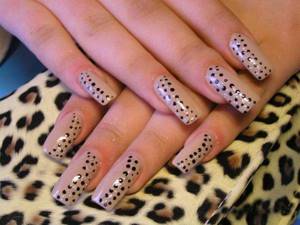
Points
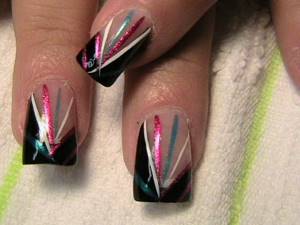
Rays
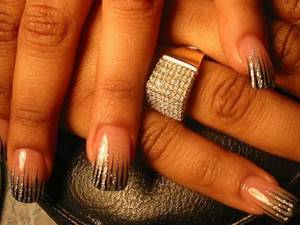
Flame of fire French manicure and dot patterns
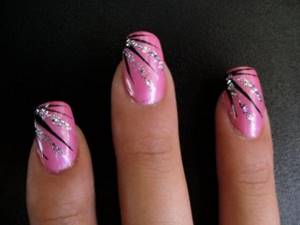
Rays and sparkles
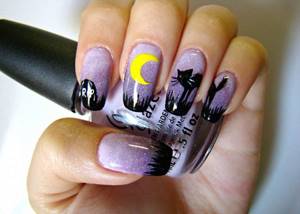
Show your imagination and the result will please you
After completing the drawing and drying the acrylic paint, it is necessary to cover the nails with a protective coating - fixative varnish. Otherwise, at the first contact with water, the pattern will blur.
How to quickly master watercolor techniques and increase your average bill?
Since the watercolor technique is mega-popular, girls often ask the artist to create “something airy” on their nails. And if a specialist in this is a real pro, of which there are few now, this guarantees a continuous flow of clients! In addition, for each nail decorated with a weightless print, an additional price is set.
We understand that mastering the basics of art and applying it to manicure is difficult. Therefore, to help the master gain new professional skills and hone them, we have prepared special offers: the most popular webinars from the top teacher of the ParisNail school Ekaterina Karpinchik - “Watercolor package 1” and “Watercolor package 2”.
The packages include lessons on creating the most sought-after and beautiful watercolor designs: cotton, clover, rose, olives, wreath, flower fairy, butterfly, fantasy images, orchid, rosebud, tulips, lavender, fantasy designs, clover, eucalyptus, monstera, twig , poppy, peony;
donut, chocolate donut, ice cream, macaroons, cake, slice of cake. Works of Ekaterina Karpinchik's students
Ekaterina will talk about watercolor paints, brushes, subtleties in work; mistakes when constructing contours and shadows: why there is no watercolor effect and the designs look rough. She will teach you how to build compositions correctly and give exercises for hand positioning.
As a result, after completing the courses, you will paint perfect watercolor designs in 5-7 minutes, and your clients will proudly wear and show off their designer manicure to others.
In addition, we are currently running a promotion: when you purchase the first package of lessons, you will receive the second one as a gift! Set price - total 1 870 ₽
instead of 4,680! After completing all courses, all students are issued an electronic diploma confirming their mastery! They can be proudly shown to clients.
The classes are structured in such a way that you will not have a chance not to master the most popular technique.
Hurry up to invest profitably in your knowledge! Works by Ekaterina Karpinchik's students
Simple designs with shellac on nails
Shellac is a new generation product that combines nail polish and extension gel. This combination allows the product to remain shiny on the nails for a long time, without chipping or scuffing.
It is not surprising that modern fashionistas and lovers of various new products in the field of beauty prefer shellac painting even at home.
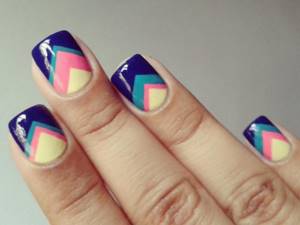
Shellac
Creating a stunning shellac manicure is not difficult if you prepare everything you need:
- shellacs of various colors
- the basis
- brushes of various sizes and structures
- top coating
- cotton pads, swabs, alcohol and nail polish remover
- Ultraviolet lamp
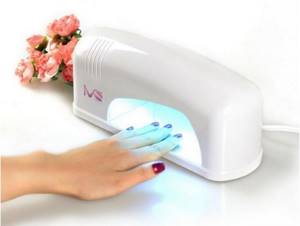
After preparing your nails for a manicure, sit back and get ready to create:
- Cover your nails with a base product 2. Gently apply shellac and dry under a lamp 3. If necessary, apply another layer of shellac and dry again 4. Using alcohol, wipe your nails with a cotton pad 5. Start creating a design: draw lines, dots, flowers or try to create imitation of a French manicure in different shades of colors 6. Dry your nails under the lamp and cover with a protective layer of top coat and dry again under the lamp
Simple Drawings: Step-by-Step Guide with Photos
Keep baby pink, black and gold polishes, base coat and top coat on hand, as well as dots and a fine art brush.
1
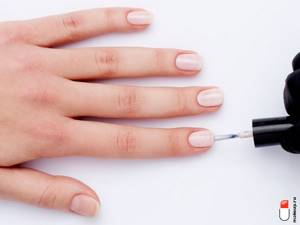
Apply the base in one layer. Then apply one coat of light pink varnish - this will make the coating look as natural as possible.
© Makeup.ru
2
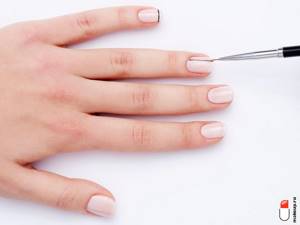
Load a thin artist's brush with black varnish and use it to draw thin stripes on the ring and little fingers.
© Makeup.ru
3
Add a few more stripes, as in the photo. At the place where they intersect on the ring finger, make a dot using a dot and gold varnish. Or stick on some decorative element (rhinestones and large glitter will do).
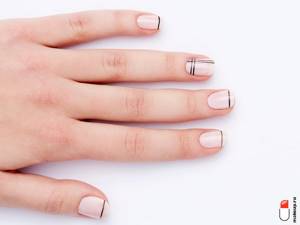
© Makeup.ru
4
Brush over the stripes again - their color will become more saturated.
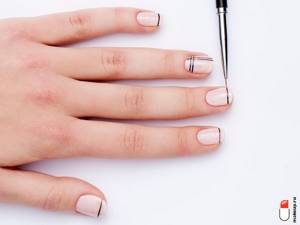
© Makeup.ru
5
Apply top coat. Manicure is ready!
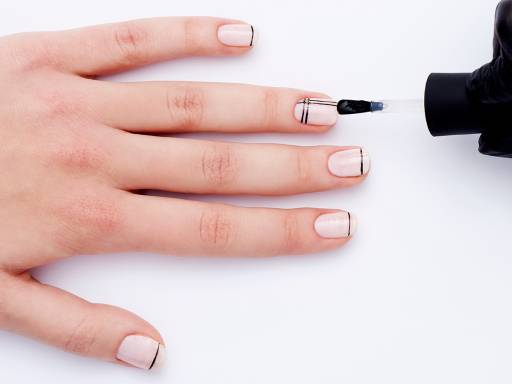
© Makeup.ru
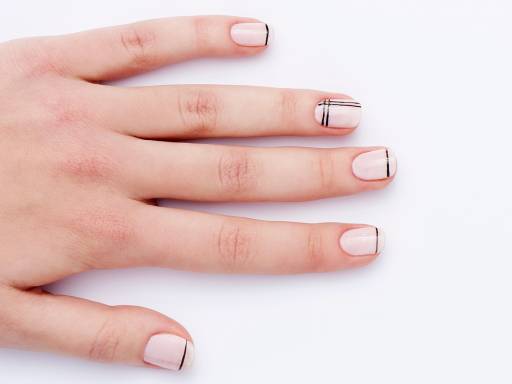
© Makeup.ru
Return to contents
How to draw simple designs on nails: tips and reviews
Absolutely anyone can create an unusual manicure at home, even if you are not into painting and really want beautiful nails. You just need to choose the technique in which you will be able to maximize your creative potential - the main thing is that both the activity and the result bring pleasure.
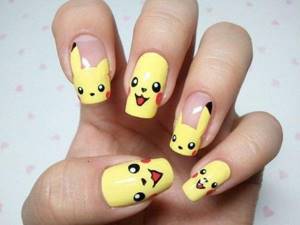
The result of creativity should inspire
To ensure that drawing patterns on your nails succeeds and lasts for a long time, follow these tips:
- It is necessary to select high-quality products that are highly durable. In the absence of such, you can turn to the good old varnish, but then you will have to repaint your nails and re-paint them often
- when creating a design, be guided by the size of the nail: do not try to draw a bunch of things on short nails - it looks ridiculous and tasteless
- If fine art doesn’t work out for you, don’t despair, because you can always turn to geometric shapes, which always look fashionable and organic
- do not neglect applying the base and topcoat
- this way your nails will please you with their appearance much longer
Don’t be afraid to experiment: create a design that your imagination suggests and don’t despair if you fail, because this is just experience and the next attempt to make a stunning manicure at home will be more successful.
Useful tips
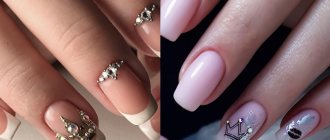
Don’t forget that you can also use beads and rhinestones at home. However, when using these elements, it is important not to overdo it with accents. To prevent the manicure from turning out tasteless, decorate one finger with beads or stones.
You can also use foil. Design ideas are presented below.


