Nail extensions allow you to get nails of any length in a matter of hours. Many girls resort to the services of a salon, but you can get beautiful nails at home. We will tell you step by step how to properly extend nails with shellac and gel, and what such extended nails are.
Basic Rules
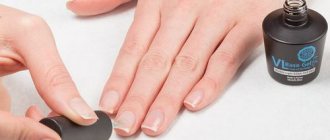
To get a beautiful finish, you need to do a manicure first, then all you have to do is follow our recommendations. Before applying nail extensions, you should treat the entire surface of the natural nail with a sanding file.
It is necessary that there is not a single section, otherwise it will cause peeling.
You should not make your nails very long, as you will get tired of adjusting them. A specific stencil must be used before applying the gel.
- First, apply the gel to the upper half of the nail and lengthen the shape using a stencil to the desired size. Next, the extended nails are dried under a lamp for one minute.
- The second layer of gel should cover most of the area, leaving about three millimeters near the cuticle area. We also dry the new layer under a lamp.
- We carefully remove the stencil and take a manicure file, giving the necessary shape to future nails. The third layer of gel should be applied to the middle of the nail plate and distributed in all directions so that a “bump” appears. It allows you to create an arch of the nail. Now the hand should be turned palm up and held in this position for about 30 seconds. To consolidate the effect, dry your nails for three minutes in an ultraviolet lamp.
- All that remains is to apply one more layer of gel. It should be applied with a thin ball, but before that you should use a file to make the remaining shape of the nail. Next, apply a special product using a nail file and dry. To prevent your manicure from turning yellow in the future, you can coat it with ultraviolet light on top. After completing the procedure, you can apply regular hand cream to the skin near the nail plates. Try to ensure that your hands do not come into contact with water for about an hour after the procedure, otherwise this may have a bad effect on the quality of the work performed.
If over time you still notice detachment of the first ball, this may indicate pregnancy or taking strong medications. In this case, everything depends solely on the individual characteristics of the female body.
Many girls wonder how to grow their nails at home.
Of course, this skill requires training, but if you don’t have the opportunity to enroll in courses, you can get training using videos.
Master classes tell you in detail how to grow nails, so you can cope with this task.
To get started, purchase all the necessary tools, nail files, gel, primer, top coat, molds and an ultraviolet lamp.
Nail extensions can also be done using tips or using the acrylic extension technique. In any case, familiarize yourself with the various techniques and choose the most optimal one for yourself. Any extension begins with a manicure. Choose a form and start the process. After that, dry your hands thoroughly, because extensions should be done on dry hands.
Nail extensions include several stages: preparing the nail plate, applying gel and shaping the nail, as well as design.
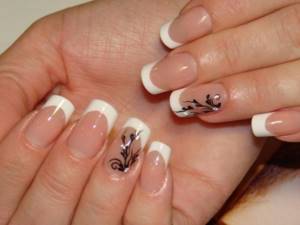
Before you extend your nails, you need to decide on a design.
Toenail extensions are becoming especially popular, and no wonder.
After all, extensions can completely change the shape of your nails and give them a fresh look.
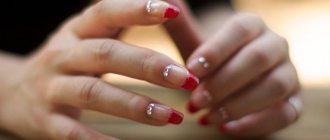
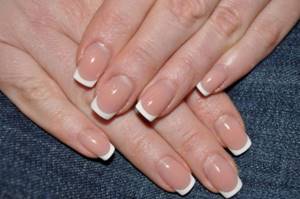
Moreover, the gel protects the natural nail from breakage, which means you can have a flawless pedicure for a long time. Often girls get their toenails done when they are going on vacation. After all, on vacation there is absolutely no time to take care of your nails, and it’s easier to take care of them in advance. The most commonly used extension is the French pedicure.
Many girls prefer nail extensions with biogel or acrylic.
Today we propose to consider gel nail extensions with step-by-step instructions, photos and videos for beginners.
Extending nails using tips with step-by-step instructions will allow you to quickly get beautiful, long nails at home.
What is better: gel extensions or tips? Which tips to choose for extensions
I am familiar with both types and forms once, so the title is 1:1. I have always been somehow against extensions, they say my nails will grow on their own, and besides, there is an active opinion that extensions ruin nails forever. I thought and thought this way, I broke my natural ones, cut them, grew them again, and at one fine moment I immediately wanted beautiful, long and strong nails. And my wish came true, even twice, now I’ll tell you how. I'll start with the forms
, because my acquaintance with extensions began with them.
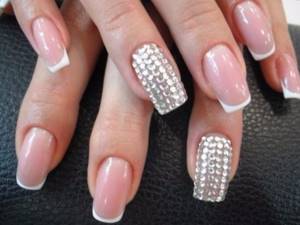
A year ago, I received a gift certificate from my friends for extensions to a well-known professional in our small town. Yes, I'm not afraid of this word. You can find many of her works on VKontakte and they are all very worthy. In short, I didn’t regret that I increased it, but there were also some disadvantages. No, not a complaint against the master, everything is subjective. An hour and a half and I have a long blue jacket with rhinestones on my ring finger! Beauty! I had it for 2 weeks and took it off because I was already tired of them. By the way, not a single one fell off, did not break off, and they even suggested not to remove such beauty, but to make a correction, but they were unable to walk. Subjective disadvantages: it is not convenient to press the seat belt button and the toilet button, and in general all the buttons that need to be pressed. You can’t pick your teeth and nose, it’s a joke, of course. I’m a wire worker myself, so the orders were standing, it’s impossible to pick up small parts and beads! I took them off and swore off extensions, not mine!
That's what I thought. Year. Until I fell for the freebie
.
Why am I writing here about tips then, since I’ve written so much about forms? Because everything is fine there - I built it up, took it for 2 weeks, and took it off. All. No problem. If I weren’t a needlewoman, that would be beauty in general. With tips everything is a little more complicated.
I was nostalgic for beautiful long nails and just saw the ad “Training center, free manicure.” Everything is on fire! Here it is, a freebie! I called and found out that the materials cost 150 rubles, that’s all! Against extensions from a professional it costs as much as 1200. Of course, these turned out to be tips
.
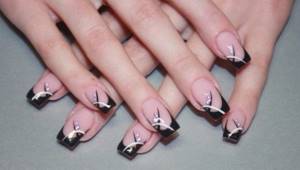
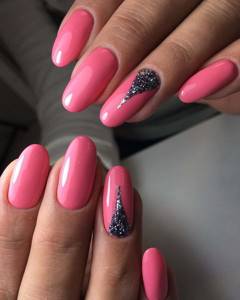
Healthy skepticism told me that nothing good would come of this idea, but I didn’t listen. And it was not in vain that the smart students gave me good nails - black French (they were so surprised, they probably thought that French only came in white), it turned out beautiful and unusual. The shape is sharp and more convenient than a square one. I could even practice my favorite hobby. And press buttons. I went through almost 2 weeks and 2 nails on my index fingers fell off. Well, never mind, I was booked in for withdrawal the very next day. They fell off painlessly. I didn’t pick the rest and decided to wait. Then the NIGHTMARE began!!!
I thought it was like last time they would soak me and pick them out, but they
started SAWING!
It’s terrible what happened to my nails... They tore off my cuticle and skin, the nail on my little finger became like a rag, and what’s more, there was almost none left! The nails were glued on conscientiously, and they were filed for 1.5 hours.
Which is better: tips or forms? What is the difference between types and forms? Which nails are more durable? These and other questions are asked very often. And then the master has doubts: what to recommend? How will be better? Therefore, the master should know in which cases it is worth extending nails with tips, and in which cases with forms.
The right combination
Working on tips is the knowledge of masters 15 years ago, forms are a relatively new direction in extensions; On tips, nails are lengthened, and on forms, they are modeled. The main task of the masters when doing extensions is not to emphasize the flaws of natural nails, but to hide them as much as possible. Therefore, it should be remembered that tips are a continuation of the natural nail (no matter how it grows - straight, up or down), and when working on forms, the master can visually adjust the direction of its growth.
Most masters mistakenly believe that tips give additional strength to the extended nail. However, both tips and forms are only support for the material, and wearability lies in the correct combination of all the requirements for modeling an artificial nail. In addition, full compliance with them brings the modeled nail as close as possible to the natural one.
The result of working on tips is visually different from working on forms. Let's take the classic shape, a square, as an example. This is a universal shape; all others are modeled from a square.
The differences in the simulation result are clearly visible in the figure. A nail extended with tips expands in the stress zone - since it is most susceptible to fractures, it is additionally strengthened with material. On forms, this thickening can be clamped, so the appearance of the modeled nail is more aesthetic and closer to natural.
The type of extension (tips or forms) is influenced by:
a) material (acrylic or gel);
b) type of natural nail;
c) the client’s wishes;
d) knowledge of the master.
The first two factors are the main ones for selection. The last two can be changed, that is, to improve the qualifications of the master or to correctly explain to the client the reason for your choice. The correct combination of these factors determines the final result and meets the client's expectations.
Features of nail shapes
In the master class presented below, we use acrylic, natural nail shapes - oval, almond-shaped, trapezoidal and bitten. For each shape, a top and side view of natural nails is shown.
Trapezoidal shape
Features: a) the presence of side rollers; b) the nail expands towards the free edge (lack of parallelism of the sides); c) short and wide nail plate.
"Rodents"
Features: a) clearly defined side ridges; b) the nail plate grows upward; c) the nail is wide, very short in length.
Oval or almond shape (pronounced C-curve)
Features: a) elongated natural plate; b) the presence of hyponychium; c) the natural plate has its own C-bend.
Subtleties of modeling
What will the extended nails look like on tips and forms (top and side views):
Trapezoidal shape
Features: a) the sides expand (“flared”); b) slightly raise the sides: up (due to the subnail fold); c) the extended nail is visually wider than the natural nail.
Features: a) the sides are parallel (squeezing in the stress zone); b) the side is smooth and is a continuation of the natural nail; c) flaws in the natural nail are hidden (the nail becomes visually narrower due to its regular arch).
"Rodents"
Features: a) difficulty in gluing tips (very short natural plate and pronounced subungual ridge); b) the extended nail is very wide (short length of the extended edge); c) the sides are raised (portability worsens).
Features: a) the extended nail has become a little narrower (squeezing); b) the sides are smooth and parallel; c) the arch is clearly visible and the pronounced side ridges are hidden.
Oval or almond shape
Features: a) expansion in the stress zone (there is no parallelism of the sides); b) the sides are strongly lowered and curved; c) a pronounced C-curve (the nail resembles a claw).
Features: a) the sides are parallel; b) the sides are slightly lowered down; c) smooth C-curve (hides the curve of the natural nail).
Thus, the presented drawings clearly demonstrate the dependence of the result of extension not only on the shape of natural nails, but also on the modeling method. Every master should know what to prefer in each specific case - only with such knowledge will he be able to perform quality work and have regular grateful clients.
Alexander Finko, training instructor
Forms
are small pieces of paper that have a glue base.
Tips are plastic nails that need to be glued onto a natural nail. Both tips and forms are used as a base for gel and acrylic nail extensions. These two methods are equally durable, mainly the quality of the extension depends on the master himself and his skills. Each method has its own advantages and disadvantages. Let's look at them. Advantages of tips: - The procedure for nail extensions using tips is less complicated and does not take much time, since the shape is formed, you just need to apply the material. — For those who have hard and rather large pillows, it is better to choose tips. — Tips
can be built up quite quickly with both gel and acrylic. — If the client has brittle nails, then tips are an ideal option. They are glued even to the most damaged nails. Main disadvantages: - Due to nail extensions using tips, they don’t look so neat and elegant. — Using tips reduces the capabilities of the master, that is, some nail shapes cannot be created (for example, edge, pipe, side, bridge). — If the master does not have experience working with tips, then in this case the nails will turn out thick with an ugly shape. — Extended nails with tips practically do not tighten, especially if gel is applied, this leads to wide and unattractive nails. Advantages of forms: - Using forms, a wide variety of unusual nail shapes can be created. — When forms are used, the nails are tightened well. This way they will look thin and graceful. — Nails do not turn out flat, since a solid structure of the nail plates is created. — Using forms, natural nail plates and their shapes are improved. The main disadvantages of forms: - Not all masters have sufficient experience working with forms, as a result of which extended nails do not look the way they should. — It is difficult to extend nails using forms if the client’s nails have hard and rather large pads. — If you extend nails with gel using forms, then this procedure will take more time. So, what is better to choose for nail extensions? What way ? Both forms and tips are quite equally good for extensions. But it is advisable to resolve this issue with a professional master with extensive experience, who will evaluate the features of the nail plates, their shape and select the ideal option for your nails.
Step-by-step instruction
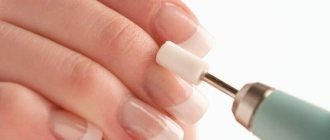
Step-by-step instructions with photos for gel nail extensions recommend starting with a regular manicure. All nails should be the same shape and length, the polish should be removed from them, the cuticle should be pushed back with an orange stick or a special spatula. Now you need to polish the nail coating with a buff, using a brush to remove dust.
When applying nail extensions using tips, the step-by-step instructions recommend degreasing your nails with a primer or other product, using lint-free wipes or a brush.
After carrying out such a procedure, it is forbidden to apply cream to your hands or wash them - now your nails should not come into contact with anything other than the materials necessary for extensions.
If you are extending your nails using forms, then each of them should be carefully but tightly bent to the nail so that it holds well and does not fall off.
So, the preparatory work is completed. Now let's get started with nail extensions using gel. The step-by-step instructions suggest applying the ultraviolet gel as the next step.
It should be applied in small portions, starting from the base of the nail plate, distributing it evenly along the entire length of the nail. Next, you need to dry your nails under a special lamp and reapply the gel. This time the gel is applied to the required length of the nails being extended. To obtain the same length of all nails, it is recommended to use special marks made on disposable forms. The gel applied along the entire length is dried again using an ultraviolet lamp.
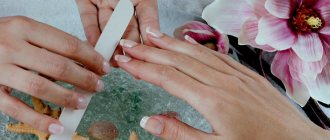
After all the nails are done and well dried, you need to carefully remove the paper forms, being careful not to damage the new coating. Next, using a nail file, the shape of the nail is adjusted. That's all, actually - nail extension using gel is completed. This step-by-step instruction will help every girl, even those inexperienced in matters of nail art, to do a proper and beautiful manicure on their own.
Using gel for nail extensions allows you to even out the surface, giving the nail a beautiful shine without causing irritation to the skin around the nail and cuticle. The technology of creating false nails at home allows you to get beautiful nails that look like natural ones, spending a few hours on it. How to do gel nail extensions, step-by-step instructions with photos will help you figure it out.
Advantages and disadvantages
Before you decide to have your nails extended with gel polish, you first need to understand all the nuances of this procedure, find out the advantages and disadvantages, and what the consequences may be. Also keep in mind that high-quality nail extensions are done in a salon for at least 3-4 hours, depending on the chosen length of artificial nails.
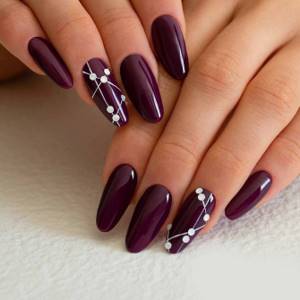
@idei_dizaina_nogtey
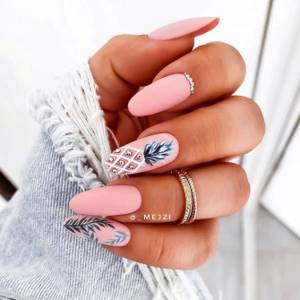
@_mejzi
@avgystiisha.nail_kzn
@tooop_nails
@nail_radio
@raisa_loginovaoffisial
Pros:
- Strengthening natural nails. Weak, short and flaking nails are firmly “sealed” with gel polish, due to which the health and appearance of natural nails significantly improves over time. In addition, even through a thick layer of gel polish, air reaches natural nails.
- Long time wear. Classic manicure, without applying gel, is short-lived. Regular varnish on natural plates becomes deformed and comes off within 2-3 days after a manicure. And gel polish coatings last up to 4 weeks, depending on your care and the growth time of natural nails.
- Hides imperfections. There are cases when the nails have some kind of damage, or the girl has short, chubby fingers, or her nail bed is too wide. All these aspects significantly reduce the aesthetics of manicure. And nail extensions with gel polish help hide all these imperfections.
The fact is that the thick consistency of artificial coatings helps to even out the nail plate and hide all the unevenness and imperfections of natural nails. And by choosing medium or long nail extensions, you will visually lengthen your plump fingers.

@olga_legkova_nails
@yana_gerasyuk
@nogti.best
- Helps get rid of a bad habit. It's no secret that even adults sometimes bite their nails. Yes, it is harmful, bad, beautiful and extremely unaesthetic. But this is a bad habit that you can get rid of with nail extensions.
Firstly, extended nails will be difficult to chew, even out of habit. And secondly, you will probably feel sorry for the time and money spent, and there is also a chance of ruining such beauty on your nails.
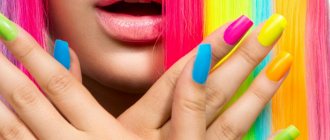
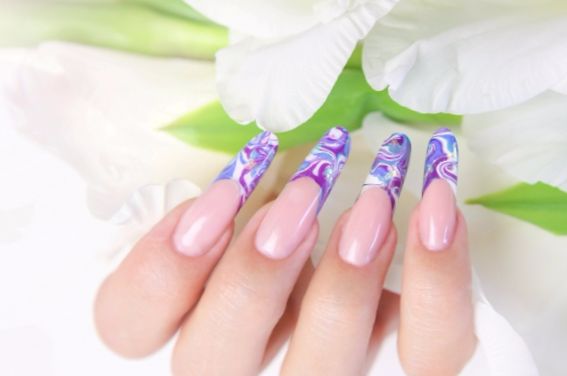
- Space for imagination. Due to their beauty, extended nails can be used to create almost any design you like. Everything will depend on your preferences and the skills of the manicurist. Therefore, it is best to contact a professional.
- Quick removal procedure. To model nails, a polymer gel polish is used, which is dried in a special UV lamp. It is impossible to remove them using regular nail polish remover. This product works well only with regular varnish.
And the manicurist uses gel-softening compounds or performs a hardware manicure, removing the old coating of extended nails using special cutters. If you turn to a professional, the procedure will not last long.

Removing gel polish using a cutter
@tooop_nails
@anastasia_aleksandrovna_nails
- Aesthetic beauty of manicure. Due to the long wearing time, you always have a beautiful, fresh manicure that you are not ashamed to show off. You will always be confident in the impeccability of your image. Especially if you have chosen the desired length and nail design, which can be called universal.
As you can see, nail extensions with gel polish have many advantages. But, as you know, “there is always a fly in the ointment,” so consider the disadvantages of this procedure:
- They may look ugly and sloppy. This is precisely the aspect when girls are not responsible enough when choosing a manicurist. A true professional will create a masterpiece on your nails, but a beginner or an irresponsible nail technician can easily ruin not only the coating, but also your natural nails.
Therefore, before you sign up for a manicure, select several masters who seem to you the most professional, read reviews about them on the Internet, ask your friends and clients about the quality of the procedure. And only after that sign up for nail extensions with gel polish.
@journal_nails
@nnnai.l
@nnnai.l
- Constant correction of extended nails is required. Unfortunately, extended nails can also sometimes break or come off completely. In this case, a local correction is made. And even if your nails are safe and sound, the natural nail plates still grow, which means a full correction must be done at least once a month.
- Price. As a rule, nail extensions with gel polish are not a cheap procedure. In addition, as a rule, it does not include the creation of nail designs and coating. That is, by the end of the entire procedure everything adds up and it turns out to be quite a tidy sum.
- Infection. Don’t be alarmed, the likelihood of infection is reduced to zero if you go to a professional salon or an experienced nail technician. Don't chase low prices and close distances. It’s better to drive further and make it more expensive than to put your health at risk.
- Discomfort. Since gel polish extensions require drying in a UV lamp, some girls may experience an unpleasant, strong burning sensation. This depends both on the chosen composition and on the sensitivity of the client.
- Removal from a master. If you can cover your nails with gel polish for extensions at home, removing it yourself is quite problematic and even harmful to the natural nail plate.
The advantages of gel polish extensions are much greater than the disadvantages. Therefore, if you have carefully read all the pros and cons and decided to have gel coat extensions, find out how it is done, so that later, in the salon, you can understand whether the specialist is doing everything correctly.
@nails_p.sveta
@saule170316
@inails_nail
Types of nail gel
Step-by-step extension includes several phases that you need to know before applying gel nail extensions. The three-phase variety includes three components that differ in their functionality. The materials used for the first layer are responsible for the safety of contact between the nail plate and the artificial coating, creating maximum adhesion. The second one models the body of the nail. The third layer creates strength, protecting the nail from the negative effects of external factors, providing a smooth and shiny surface.
Gel nail extensions, step-by-step instructions with photos using a two-phase system, happen differently. One of the components is necessary for modeling and adhesion, the second is responsible for the final strength of the nail. The single-phase system uses a universal material, like acrylic, it is distinguished by the presence of all the necessary properties, while providing strength, modeling and adhesion.
Strengthening nails
The composition of many gel polishes, in addition to the main substances that give it its characteristic properties, may include vitamins, minerals and other complexes that help strengthen natural nails.
A variety of designs can be created on artificial nails, and after strengthening your natural nails, you can choose a design for them.
During periods of rest from extended manicure, let your nails rest: take warm baths, adding essential oils, chamomile infusion, sea salt, etc. Rub the pharmaceutical preparation "Aevit" into your nails and cuticles, it moisturizes and strengthens them.
Don't forget about useful hand masks, which also strengthen your nails. They can be purchased at a cosmetic store or made at home by finding useful recipes on the Internet.
To summarize, we can say for sure that if you choose the right nail artist, nail extensions with gel polish are a fairly safe procedure that will help you always maintain the aesthetic beauty of your manicure.
@master_nails_g23_
@s.barantseva
@linaa.nails
@master_nails_g23_
@yurtaeva_nails
@nogotochki.dizayn
@ina_nail_volkovysk
@alena6604
@nail.bar.kzo11
@master_nails_g23_
@usharal_nailss_aigerym
Extension methods
Before you extend your nails with gel, you should decide on the available methods for carrying out the procedure.
Extension is carried out using forms and tips. Nail extensions using tips are artificial nails that differ in size, color and shape. They are glued to the natural nail plate and covered with extension gel. Ultimately, the tip becomes part of the resulting nail. This extension option is suitable for everyone; you can use it even with very short nails.
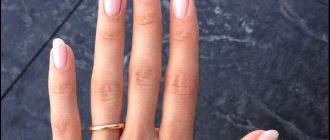
Carrying out extensions on forms (upper or lower) is carried out somewhat differently. With this method, a special plate is attached to the nail, onto which the gel will subsequently be applied. After the extension is completed, the form can be easily removed from the nail. The main advantage of this method is the high naturalness of such a manicure, and removing gel nails extended in this way is much easier than when extensions are made with tips.
Materials for nail extensions must be chosen of high quality, because they are the key to the success of creating a high-quality manicure. When looking through the list of extension gels, you need to choose those that do not contain harmful substances.
Comparison
The forms serve as an auxiliary tool for extensions and are removed immediately after work. Tips are plates that are securely attached to the natural nail and remain on it until the end of wearing. Only an experienced nail technician can choose the optimal extension option suitable for a particular type of nail.
The use of forms can be called a relatively new trend in this area, while tips have been used for more than 15 years. If on the first nails they model, then on the second they simply lengthen them. Tips are only a continuation of the natural nail and, no matter how it grows, it will not be possible to correct it. Using forms, you can visually correct the direction of growth of your nail. Both serve as support for the main material, their wearability depends on the overall compliance with the modeling requirements. However, it should be noted that the appearance of nails on forms is closer to natural, that is, more aesthetic.
The forms do not require cutting off the overgrown nail; it is lengthened using gel or acrylic. Tips are applied to a previously cut nail. The extensions on forms are much stronger, and the material lasts longer. However, this method is not suitable for bitten or too short nails.
Nail gel
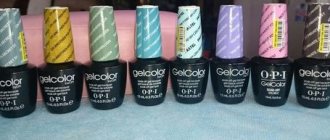
When choosing what to use for extensions, special attention should be paid to the gel, because this is the main material in this technology.
Under the influence of an ultraviolet lamp, the gel tends to harden. This base is often called a living polymer, due to the fact that it does not suppress normal biological processes in natural nails, giving them the opportunity to breathe.
Such materials for nail extensions have many advantages:
- the gel is not capable of causing skin irritation;
- due to the gel, the nail surface is leveled, the nails acquire a natural appearance and begin to shine;
- The gel applied to the surface of the nail is able to level itself, spreading in the desired direction along the nail plate.
What are tips?
Tips are tips made of ABS plastic, which are designed to imitate a natural nail.
This is a fairly practical material for nail extensions, since, despite the thinness of the tips, it is durable, quite elastic and easy to file. In addition, it is completely safe for human health. I wrote earlier on the blog about the variety of types of tips depending on their color, shape, size and contact zone, and you can read it at the link. I would just like to add a little about using them in extensions. For this purpose, it is better to buy tips with a contact zone: it is specially made a little thinner for faster filing of the transition between the natural nail plate and the tip. The contact zone can be different in width, just like they themselves, which allows you to select them for each nail individually. If necessary, the tips can always be filed along the edges to perfectly match the shape of the nail. Read the article in detail about the technology of nail extension with tips.
Tips for extensions
Tips intended for nail extensions are plastic templates that are glued to the surface of a real nail using special glue.
Next, using special grinding and a file, the boundaries between the artificial and natural nails are aligned.
You can reduce the length of the tips using special tweezers, and if it is necessary to adjust their shape, it is recommended to use a nail file. It is extremely important that the tips you choose are elastic, can withstand certain loads and fit perfectly into the shape of your natural nail. Today, the most popular shapes are oval and square nails.
Nail cleaner
You should also always remember that before sticking tips on your nails and applying gel, you must use a cleaner.
This substance is a special degreaser intended for natural nails. With its help, you can clean your nails and disinfect them before starting modeling. Also, using a cleaner, you can remove the sticky layer from your nails after the gel has dried.
These are the basic, but not all, materials that you will need for nail extensions.
If you decide to get a pedicure, gel polish is a better base.
It lasts much longer than a regular surface, and most importantly, it allows you to create a unique and interesting design. Nowadays, decorating nails with stones is becoming especially fashionable; in combination with monochrome gel polish, stones will look great if you decorate your big toe nail with them. Moon manicure is not inferior in popularity, especially since experts offer girls different types of holes. You can make a regular standard one or choose a curly one, you can leave the natural color of the nail or cover it with contrasting gel polish.
If your nails are not as naturally strong as you would like, you can purchase a pedicure gel.
The gel is saturated with protein and calcium and imparts all its properties to the nails, reducing layering. Moreover, this cover is perfect for vacation. I am not afraid of salt water or the scorching sun. No matter how hot the temperature is, the bio gel will not lose its appearance or become cloudy. In order to apply bio gel, you need a UV lamp, because without it the gel simply will not dry on your nails. Bio gel is otherwise called fruit acid, so you can find it in the store under that name.
Acrylic is a mixture of liquid and powder. We suggest looking at acrylic nail extensions, video lessons for beginners, and step-by-step instructions that will allow even a beginner to figure it out. There are two methods: creating nails using forms and using tips.
On forms, the nail plate is created directly from polymer materials. This technology has a number of advantages, namely: the strength of the material, protection from negative environmental influences, and long-lasting nail wear (up to 4 months).
Little tips for perfect results
Small nuances that will definitely be useful to you:
- If your nails are too long, do not use scissors or clippers to shorten them. For these purposes, only a special guillotine or coarse abrasive file is suitable.
- After the procedure, use caring oil. Nails are under stress, so for the first 2 days, use this treatment every 3-4 hours.
- It is better to wash your hands thoroughly before applying extensions.
- Inspect the handles for severe scratches, wounds, damage, warts, etc. It is better to cure all inflammatory processes first.
- After the preparation stage, there should be no particles of cut nail tissue left on your hands.
- If you cannot find a tip that fits your nail perfectly, take a wider one and remove the excess with a file.
You can decide which type of extension is right for you together with the specialist or with us. You can see how to correct nails on the pages of the site.
Minuses
Before you extend your nails with acrylic, you need to know about some of the disadvantages that this material has. Video lessons on acrylic nail extensions for beginners will help you learn that a material such as acrylic is toxic and has an unpleasant odor.
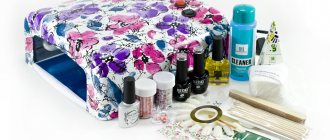
As you can see in the photo, the starting materials you will need are: acrylic itself, a liquid that increases the adhesion of the artificial nail to the natural one, a nail file, a brush, a degreaser and a solvent. You can buy this at any specialty store. The purchased materials will last you for a long time, so the money spent can pay for itself extremely quickly.
Extension on forms
If you are a beginner, then before you extend your nails with acrylic, you should stock up on forms.
This method is simpler. Before starting extensions, you must wash and disinfect your hands. Get a manicure and trim your nails with a file. Using a grinder, go over the entire length of the nail, removing dust from the nail plate and around it. Apply a special cleanser and wait until it dries completely.
Attach the form and glue its ends together, thereby creating the future nail. Next, pour the liquid into the container and dip the brush into the monomer. We squeeze the brush well from the liquid so that it is almost dry. Now use a brush to pick up a ball of camouflage powder. In appearance it should resemble a hedgehog. If the ball turns out to be wet, then you will not be able to work with it; the acrylic will simply spread over the entire nail.
Wait until the ball is completely saturated with liquid, then apply it to your mold. Now you need to roll it out over the cuticle area and the entire shape, retreating a millimeter from the cuticle itself. We create the required nail shape. That's all, we do all the nails in the same way, dry the nails in an ultraviolet lamp, and cover the top with a final coat.
Nail extension with glue powder consists of three main stages. In total, the procedure takes no more than an hour; the total duration of the manicure depends on the complexity of the final painting.
Main stages
Nail extension with glue powder is carried out in 3 main stages.
- At the first stage of the extension, the master prepares the nails by attaching tips (artificial nails) to them. It should be noted that this manicure technology always involves the use of tips; it is not performed on natural nails.
- The second stage of the manicure involves applying special glue to the tips and dipping the nail plate into powder. This action must be repeated several times until the nail acquires sufficient density, after which an activator should be applied to its surface, which will fix the layers of powder, while making the nail smooth.
- At the final stage, the master carefully adjusts the shape of the nail plate and files off excess powder.
After completing these three steps, you can begin drawing.
Nail extensions with fabric allow you to extend nails of various shapes and lengths with flax, silk or fiberglass (fabric that looks like silk and is made from fiberglass).
The principle of the technique lies in the fact that a tip (plastic nail) is glued onto your own nails, onto which layers of fabric are glued.
What is better to use for extensions: tips or gel?
Any fashionable look is unthinkable without details that correctly emphasize individuality . It can be anything - minimalist earrings, bright lipstick or impeccable hair. However, in most cases, everything can be done with a high-quality manicure.
It is no coincidence that the modern nail industry is replete with various nail transformation techniques, the most popular of which have been tips and gel for a long time. Each of these technologies has its own characteristics, which are important to consider when going to a manicurist.
Benefits of the procedure
Nail extension with fabric has a number of advantages, thanks to which it can be used as an independent method of nail extension. The main advantages of the technique include the following points.
- Nails extended using the fabric method are quite impact-resistant and elastic.
- It is very easy to repair a damaged nail - a new layer of tissue is simply attached to the crack.
- The procedure can be carried out using various fabrics - extensions with fiberglass, linen, silk, depending on the client’s wishes.
- Thanks to the presence of a variety of colors and textures of fabrics, you can get different designs on your nails, which allows you to eliminate the need to constantly use a coating.
- Nail extensions using fabric covering are as hypoallergenic as possible and are almost incapable of causing an allergic reaction.
Nail extensions with fabric allow you to extend nails of various shapes and lengths with flax, silk or fiberglass (fabric that looks like silk and is made from fiberglass). The principle of the technique lies in the fact that a tip (plastic nail) is glued onto your own nails, onto which layers of fabric are glued.
What are forms?
Forms for nail extensions are special templates on which gradations are applied for easy modeling of nails. They are disposable (most often made of paper coated with polymer or metal) and reusable. It is still more practical to use the first ones, since they allow you to more conveniently select a template for various nail shapes. Forms can be top and bottom. I wrote in detail about the first and second and the technology of their use in the article. But read about the detailed technique for performing acrylic and gel extensions on forms.
Benefits of the procedure
Nail extension with fabric has a number of advantages, thanks to which it can be used as an independent method of nail extension. The main advantages of the technique include the following points.
- Nails extended using the fabric method are quite impact-resistant and elastic.
- It is very easy to repair a damaged nail - a new layer of tissue is simply attached to the crack.
- The procedure can be carried out using various fabrics - extensions with fiberglass, linen, silk, depending on the client’s wishes.
- Thanks to the presence of a variety of colors and textures of fabrics, you can get different designs on your nails, which allows you to eliminate the need to constantly use a coating.
- Nail extensions using fabric covering are as hypoallergenic as possible and are almost incapable of causing an allergic reaction.
Is it acceptable to combine acrylic and gel when doing nail extensions?
Most clients are afraid of this type of mixing of materials. However, in reality there is nothing wrong with this - it will not affect the quality of the extended nails at all.
Tips and gel: what do they have in common?
- Both extension technologies are largely identical. This is evidenced by the tools and materials used. In addition, before each procedure, a hygienic manicure , which includes treatment of the cuticle and length correction .
- The next unifying element of these extension methods is consistency . So, at the first stage, the nail plate is treated with a primer, after which it is covered with a base, the rapid drying of which requires the mandatory application of gel. And at the very end, the nail is covered with a finishing topcoat.
- If you want to become the owner of a long-term manicure, in both cases an LED lamp will be used to dry each subsequent layer. Regardless of the extension technology, constant contact with water will lead to the destruction of all previously applied layers . Therefore, during cleaning, it is important to take care of the presence of household gloves.
- In the event of the formation of small cracks and chips, which often accompany both tips and gel extensions, it is necessary to contact a specialist in a timely manner. The latter, depending on the situation, will take care of partial or complete correction of the manicure.