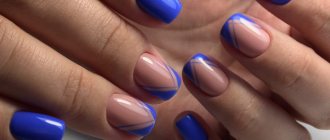
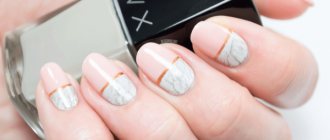
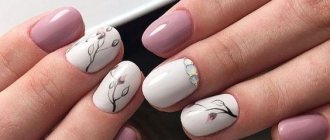
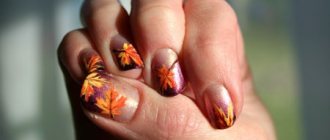
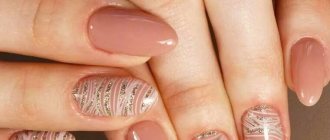
Marble manicure on a white background: YouTube/Art Simple Nail Marble on nails is a spectacular design that is sure to attract attention. Despite the fact that the design began to be applied several years ago, the design is still in trend. Want to replicate the marble effect yourself? In this article we will describe how to make marble on nails with gel polish.
Features of marble nail design
A method of decorating nails that involves creating stains that imitate the pattern of marble or other natural stones is the main feature of such a manicure. Such ornaments are applied to gel polish or a regular varnish base.
This design can be created using several shades at once, since the design requires a background that includes different colors. Now and in the next season, marble nail art will remain at the peak of popularity. In addition, it has many design options.
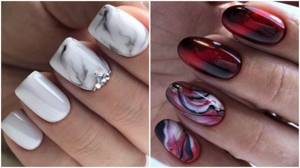
A manicure with a marble design is universal and suitable for both holidays and every day.
For fans of the classics, a French jacket designed in a simple style will suit you. Bright, extraordinary girls can additionally decorate their nails with sparkles and rhinestones. Stylists also recommend actively using rich, rich colors that will highlight the beautiful shapes of your nails.
The most successful color combinations:
- Black or gray blotches on a white background. This classic design is most often used to decorate marble nails.
- A yellow tone combined with orange gives an amber color.
- Green tones and gray or black paints. They create a malachite color.
- Violet shades cleverly mixed with other tones recreate amethyst colors.
- Turquoise, blue colors including black streaks or inclusions. They emphasize the extraordinary beauty of the sky-colored stone.
- Using a dark red tone will give your nails a jasper tint, while a rich blue will make them look lapis lazuli.
Craftsmen also prefer matte, iridescent, and pearlescent compositions. Or they use coloring agents that have a holographic effect. In addition to them, “metallic” colors are used, which makes it possible to obtain an image of the stone using 3D technology.
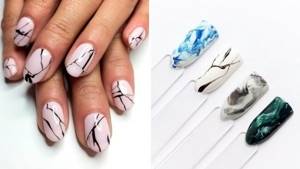
A discreet classic bow in delicate pastel colors is most suitable for owners of short nails. Therefore, it is better for them to choose a discreet design with a small pattern or trim from microscopic rhinestones, and it is advisable to add sparkling details in a single copy.
Girls with long nails have much more opportunities. They can easily experiment with different design ideas.
For example, decorate the nail plates with such decorative details as:
- Rhinestones are abundantly decorated with all fingers, applied completely or partially to the nails.
- glitter, they are placed on one or all nail plates.
- lace prints, floral patterns.
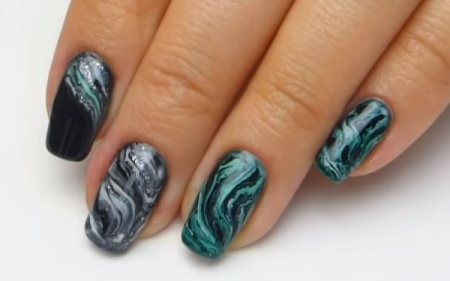
There are also other decor variations recommended by stylists:
- matte, glossy coatings;
- French;
- stylization of a marble surface with a transparent base;
- lunar design;
- combinations of lines with golden and silver elements;
- combination of decor and colored chips;
- pearl rub.
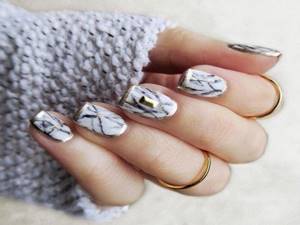
A manicure with a marble design is decorated using various means:
- acrylic paints;
- varnishing compositions imitating marble inclusions;
- stamping dies;
- sticker sliders with a marble pattern;
- gel polishes and thin brushes;
- polyethylene;
- alcohol;
- water.
What is marble on nails with gel polish?
Marble on nails with gel polish makes their surface look like natural stone. Using products of different shades, they also imitate the appearance of turquoise, malachite, opal, quartz, etc., it depends on the colors used.
The classic marble effect on nails with gel polish is achieved using a basic light background, on which blurry and thin clear lines are drawn in beige, pink, gray, and black. They look like veins of natural precious stone. Instead of lines, they also depict small dots and specks, similar to marble chips.
You can use other shades as a base, not just the classic beige-pink or white. But they should be lighter or darker than the streaks and veins so that you can create the texture of a stone on your nails.
Ideas for a monochromatic manicure
Manicures with marble designs are very popular today, especially monochromatic ones. The white type of nail art is considered the most popular. It looks elegant, discreet, sophisticated. This style is suitable for home, study, and office. It can be worn every day and in festive looks.
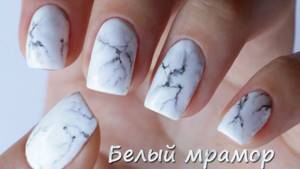
A monochromatic design is very easy to do:
- First, the nails are covered with a white base. They are dried using a lamp.
- Then the marble strips are painted with black varnish.
The nail plates can be additionally decorated with rhinestones, gold and silver stripes, and rubs with various effects. Black marble is another trendy manicure. It is called classic, like the white version. This design is carried out similarly to the previous one. It is also suitable for everyday, business and holiday looks.
Options in different shades
There are a large number of different shades to create a marble manicure. Here are just some of the most current colors.
Rose quartz
The pink shade harmonizes perfectly with marble nail art. It gives the nail design softness and romanticism. This stylistic solution looks great on short as well as long nails of various shapes, making the images elegant and graceful.
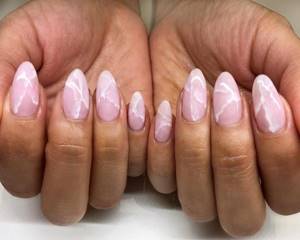
Sequins scattered along the lines of streaks, stripes and the amber technique give the nails an extraordinary chic. Individual fingers are decorated with similar elements. Bright polishes also add accents. A design in this shade is very suitable for special occasions, although it can also be used for everyday wear.
The technique for creating such a manicure is quite simple:
- First, the nail plates are covered with a light pink base.
- Then grayish or silvery lines are applied over it.
Another option: bright pink stains are depicted on a black, gray or beige background. This manicure is complemented with small sparkles or a scattering of rhinestones.
Dark sapphire
The dark sapphire shade looks mesmerizing. It will decorate long and short nails. It can be worn daily, as well as on special occasions.
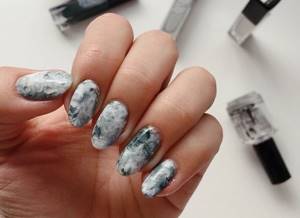
This design is created using standard technology:
- First, the nail plates are covered with a white base.
- Then dark blue lines intertwining with each other are chaotically applied. Their boundaries are made slightly blurred.
Lapis lazuli
The azure color is associated with a marine theme. This is an original design for summer nail art. This shade looks very cute on short nails and gives an elegant look to long nails. It is suitable for festive outfits, and is also appropriate in everyday life.
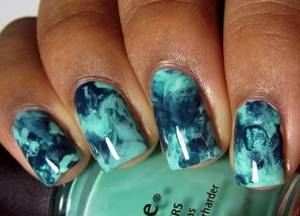
Such a design is made in one of the standard ways:
- First, a mint base is formed.
- Then dark blue stains are depicted on top of it.
Burgundy
The burgundy shade looks very attractive even in the design of short nails. It goes perfectly with gray tones without needing any additional decorations.
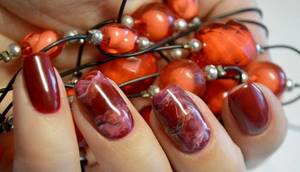
It is performed using one of the standard schemes. This manicure is appropriate for everyday and business looks.
Red
Scarlet color is most suitable for active, self-confident women. This shade is complemented with black and white streaks, which looks very impressive on elongated, almond-shaped nails.
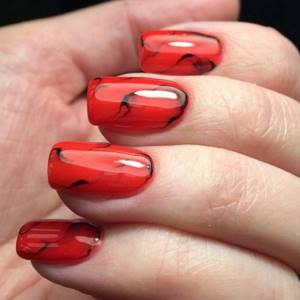
Fiery, bright nail art is very suitable for special occasions and evening events. A manicure in red shades is done using one of the methods presented above.
Blue
Blue tones look great on girls, women with a multifaceted, subtle nature. Such paints complement blue and snow-white shades, creating graceful veining.
Nude
This design looks good on long and short nails. It is best suited for a casual, business look.
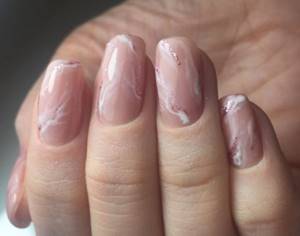
This shade is complemented with white and gray undertones. It is also decorated with gold and silver stripes.
Green
The green shade makes the look stylish and fresh thanks to its mixture with black and white varnishes. The manicure is formed based on the intended purpose.
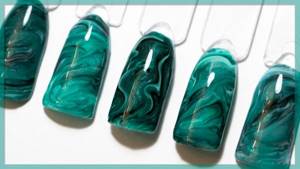
For example, nail plates are decorated with sparkles, glitter, rhinestones for special occasions, or created without any additional decor if used for everyday wear.
Grey
This color is best combined with white shades. It can be complemented with silver stripes, rhinestones, and other decorative elements. This design is appropriate for everyday, business, and festive looks. It will perfectly decorate short and long nails.
How to make marble: a master class for the pros
The master class on how to make marble on nails with gel polish involves several steps:
- First, a thin layer of base is applied to prepared degreased and primer coated plates, then leveled.
- It must be dried in a lamp.
- Apply gel polish of the main shade in 2 layers, do not dry the latter.

- On the palette, mix the second flower bed and the top coating to obtain a product that will be used to paint the veins of the stone.
- This mixture is taken with a thin brush and broken lines are drawn on the nails along the wet base gel polish.
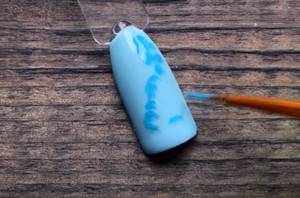
- Then the same veins are drawn, but with the second shade of the flower garden, to which the top is not mixed.
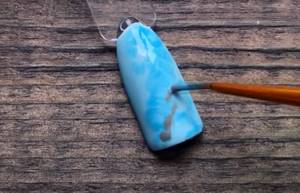
- The coating is dried in a lamp.
- Nails are painted again with the main color.
- And again the veins are drawn, as in stages 5 and 6.
- The next layer needs to be polymerized.
- You can apply a few more brighter lines with a second shade of gel polish.

- They are dried and the nails are covered with a finish.
- After another polymerization, the design is ready.

For this method, the main shade of the gel polish should be translucent. If you follow the design technology, the “marble” will have deep veins and will look very natural.
Matte manicure
The matte finish looks elegant in everyday, office, and holiday nail art of nail plates of various lengths and shapes. Delicate peach and grayish tones give them an irresistible effect.
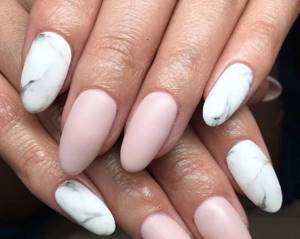
Two fingers decorated in a marble design, and the rest with a velvet finish, look incredibly stylish. If desired, this manicure can be finished with glitter, strips of foil, or sparkles.
Options with patterns and designs
Manicures with marble designs are also complemented with various designs and patterns. Moreover, they can choose any palette of varnishes. So, these can be all kinds of flowers, floral patterns, or various butterflies and bees.
Insects or laconic floral prints on a white background look especially beautiful. They make your nails look elegant. This style is very suitable for creating romantic summer looks.
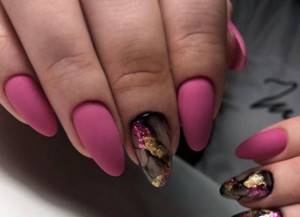
In spring or autumn, you can also use a floristry theme in the design of your nail plates, for example, images of various leaves and twigs. All kinds of abstractions are considered trendy designs. They add unusualness and mystery to the nails. Geometric shapes and straight lines are no less popular. Such elements help to create a discreet style for them.
In winter, nail art with frosty patterns looks interesting. It is also decorated with sparkles to enhance the effect. The design is applied like snowflakes, frost on glass, or a starry sky.
In addition to the seasons, all kinds of curls, uneven lines and other prints are drawn. Ornaments are made on nails of various lengths, regardless of their shape. They are worn in everyday life and created for special occasions.
Decor ideas
Various types of nail plate finishes are used for marble manicure to make them even more attractive. Such decorations are used to create daily, business, and festive looks. They decorate long and short nails.
With rhinestones
In a “stone” manicure, it is important not to overload the overall nail design with decor and it is advisable to use rhinestones as small accents. Therefore, it is preferable to choose them small, not too bright colors. They should fit harmoniously into the color scheme of the nail art without contrasting with it.
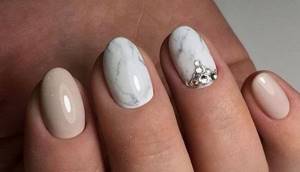
Most often they are laid out along one line or several stripes are highlighted simultaneously with single dots like sparkling drops.
With foil
Last year's fall-winter hit with a metallic gold background is still relevant this season.
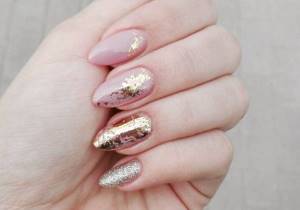
They are used to decorate one or two nails if the manicure is intended for everyday wear or to decorate all fingers in the event of special occasions. Moreover, the marble stains themselves can have different shades.
With rubbing
The pearl coating combines perfectly with the marble texture of the nail plates, creating a delicate feminine manicure.
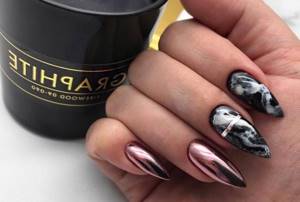
Stylists do not recommend oversaturating it with a bright palette of colors, preferring pastel colors.
With glitter
This is an incredibly impressive combination that combines marble patterns with sparkles.
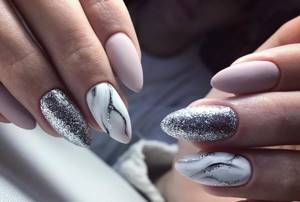
But most often, craftsmen decorate one finger on each hand with similar decor. The rest are covered with a light base. Or glitter is placed along one of the lines of the print.
Tools and varnishes for marble manicure with gel polish
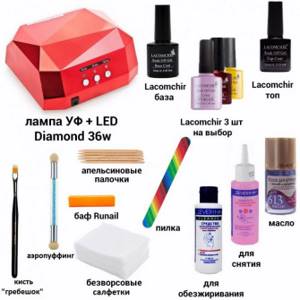
Marble manicure with gel polish requires the use of the following products and tools:
- nail files, buff, silicone “hoof” for moving the cuticle, scissors or nippers for its removal;
- degreaser, cleaner and primer;
- base and top;
- several shades of flower beds;
- a thin and flat brush, dots for drawing design details;
- lint-free wipes;
- toothpicks and an orange stick for removing streaks or mixing products;
- ultraviolet or LED lamp for drying the coating;
- lamp to clearly see the nails and bring out even highlights.
The design can be done in several ways, and depending on what you choose, you may need:
- clean water in a container,
- polyethylene film,
- acrylic paints,
- stamping stamp,
- Defender to protect the skin around the nails.
Fashion trends in 2022
Marble manicure or design in the marble stone style appeared relatively recently and has already gained popularity among women of all ages. It consists of original stains on the nail plates that imitate the surface and pattern of natural stones.
Fashionable colors of this season are gray, white, beige tones. And also black and pale pink shades. This traditional palette of colors will appeal to girls who prefer discreet nail art. No less popular are rich blue, green, and red colors. They are also used as a base or addition.
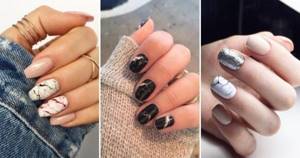
The marbled design is created on all fingers at the same time or one or two are selected as desired. Also, individual nails are complemented with a mirror polish. In addition, they are trimmed with gold or silver stripes, threads, or decorated with elegant rivets.
Today, sharp, rounded, trapezoidal nail shapes are most relevant, and they can be both long and short. Marble manicure goes well with any type of nail art, for example, French manicure.
Asymmetry has become widespread. This is when two nails are covered with marble, and the rest are decorated using a different technique. Often, the marble stone design is combined with various types of coatings, creating simply incredible patterns on the nails of both hands. They are also treated with a special composition that has a matte and sugary effect.
A stone-inspired manicure has a huge variety of different shades and textures with a marble design. The most common methods of decorating nails are presented here, but this does not stop you from experimenting and coming up with new variations of fashionable nail art.
How to paint marble on nails with gel polish
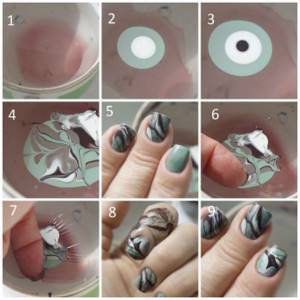
You can paint marble on nails with gel polish using ordinary water:
- After performing a hygienic manicure, the nails are degreased and a primer is applied to them.
- Once it has air dried for a couple of minutes, they are coated with a base coat.
- It is polymerized.
- It’s time to use the main color of the gel polish; you can apply 2 layers for even coverage.
- Both times the product is dried in a lamp.
- Nails need to be wiped with a clinser, and a defender should be applied to the skin around them.
- Pour water at room temperature into a bowl or cup.
- 2 other shades of gel polishes are dripped into it, which will highlight the veins of the stone.
- The drops are mixed with an orange stick or a toothpick so that beautiful stains are obtained.
- Each nail is dipped into the liquid parallel to its surface and removed; marble overflows should remain on it.
- Excess auxiliary shades are removed with an orange stick.
- Then the protective film is carefully removed from the skin, and the coating is polymerized.
- The last steps are to apply the finish and dry it.
Using polyethylene
This design method requires thick plastic film. If it is thin, it may wrinkle at the most crucial moment, and the colors will not mix as needed. The complete process looks like this:
- Nails are processed and prepared for coating.
- After using the base and drying it, paint them with the main color.
- Then the coating is polymerized and a second layer of flower bed is applied.
- It must also be dried in a lamp and the stickiness removed.
- Drops of other shades of gel polishes are applied to a piece of polyethylene.

- They are mixed with an orange stick until streaks are obtained.
- The drawing is taken with a flat brush moistened with clinser.
- Using this tool, it is carefully transferred to the nail and distributed more evenly.
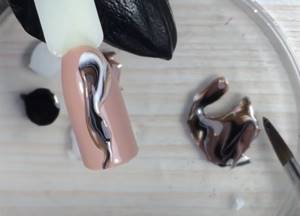
- Excess gel polish that gets on the skin is removed with a napkin or an orange stick and the pattern is corrected.
- The coating must be polymerized.
- The last layer is the top, which is also dried.
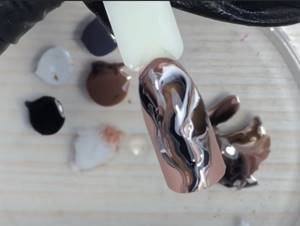
Using a soft film, you can create a more original, voluminous marble design:
- Nails are prepared for coating.
- Use the base and dry it.
- Next, paint the nails with the first layer of the main color of gel polish and polymerize it.
- Then they apply a second one and do not dry it anymore.
- Place cling film on a damp surface.
- It is lightly moved with tweezers along the nail so that broken lines are formed inside.
- Without removing the film, the hand is sent to the drying lamp.
- The polyethylene is removed, and the nail is covered with a different shade of gel polish, preferably translucent or stained glass.
- It is also dried in a lamp.
- The final stage is the application of a top coat and another polymerization.

“Marble” in this case is obtained with textured, very natural veins.
Stamping
To create the desired effect, you can use a silicone stamping pad and 2-3 shades of gel polish, close to the main color:
- On prepared nails, a single-color manicure is performed in the usual way, but without a topcoat yet.
- Both layers of gel polish are polymerized.
- After removing stickiness, the skin is protected with a defender.
- A few drops of auxiliary shades of gel polishes are applied to the silicone stamping stamp.
- They should be mixed with an orange stick until streaks appear, like on a stone.
- The stamp is applied to the nail plate with several short imprinting movements.
- You can correct the transferred drawing with a toothpick.
- Then the defender is removed and the layer is dried in a lamp.
- The nails are covered with top coat and polymerized.
Watch the video about different ways to apply marble manicure:
Alcohol solution
This method requires ethyl alcohol. The design is done as follows:
- The nails are covered over a dried base with the main flower bed.
- It is also polymerized.
- The surface is wiped with alcohol using a lint-free cloth.
- While it remains wet, draw a broken line with the second shade of gel polish.
- The strip is blotted with another, thinner brush, and at the same time the stains are removed and the excess is removed.
- To remove excess second color, you can use another brush - dipped in clinser.
- Steps 4-6 are repeated until the desired pattern is obtained.
- It is polymerized and coated with a finish.
- All that remains is to dry the top layer and apply caring oil to the skin.
Marker
This method will be useful for those who have a marker for CDs and DVDs:
- Nails are painted with the base color of gel polish according to the standard of long-term manicure.
- All layers must be dried, since further work must be carried out on a dry surface.
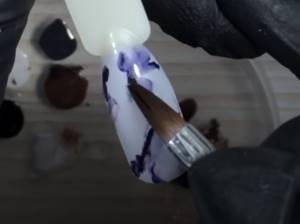
- Use a marker to draw arbitrary broken lines on the nails.

- A flat brush is moistened in acetone.
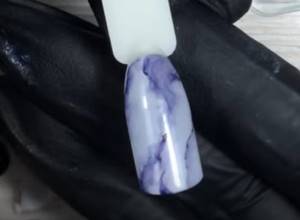
- It is used to blur the stripes applied to the nail so that they become more vague and look like inclusions in marble.
- You need to wait a few minutes for the acetone to evaporate.
- Nails are coated with finish and dried in a lamp.
Acrylic paints
With this method, they use products not for drawing on paper, but specially produced for nail design:
- First, they do a manicure and prepare them for coating.
- Apply the base and main color alternately, not forgetting to dry each layer for the prescribed time.
- A drop of the desired shade of acrylic paint is squeezed onto a palette or piece of foil.
- A thin brush is moistened with water, dipped in acrylic, the excess is removed and the veins of the stone are painted.
- When the drawing is ready, the paint is allowed to air dry for several minutes.
- All that remains is to use the finishing coat and dry it under the lamp.
