One of the most popular cosmetology services is nail extensions. Not every girl has long and strong nails; modeling (or extensions) can help her. This procedure allows you to forget about your hands for a month and look stylish and well-groomed. Extensions in salons are expensive, but if you want, you can learn everything yourself and do a manicure at home. You just need to be patient and work carefully.
Acrylic for nails
What is acrylic
The material for nail extensions is often acrylic. It is obtained by combining powder and monomer, which harden in heat. It takes up to 7 minutes to harden the surface, but the procedure is considered complete only after one or two days.
Acrylic nails are easy to remove. To do this, they are kept in a special solution. Acrylic nail plates do not require special care, but they are very durable and suitable for people who work a lot with their hands (cashier, cleaner, etc.). Their advantage is the ability to create a variety of designs.
Effect
Acrylic powder is used for nail extensions and design. The product is easy to use and does not get on the cuticles. The powder has a porous structure, so the natural nail is not devoid of air. The properties of the product provide protection against breaking off the plate; it does not peel off, which extends the life of the manicure.
No bubbles form after the powder, which is important when using liquid tips
Acrylic effectively strengthens nails. It serves as protection from external factors, for example, sun rays and frost. Due to the characteristics of the functional product, you don’t have to worry about the strength of your nails, and you can also safely do all your housework, since household chemicals do not affect the coating.
After acrylic, the nails will be hard, so they are less likely to break. But the healing effect is only mechanical in nature. The plates themselves are not strengthened, they only receive a protective film. Your nails will look well-groomed and beautiful.
Gel and acrylic: which is better?
What is better for nail extensions: gel or acrylic? All materials have their pros and cons, and before choosing, you need to weigh everything well. The difference between materials is not only in properties, but also in extension technology. The difference is not noticeable on the hands, so the choice depends more on the desire of the master.
Arched nail extensions
Before extensions, nails are filed and a small layer of natural gloss is removed. Then artificial plates are formed. The difference is as follows:
- Acrylic gel for nail extensions hardens faster and easier. The gel requires a special lamp with ultraviolet radiation. Gel polish should not be left in the open sun.
- The difference between the materials is in the removal of extended nails. The gel is cut off, the acrylic is removed with a special liquid.
- The gel was developed later than acrylic and contains additional materials. It is lighter and people get used to it faster.
- The gel base has a glossy surface, while acrylic has a matte surface that requires a varnish coating.
- The glassy surface of the gel can provide great opportunities for complex design patterns.
- The difference between gel and acrylic is the texture. The gel is less dense and allows the nails to breathe, protecting them from fungus.
- At low temperatures the gel becomes brittle (it is afraid of frost).
- Nail plates with gel coating grow faster.
When choosing a material, they primarily rely on experience and customer recommendations.
Important! During the extension procedure, try not to swallow dust when filing the edges. It can cause a sore throat and cough.
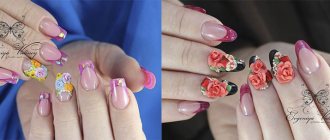
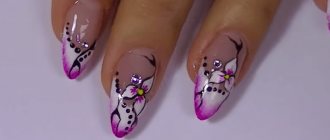
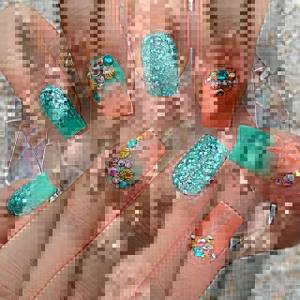
The result of acrylic extensions
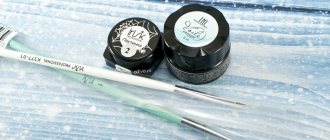
How to work with acrylic paints correctly?
Before creating a nail design with acrylic paints, be sure to remove the old coating and perform a mechanical manicure. A step-by-step drawing on nails with acrylic paints is created as follows:
- the cuticle is pushed back or removed;
- the surface of the nail is polished;
- the free edge is given the desired length and shape;
- the marigolds are thoroughly degreased;
- base coat is applied;
- a drawing is created (using the selected application technique);
- If the result is satisfactory, a fixative is applied.
Nail design with acrylic paints step by step for beginners is not too different. But it is worth remembering that acrylic is difficult to remove from skin and clothing after drying, so if it gets on your fingers, it is better to solve the problem immediately.
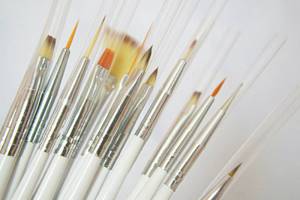
To work with such paints you do not need special tools. It is enough to have several brushes of varying thicknesses with you. Ideally, these should be nylon brushes - they have more elastic and thinner bristles. This will allow you to draw clear and thin lines. But it should be remembered that after finishing painting, the brushes must be thoroughly rinsed under water and allowed to dry.
When creating a design with acrylic nail paints, it is not necessary to have a huge color palette with you. You can get by with basic colors, including white. The latter goes away faster with constant mixing, so it’s better to have an extra tube.
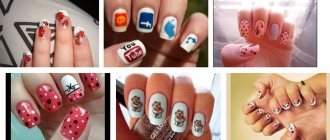
Several educational examples of creating drawings are presented below.
Video “Working with acrylic paints”
From this video you can learn how to use acrylic nail paints coated with gel polish.
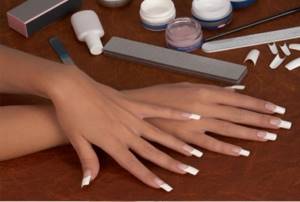
Acrylic nail extensions
Acrylic was first used to create dentures, until one of the dentists thought of giving his wife acrylic nails. The material quickly gained popularity. The working technique may be different, but they always keep in mind that the material hardens very quickly. Acrylic gel for nails is extended onto tips and forms. The first method is fast, it takes no more than an hour, but it is used for wide square or oval-shaped plates. Thin, sharp nails are difficult to grow. Extension to molds allows you to choose any type of plate.
Acrylic nail extensions
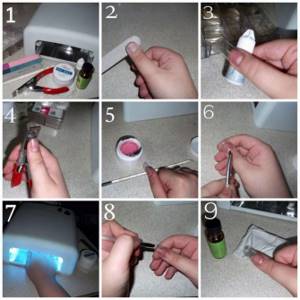
Having chosen the appropriate equipment, prepare the necessary instruments and tools for the work. You will need:
- Acrylic powder;
- Disinfectant;
- Glue for tips;
- Liquid for cleaning brushes;
- Finish coating;
- Special brushes, files, molds (or tips).
You can purchase a ready-made extension kit.
Important! There are contraindications for applying acrylic. It cannot be used for fungal diseases, diabetes and individual intolerance.
Tip extensions are a fairly simple procedure that can be easily repeated by a beginner.
Step-by-step instruction:
- The hands of the master and the client are cleaned and disinfected.
- The nail plate is freed from the cuticle, removing the film underneath it.
- Using a file, remove the top layer of the glossy coating until a white surface is obtained.
- Tips are selected taking into account the shape of the nail.
- Glue is applied to the tip from the inside and the prosthesis is pressed to the finger.
- Sand with a tip file and remove dust with a brush.
- Degrease and treat with primer.
- Take the liquid with a brush, dip it in acrylic powder, put the composition on the plate and form a nail.
- They file, remove scratches and polish the surface.
- Lastly, you need to apply oil to the cuticle and rub it into the surface.
Important! You can't do without a primer. It increases the strength and durability of the manicure.
Extension to forms is more complex and requires skill. At the same time, you can realize any fantasy and make nails of any shape.
Description of work step by step:
- Hand disinfection.
- Removing the fatty layer from the nail plates with a file.
- Release from the cuticle.
- Lubricating the surface with primer.
- The shape is given a bend by putting it on the finger, and the primer is used again.
- Dip the brush into liquid and acrylic powder.
- The ball is placed on the mold, making a French and white tip.
- Dip the brush into the liquid and powder again, placing the ball in the center of the plate, forming a joint.
- The second ball is smeared near the cuticle and the surface is smoothed with a brush.
- The third acrylic ball strengthens the stressed area.
- After waiting for the material to dry, remove the forms and file down the sides of the nail.
- Sand the surface to a shine and apply cuticle oil.
Keep in mind! If you use less powder and more liquid, it will be easier to shape the nail.
Building up acrylic onto top forms is easier, takes less time and gives a flat and smooth surface.
Step by step working method:
- Hand cleaning and disinfection.
- Preparing the surface of the plate for extension, as in the previous method.
- Degreasing and selection of shape.
- Distribute 2-3 acrylic balls inside the mold using a brush.
- Press the workpiece to your finger and squeeze out excess material, waiting about 7 seconds.
- From the inside they give shape.
- Wait until the end of polymerization and remove the mold.
- File the edge and apply oil to the cuticle.
Important! Forms and types should not be confused - they are different things. Tips are disposable, forms are reusable materials.
Acrylic nails
Acrylic is a plastic, hygienic and load-resistant material. It contains acrylic polymer and liquid monomer. When growing, the polymer and catalysts combine to form a soft plastic mass that quickly hardens and allows the base to be shaped, polished, and painted on the surface.
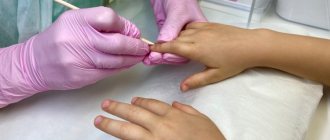
To get beautiful marigolds, follow the instructions and accurately carry out the work in stages.
Combined extension step by step
What you need for nail extensions
Acrylic and gel coating can be combined in two ways. They differ in the order of application, the number of layers and technique. The basis can be either acrylic or gel.
With an acrylic base, 2 types of nail production are possible:
- The acrylic base is coated with gel. That is, the nail is extended from acrylic, and the top is covered with gel for shine. In this case, there is no need to use varnish;
- interior design is performed using acrylic. With this technique, a layer of transparent acrylic is applied to the nail plate, and a design of colored acrylic paint is applied to it. Next, the nail is built from a transparent gel. The gel is applied, dried under a UV lamp, applied again and dried again. Then a layer of finishing gel is applied.
If an acrylic composition is created on a gel nail, then the nail itself is formed from the gel, and the design is made from acrylic. This could be tinting or stucco elements.
Combined extension
The master extends the nail according to the standard procedure for making a gel coating:
- hands are treated with a disinfectant;
- the cuticle is carefully pushed back;
- use a soft file to remove the top layer of the nail for reliable adhesion to the gel;
- the surface to be treated is degreased;
- then the template is placed. At the same time, you need to make sure that it “sits” correctly - it is not pulled up or down too much;
- at the next stage, apply the primer and dry thoroughly;
- Gel is applied to the nail and template to the required length. It is necessary to ensure that the gel does not get under the cuticle; to do this, the finger must be slightly tilted down;
- The coating is dried under the lamp for about 3 minutes;
- then you need to cut down the gel surface a little. This is done for a better connection of acrylic and gel. Acrylic will not adhere well to a surface that is too smooth. An acrylic pattern is attached to the prepared surface and everything is covered with gel;
- dries well again;
- the sticky layer is removed with a special product;
- after the gel hardens, the templates are removed;
- a special file is used to give the nail the required shape and length;
- after using a file, use a brush to remove all dust;
- The finishing gel is applied in a very thin layer. In this case, it is necessary to cover the junction of the polymer and the natural nail;
- dry again for 3 minutes under the lamp;
- the sticky layer is removed;
- Oil is applied to the cuticle and rubbed into the skin.
Note! Creating a gel nail with a voluminous design made of acrylic inside (sculpting) is a very delicate and painstaking work that requires a certain skill. Of course, such work cannot be called an everyday option. This manicure is performed for special occasions: weddings, anniversaries, and so on.
Pros and cons of the material
Forms of extended nails
Advantages and disadvantages of covering nails with acrylic
| pros | Minuses |
| Acrylic nails are easy to remove | Unpleasant smell |
| Acrylic does not require special care | Dull finish requires polishing and varnishing |
| Artificial nails can be repaired | Poor quality acrylic may turn yellow |
| The material shrinks unnoticed by customers | Healthy nails are a prerequisite for acrylic coating |
| Acrylic dust is larger, less volatile and less inhalable than gel | It is prohibited to apply acrylic if you have a fungal disease. |
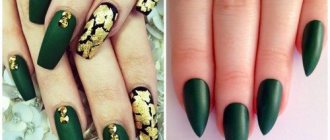
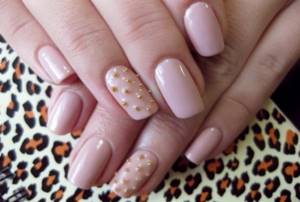
| Possibility of creating any design |
Flaws
The main drawback of the material is that it fades when it dries. Therefore, finished nails will have to be polished or coated with colored gel polish.
The second disadvantage is the strong smell during manicure. It smells like the solvent that is part of the liquid product. The unpleasant sensations will go away as soon as the substance hardens.
Other disadvantages of acrylic coating:
- Does not allow the nail to breathe.
- It is not very elastic, so with strong impacts the polymer may peel off from the plate or even crack.

Contraindications
Acrylic should not be used by those who are sick:
- Diabetes mellitus.
- Herpetic infection in any form.
- Fungal diseases.
Advice from manicurists
When you decide to get extensions, you need to keep a few things in mind to save time and keep your nails in excellent condition. It is important to know:
- When applying nail extensions for the first time, do not extend nails that are too long. Out of habit, they can get in the way; taking them off and putting them on again when needed won’t work. Only after getting used to hands with long nails can you go further.
- You need to be careful with artificial nails. You will have to get used to working on the keyboard, using the phone, and even opening door handles. Over time, long nails will become invisible and stop getting in the way.
- Having contacted the master at the salon and choosing the shape and design on their own, they explain their wishes to him in detail and listen carefully to the specialist’s advice.
- If you don’t like the first experience, you can remove acrylic nails ahead of time, but only a master should do this. Under no circumstances should you attempt this procedure on your own. This can damage the nails, then treatment will take a long time.
- Artificial nails can correct the imperfections of natural plates if there are defects. A beautiful manicure can influence a person’s character, make him more confident and get rid of bad habits.
- Artificial nails should not be tapped on hard surfaces, opened or bent, or used to bend anything.
- Extensions cannot be used if you are pregnant or taking antibiotics or hormonal medications.
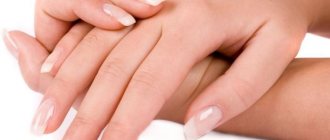
Beautiful hands have always been and will be a symbol of a well-groomed woman. Not everyone has beautiful and strong nails. For those whom nature has deprived of them, extensions are a unique opportunity to forget about the problem and look stylish and fashionable. Acrylic manicure does not require special care and is quite durable. This achievement of our time allows us to experiment with different design options.
Strengthening nails in the salon - what is it?
Strengthening nails in the salon means using extension gel, acrylic, powder or biogel under a colored coating, but not only. There are also procedures that have a therapeutic effect:
- Lamination. Includes preliminary preparation, that is, hygienic manicure, hand massage. Then vitamin serums and oil extract are rubbed into the nails. They are coated on top with a nourishing composition in the form of varnish so that the beneficial substances penetrate into the thickness of the plates and are not washed off. It also serves as protection from external influences. And on top of the laminating composition you can apply gel polish.
- Sealing. The procedure is similar to lamination in that nutrients are also rubbed into the nails. These are oils, waxes, vitamins, mineral pastes. They restore the legs and form a protective film on them. But design is not done with gel polishes after sealing.
- Hot manicure. This is a hand bath with herbal, oily vitamin solutions, creams, serums. A constant temperature is maintained in the container during the procedure, which enhances the effect of beneficial substances. After this, you can make a color coating.
- SPA manicure. This is a complex procedure that includes hygienic nail treatment, scrubbing, baths, and massage. The effect is directed not only to the nails, but also to the hands.
- Paraffin therapy. The substance is melted in a special bath, the hands are prepared by scrubbing and massage. Oil, mask or cream is applied to them and to the nails. Hands are dipped into melted paraffin three times, allowed to dry a little, and the hands are wrapped in polyethylene and thicker fabric. After 20 minutes everything is removed. Hands are washed and cream is applied.
Strengthening compounds will help extend the wearing of the design for up to 3 weeks, after which correction is needed. Otherwise, the problems that caused the need for their use will worsen. And in order for the nail-strengthening composition to lay more evenly, you need a high-quality hygienic manicure.
How long does acrylic last?
Depending on the strength, correction of the extended nails will be required after 3-4 weeks. If you delay this, your natural nails may break.
Extensions not only allow you to make your hands look well-groomed, but also correct their natural irregular shape. The procedure acts as a strengthening of the native nail plates. Acrylic has no harmful effects on the body. You can paint it with paints or decorate it with sparkles.
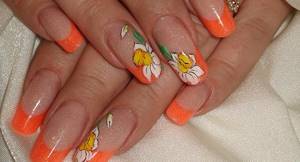
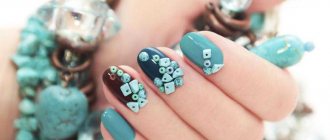
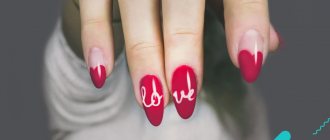
Design of extended nails