Imagine that you are suddenly invited to an important event, but your manicure is not done. There is no time left for the salon, and this issue needs to be resolved quickly. Do you know what tips are? These are false nails that will make your fingers look well-groomed when time is running out.
- Tips: what is it?
- Types of tips
- Advantages and disadvantages
- Adhesive mixture
- Which tips to choose?
- Instructions on how to properly glue tips on nails
- How to remove tips yourself?
- Useful tips
Don't know how to use them? For help with this, we recommend reading this article. It discusses in detail the following issues:
- what are these overlays;
- their types;
- what glue to choose for tips;
- growth algorithm;
- how to remove tips yourself.
What are tips and their history
Most girls know or have a rough idea of what tips are. Tips are frames shaped like a nail plate, made of plastic, nylon or polyflex.
The first plastic forms appeared back in the seventies; they were made by hand, so only noble people could wear beautiful artificial nails. They were the same length; due to the lack of manufacturing skills, the first tips were very thick and rough. Since 1974, mechanized production of tips began. Plastic heated to 150 degrees was poured into special metal molds. After cooling, the molds were opened and the finished tips were taken out.
Materials for tips
Over time, nail extensions using tips became very popular, so plastic frames began to be produced in large volumes. Tips are made from various materials, often using three types of substances:
- Polyflex - frames made of this substance are often used when extending nails onto gel tips; this use is due to its fast and strong adhesion. The substance has good elastic properties and is not destroyed by acetone.
- ABS plastic - the name arose due to the components included in the substance, namely: acrylonitrile, butadiene and styrene. ABS is the most common material used to make tips. The frames are durable, highly elastic and have good adhesion to extension materials.
- Nylon is an impact-resistant material that holds its shape well, has high elasticity, and is easy to model. However, nylon frames are not suitable for nail extensions with tips at home, since they are difficult to glue to the nail plate.
Regardless of what material the tips are made from, they must be of high quality. To check reliability, you can slightly bend one of the frames along the length.
If, after a slight bend, a white stripe appears in the center, then the tips are of poor quality.
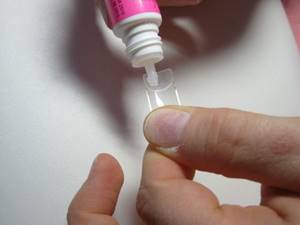
How to glue without glue
As a rule, a special glue comes with the tips. It is not recommended to use a substance for this purpose that is not intended for this purpose. It is best to buy glue in a special store. If you forgot to buy it, you can use clear varnish. Before applying it, the nail must be degreased. Then apply a thin layer of varnish with a brush, onto which the artificial plate is applied.
To prevent the tip from moving, you need to hold the nail for a few minutes. However, this method is not very reliable, since with any manipulation the plate may simply fall off. The advantages include the safety of the procedure, since the natural tissues of the finger in this case will not be harmed at all.
Some people try to glue tips with simple glue. To prevent toxic substances from getting into the nail plate, cotton wool is placed under the false nail. If the decoration is stuck in this way, it should be removed after a few hours to avoid health problems.
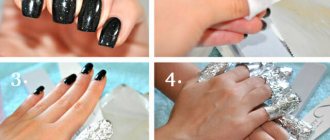
To avoid using glue, you can buy glue-based tips. To apply them, you should thoroughly wash your hands and remove excess oil from your nails (you can use alcohol or acetone). Afterwards, remove the film from the tip and glue it to your finger. This is a convenient and safe method, however, pieces of plastic glued using this method will not last long.
Types of tips
Tips differ not only in the material from which they are made. They have different shapes and colors. To make nail extensions with tips easy, you should choose the right shape that suits a specific type of nail plate.
Tips forms
Tips are available in various shapes to create a specific nail design.
Varieties:
- Classic – have a smooth natural curve, suitable for almost all types of nails. Most often used by professionals. Often sold in packs of 50 copies, the cost is from 250 rubles.
- Straight - in this form of tips there is no contact zone, which is why they are also called non-contact tips. Due to the lack of a contact zone, they are often used for French design. For 150 rubles you can buy a set of 100 copies.
- Tapered tips - used to create nail shapes such as stiletto, bridget, and cat nails. The set includes 50 tips, you can buy a set for 150 rubles.
- Curved frames are indispensable for nail extensions using American style tips.
- Almond-shaped tips - used to quickly give the nail an almond shape. They come in different lengths, most often they do not have a contact zone, which makes it easier to create a French design. The price for 50 pieces varies from 100 rubles.
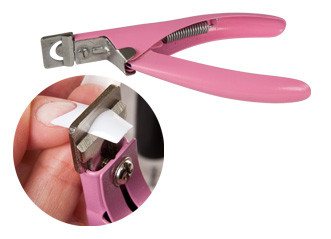
Each of the described types has a different length, which is written on the packaging. Manicurists use the maximum length of the tips; special clippers are used to change the length.
Color spectrum
In addition to the shape, the tips differ in color. Manufacturers produce a variety of colors to create the perfect manicure.
Kinds:
- transparent - ideal for almost any design;
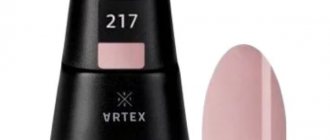
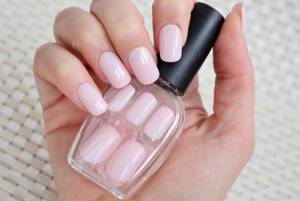
- flesh or natural shade - to give nails a natural look;
- colored - it’s easy to draw a picture without using the main color of varnish;
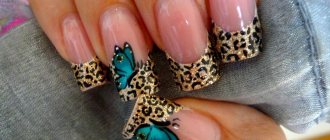
- with a pattern - tips are used to quickly create a beautiful manicure;
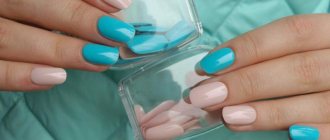
- French tips for nail extensions - quickly create the perfect French manicure.
How to choose tips
Every girl wants her nail extensions to be as similar to natural nails as possible. In order to achieve this result, you should buy thin, but at the same time durable tips. The thicker the frame, the worse it will look on the nails. You shouldn’t skimp on the material; it’s better to buy tips from well-known companies so as not to end up with a fake.
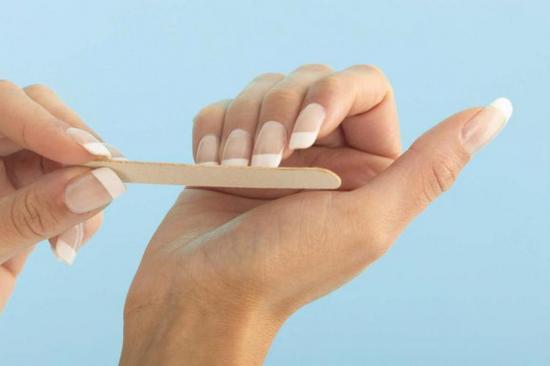
When purchasing tips, you need to consider not only their length, but also their shape. The better the frame fits on the nail, the easier the extension process will be. If it is difficult to choose the appropriate size, then you can take slightly larger tips, apply them to the nail and use a file to remove excess edges.
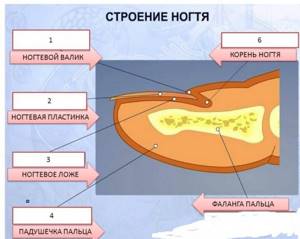
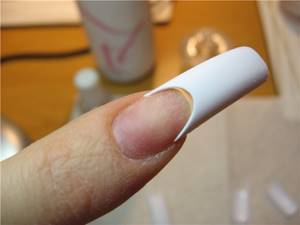
When choosing tips, you should pay attention to the stop line, the length of the free edge and the contact zone. The free edge is thicker and longer than the contact zone. The stop line is a conditional separator between the contact zone and the free edge. The tip of the nail plate should rest against the stop line.
Tips should be cut with a tip cutter; do not use scissors or other cutting tools.
If the natural nail is slightly raised up, for convenience and a beautiful manicure, the free edge should be of medium length. For defects in the nail plate, it is best to use adhesive gel; it can fill cracks and grooves, smoothing out the natural nail.
Features of the contact zone
The contact zone is a thin part of the plastic frame, similar to a dimple. The recess should fit snugly against the nail and be in contact with it. Glue is applied to the contact area, only then the tip is glued to the nail plate.
The contact zone comes in different lengths. It varies from three to six millimeters. The shorter the nail bed, the smaller the contact area should be.
The contact zone can be:
- with several slots;
- round;
- deep;
- V – shaped;
- small;
- big.
During the extension process, the contact area is cut down. It is best to start nail extensions using tips at home with non-contact frames. In such types there is no possibility of design violation.
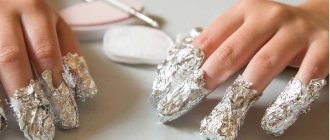
Removing the cover plates
If you lack experience, it is recommended to remove tips only with the help of a specialist. But if you decide to carry out this procedure yourself, you should take into account all the nuances and thereby avoid unpleasant consequences.
To remove overlay plates, a solvent containing acetone is usually used. Kits from Irisk Professional must contain the specified liquid. With its help, the synthetic plate and glue are softened.
The wrong choice of the latter can significantly complicate the process. The fact is that glue can have different intensity of action. If a product is chosen that is too strong, it will take a lot of time to weaken it, which can lead to unintentional damage to the nail. It is strictly forbidden to use Moment. It and similar chemicals are not intended for gluing tips.
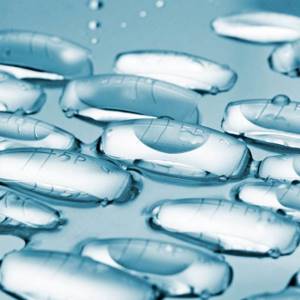
Liquid tips
Progress does not stand still. Since 2010, liquid tips for nail extensions have become widely used in the nail industry. Such frames are made of flexible polymer material. Liquid tips are called because they contain a gel that has a liquid structure. The molds are very durable and can be used up to 200 times.
To work with liquid tips, you do not need to buy additional glue and many forms; you just need to purchase a gel and a rotating ultraviolet lamp.
The box contains 50 tips, such a set costs from 1500 to 2500 rubles. One set lasts professionals almost two years. Liquid tips save not only the time allocated for extensions, but also money. For beginners, the online store has the opportunity to purchase complete sets, which contain not only tips, but also a suitable gel for extensions.
Extensions with liquid tips
Step-by-step instructions for nail extensions using tips for beginners:
- remove cuticle in any convenient way;
- polish the nail plate;
- degrease the nail;
- apply primer coupling;
- attach the tip to the nail, choosing the most suitable size;
- determine the size; for this purpose, special markings are used on the form;
- Using a brush, put the gel into the liquid tip;
- coat the mold evenly to the selected length;
- glue the form with gel to the nail;
- holding the shape, dry the nail for 10 seconds under the lamp;
- after drying, remove the tips;
- Using a brush, apply a layer of gel to the finished substrate, forming a stress zone;
- dry the nail under the lamp;
- remove the sticky layer;
- shape the free edge;
- apply top gel, remember that it must be without a sticky layer;
- dry under the lamp for several minutes.
Video “Liquid Tips”
The video shows step-by-step instructions for gel nail extensions using liquid tips.
Advantages and disadvantages of liquid tips
Pros:
- easy to place on a natural nail;
- multiple use of tips;
- no need to apply glue to nails;
- no need to cut tips to give the desired length;
- creating a French manicure is faster due to the highlighted smile line;
- Can be used even on very short nails.
Flaws:
- Before using liquid tips, newcomers to the nail industry should attend lessons on gel nail extensions using tips.
- Not suitable for people with wide nail plates.
- You need a turning lamp; when drying in a regular UV lamp, the gel may spread.
Current design trends
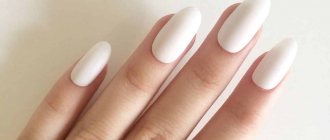
The most current trend this season continues to be minimalism. Plain plates without unnecessary decoration are considered a classic solution. Successfully fitting into any image, they do not draw attention to themselves and look laconic and elegant.
Another popular trend in manicure is tattoo pictures. They are placed not on the ring finger, as they did a couple of seasons ago, but on the thumb. It looks more trendy and interesting.
The latest trend is neon. Originating on the Milanese catwalks, it smoothly flowed into the nail industry. Bright neon polishes are perfect for summer.
Acrylic
Acrylic is a durable, quick-drying material. Acrylic nails are elastic; after extensions, the nails turn out thin and look natural. When using acrylic at home, you need to choose a well-ventilated room, as the substance has a specific aroma.
Extension tools
Before you move on to creating an artificial nail using tips, you should check if you have all the tools at hand.
List of materials:
- extension material – acrylic;
- primer or degreaser;
- liquid for dissolving acrylic - monomer, volume of at least 50 ml;
- set of tips;
- brush for applying acrylic powder;
- nippers for cutting tips;
- file with abrasiveness from 100 to 180 grit;
- lint-free wipes;
- buff;
- alcohol or other disinfectant;
- a jar with a lid will be needed for the monomer;
- dust removal brush;
- glue for tips;
- oil or cuticle softener.
After purchasing all the necessary materials, you can start creating beautiful nails.
Instructions
Before you start doing any manicure, you should wash your hands well with antibacterial soap. If this is not possible, then the skin of the hands is treated with a disinfectant, alcohol or antiseptic.
Extension process:
- File the free edge of the natural nail.
- Remove cuticles using an orange stick.
- Use a nail file to remove oily shine from nails.
- Choose the right tip for each nail; the contact area should cover less than half of the nail plate.
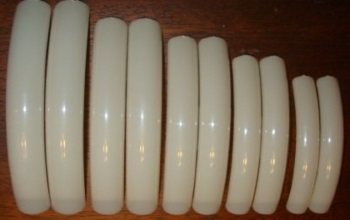
- The numbering of tips starts with the number 1 and ends with the number 10, the first size is the widest, then the width decreases.
- Arrange the tips after selection in order.
- File down the edge of the contact area on each frame.
- Degrease the nail plate.
- Apply glue to the contact area and distribute it evenly.
- The tips should be held at an angle of 45 degrees to prevent the glue from spreading.
- Apply the tip so that the stop line is in contact with the tip of the natural nail.
- Press the frame onto the nail plate and hold until it holds firmly.
- Adjust the length of the free edge using a cutter.
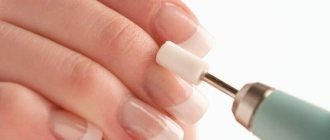
- Using a file, give the frame the desired shape.
- Use a buff to reduce the boundary between the tip and the natural nail, so that when you run your finger along the plate you don’t feel the bumps.
- Mix acrylic powder with monomer until a plastic mass is obtained.
- Using a brush, evenly distribute the acrylic mass along the entire length of the nail.
- You can remove excess thickness with a nail file.
- Apply a fixative to the nail.
After the fixative has completely dried, the nails can be covered with a single-color varnish or a special design can be created. For beginners, it is better to use colorless acrylic for nail extensions with tips, and a light pink color is suitable for French manicure. Extending nails with tips using acrylic is a very easy and simple procedure.
Adhesive mixture
It is especially important to choose glue for tips. It usually comes in a kit with these parts. If it is not there or it has run out, craftsmen recommend buying the adhesive composition in a specialized store. Adhesives not intended for this purpose (“Second”, “Superglue”) will cause harm to health.
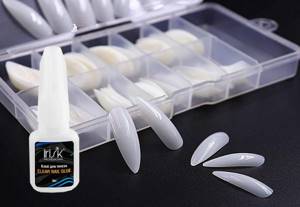
The most common glue is Irisk. It has high adhesion strength and comes straight with a brush for application.
Gel
One of the main materials that nail art masters use to build up nail plates. The gel is easy to apply to the nail plate, it adheres well and does not dry out as quickly as acrylic. Therefore, nail extensions using gel tips will be an easy and fun procedure that even inexperienced nail technicians can handle.
Extension tools
The list of equipment needed for gel nail extensions is very similar to the list for using acrylic powder. The only acrylic powder and monomer are replaced with gel, and instead of a jar for liquid, an ultraviolet lamp and liquid are purchased to remove the sticky layer.
You will need three types of gels: camouflage or modeling gel, base and finishing gel.
Instructions for beginners
Step-by-step nail extension with gel on tips, the first 15 points are identical to acrylic extension. You should file your nails, remove oily shine and push back the cuticles. Starting from point 16, nail extensions with gel tips will differ from acrylic designs.
Gel application steps:
- open the jar of base gel;
- drop the gel into the center of the nail plate;
- distribute the material evenly over the entire surface of the nail, leaving 1 mm margins from the tank rollers and cuticle;
- dry the nail under ultraviolet light for 3 minutes;
- apply modeling or camouflage gel, leaving most of it in the stress area, in the cuticle area and on the free edge the layer of gel should be minimal;
- dry the layer under the lamp for three minutes;
- remove the sticky layer;
- form nail arches;
- using a file, make the free edge of the nail thinner;
- clean the nail with a brush;
- evenly distribute the gel finish over the nail;
- polarize the nail for 2–3 minutes;
- remove the sticky layer if the topcoat leaves it;
- Apply oil or emollient to the cuticle.
The gel allows the nails to breathe, it does not have a specific odor, which is why this material is more popular in contrast to acrylic powder.
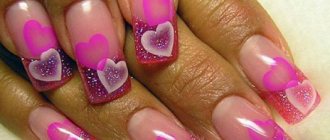
French design
French manicure has gained its popularity a long time ago and still holds a leading position. French nail design can be done using two methods:
- Express - quick nail extensions using French tips. To do this, you need to buy special tips with a drawn smile line. Stick them on the natural nail and cover with finishing gel.
- The standard creation of a French jacket involves the presence of a light pink camouflage gel. It is applied after the base coat to the entire surface of the nail. After drying and removing the sticky layer, a smile line is drawn with white gel. Finally, you need to apply a finishing coat.
Glitter extensions
If you want to make a bright, shiny manicure, then the modeling gel can be mixed with glitter. It must be applied in the same way as described in the step-by-step instructions. To give a more saturated color, you can apply two shiny layers. Dry each separately under a lamp.
Nail care
To make artificial nails look beautiful and last longer, you should monitor their condition. It is advisable to make the first correction two weeks after the extension. Subsequent ones can be delayed for three to four weeks, it all depends on the growth rate of the natural nail.
When working with chemicals and large amounts of water, it is advisable to wear gloves to prevent your nails from peeling off. Do not allow sudden changes in temperature, as the gel nail may crack. You need to remove polish from artificial nails with a liquid that does not contain acetone. Extended nails should not be banged on a table or other hard objects.
Care instructions
A glued-on nail will last a long time if you care for it properly. To do this, you must follow these recommendations: Avoid contact with acetone. This substance can dissolve the material and damage the coating.
Periodically reduce the length using tweezers and a nail file.
Inspect the nails; if defects are found, then it is better to remove the plates, and only after 7 days glue new ones. After washing, dry your hands thoroughly to prevent mold from forming under your nails.
Compliance with these basic rules will help maintain health and beauty.
Differences from extensions to forms
By looking at the table, you can understand which type of extension is best to use.
| Tips | Forms |
| If there is no free edge of the natural nail | Wide nail plate |
| A natural nail has a flat shape | Flat nail shape |
| Springboard nail shape | The free edge of the natural nail is strongly bent downwards |
| Deformed nails | |
| Nibbled nail plates |
Advantages and disadvantages
Advantages:
- rapid increase in length;
- less chance of allergies;
- ease of extension, which even a beginner in nail art can easily handle;
- you can make smooth nails, even on deformed nail plates;
- You can create an exclusive nail design of maximum length and various shapes.
Flaws:
- it is difficult to achieve a natural look;
- in the first stages, large expenditures of money are required;
- Due to the thick free edge, artificial nails are inconvenient to use.
What can be replaced
It is better to fix artificial nails with special glue. We can assume that there is no alternative to it. Fastening with PVA or BF-6 is unreliable. Superglue can seriously damage your nail plates. Even if you managed to fix the false nails at first, there is no guarantee that after a while they will not unexpectedly get lost.
When buying manicure products, you should take care of purchasing a well-known brand of glue to not only ensure reliable fixation, but also the health of your nails.