Recently, manicures with gel polish have become very popular, since they come in many colors and can remain in their original form for a long time. But when the nail grows or the coating becomes damaged, it becomes necessary to remove it. To do this, it is recommended to go to a beauty salon. If for some reason this option is not possible, the procedure can be carried out at home, the main thing is to know how to do it correctly without causing severe harm to the nail plate.
Preparation for the procedure
To make the process of removing nail polish or shellac at home easier and to protect your nails from negative effects, it is recommended to use the following recommendations:
- First remove the top layer of the coating with a regular file, cutter or buff.
- Lubricate the cuticle with oil or rich cream so as not to dry it out.
- Proceed to remove the gel when all the necessary tools are prepared.
- Remove the gel coating on each nail one at a time. If you leave small fragments of the coating and move on to another nail, the gel will harden again and the procedure will have to be repeated.
- First, the varnish is removed from one hand, then from the other. This is more convenient because the second hand will be completely free.
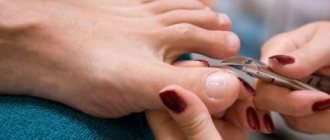
- If you are having a French manicure, the cotton wool with gel polish remover should be kept longer on the tip of the nail compared to the other area, since the coating is thicker there.
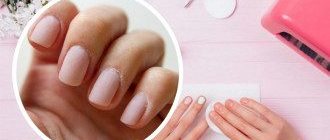
- If the varnish will not be reapplied, it is recommended to carry out restorative procedures for the nails. These include various salt baths, application of oils and other products.
Scrubs, masks for manicure and pedicure
Storage recommendations are the same as for creams - in a dry, cool place away from heat sources and direct sunlight.
Shelf life: up to 2 years subject to storage conditions. Products based on natural oils – up to 6-12 months. It is necessary to look at the designation on the packaging.
Signs of unsuitability: change in consistency, appearance of an uncharacteristic odor, especially for oily compositions, hardening due to evaporation of moisture, separation of the composition into liquid, oils and solid particles.
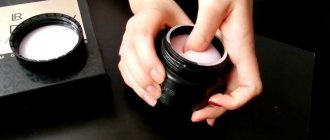
Removal with remover liquid
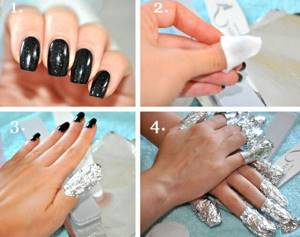
Remover is a professional liquid that is sold in all specialized stores. To remove gel polish from nails, you need to:
- Cut the cotton pads in half or take regular cotton wool.
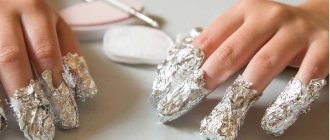
- Soak them generously in remover and press onto the nail.
- Wrap the foil around your finger with the shiny surface up and the matte surface down. You can buy a special one for manicure removal or take a regular food grade one. The foil needs to be cut so that the width is slightly larger than the size of the nail, and the length is enough to wrap your finger.
- Keep the remover on your hands for at least 15 minutes.
- Then remove the foil. The gel should dissolve and come off easily from the nail plate.
- Use an orange stick to remove any remaining coating.
- A small amount of remaining gel can be removed with a polishing file.
- If necessary, it is recommended to repeat the procedure.
Rubber bands for banknotes
In most cases, the problem with opening the varnish is the thinness of the lid. I can't get my hands on it enough to turn it tightly enough. Ordinary rubber bands for banknotes will help correct the situation. Twist them in half, put them on your fingers, then tightly wrap them around the bottle cap. If necessary, use several pieces to ensure a tight grip. You will be able to open even those bottles that are equipped with a sharp and thin cap.
how to remove nail polish stains from clothes
Removing the coating with acetone
Some girls try to remove gel polish using acetone. But this product dries out the skin and worsens the condition of the nails. If there is no professional remover, then you can get rid of the coating this way. The following instructions must be followed:
- Cut the cotton pads in half.
- To minimize the negative impact of acetone on the skin and cuticles, lubricate them with baby cream, cuticle oil or Vaseline.
- Soak cotton pads in acetone, apply to the nail and wrap it with foil or cling film.
- Keep for 10 to 15 minutes.
- Remove the foil and cotton wool from the first nail.
- Remove most of the coating with a cotton pad.
- Remove the remaining polish with an orange stick or manicure spatula.
- Polish your nails with a buff.
- After all manipulations are completed, proceed to the 2nd nail.
- If desired, apply any nutrient mixture.
If you remove all the foil at once, the acetone will evaporate and the gel will become solid again.
Paraffin for paraffin therapy of hands and feet

It is recommended to store paraffin in a cool, dark place away from sunlight and heat sources as it may melt. Classic paraffin without impurities and additives has an unlimited shelf life. The composition with cosmetic additives will last up to 2-3 years, subject to storage and operating conditions. Product with natural additives – up to 4-6 months.
It is recommended to store paraffin in plastic containers or bags. It is recommended to change the composition in the paraffin melter every 4-6 months with a large flow of clients.
Signs of unsuitability: change in color, separation of texture in the presence of additives, change in odor in the case of fragrances. Natural paraffin without additives can be melted down in case of deformation under the influence of heat, and folded into a mold for further storage.
Removal with vodka or alcohol
This option is the most convenient if there is no professional nail polish remover or liquid. The procedure is easy:
- Soak cotton wool or half a cotton pad in vodka/alcohol and apply it to the nail.
- Secure with foil.
- Leave for 20 minutes.
- Remove the cotton wool. The gel should come off the nail plate easily. There is no need to rip off the coating, as this can damage the nail.
- Repeat if necessary.
The alcohol must be diluted with water in a 1:1 ratio.
Removing the covering with adhesive tape
To remove the gel yourself using an adhesive plaster, you need to follow a series of steps step by step:
- Pour acetone or a special remover liquid into a small container.
- Lubricate the cuticle with rich cream or oil.
- Wrap each nail with a bandage. It should completely cover the nail.
- Dip your fingers into the container with the liquid so that the patch is completely immersed in it.
- Wait 10 minutes.
- Remove the patch. Most of the coating should come off with it.
- After a while, remove the residues with a pusher or an orange stick.
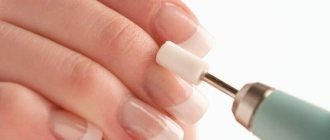
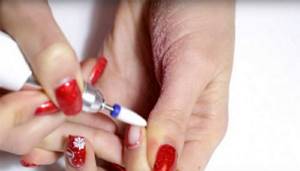
Removing gel polish with a special device
This method is more reliable, faster and gentler than using acetone. But for this you need to buy a machine and a nail polish remover. A cutter is similar to a small drill or grinder. Most often, several attachments are included with the device - hard ceramic or soft metal, reminiscent of dense cotton wool. Hard attachments are designed to remove the main part of the gel, and soft ones are designed to work near the cuticle and remove polish residue.
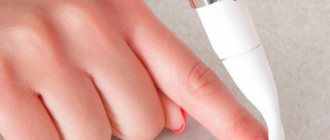
Before you start using the device, it is recommended to try it on false nails or plastic. This way you can understand at what angle to hold the device. Instructions for using the device:
- Wash and dry your hands.
- Using different attachments, remove the gel layer by layer.
- Movements must be gentle so as not to damage the skin around the nail and cuticle. You can’t put pressure on the nail; you need to gently move the attachment over it until the coating wears off.
- Recommended speed is 12-20 thousand rpm.
- After the varnish has been completely removed, use softer attachments for polishing.
If your nails hurt after removing the gel, it is not recommended to polish them or apply a new coating.
Glue for fixing tips and other elements in manicure
It is recommended to store the glue away from sources of open flame, sunlight, air conditioning, and at temperatures up to 40°C. Do not pierce the tube, otherwise the glue will dry out. It is necessary to close the lid tightly after each use and remove any remaining adhesive from the neck with a paper or lint-free napkin.
Shelf life: for most manufacturers it is 1 year from the date of production. After opening the tube for the first time, the product may dry out quickly, so you need to ensure that the cap is tightly sealed.
Signs of unsuitability: dryness, viscosity, fibrousness, formation of lumps.
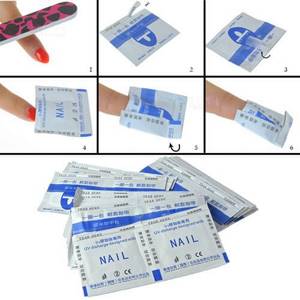
Using special napkins
Wipes soaked in acetone can be bought online at specialized websites or in a cosmetics store. Instructions for their use:
- Remove the top layer of coating.
- Lubricate the cuticles and skin on your fingertips with a rich cream.
- Open the bag, take out a napkin and spread it on the nail.
- Place the bag on top and gently squeeze it to secure the napkin.
- After 15 minutes, remove everything from the nail plate.
- Remove the covering along with the napkin.
- If the gel remains, you can pry it off with an orange stick or a manicure spatula.
- If necessary, repeat the procedure.
- Wash your hands with soap and moisturize them with cream.
Common mistakes when removing gel polish
In order not to spoil the nail plate, it is recommended not to make the following mistakes:
- Do not scrape or pick out the coating with various means or tools (except for a special apparatus). Many people try to get rid of the gel mechanically. As a result, severe damage to the nail occurs, especially if shellac is present.
- Do not apply acetone without oil or rich cream on the cuticle and skin around the nail. The substance dries out the skin greatly, which negatively affects its condition.
- Do not try to completely remove the coating using an ordinary file. In any case, it will damage the top layer of the nail.
- Do not scrape off the gel with an orange stick. It won't damage the nail too much, but it won't remove the coating either.
- Do not use pure acetone. It is better if it is a professional product or nail polish remover with acetone and the addition of various vitamins.
- There is no need to rush. If the polish does not separate from the nail, then you need to wrap your finger again and wait some more. The difference in exposure time depends on the type of varnish and primer.
After the gel removal procedure, it is recommended to trim thin and brittle nails. After this, you need to treat the nail plate with professional means to restore it or with natural products (lemon juice, sea salt baths, oils, iodine).
How to remove gel from nails at home. What not to do
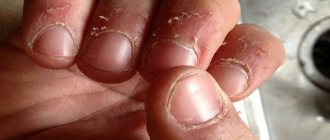
Some gel polishes begin to bend around the cuticle after just a few days.
Usually the problem is either in the varnish itself, or in the fact that the nail technician did not degrease the nails enough. You want to tear off this shiny record, but you can’t. The gel penetrates into all irregularities, so by peeling it off, you can turn a small scratch into a full-fledged crack. And this applies not only to the tip of the nail. Take it from the person who ignored this advice: a crack at the base of your nail is a very unpleasant thing. It's painful, very unsightly and simply unhealthy. And a healthy nail takes forever to grow.
As much as you might like, don't peel off the polish.
The exception is the gel that is not completely dried. Peel it off calmly and wash off the residue with acetone. How can you tell if the varnish is under-dried? It's simple: the nails smell unpleasant, they stick to everything, the polish smudges.
After completing the manicure, press on each nail with the pad of your finger and move it slightly to the sides. Don't be afraid to ruin something: if the varnish is dried correctly, nothing bad will happen. If something is done wrong, it will not dry without a lamp. The top layer may be hard, but the colored one is half-baked. This type of coating will not last long.
If you encounter this, feel free to file a complaint with the master. Either he was too lazy to apply several thin layers instead of one thick one, or he didn’t spend enough time drying, or he used a low-quality lamp. In any case, you need to get rid of this as soon as possible, because the varnish can get into your food or stain your clothes.