A practicing manicurist, a beauty salon store, a training center - everyone needs samples of materials. There are special palettes of different types onto which varnishes are applied. Sometimes well-known brands sell such palettes with the numbers of varnishes, gels and other coatings already applied.
But over time, some bottles run out, and a new palette has to be prepared. How to apply gel polish to a sample? Do I need to treat the surface with a buff? Should I apply a base? But what about neon coatings, since they are almost transparent?
How to choose a good palette
There are different plastic molds for applying varnish samples. Some have a completely transparent structure, others are milky, and others are white.
To apply the sample, it is better to use milk palettes. Or natural, slightly yellowish in color. The applied sample on them will be closest in color to the painted nail.
Some palettes cannot withstand the action of solvents - acetone or alcohol. These are not worth purchasing. Good professional palettes are made from durable plastic and are easy to work with.
Our life consists of many little things. Little things surround us everywhere. You can save a little on many things, for example, I’ll tell you how to use cosmetic containers to make a display for demonstrating nail polish.
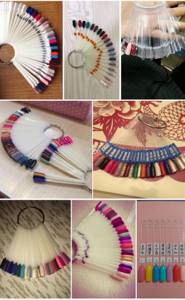
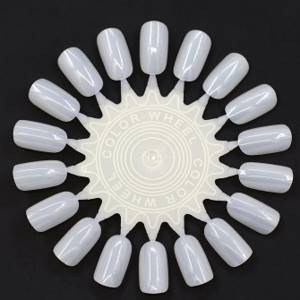
Tips for displaying nail polish are needed in cosmetics stores to show the color of the nail polish, its saturation, and its shades. Each brand has its own and may differ. Usually the buyer is shown a daisy - these are tips with different shades of varnish. Sometimes the nail itself is put on the top of the polish.
What types of samples are there?
- Tips.
You can simply glue the tips onto a frame and hang them on the wall. When working, they are not very convenient to hold and paint.
- Chamomile.
The standard palette is chamomile. Its name is not accidental; it really looks like a chamomile. Round base with white tips. Usually it is used to show the colors of the varnish; it is inconvenient to draw a design on it.
The palette can have a rectangular shape.
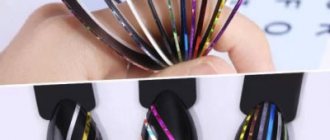
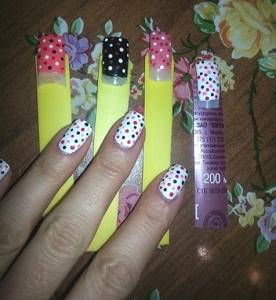
- Stripe with nail.
The marigold strip is used when showing designs: flowers, monograms, dot painting, Chinese techniques and other elements. You can lean each nail against your own and decide whether this color is suitable? Is it comfortable with him? Should I take it?
- Silicone finger.
A training finger for practicing the extension technique, but you can also glue tips and draw a design.
Clients want to take a closer look at the color. The color display shows new shades, techniques for using foil, stickers, beads, rhinestones or glitter. Such palettes increase nail polish sales.
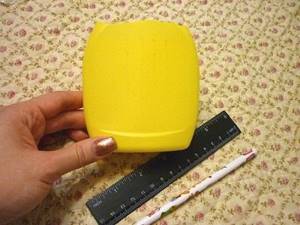
Many mothers on maternity leave make extra money by making beautiful hands and nails: doing nail extensions, manicures, pedicures. Regular polish has been replaced by gel polish (shilak). It is durable and wear time is about 2 weeks. Gel polish has a bottle of one color, the shades differ in numbers. In order not to open the varnish again every time to choose a shade, we will make tips to demonstrate the varnish, and maybe the design.
To implement the idea we will need:
— a bottle of shampoo, cream soap or hand cream;
- scissors, ruler and pencil;
— tips (artificial nails);
- glue gun;
- In our example, the cream is the Ushasty Nyan soap, Nevskaya Cosmetics. Remove the label and cut into segments as shown in the photo.
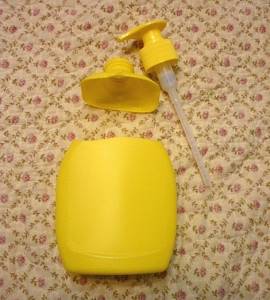
2. We will work with the main part of the bottle.
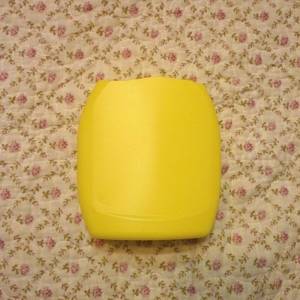
3. You can do more, or you can do less. Our fingers are all different, and besides, it is more convenient to learn to draw some elements on wide nails, for example flowers, and others on narrow ones. We measure the distance on the body, about 1.5 cm.
4. Using scissors, cut the strips. It's okay if they aren't all perfectly straight.
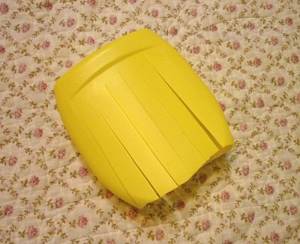
5. Cut it off. We round the edges a little.
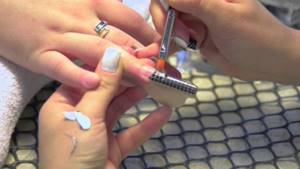
6. Select tips for stripes. The nail should be a little smaller; for a sample, you can look at the finger of your hand. Apply glue (glue gun) to the inside of the tip and glue it to the strip. We wait a little time for the nail to stick to the strip.
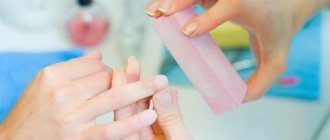
Before designing your nails, you can trim your nails with nail scissors. To reduce the consumption of varnish and gel polish.
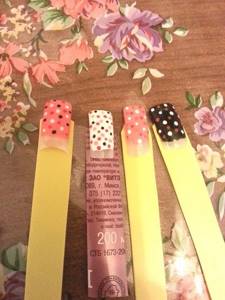
We paint our nails with different varnishes and implement the design. If it doesn’t work out, you can easily tear off the nail and glue a new tip.
In the cosmetics department, palettes or nails are inexpensive, but since they are inexpensive, you don’t have to buy them at all, but make them yourself.
How to store?
Let's consider options for storing a color palette. The easiest option is to put all the marigolds in a small glass. A small clear baby food jar will work too!
You can put the tips in a cosmetic bag with varnishes; if you have a lot of them, then in a large box.
Using a hole punch, you can make a hole at the end of the strips, then thread them through a satin ribbon and tie them into a knot. The entire palette will be collected in one place.
Do not rush to throw away an empty bottle of foam, gel, cream or shampoo. In future master classes I’ll tell you what else you can do with them.
Author:
Creative Anna
Applying gel polish to the substrate
To properly apply gel polish to the palette, you should determine the degree of its transparency. Opaque coatings are applied in two layers, translucent ones in three. Cover the top with top. If the gel polish is translucent - a haze for a jacket or berry, then make a base: the first layer is painted with a dense nude shade, similar to the color of a natural nail.
You can make several options for this coating for beige, peach, and pink substrates. Each color can be warm or cool, which increases the number of options. With such a palette it will be easy to determine the natural color of the client’s nails and show her how gel polishes will look on her hands.
If the gel polish is neon, a white base is made for it - the same as for nails. Then it will be bright. For gel polishes of the “cat’s eye” series and for mirror rubbing, a black base is made.
Possible forms of adaptation
The device can have different shapes and fold. The best option is “chamomile”. You can apply the tips to your nail to see what looks best. Shades are easy to view and move. The fan palette is also quite compact and convenient; it is good for displaying various patterns and decorative options. A rectangular palette is not very convenient for choosing colors, since they are located next to each other, they cannot be applied to the nail, and the shades can merge. If you use gels or shellac, how to apply to the palette - read below.
How to apply a shade to a palette?
How to make a palette of gel polishes ? In general, the technology is very similar to conventional nail coating, there are only some features. Let's take a closer look at them:
- Before covering the palette with gel polish , the tips must be degreased - this will increase the adhesion of the coating to the surface, the gel polish will stay on them for a long time, and will ensure frequent use of the palette;
- do not worry about the condition of the plastic after drying - the UV lamp will not damage the material, but will only strengthen the coating. However, as with applying coating to nails;
- Should I apply a base? There are two options: if you want to change the coating on the palette in the future, it is better to use a full complex of all stages of coating; if not, you can save money and apply only a color layer;
- how to determine how many layers of coating to apply? Focus on the situation: if one layer looks rich and dense, that’s enough, but if the plastic shows through it, there are stripes, it’s better to coat the tip again;
- Applying a top coat improves the visual quality of the palette, gives the coating shine and conveys as accurately as possible how the nails will look after the procedure.
Preparing a palette will not take much time and effort - on the contrary, it is a fascinating process that will allow you to become more familiar with different types of coatings and understand how best to apply them to your nails. You can create a smooth transition of colors from light to rich or group varnishes by shade - it depends on your taste and imagination.
How to apply gel polish to a palette: technology
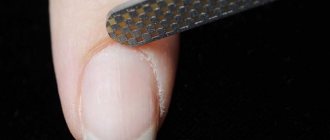
In order for the coating to adhere well to the surface, there must be adhesion - adhesion to the material. For this purpose, natural nails are specially prepared, sterilized and buffed. If the palette is new, you don’t need to wipe it with alcohol - it’s clean. You just need to avoid leaving greasy fingerprints on it.
Glossy surfaces that shine are treated with a 400 or 240 grit buff. After this, colored gel polish can be applied. It doesn't need a base, it will hold up well anyway. Apply two layers, with polymerization in a lamp. After this, the sample is coated with a glossy topcoat, polymerized and the sticky layer is removed.
Coating
To complete your manicure, you need to know how to coat the tips with gel polish to make your nails look natural and well-groomed.
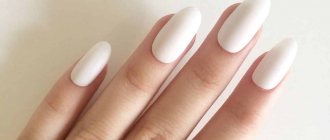
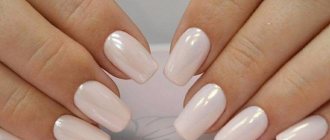
The gel polish is applied in two stages. First, a thin first layer is applied to the prepared surface with a brush, which is distributed evenly over the entire area. Then it must be dried well under an ultraviolet lamp. The second layer is applied in the same way. After the gel polish has completely dried, the surface of the nail is carefully sanded. Remember that it should be perfectly smooth, as in the photo.
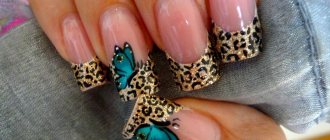
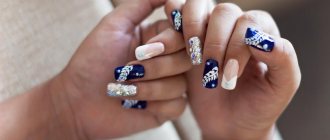
Now you can apply a pattern to a new nail, glue rhinestones, or make any design.
Polymerization in a lamp
Before applying gel polish to the palette, you should take care of its placement in the lamp. A drop of gel polish may end up on the base of the manicure lamp and stick to it. To avoid this, you can use a small plastic cutting board for your palette.
If during the polymerization process a drop from the palette sticks to it, at least you won’t have to remove and clean the tray. The stuck drop can be cut off from the plastic with a scraper, and then the end can be cleaned with an old file.
What are tips?
Tips are an artificial nail template that is glued on top of the natural one using special glue. The main purpose of using tips is to lengthen the nail plate.
Plastic templates for nails are distinguished:
- Shape (elongated, curved or straight).
- By color (white, transparent or matching the color of a natural nail, available with colored designs).
- By purpose (for French or adding length).
When searching for suitable material, you should be extremely careful, as you can often find fakes of low quality. Such tips bend poorly, weigh down the nail plate and do not allow air to pass through to the nail. All this leads to premature correction.
How to quickly fill a chamomile palette
The most common shape for nail polish samples is chamomile. Beginners sometimes have difficulty applying gel to it. But there is an easy way to apply gel polish to a chamomile palette.
Due to the fact that this palette is round, you will have to apply the gel polish in parts. You can paint one “petal” at a time, then it will turn out neat, but it will take a long time. Therefore, we apply gel polish to four petals and send them to the lamp. If you paint more, the gel will flow down, and the coating will become transparent in the center and with streaks on the sides of the petals.
So, four petals each, paint the entire circle in one layer. Then the second layer is repeated, after which it is covered with top. Here's how to properly apply gel polish to your palette.
Why do you need a base?
It is the base that holds the gel polish on the nails. It acts as a layer between the natural nail and the polymer coating.
The base is in direct contact with the nail. Not gel polish, but a base. Therefore, it is very important to choose a base that will hold the gel polish firmly on the nails, but will not harm the nails.
The base coating is designed to protect the nail plate from coloring pigments in gel polishes, smooth out all defects on the surface of the nails, and ensure reliable adhesive bonding of the polymer material to the nail.
Another important function of the base is to strengthen the nail plate. The natural nail may be weak, thin, or bend and break. All this will not allow the coating to last on the nails for the required 2-3 weeks. A properly selected base will strengthen and protect even the thinnest and weakest nails.
Detachments, chips, cracks - all this can happen due to a poorly selected base.