There are women who are allergic to gel polish or even regular polish. Not everyone can grow their nails; beauty salons offer extensions, but not everyone is healthy, and constant corrections of extended nails cost a pretty penny. If you want to have long and well-groomed nails, but don’t have time to go to salons, there is a great idea - to make false nails at home.
Remember that you only need to glue tips on absolutely healthy nails, as there is a high risk of rapid development of infection under the artificial material.
Benefits of false nails
Advantages of this type of nail extension:
- You can choose the desired shade.
- Strength and durability in different situations in everyday life.
- False nails hide all the unevenness and imperfections of your own nails.
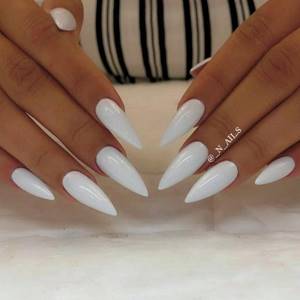
- Using manicure accessories, you can give any shape to the tips (from stiletto to oval).
- On false nails, the polish will last longer than on your own and looks brighter and richer than on natural nails.
- The varnish is well applied to a smooth surface and lies evenly.
- False nails are made of safe material and do not cause harm to health, unlike extensions, and do not deform your own nail plate.

klekovkina_nail_stylist
extreme_nails_art
extreme_nails_art
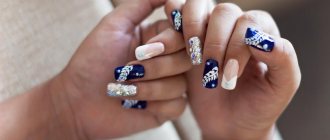
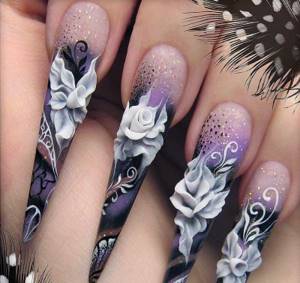
Picturesque beauty
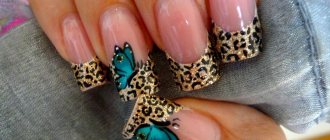
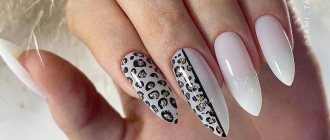
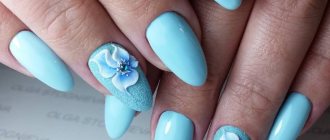
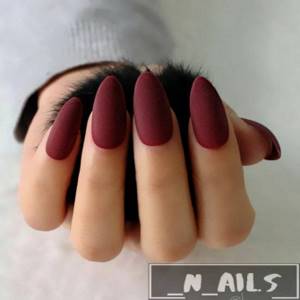
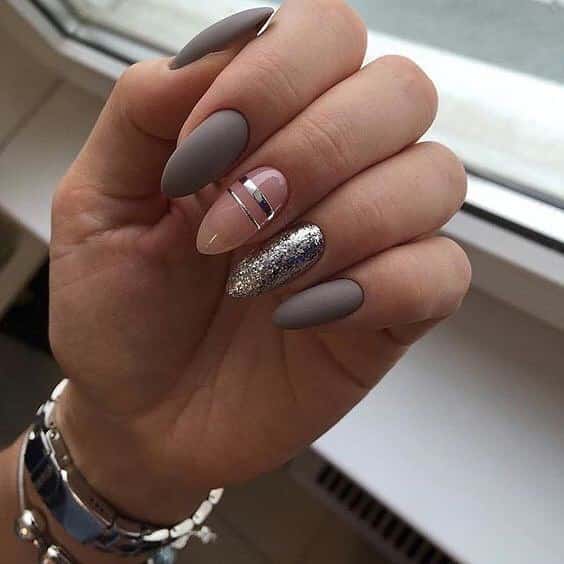
Today, rarely does anyone get a monochromatic manicure. Most often colors and shades are combined.
An image is applied to one or two fingers of the hand. It could be anything. Some people prefer stencils, others are crazy about rhinestones, and still others draw something.
What will you need?
First of all, you need to prepare the necessary tools:
- desired set of false nails;
- glue;
- orange stick;
- alcohol wipe or nail degreaser;
- dry wipes and cotton swabs;
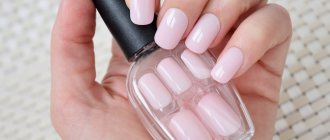
- regular base varnish of any color;
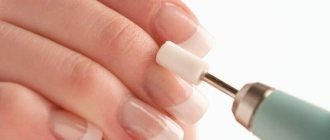
- buff;
- medium hard nail file;
- bath with hot water.

top_master_krd
_n_ail.s
_n_ail.s
Choosing false nails
How to choose tips so that they look natural and beautiful? When choosing plastic nails, you need to know the size of your own nails. You will be asked for these measurements when you make a purchase online. Only if the sizes completely match will your nails look natural.
When choosing tips, you should give preference to more well-known manufacturers; such nails will cost more, but you will be sure of the quality. When paying attention to little-known manufacturers, read the latest reviews.
Kinds:
- Transparent nails . Here you can show your imagination. Create your own unique design with rhinestones, patterns and other accessories.

- "Natural" nails . Tips imitate natural nails with or without a hole. More often they are not painted over, but decorative elements can be added - sparkles or rhinestones. This type of nails is suitable for camouflaging family members with uneven or defective nails.
false.nails.by.vicky
- Nails with design . By purchasing these nails, you will not only have beautiful and long nails, but also a chic design. And you also save your time, since you don’t have to sit for hours at the nail service specialist, waiting for the desired result.
In what form is the material sold?
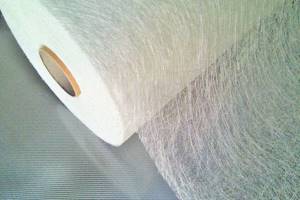
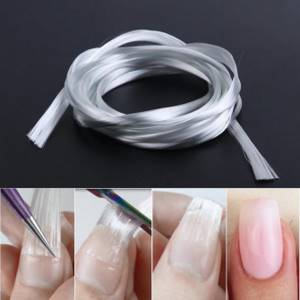
Fiberglass can be found in three versions:
- Rolled (fiberglass) - densely spaced fibers rolled into a roll. Often used as patches for repairing or extending nails.
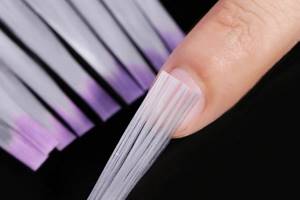
- Tape - the fibers are not connected to each other, but are simply distributed over the tapes, their ends are not sealed.
- Sealed - the fibers are folded into small tails and sealed at the ends for easy placement on the nail.
Multiforms for extensions 100 cm Roche Nail
Multiforms for extensions 200 cm Roche Nail
How to choose the right format for yourself? It all depends on what result you want to get and what methods are used. For standard techniques, it is especially convenient to use sealed fibers, since they do not get tangled with each other.
If we are talking about repairs or corrections, fiberglass and tape fiberglass will come to the rescue. When you need to strengthen a nail, repair a crack or a broken part, fiberglass in a roll is perfect.
Fiberglass in the form of ribbons is recommended for creating an arch, lengthening the free edge or strengthening the critical area between the tip and the natural nail. It can also be used as a local patch: to extend corners, restore broken edges, camouflage vertical or horizontal cracks, and correct chips.
We have already found out that fiberglass comes in several types and is used for various jobs. But what advantages distinguish it from other materials?
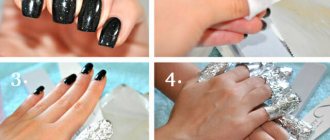
Preparation
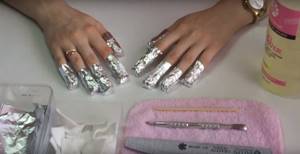
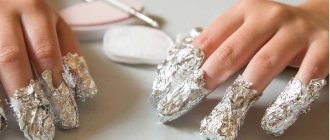
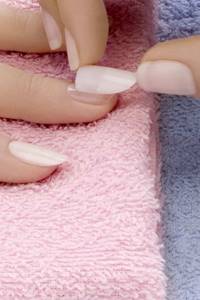
Before gluing tips, you need to prepare your own nails:
- To ensure that false nails do not come off and stay firmly in place, remove the remaining old polish, then use the soft side of the buff to wipe off the glossy layer from the nails.

- Use an orange stick to push back the cuticles from your natural nail.
- Wipe your nails with an alcohol pad to degrease them.
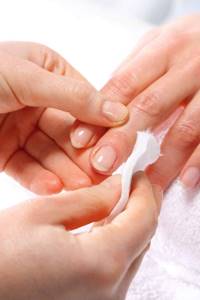
- To protect the nail plate, it is correct to cover your nails with regular polish.

Attaching nails
There are several ways to attach false nails to natural ones:
- glue
- tips with a ready-made adhesive layer
- adhesive stickers
- transparent base for varnish (in emergency cases).
Apply glue to the nail. Apply a bead of glue to the center of your nail and along the edges of the false nail.
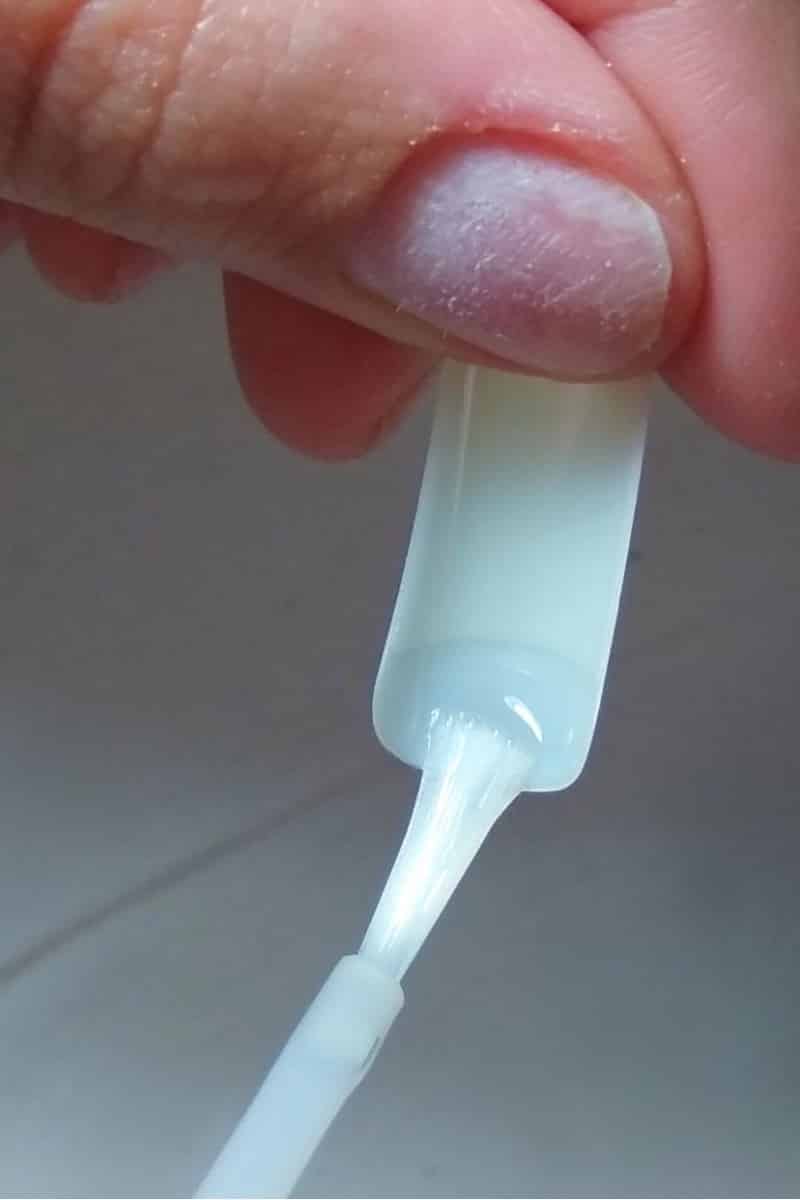
Choose high-quality glue, because the wear time and health of your natural nails will depend on it. Superglue is not suitable for such purposes; it is incredibly toxic and will harm your nails. You risk injuring the nail plate when removing false nails from such glue. If there was no glue in the kit, then it is better not to experiment with improvised means; as a rule, this will not end well. As a last resort, use a transparent base coat.
Place the false nail against the natural one, apply a little pressure and hold it there for 15 - 20 seconds. Do this 9 more times and enjoy the result.
Now there are false nails that have an adhesive layer. This greatly simplifies the gluing process, because in this case it is enough to select the tips according to size.
Adhesive stickers are becoming increasingly popular - this is a very convenient solution for those who need to stick their nails on for one evening or who like to change their look frequently. Apply the adhesive sticker as close to the cuticle as possible; they can be easily removed without steaming.
Adhesive stickers for false nails
Pros and cons of using
First let's talk about the benefits:
- Press-on nails are cheap and easy to find at nail supply and supply stores.
- There is a large selection of coating colors and designs, so you can buy several different ones at once in reserve.
- They are easy to use, so there is no need to go to the salon, this also has its own savings.
- Gluing on false nails takes only a few minutes, and the result is sometimes indistinguishable from a professional manicure.
- Suitable for children.
- If used correctly, the nails will not cause any harm to the nail plate.
And now about the disadvantages:
- Improper gluing will cause damage to the natural nail plate. Therefore, carefully study the instructions. We will talk about this separately.
- It is not always easy to choose false nails to fit the size of the nail plate. Still, it is individual for everyone, so most likely you will have to file them a little in width. Manufacturers usually include tips for such purposes not for 10 nails, but with a reserve.
- It is important not only to attach your nails correctly, but also to use them in everyday life in compliance with certain rules. We will also look at this in more detail below.
False nails are not a complete replacement for a manicure with a decorative coating. Therefore, you should not compare them; after all, professional materials are professional because they are used in a completely different way.
How to remove false nails
Instructions for removing false nails from family members:
- Using tweezers or clippers, remove the main length of the false nail.
- Place your hands in a bath of moderately hot water for 10 to 15 minutes. You can add a little olive oil for better peeling of the artificial nail.
- After this, carefully peel off the false nail. Start peeling off the cuticles from the base.
- Remove the remaining glue using a buff.
Dry your hands and use cuticle oil, applying it to the entire natural nail plate.
If after removal, you notice dark or any other strange spots on your nails, seek medical help immediately.
Now, you can glue new tips or give your nails a rest. After several attempts, if you are patient, you can try to extend your nails using tips, thereby experimenting with the design.
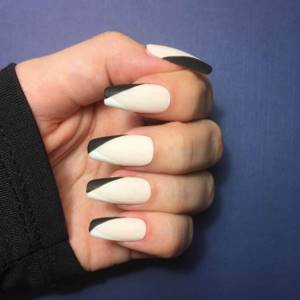
French manicure using tape: an elegant classic style!
The always fashionable French manicure - French - can also be done using tape. It's not easy to do accurately. But if you practice a little, you will definitely succeed!
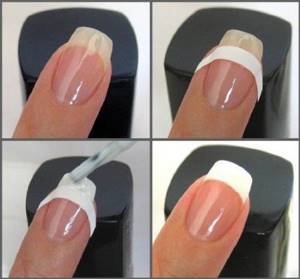
Special white stripes for French jackets are not always available at home. And tape will help out at any time! It will be more difficult to make the tips of your nails in the shape of a smile, but a straight line looks very good, especially on short nails.
Tips for wearing false nails
- Use rubber gloves before working with household chemicals.
- For long-term wear, avoid prolonged contact with water if possible. After washing your hands, dry your hands as quickly as possible.
- Do not try to bite false nails, as this may cause the original plate to crack.
- To test a nail for allergic reactions, stick on one nail and wait for the body's reaction.
- False nails may not stick if your hands are wet and there is not enough glue.
- Handle the tips carefully, do not use them as a screwdriver, and do not hit your nails on hard surfaces.
- Avoid contact with substances that contain acetone, it will corrode the plastic nail.
- If, after removing false nails, your family members do not look attractive, pay attention to how to care for nails with minor problems.
Applying false nails at home is not that difficult. Use these step-by-step instructions and the instructions included with the kit to ensure your false nails are always in great condition and looking great.
beauty._angel
beauty._angel
beauty._angel
Step-by-step instructions for working with fiberglass
To make it easier for us, we will divide the procedure for nail extension with fiberglass into three stages: preparatory, main and final.
Preparatory stage
At this stage, we prepare the nail plate for the procedure.
- We remove the old coating.
- We perform hardware or classic manicures to give your nails a beautiful shape.
- We treat the nails with a buff or a file to lift the scales to improve the adhesion of the materials.
- Degrease and dehydrate the nail.
- Determine the length of the free edge. When extending onto fiberglass, it is recommended to leave a short length of the free edge without cutting it down to zero. This will make working with the gel easier. However, this option is not suitable for fingers with a pronounced pad.
- We apply the primer, wait for it to air dry, and cover the nails with a thick gel base or a thin layer of thick gel.
- Using technical scissors or wire cutters, cut pieces of fiberglass to the required length. It should start from a point just above the apex of the nail and end at least half a centimeter from the free edge. This way we will protect the nail from breakage and soft tissue injuries. And when adjusting the length, the cut pieces will be visible and will be easy to collect on a napkin.
Important!
The material must have a sticky layer on which the fiberglass will be leveled. Apply with rubbing movements, leaving 1-2 mm from the cuticle.
Main stage
- Using tweezers, place a fiberglass blank on an undried layer of thick gel or base just above the apex. Using an orange stick, we level the fiber so that it fits as tightly as possible to the nail, without voids between the individual fibers. The area of the side bolsters and the free edge require special attention here.
- Now let’s make sure that the surface is perfectly flat and that we haven’t forgotten to leave a margin for nail growth (a small indentation from the cuticle) to avoid detachments and breakage of the plate during the regrowth process. Dry the nail in a lamp.
- Carefully coat the entire length of the free edge with a thin layer of modeling or camouflage gel, paying special attention to the side rollers and the place of the step. We try not to put pressure on the hanging fibers. Before polymerization, we check whether all fiberglass fibers are united into a homogeneous dense layer. If there are delaminations, iron them until the gel and fibers become one.
- Use tweezers to cut off excess length. If we are making an oval shape, we remove the corners; if we are making a different shape, we immediately dry the material for 10 seconds in a lamp.
- We form the volume and arches using a construction gel. We try not to thicken the free edge of the nail when laying out the gel. We mask the relief formed by the threads, coating the inside of the nail, and smooth out the transition where the fiber is applied to the nail. Remember about the side areas of the nail and the end. Use your fingers or clothespins to press the free edge of the nail, forming a beautiful arch. We send the nails to dry in the lamp.
Important!
Cut the fiberglass over the napkin, not over your palm! If particles of material do get into your palm, do not squeeze, blow or rub it. Go to the sink, without turning your palm over, turn on the water with your other hand and rinse the area where the cut fibers have fallen. Try not to get your nails in contact with water. After wiping your palm, check under the lamp to see if there are any remaining glass residues.
Final stage
- To get rid of excess thickness, we process the surface and edge of the plate, moving in one direction. We use a glass file or a cylinder cutter. Cardboard or metal files are not recommended, as their grainy texture may cause microdamage on the nail.
- We have already obtained the desired length and shape, now we remove the sawdust with a lint-free cloth moistened with a degreaser. Next, if we do not plan to cover our nails with gel polish or classic polish, we apply a top coat for gel materials on the outer and inner surfaces of the nail. Don't forget to seal the end. Using a thin brush, carefully distribute the top coat into hard-to-reach places. We send the nails to the lamp.
Advice:
If you want to create a French design on fiberglass, cover the fiberglass fibers in the smile area with a white shade of gel, and the nail bed with your chosen shade of pink, beige or soft peach.
Now you know how to extend nails using fiberglass. But there is one more important stage. After 3-4 weeks the material will need to be removed. How to do it right?