What is a DIP system in manicure?
During the polymerization process of gel polish, the nail plate becomes very hot. Due to the use of low-quality Chinese materials, the number of cases of onycholysis, burns of the nail plate and the skin under it, has increased. More and more craftsmen are faced with the problem of allergies, when, after applying gel polish, the surrounding skin becomes covered with ulcers and blisters, from which a clear liquid is released. Many of the masters’ regular clients who once experienced allergies, onycholysis, or a burn to the nail plate are forever deprived of the opportunity to wear a beautiful manicure. A DIP system was recently developed especially for these women.
What is a DIP system in manicure:
- This is a special technology that provides unique materials for leveling and coating nails. Just like gel polish coating, this system is worn for 3-4 weeks.
- However, the coating process does not use ultraviolet lamps, the coating is not heated, but dries in air. It is worth noting that this system consists of several drugs, which should not be replaced with similar ones from other manufacturers. This is due to the difference in composition.
- If, when coating with gel polish, you can use the base of one brand, and the flower beds of another, then in the DIP system you need to buy the entire kit with which the coating is carried out.
Acrylic nail powder - what is it?
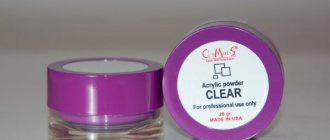
Acrylic powder is a synthetic material that has excellent thermoplastic properties. In cosmetology, the material is found in the form of a tiny powder. Acrylic acid, from which the powder is made, can strengthen any surface to which it is applied. Many experts prefer this material due to its ability to allow air to pass through, which makes natural nails look healthier.
It is worth noting that natural nails do not become stronger from powder themselves; they are only covered with a stable acrylic film. In addition to colorless powder, there are other options for creating an original design.
The only drawback of the material is the difficulty of carrying out the procedure for beginners. To make your manicure look neat and impressive, you need to fill your hand and carefully study the information on working with powder. Strengthening nails with gel polish is a simple process, but extensions will take more time and effort.
✿ Original manicure ideas ✿ Read – nail polish – step-by-step instructions, photo ideas + video of use!
What does the DIP system for nails without a lamp consist of?
In order to cover or strengthen nails using the DIP system, the following materials are used.
What does the DIP system for nails without a lamp consist of:
- DIP base coat
- Transparent mineral or acrylic powder
- Colored mineral powder
- Activator
- Top coating
In addition, additional drugs are used, just like in the gel system. These are dehydrators that dry out the nail plate. The principle of operation is quite simple, but it is not performed in the same way as gel polish coating, but using special equipment.
System by Nicole Diary
You shouldn't do this manicure yourself.
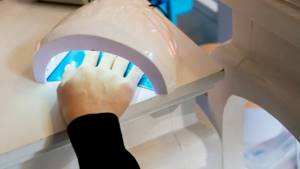
At this point, many may think that the surest way to avoid catching any infection in a beauty salon is to buy dip powder for yourself while performing the procedure yourself at home. In this case, you really won’t get infected, but still doing such a manicure yourself is not a good idea.
Fashion industry professionals never recommend doing your own gel or powder manicure because both treatments have chemical products that can harm the skin or nail bed if not applied properly.
Even professional-grade formulations and products sold for home use contain harmful chemicals, so it's safer to go to a salon where a professional will treat you.
Powder manicure technique
Preparation is no different from standard coating. It is necessary to file off the top glossy layer, making the nails matte. It is best to use a file with a grain size of 180-240 grit for these purposes. Buffs with the same grain size are also suitable. The cuticle is removed using a combined technique. Using a cutter with a blue or red notch, the pterygium is removed, and then the cuticle is cut off. If necessary, grinding is performed using a polisher.
Powder manicure technique:
- After the nail plate is prepared, remove dust from its surface using a brush and wipe with a cloth moistened with alcohol. After this, a dehydrator is used, which is also sold as part of the deepsystem. It dries the surface of the nail plate and improves adhesion to the material.
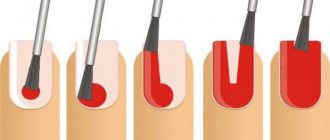
- Next, the DIP base coat is applied. It is applied, unlike the gel polish system, a little differently. This base contains acrylic resins, which are quite hard and voluminous. Therefore, at the first stage, the product is not applied to the entire surface of the nail, but not reaching the cuticle and side ridges by 2 mm. Next, dip the nail in transparent powder, shake off the excess and let dry for 2 minutes. All nails are coated one at a time.
- It is necessary to work using the conveyor method. It is impossible, as in the gel polish system, to apply a base to all nails, dry it and then apply color. Here you need to do all the manipulations one nail at a time. After the top layer of mineral powder has dried, the excess is removed using a soft brush. Next, a base layer is applied again and the nail is dipped in mineral powder. However, this time the base is applied close to the nail plate.
- That is why, before applying the second layer of strengthening, you need to push back the cuticle with a pusher. This should be done very carefully, because unlike the gel system, which is completely dry, the DIP system, before applying the activator, is quite soft, similar in structure to plasticine. After the two transparent layers have dried a little, you need to use colored powder. It is applied in 2 layers according to the same scheme. That is, the base is immediately applied, not reaching the cuticle 1-2 mm, immersed in colored powder, air-dried for 2 minutes.
- On the second layer of colored powder, the base is placed under the cuticle. After the remaining powder has been removed and the color coat has been applied, it is necessary to ensure that this entire layer of mineral powder and base becomes hard. For these purposes, use a special activator, which is included in the kit. It is applied to the entire surface of the nail and allowed to dry for 2-3 minutes. It is during this time that all layers become hard and do not resemble plasticine. At this stage, it is necessary to carry out sawing, removing all excess. The sawdust is performed using a file with a grain size of 180 grit. It is worth understanding that the system is created on the basis of mineral powder, so it is much more difficult to cut than polygel or gel. You will have to put in more effort and use a file with a larger grain size.
- As soon as you are satisfied with the nail architecture, all excess material will be removed from the ends and side ridges, you need to brush off the remaining material using a brush, and go through the activator again. This is a final treatment that makes the material as hard as possible. It is worth considering that in the process of sawing the end, a thick layer of material may be observed. To make the DIP system wearable, it is best to cut out 1 mm of the natural nail from the back side, rather than removing a significant amount of mineral powder from the end to achieve a slight thickness. If you remove a lot of material, the reinforcing layer will be too thin and it will simply burst. After the second layer of activator has dried, the nails are covered with a top coat. It is also applied in 2 layers and dries in 4 minutes. After applying the first layer, the top coat is absorbed into the loose layer of mineral powder and small scratches may appear on the surface resulting from filing the surface. On the second layer, all scratches and imperfections in the coating disappear. The whole process takes one and a half hours.
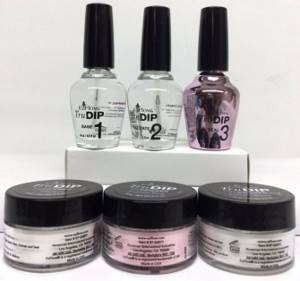
Powder system from EzFlow
Properties of gel powder
Gel powder is suitable not only for creating a colored coating. With the help of this system you can further strengthen or increase your legs. Let's take a closer look at all the beneficial properties of the gel-powder system.
Advantages and disadvantages
Gel powder for nails is an organic system that has its pros and cons. Let's take a closer look at them.
Pros:
- speed of coating creation;
- no pungent odor;
- ease of use;
- a huge number of shades;
- the ability to create French without brushes and stencils.
Minuses:
- a large number of materials that are easy to get confused in;
- expensive cost of materials.
Strengthening nails
If your nails have any unevenness, bumps or depressions, then gel powder is a great option to even out and strengthen your nails. This procedure is quite simple. It is easy to do at home.
What you will need:
- manicure file;
- buff with an abrasiveness of 240 grit;
- brush;
- primer;
- base;
- gel powder for nails;
- top;
- activator (fixer).
How to strengthen nails with gel powder:
- Treat your nails with a manicure file.
- Remove excess cuticle.
- Treat your nails with a 240 grit buff to remove excess gloss.
- Use a manicure brush to remove excess dust particles.
- Apply primer to your nails as a primer.
- Apply a thin layer of base gel to your nails.
- Dip your entire finger into the pink powder.
- Use a brush to remove any residue.
- Apply the gel to your nails again and dip into pink powder.
- Cover the design with a finishing top.
- Allow the materials to dry and apply the activator.
- File your nails with a buff and brush off any remaining residue.
- Ready!
Nail extension with gel powder
Gel powder for nails will help you achieve strong and long nails. The technology is reminiscent of gel extensions on tips, but still has its own characteristics. Let's take a closer look at the basics of gel powder extensions.
What you will need:
- manicure file with 240 grit abrasiveness;
- buff;
- brush;
- primer;
- base for extension;
- tips;
- gel glue;
- powder;
- top;
- activator.
How to extend nails with gel powder:
- File and shape your nails with a 240 grit manicure file.
- Carefully remove the gloss with a soft buff.
- Remove excess dust with a brush and apply degreaser-primer.
- Apply a thin layer of base gel.
- Place the tips on ½ of the nail and glue them with gel glue.
- Press the tip firmly with your finger and wait 10-15 seconds.
- Cover your nails with an even layer of gel powder base.
- Completely dip your nail into the gel powder.
- Cover the nail with base coat again and dip the whole nail into the powder.
- Use a brush to remove excess material.
- Apply an even layer of finishing top.
- Let the material dry for 30-60 seconds.
- Cover your nails with a special glue activator to harden the materials.
- Correct the shape with a 240 grit buff and remove excess dust with a brush.
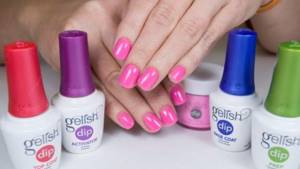
Powder nail system: benefits
To create a large number of color solutions, it is necessary to purchase powders of different colors, which significantly increases the cost of the procedure. That is why most craftsmen who deal with this system acquire only the most popular colors. This reduces the number of colors and designs for customers. This system is ideal for girls who love a monochromatic coating without patterns or designs.
Powder nail system, advantages:
- Using exclusively natural materials
- No heat or acids on the surface of the nail plate
- No contact with aggressive components that cause allergies
- Inability to burn the nail plate due to the coating drying in air, without the use of an ultraviolet lamp
- Good wearability, coating durability
Features of the material
Velvet sand gradient Velvet sand is a medium to coarse powder.
Compared to acrylic powder, sand consists of larger fractions. It looks like dense powder, semolina or very fine sugar.
Where can a novice craftsman get sand powder? The technology is very popular, and the material can be purchased at any professional store online and offline. If the material is not at hand, it can be replaced with acrylic powder or scrapbooking powder.
Which velvet sand is better? Experienced craftsmen recommend using medium-grain material and light shades for decoration. Transparent white is best. This is a universal solution, since velvet sand, when covered, takes on the shade of the colored base on which it is poured.
There are several types of velvet sand:
- White translucent. Takes on the shade of the coating it is applied to.
- Color. Can replace gel polish and is applied immediately to the base.
- With sparkles. Used for both fine decoration and full nail coverage.
The velvety texture does not need to be covered with a top or finishing layer. Sand dusting can be used to strengthen nail plates, just like acrylic powder. It reinforces and creates a durable layer.
The coating lasts 10-21 days, just like gel polish. The texture does not crumble and does not form bald spots during wear.
Hands with this design can be actively washed with soap and do any housework as usual. The coating does not react to alcohol solvents.
To remove a design with a velor texture, you will need 15 minutes, foil and a gel polish remover on which the material is attached.
How to remove DIP powder coating?
It is quite difficult to remove and takes much longer than a base or gel coat.
How to remove DIP powder coating:
- Some companies suggest removing the coating each time using acetone-containing substances. Thus, the effect on the skin of allergy sufferers will be a real challenge. After all, people who have allergies are likely to react to a liquid that contains acetone.
- But you can remove it without using acetone, using a cutter. But this process is much longer than when removing the gel coating. It is necessary to remove the materials almost completely, leaving only a thin, transparent base that remains after applying the base and transparent powder.
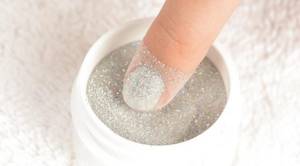
Mineral powder with glitter
Time to create a manicure
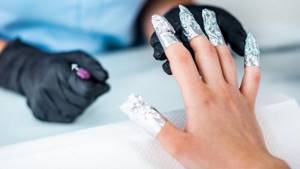
Dipping powder wins over other manicure methods when it comes to how long the procedure itself takes.
Dipping powder does not require UV or LED light and typically takes much less time from start to finish than any other method. The main thing is that you don’t have to wait for your nails to dry. But this is the most boring and tedious part of any gel or acrylic manicure.
Speed of application was the main thing that interested nail salon owner Denise Gottschalk from the very beginning.
“I was fascinated by the fact that the whole procedure took 30 minutes,” Gottschalk said of her first experience with the original immersion system. The simplicity and speed of application, combined with their funny name, attracts more and more customers every year.
Disadvantages of powder manicure with DIP powder
But there are a significant number of disadvantages. Many experts question the hygiene of the procedure, because in order to cover the nails, each client must insert his finger into a container with powder. The remaining powder is removed by tapping movements, and the powder falls back into the jar with the material.
Disadvantages of powder manicure with DIP powder:
- In addition, some nail service specialists very much doubt the naturalness of the system, since the base contains acrylic resin, which is also a fairly strong allergen.
- Another big drawback is the difficulty of removing the coating. To do this, you need to use cutters with black or green notches, because mineral powder in its structure resembles natural stone. The nails are really very hard and durable, despite the small thickness of the coating.
- The need to purchase the entire set, which significantly affects the budget.
How long does this manicure last?
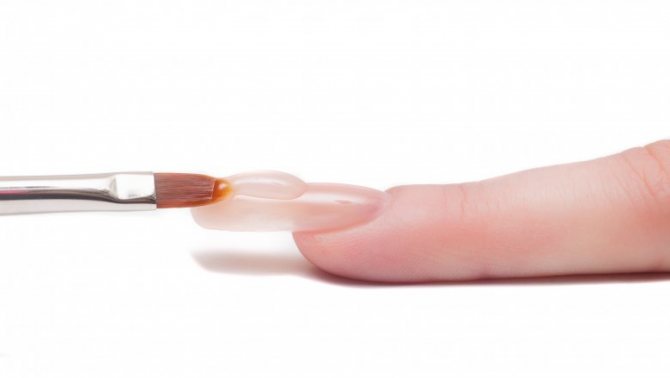
One of the distinctive features of this manicure is durability. Nail specialist Elaine Lin Lee, who works at Valley Salon in New York City, confirms that this is truly an incredibly long-lasting manicure. It lasts up to two months.
Such a period may seem incredible to many, but it is true. However, most experts do not recommend wearing it for so long so as not to damage natural nails. After all, they also need rest.
Now that you know a lot about dip powder for manicure, you can make your own decision and figure out whether you need such a procedure in a beauty salon or whether you would prefer to opt for the more familiar and familiar acrylic or varnish.
Found a violation? Report content
DIP system for nails: reviews
Craftsmen have an ambiguous attitude towards the DIP system. In some cases, this is the only possible option if the client has a severe allergy to gel polish and wants long nails. This is why many women resort to this procedure.
DIP system for nails, reviews:
Olga . I have only used this system twice. I haven’t applied gel polish for more than 2 years due to severe allergies, which I treated for 6 months. Then I took antihistamines and rubbed in ointments. The nails were burned out and there were wounds around the nail plate from which liquid was oozing. At my own peril and risk, I made an appointment with a specialist who offered me a new coating based on minerals. I was very disappointed by the small number of flowers. My master had about 5 of them, most of them were light and shiny. I don’t really like such color schemes, but I had to use a light milky shade with a silver sheen. I can say that I completed the master coating in just 1 hour and 20 minutes. Initially, I didn’t really believe in this system, since everything that happened during the manicure seemed quite strange and unusual to me. The first correction was done after 3 weeks. Everything held up well, except for two nails, on which detachments appeared in the area of the sides of the nail. But I almost always had them there when I covered my nails with the gel system. I am very pleased, because for me this is the only chance to have well-groomed hands and a beautiful manicure. I hope that manufacturers will soon release a wide range of colors and the ability to create interesting designs.
Maria. I work as a manicurist at home, so I decided to buy this system, because among my clients there are those who suffer from allergies. For them I use expensive products that are affordable. I can’t say that the DIP system was cheaper. The whole set was quite expensive. But overall I was satisfied. Two clients have already come for correction with good socks. There were minor detachments, but I was surprised that given the small thickness there were no chips on the free edge. I don’t really like that it’s impossible to clearly draw the edging at the cuticle, because the powder lays unevenly and can scatter a little to the sides. But overall it looks good, especially if you use light shades. Now I want to master French with the DIP system. Since no paints are used during the application of the products, it will not be possible to get deep whiskers. To create a jacket, two colored powders are used: camouflage and white. A white tip can be obtained by dipping the nail into white powder. Accordingly, the manicure turns out natural, with shallow mustaches. It is ideal for short nails. Most of my clients want a soft, well-groomed manicure.
Violet. I am not allergic to gel polish, but I wanted to try this system because there is a lot of information on the Internet about its environmental friendliness and naturalness. In the end, I regretted coming because of the strong chemical smell of the base, which was reminiscent of superglue. Perhaps this smell only comes from the manufacturer whose products my master uses. Overall the technology is interesting. I had coverage for about a month. After removing it, I still went back to gel polish, because I don’t have allergies. A wide range of colors and designs when coating with gel polish is a big advantage for me. I think this is a good option for allergy sufferers, although the strong smell surprised me.
Read on topic:
- Nail psoriasis or fungus: how to distinguish?
- Is nail onycholysis a fungus?
- Lamisil: cream for nail fungus
- Treatment of nail fungus with baking soda
- Teymurov's paste for nail fungus: instructions for use
So far, the system is popular among allergy sufferers. Some masters are happy to use the new product because of the speed of coating, which saves time and allows them to serve more clients, increasing their income.
You don't have to worry about skin cancer
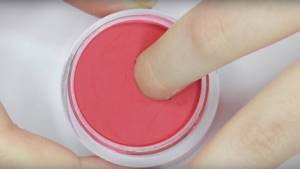
Another plus is that there is no need to expose your hands to ultraviolet light. This not only saves time at the nail salon, but also eliminates the risk of skin cancer.
Improves soil quality and fights fungi: using cinnamon in gardening
Mousse dessert with grapefruit flavor: how to prepare an unusual treat
When choosing a seat on an airplane, Russians try to take their “favorite” seat: survey
Of course, the likelihood of getting skin cancer from UV lamps used in nail salons is relatively low. However, one study found that the lamps cause enough damage to skin cells to cause skin cancer. Especially if you get involved in this procedure very often.
Removing the coating
Removing acrylic is no less important a procedure than applying it. This requires a special liquid. The procedure goes as follows:
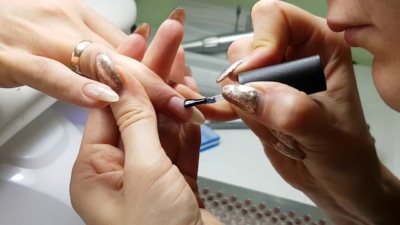
- First, trim the raised areas of your nails. This must be done as carefully as possible, otherwise part of your own nail may break off.
- Then the finishing gel is removed with a large file. This is a rather complicated process, so be prepared to work hard.
- Soak a cotton pad in the removing liquid and apply it to the nail, then wrap it in foil. This is done with all fingers. Wait 10 minutes.
Thanks to this procedure, acrylic becomes soft and pliable. It can be easily removed with a simple nail file.
What types of powder varnishes are there?
The nail industry has a wide range of products. There are these types of gel powder:
- Transparent. This is a fine matte chip of white or beige color, which after hardening resembles a natural nail. Used to strengthen, build up and eliminate minor defects. The manicure looks natural and the nails do not break.
- Finish. Used as the last layer, creates a glossy surface, extends the life of the manicure.
- Camouflage. The powder is opaque and matches the natural shade of the nail plate. Having a dense structure, it masks any defects.
- Colored. These are multi-colored powders that are used to paint the entire nail plate or create designs and decorative elements.
- Neon. This is a fine powder for creating club nail art, which contains phosphorizing components. Under the influence of ultraviolet light, the manicure shimmers beautifully and attracts everyone's attention.
- Powder with multi-colored or plain glitter. The powder is homogeneous, translucent, contains shiny particles of different colors and shapes. Used as decoration to create a festive manicure and a good mood.
To create a velvet effect on your nails , a separate category of decorative coatings called “acrylic-free manicure powder” is used. Externally, it is a small wool or viscose fiber of different lengths, which allows you to reproduce a velor, plush, voluminous manicure on the nail plates. True, such softness does not last long.
Nail powder has a wide palette of colors that can be mixed if desired. This way, new shades appear, a unique opportunity to create an exclusive nail design. There are also differences in powder structure, degree of grinding and manufacturer. In the latter case, the prices of nail powder are also different.
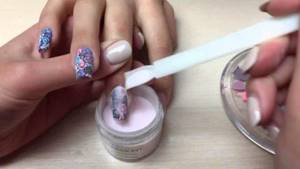
Nail Design Ideas
Now let's move on to the most interesting part - nail design. And now we will talk about the best and most popular ideas in this segment of nail art.
Plain manicure and glitter acrylic powder. Perhaps this is the simplest and most versatile design that can be used for all occasions. Here you can cover most of the nails with gel polish of your favorite color, and one or two fingers on each hand with shiny acrylic powder to match. This manicure will look very cute, despite the simplicity of its execution.
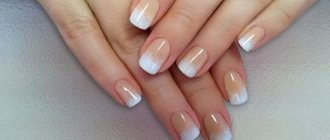
French acrylic. A French manicure decorated with acrylic powder also looks very stylish. In addition, this is a great opportunity to reveal a design that has already become familiar from a new side. However, the color schemes here, most often, remain quite classic. That is, for a velvet jacket you should choose a matte white or nude powder. So, after you give your nails the desired shape, apply two layers of gel polish and without drying the last one, dip the tips into a pre-prepared jar of powder. When the coating on your nails is dry, simply shake off the excess sand from your nails. And that’s it, your winter jacket is ready.
Important! If you want the surface of your nail not only to look velvety, but also to feel like that, then do not apply a finishing sealer over the powder.
Interesting: Mother of pearl manicure with design
Knitted design. Perhaps today, a manicure with acrylic powder laid on the nail in the form of a knitted pattern is the most current winter trend. And to do it yourself, just look at step-by-step photos or video instructions, of which there are a lot on the Internet. This nail art looks really cozy. After all, it seems that your nails are wrapped in a warm sweater and reliably protected from the winter cold. But when it comes to application, it’s not so simple. You need to create patterns with a thin brush, and dry them immediately after you place them on the nail. The main thing is not to let the substance spread. It is generally better to apply more voluminous and complex knitting gradually.
Creating a manicure with a braid step by step
Matte manicure
Matte nail art with acrylic is a very interesting solution that will definitely attract the attention of others to your manicure. And here's why: firstly, velvet patterns literally enrich the matte finish of your nails, and secondly, by creating such a design, you decorate your hands with two fashion trends at once
Nail sculpting or 3D design. I must say that this manicure is not suitable for everyday wear. Rather, fashionistas resort to it on special occasions, such as weddings or big holidays. Moreover, it is quite difficult to recreate this nail art yourself and you will have to look for a good nail technician for this case. However, it’s hard to deny that volumetric modeling looks simply amazing. And the final result will directly depend on your imagination and skill of the specialist.
Important! It is necessary to remove volumetric modeling with a special strong liquid. Moreover, this must be done extremely carefully to prevent it from coming into contact with the skin on your hands.
Interesting: Stamping on nails
Drawings and patterns. An excellent start for beginners working with acrylic powder would be to create velvet patterns and designs on their nails. This does not require any additional skills, and the result can be really very nice. Patterns and designs can be absolutely anything that comes to your mind. And we have already described the technology for their production in our article just above. Therefore, use your imagination and go ahead to stylish nails!
This concludes our review of manicure with acrylic powder. We hope you now know exactly what this powder is and how you can use it to create some really interesting designs.
Bohemian manicure style
Another incredibly fashionable trend today is boho. Ethnic motifs, floral prints and halftones - all this fascinates and attracts with its femininity. To complement the image of a bohemian lady, choose a manicure in this style group.
The idea of a powder-colored manicure in boho style is very simple. All you need is a set for creating shellac and dots with different sizes of balls. This tool is a small stick with one or two tips in the form of metal balls. With their help you can create unusual polka dot patterns.
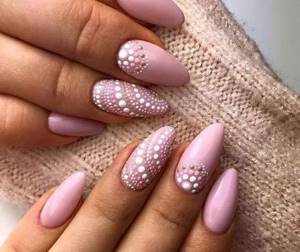
So, after preparing your nails and covering them with colored powder gel polish, you can start decorating. For this design you will need white, pink and coffee gel polish. Start with the central pea, this will make it easier to create a full-fledged pattern. Alternate the colors of polishes and the size of the dots - you will get an unusual boho manicure in just a few minutes.
Advantages and disadvantages of using it over other techniques
The powder contains calcium and vitamins that are beneficial for the growth of the nail plate.
The main advantages of gel powder:
- strength of nail plates, reliable protection from external influences;
- penetration into the nail, restoration of structure;
- filling microcracks in the nail plate;
- uniform application of decorative coating;
- camouflage of defects and chips;
- hypoallergenic composition;
- long-term wear – from 3 to 5 weeks;
- doing manicure at home;
- no need to purchase a special drying lamp.
However, powder manicure has its drawbacks:
- the need for practice to obtain a flawless manicure;
- the presence of a specific smell of acrylic powder;
- the need to purchase the entire series of the selected brand.
Before using this type of product, it is advisable to make sure that there is no allergic reaction to the selected material. Such cases are rare in practice (3-5% of all beauty salon clients), especially if you purchase products from reliable manufacturers.
Simple and beautiful monograms with shellac, gel, acrylic
Creating designs in the form of monograms can be the main decor for a manicure or additional on some nails, using the main elements. The work process is carried out using acrylic, shellac, gel, and goes well with sparkles and rhinestones. Monograms are drawn using a needle or brush.
Volumetric
Volumetric monograms are patterns combined with volume that give a convex effect to the design and are quite easy to reproduce. To work, you will need gel paint that does not stick - the designs are applied over the topcoat.
Each component is drawn with a thick curl and immediately dried under a lamp for 10 seconds. It will be enough for the material to dry out and not mix with subsequent curls in the composition.
With French
First, a French design is made on the nails, decorating the top with patterns of simple weaves. The difference between this nail art is the spirals painted on the sides of the nail plate, usually on one side, complemented with rhinestones.
With rhinestones
Strokes with the addition of shiny stones look especially stylish and graceful on long nails. Professional craftsmen advise emphasizing the brilliance of the design by combining decorative elements and a plain background. You can use rhinestones to highlight the middle of the monogram, and also place it along the edge of the hole itself.
With acrylic powder or sand
To create monograms, you must also use acrylic powder and varnish with a sticky property:
- Cover the drawn pattern with a sticky layer of varnish.
- Using a wide brush, gently powder. The decor will be evenly distributed, the particles will be fixed without crumbling later.
- Dry the resulting manicure under a UV lamp.
This design is suitable as a DIY nail design. It should not be combined with other techniques.
With glitter
You should treat the nail surface in advance, painting it with a varnish base. Having decided on the choice of the desired sparkles, they should be applied with a hairpin or a toothpick dipped in water along the contour of the indicated pattern. The final stage of the procedure is drying and applying a bleached fixative.
With openwork
The most complex and somewhat painstaking technology in manicure design. The finest mesh, similar to lace fabric, carefully drawn over the entire surface. To facilitate this method, there are special stencils. Working manually, with the simultaneous use of different tones, requires a clear image of the future picture.
You can diversify your nail design with drawings and decorative elements. A step-by-step brief description of the work processes for beginners and photos will help you acquire skills and learn how to combine various techniques for applying gel polish.
