Hands and nails can say everything about you. Fortunately, manicure services are now available at every step. But not everyone goes to salons to get their fingers in order. Many girls are happy to do this on their own, but not everyone manages to create perfect compositions on their nails. For those who do not have special artistic skills, stencils were invented. In our article you can get as much information as possible on how to make a nail stencil with your own hands.
Why do you need nail stencils?
One tone of varnish looks boring and dull. A manicure blank or stencil is used to create complex designs on nails. Using such a template, you can achieve the effect of identical patterns without worrying about a trembling hand with a brush, because it is simply not needed.
Features of use
Stencils do not create any difficulties in working.
By applying a stencil and using its outlines, the manicure becomes beautiful or even unique. The contours of the stencil must be stable and not move, otherwise the intended pattern will not work. Therefore, use materials that have an adhesive base. The created stencil must be placed with the sticky side on the nail and armed with varnish. Then everything depends on your imagination. Once the varnish has dried, the workpiece can be carefully removed. The nail pattern will correspond to the location and shape of the selected template.
Specifics of working moments with stencils:
- Peel off from the backing just before gluing to the nail surface;
- use a sponge to create a pattern (a brush will make the design messy);
- remove the template after the varnish has completely dried, which is applied in 2-3 layers.
Kinds
Today there are 3 types of manicure stencils:
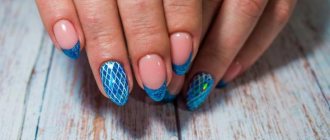
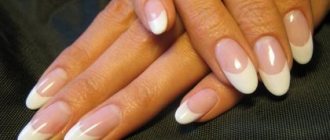
- Simple ones with an adhesive base (mainly used to create French manicures).

- Stencils with complex designs and patterns.
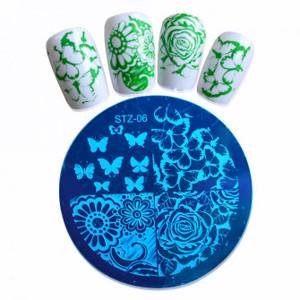
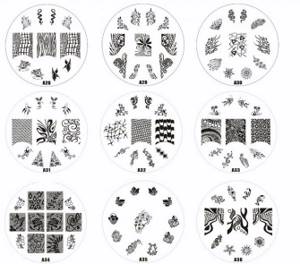
- Disc blanks (stampings) for imprinting a design on a nail using a stamp. These are reusable stencils, they are strong and durable.
Advice
! If you are not a professional, then it is better not to use disk blanks: they are several times more expensive than others (for example, regular sticky ones); their use requires certain skills.
Purchased nail templates are replete with a huge variety: they come in various geometric shapes, with images of animals and people, elements of nature and cartoon characters.
Sticky templates are the most convenient for home use - you just need to attach them to the nail. But there is one big drawback: they are not suitable if you prefer intricate patterns.
The difference between airbrush stencils
It's no secret that salon manicurists turn to blanks to save time. But in airbrushing you need to use them very skillfully so that the sharp edges and corners do not stand out. This art technique requires a smooth transition of tones, so a stencil is needed only to maintain the proportions of the drawing. What is important here is the smoothness of the lines and the effect of creating a masterpiece with your hand and brush.
Application in art painting
The use of artistic painting, and even on both hands, is beyond the capabilities of many who wish. Imagination is not enough here; when designing, you need to have good drawing skills with both hands. But to solve this problem, you can make friends with a relatively new technique - stamping. Using it, you can transfer the element you like within a matter of seconds, subsequently obtaining the desired result. In stamping, the workpiece is a metal disk. Its plate has stencils for manicure.
How to make a nail stencil?
If you think that creating a stencil with your own hands is a labor-intensive process that requires a lot of time, then we hasten to gladden you that you are wrong. Moreover, there may not be ready-made stencils in the store with exactly the patterns you want. This is another reason to quickly start making an assistant to create a great manicure at home.
Prepare the following auxiliary tools:
- scissors;
- masking tape (can be replaced with tape);
- knife (preferably stationery);
- glass (it will be convenient to use a small table with a glass surface).
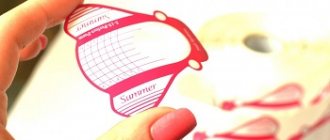
If you have not yet come up with a drawing, then do so immediately to begin the next steps:
- Use scissors to cut a small piece of tape.
- Glue it very evenly onto the glass.
- Take a knife and carefully draw a pattern (square, triangle, crescent, etc.).
Advice
! Not only adhesive tape is suitable for creating a stencil; pharmaceutical plaster is also an excellent alternative, but you will have to use it more carefully due to the softness of the material. Old stickers and pieces of paper will also be useful in your work, you just need to get used to accurately placing and holding them on the nail plate.
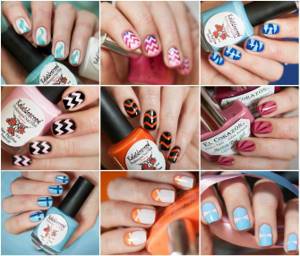
Design ideas
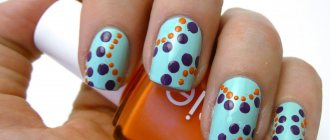
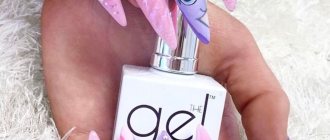
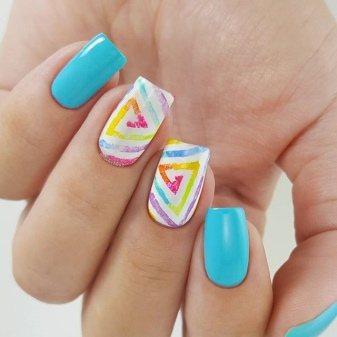
A wide color palette of gel polishes in combination with vinyl stencils work wonders; with their help, everyone can create unique and original nail designs. Let's look at a few different techniques.
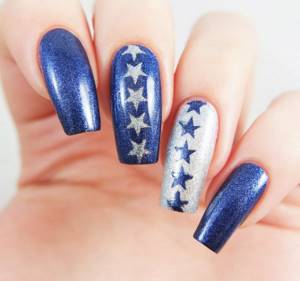
- “ negative technique - it uses only one color of coating, and part of the nail is simply left unpainted, which results in patterns that can be compared to cutouts in clothes.
- When using several colors in a manicure, ombre ” (gradient) technique using a stencil will look very impressive
- restrictions on the number of shades of gel polishes used in a manicure; the most important thing is that they all combine harmoniously with each other.
- When creating a two-color manicure with stencils, it is best to choose gel polishes with different textures. This could be, for example, a cream color coating paired with glitter and so on.
- An original solution would be to create various patterns using the technique of slider design (water-based stickers) or stamping (printing on nails).
Stencil templates for manicure make it possible to try combining different patterns and colors of gel polishes.
Try different master classes and experiment, because the same pattern can look completely different on different shades of coating.
Among other things, stencils are also very economical to use. Each piece of paper with templates usually contains an average of at least twenty stencil windows. You can even use many of them twice, creating raised and indented patterns.

The sequence of creating a manicure
Surprising with a gorgeous nail design is not too difficult a task. From the beginning to the end of the process you need to go through only 2 stages.
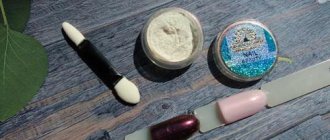
To get started, stock up on the following:
- antiseptic;
- varnish of the desired colors;
- fixative;
- workpiece
Stage 1. Nail preparation:
- dip your fingers in a warm bath and hold for about 5 minutes;
- trim and file nails to achieve the desired length and shape;
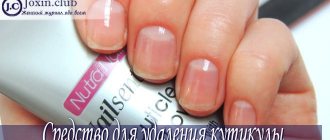
- remove the cuticle;
- We use an antiseptic to treat the skin around the nails.
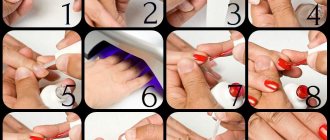
stage. Using a sticky stencil:
- apply the background varnish on which you will place the pattern and wait for it to dry;
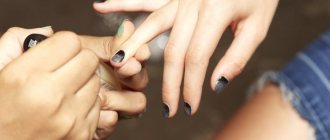
- attach the blank to the nail the way you intended to place the design;
Advice!
When applying the stencil, make sure that it fits tightly to the nail; if air gets in, the picture will be blurry and the polish will smudge.
- apply varnish to the entire nail on top of the stencil (the color should be different from the base);
- wait for the second layer to dry;
- remove the template (lift one edge up and pull);
- apply a fixative;
- After the design has dried, coat the nail with finishing varnish.

The procedure takes no more than 15 minutes, and the effect can be amazing.
If you use gel polish, then the procedure is as follows:
- apply the base and dry under a UV lamp for about 2 minutes;
- place the blank on the nail (check if it fits tightly);
- paint the stencil with varnish (you can use acrylic paints);
- delete the template;
- After the surface of the nail has completely dried, cover it with fixing varnish and place your fingers under the UV lamp for 2 minutes.
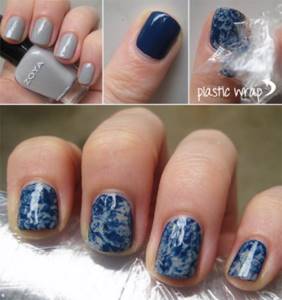
If you don’t have tape on hand, and you have cling film and foil in your kitchen arsenal, then painting your nails is as easy as shelling pears:
- Apply a base coat that does not show through.
- Apply a varnish in a contrasting color to the base onto the foil.
- Wrinkle up the cling film and press it onto the foil.
- Make a stamp on the foil, then do the same on your nails.
- Do a similar procedure with the other varnish.
- Apply top coat to your nail.
Advice
! It is better to choose the color of the varnish and the pattern depending on the season. Also consider the place where you are going to show off your manicure.
By showing your imagination and defeating laziness, you can make your fingers irresistible in these simple ways. Use our tips and be beautiful!
Positive characteristics
They are securely attached due to the presence of a sticky base. This advantage guarantees the quality of the applied pattern. Well, when designing a jacket, they will ensure clarity of the drawn lines.
These stencils for manicure are presented in different versions. The presence of ready-made shapes, angles and figures guarantees beginners quick application. Their use will save time, and the presence of imagination will add splendor and individuality to the change. To do this, you just need to choose an option that suits the style and image.
Stamping technique
How to use a nail stencil? It all depends on the method of performing manicure. For the stamping technique you will need:
- Discs on a metal base with three-dimensional designs.
- Rubber stamp - required to transfer the image to the nail.
- Scraper. It removes excess varnish that gets onto the workpiece.
- Varnish of a viscous consistency, which is intended for stamping.
There are kits on sale that include all the necessary material to obtain an unusual manicure design. Many manufacturers include several plates with different images in sets. The application procedure is performed as follows:
- First you need to remove the old varnish.
- Careful filing of nails and degreasing is required.
- A special varnish-paint is used to fill the image on the stencil.
- Excess varnish is removed with a scraper.
- The rubber stamp touches the mold and collects the applied paint.
- You need to carefully touch the stamp to the nail and transfer the design to the plate.
- After the paint has dried, the image is treated with transparent varnish. This will allow you to maintain your manicure for a long time.
Compliance with all stages of work leads to excellent results. You should also read the instructions supplied by the manufacturer.
Disposable
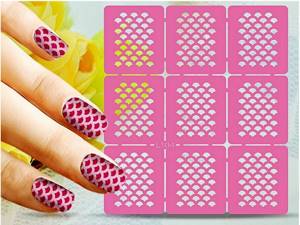
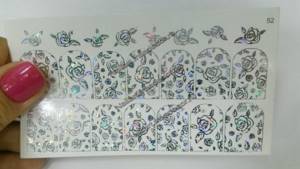
These nail stencils are designed to create an elegant manicure. They are sold in the form of paper blanks with an adhesive base. During application, the backing is removed and the sticky base is applied to the nail.
Then you can paint it in any shade. After applying the varnish to the stencil, it can be removed. In its place there will be a picture. The price of disposable blanks is affordable. They are easy to use, which is why they are in demand.
To obtain a clear image on the nails, it is advisable to choose vinyl-type materials. They fit tightly onto the nail, thereby protecting against varnish getting under the connector. The downside is only one-time use, which leads to constant spending.