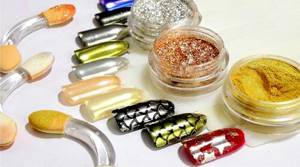
Not so long ago, a fashionable novelty in nail design appeared, which appealed to many masters and lovers of beautiful manicures - this is a gel polish rub. With it you can create various effects on the surface of your nails. There are metallic pigments for nails with the effect of mother-of-pearl, mirror surface, iridescence, prism and others. The article contains the most popular rub-on manicure options, briefly describes the technology and collects information about the types of pigments currently popular on the market.
What is rubbing
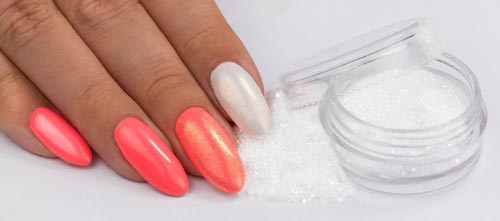
The technique involves applying polyester powder to a layer of gel polish. Depending on the chosen pigment, you can achieve different effects. Nails can have a mirror or pearl shine. In this case, the main color of the gel polish will practically not change.
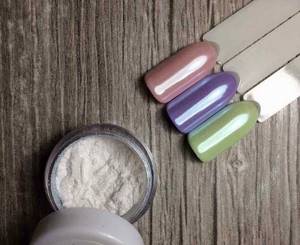
Rubbing is nothing more than fine glitter
The powder resembles very fine sand. It is applied using a special applicator. The pigment does not affect the durability of the coating.
About the tops
Most craftsmen recommend applying the rub “hotly” - onto a top coat with a sticky layer immediately after removing it from the lamp. In this case, you should work using the conveyor method, that is, one nail at a time.
But there are many other reviews. Some rubs fit perfectly on a cooled topcoat, and even on a coating without a sticky layer. Everything needs to be tried.
But what you definitely shouldn’t do is pour powder onto raw material. You might even end up with something nice, but it will look more like regular glitter rather than rub-in.
Advantages of technology
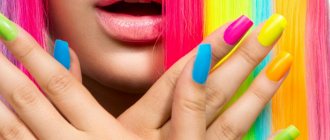
Rubbing is used by those who want variety. Using polyester dust you can create incredible designs on your nails.
This decorative pigment is chosen for the following advantages:
- ease of use;
- moisture resistance;
- creation of three-dimensional design;
- large selection of effects.
Rubbing allows you to create different nail designs
Important! Experts recommend choosing the color of polyester dust to match the shade of gel polish for greater harmony.
Video: secrets of working with rubs on gel polish.
If you are new to working with rubbing in general and want to see more clearly how to create such designs correctly and beautifully, our training video will help you.
The principle of operation and handling of the hero of the master class video and pearl pigment are similar. The presentation will help clarify all possible questions regarding manicure involving nail rubs. Now you know absolutely all the tricks and secrets of this pearly novelty. We hope we were able to tell you all the most interesting and useful things about creative manicure with her participation!
You can buy pearl nail rub using the link.
Pearl rub step by step
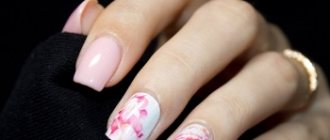
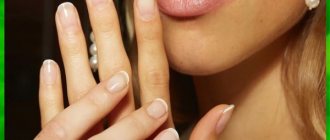
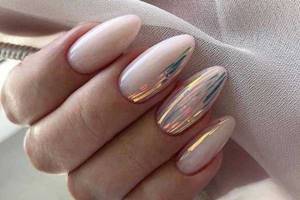
A special feature of pearl rubbing is a more natural appearance of nails than when using mirror pigment. This technique is used to create a classic look (it is especially popular among brides). Finely ground polyester dust produces a uniform glow under different light sources.
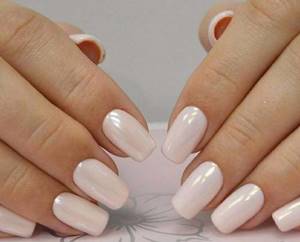
Mother-of-pearl rub creates a pearl effect
The powder is easy to use. To apply pearl rub on gel polish, no additional skills are required.
The technique is as follows:
- perform a trim manicure and treat your nails with a degreaser;
- Apply the base, remembering to seal the end of each nail. Dry in a lamp;
- Cover your nails with colored gel polish (2 – 3 layers). Dry each layer;
- remove the sticky layer using a degreaser;
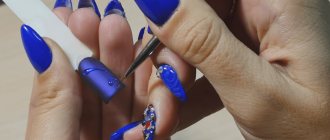
- Apply pearl rub using the applicator and spread it over the surface;
- put your nails in the lamp, then apply the finish and dry again.
The nail is given a beautiful mirror shine
To apply the pigment, you can use not only a special applicator, but also a brush or sponge. Pearl powder is absolutely difficult to use.
Pearlescent manicure for long shapes
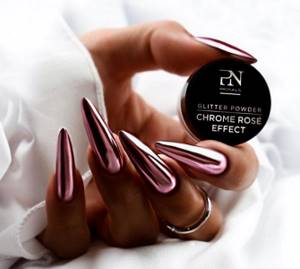
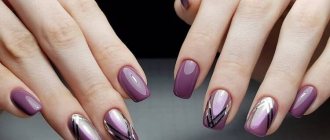
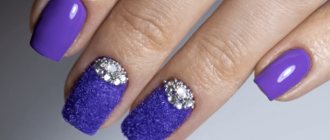
The design with rubbing looks especially attractive on long nails. The top options for owners of long nails in the 2022-2023 season are: mirror design, French, gradient, mother-of-pearl nails with patterns or additional decor. The long shape perfectly complements the versions when the mirror shine alternates with a velvet coating.
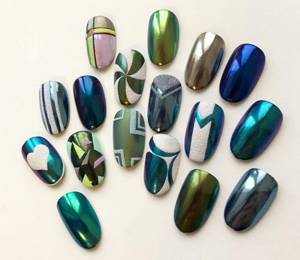
Mirror effect
To create a mirror effect, you need to purchase a special powder. The main difference from the previous technique is that the pigment is not rubbed into the sticky layer, but into the finish, which does not require additional removal of the sticky surface. The powder must adhere well to create a mirror effect.
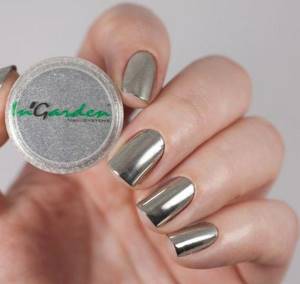
The most popular trick is the mirror effect
If you want to properly apply mirror rub on gel polish, follow this technique:
- remove the cuticle and prepare the nail plate for application using a degreaser;
- apply the base layer, dry it in the lamp, then repeat the same manipulation with the base tone;
- cover your nails with a finish without a sticky layer;
- Apply mirror dust with an applicator or brush and carefully distribute it;
- Cover your nails with a top coat and dry. Apply another layer and dry again.
It is better not to add rub in to the top coat, as this may affect the durability of the manicure. Mirror pigment goes well with wine, turquoise and pink gel polish. We suggest you look at the photo to understand what this nail design looks like.
"Broken glass"
A creative design in a snow-white interpretation looks like a cracked eggshell on the nail plates. Extraordinary nail art can be successfully combined with various decorative options. They use a special manicure foil, which generates spectacular silver, gold or bronze tints under a colorless topcoat. This design is distinguished by visual lightness and tenderness.
It attracts the eye with its unique creative twist, simulating the cracked surface of the nail plates. Shards of broken glass on a white background can be recreated using colored foil or fragments of polymer film of unequal sizes.
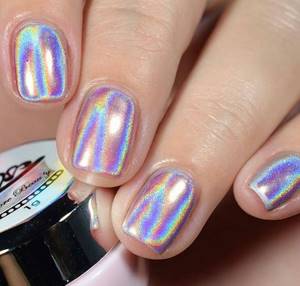
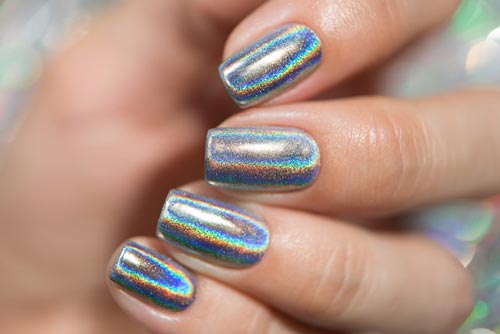
Holographic rubbing
Holographic rubbing is a fine powder with particles that can change their color. It depends on the lighting.
The application of holographic rubbing occurs step by step in several stages:
- nails are prepared in the same way as for any other manicure (degrease, apply a base layer, dry in a lamp);
- nails are covered with 2 or 3 layers of gel polish and then dried;
- The holographic pigment is distributed, after which it is fixed with a dense finish and dried.
Sometimes holographic powder is confused with a rubbing substance called “prism”. They are indeed very similar. The difference is that the holographic particle is slightly larger.
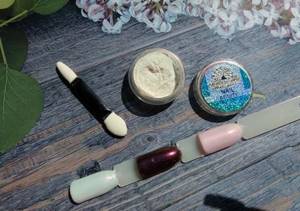
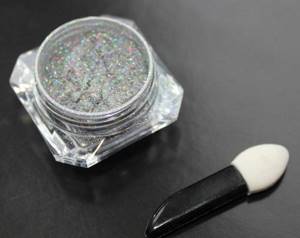
Required Tools
If you ask several craftsmen who work with rubbing, which tool is more convenient to apply, you may get different answers. Some people use a standard applicator (the same one used to apply eye shadow). Some people find it more convenient to work with a silicone brush or a cosmetic sponge. And some people prefer their own finger.
Much depends on the rubbing itself. Therefore, having purchased the treasured jar, try applying the powder with different tools. Evaluate which one rubs in dust better, allowing you to get the most even monolithic surface.
For this purpose, it is advisable to use white tips. You can also coat transparent tips with white varnish. This will give you an idea of what the white backed rub-in design will look like on your nails.
How to choose materials
If you want to do everything right, purchase only high-quality pigment. Cheap polyester dust can leave streaks and reduce the life of the coating. If you don't know which manufacturer produces first-class powder, check out the reviews.
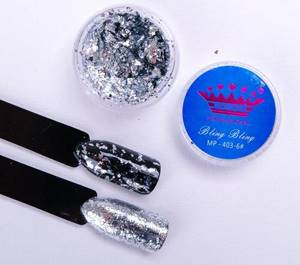
The most popular mirror pigments are gold and silver. For a pearl effect, choose light shades. For those who want a rich design, it is better to use dark gel polish as a base. To create a more delicate look, opt for pastel shades.
If you use a brush, choose a very soft one so that the particles stick to it and do not fall off.
General rules when using rubbing
Those who use technology for the first time have different questions. For example, is it possible to apply pigment directly to the base layer? It is possible, but the effect will not be as pronounced as when using gel polish. Whatever color you choose, it will look more advantageous with powder in any case.
To ensure that the coating pleases you for a long time, remember the following rules:
- do not skimp on the rub, otherwise you will get an inexpressive color;
- This technique can only be used on perfectly smooth nails, so it is important to polish them thoroughly with a buff;
- do not use a matte finish;
- the layer on which the powder will be applied must be well dried;
- there is no need to distribute the particles with your finger, since it contains sebum, which can affect the durability of the coating;
- the remaining glitter that remains on the cuticle should be brushed off with a brush.
Nail industry experts believe that rubbing is the future. It looks impressive on both dark and light gel polish, and besides, it can be combined with other decorative elements. And, most importantly, this technique is suitable even for beginners, as it is very easy to use.
Whatever pigment you choose, follow the application technology. Watch the video for step-by-step instructions.
Alignment of the nail plate
Whenever you do a light-colored manicure, special attention should be paid to nail preparation. If the plates are poorly aligned, it will be very noticeable. Rubbing will only enhance the effect.
Professionals generally advise starting to learn how to do a white manicure with rubbing only when you have mastered the technique of perfect highlights. If you are still unable to achieve good results in leveling, perhaps you should hold off on rubbing.
It is best to carry out the procedure using a thick base. Place a drop on the middle part of the nail near the cuticle. Press down on the brush, first pull the drop towards the growth area and then towards the edge. Coat the edges thickly in the same manner. Be sure to seal the end.
Before drying, turn the nail upside down and allow the material to spread. If necessary, help the base with a thin brush. After drying, evaluate the result by examining the nail by turning it. If necessary, remove excess with a file. All that remains is to apply white polish and coat the nail with top coat to begin working with the rub.