Many women visit beauty salons to get their nails done. This process is usually accompanied by the application of a special varnish. Without equipment, it takes a long time to dry. To quickly dry gel polish, use a lamp with ultraviolet light. Its main property is the rapid polymerization process of the applied material. To ensure a high-quality manicure, you need to carefully choose a lamp for drying nail polish. Today there is a wide selection of this product, but you can make a device for drying nails with your own hands.
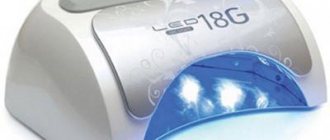
UV lamp device for nails
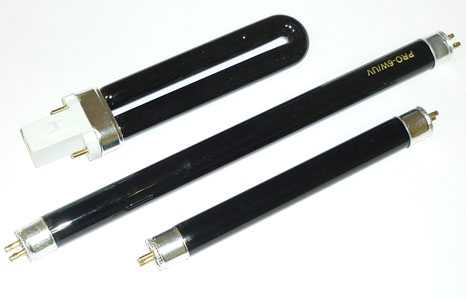
To make such a useful device for women with your own hands, you need to study its structure and principle of operation. Ultraviolet lamps for nails have gained great popularity among home manicurists. Devices can be of different designs, this is due to the type of light source used, which is required for drying gel polish. Thus, we can distinguish several most used types of light source:
- fluorescent lamps;
- LED version;
- combined.

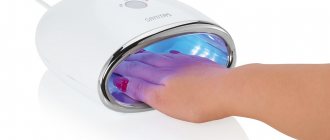
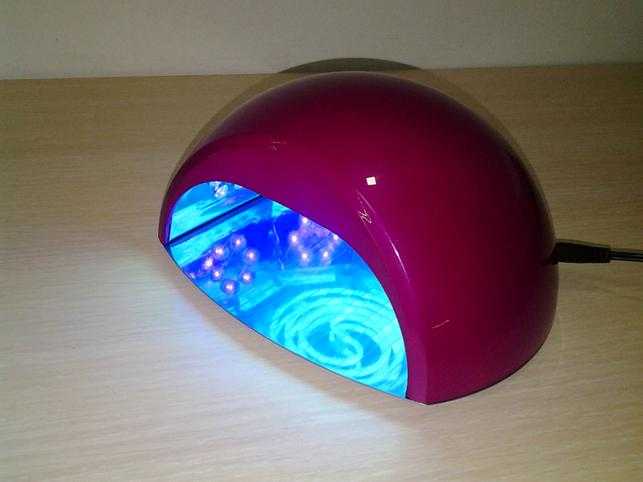
UV device for drying varnish
In professional manicure salons, high-power lamps are used, and for private use, medium-power light sources, which have a low price, are suitable. There are models for one hand and larger ones that can accommodate a pair of arms or legs. This design allows you to save on energy and time.
The design of this device is quite simple. Its body contains several light bulbs, and there is a control panel outside. Some devices are equipped with fans to speed up polymerization. The gel polish dries due to the release of heat by the heating element, which is LEDs or fluorescent lamps.
Good day!
We will talk about solving such a problem as the polymerization of finished 3D models after printing on LCD 3D printers, for example, on ours - Anycubic Photon S. This printer prints on the basis of photopolymer resin - after printing, the models are washed in isopropyl alcohol, but the models themselves remain sticky, soft.
The premise for this writing was the urgent and immediate need for a lamp to cure printed models before painting. Analysis of the Internet showed the absence of ready-made budget lamps for sale - strange, given how widespread 3D printers are now... In any case, I hope the article will be useful to those who are starting to print on photopolymer and are faced with the problem of drying printed models.
The superiority of LED lamps over fluorescent lamps
There are structural differences between these two types of lamps. For example, for an LED device to operate, all that is required is the presence of the diodes themselves, while fluorescent lamps require, in addition to lamps, a mount for them, a special ballast and a starter. UV varnish drying devices that use LEDs have the following advantages:
- a simple device with installation of LEDs and drivers for them;
- long crystal life;
- availability for inspection and replacement of faulty elements.
LED UV lamp
Nail dryer, in which fluorescent lamps are installed, has significant disadvantages in comparison with LEDs:
- CCFL light sources contain mercury, which is dangerous if the device is subjected to mechanical impact;
- easy to beat;
- high cost;
- The large size of the lamp does not always allow replacement with a more powerful one.
It is worth remembering that different drying devices are used for different types of manicure material. For example, an LED lamp is used exclusively for shellac.
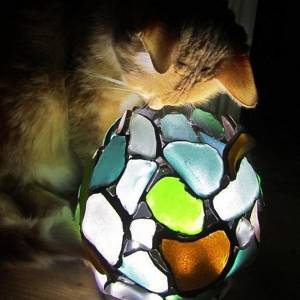
Cat lamps and more
Ouch. I go to read and see that the number of subscribers is slowly growing) well, there will be a message for them at the end of the long post, but for now, for everyone, in honor of the long-awaited spring - cats and stained glass windows made of sea glass.
(traditional chorus - the manufacturing technology is described in detail, as far as I can, in previous posts)
I ended up making a logo for myself from this photo - my friend redrew it in FSH where, I don’t know how to do graphics
So, for subscribers and those who want to join them - oh, no need) I’ve done a lot of new things, but I won’t make any more posts - it doesn’t make me happy. I understand everything, this is the Internet, people can tell you to go to hell here, but I write on several platforms and prefer to choose a friendly audience. In fact, I’ve already told you everything, anyone who wants to will repeat it, whoever wants to ask something - I go to the peek-a-boo all the time (I read posts, but almost never comments on them, I generally try not to read comments on the Internet - but what about my posts? hold on))))), I will respond promptly to comments and messages if anything happens.
It was the lyrics, now it’s to the point. There are advantages to posting yourself on the Internet, besides the hassle - a wonderful person who makes florariums wrote to me, I read about your struggles with choosing a flux, and try pharmaceutical glycerin!
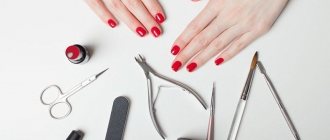
How to make a nail polish dryer with your own hands
There are several options for making lamps for drying nails. First you need to decide on the type of light sources used. Let's look at some of the ways to assemble these devices.
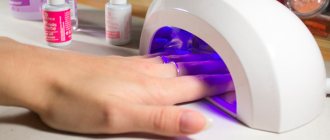
UV lamp for nails
To make this device, rated at 18 W, you will need to buy some parts, the cost of which is not too high. The set of lamps for drying gel polish includes:
- an old computer power supply that you no longer need;
- two ultraviolet lamps with a power of 9 W each;
- electronic ballast, designed for the power of two lamps - 18 W;
- wire with which the device will be powered.
Assembling a UV device with fluorescent lamps
First, you will need to get to the insides of the lamp, removing its base. To do this, you need to cut off the legs and remove the base. There may be a starter and a capacitor inside the lamp, which should be removed as unnecessary. Only the power wires remain. The same operation must be performed with another lamp. Now you need to connect both lamps in series with respect to the electronic ballast. A cable is connected to the power terminals, which will be connected to a 220 V network.
The next step is to assemble the housing. For better drying and a reflective effect, it is better to cover the inside of the power supply with reflective foil or other similar material using double-sided tape. One of the sides can be bent, thereby freeing up space for ballast, and a window for the hands will appear. You can secure the lamps using the same tape or mounting clamp. All that remains is to assemble everything into a single product and check its operation.
LED lamp for drying nails at home
In this case, any object that is suitable in size and suits the consumer from an aesthetic point of view can be used as a housing. It could even be a large junction box.

Applications of LEDs
In this design, the main element is a driver rated at 27 W and nine LEDs with a power of 3 watts each. It should be remembered that before choosing drivers, you need to study the parameters specified by the manufacturer in the instructions for the LEDs. The LEDs are connected in series to each other and soldered to the driver terminals. It is advisable not to confuse “+” with “-”.
Inside the body of the future DIY UV nail lamp, you will need to make a radiator in the form of fins to cool the LEDs. To do this, you can use what you have at hand, for example, an aluminum profile. Just as in the first case, you will need to perform light reflection inside the case and provide space for your hands.
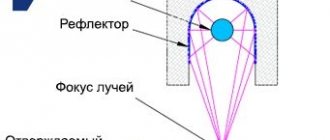
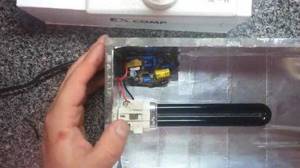
UV lamp with DRL lamp
To assemble a device for drying varnish using this method, you will need the following parts:
- electronics from an energy-saving lamp with E27 socket;
- UV lamp, which is used in banknote checking devices;
- terminal blocks;
- cartridge for E27 socket;
- cable for powering the device.
UV lamp
The leads from the UV lamp are connected to the terminal blocks, and on the other side of them are screwed wires that will be soldered to the terminals of the board. Wires going into the flask are placed on these contacts, which need to be removed. After soldering, the base is assembled back and screwed onto the cartridge.
The resulting product must be placed in a housing. For the body, you can use the items listed in the first two cases. There may be several lamps; they should be selected experimentally.
This review is suitable for those who need an ultraviolet lamp to dry nail polish and do not want to overpay for the finished product.
All means are good
There are several ways to quickly dry gel polish without a lamp, let's look at the main ones in descending order of effectiveness:
- ice water. Drying with plain water is suitable for light-insensitive gel polishes. Place freshly coated hands in very cold water (you can put ice) for 15 minutes, the gel polish will set. You can polymerize the coating by keeping your hands in the freezer for 2-3 minutes;
- cold coating. Keep the gel polish in the refrigerator for about 20 minutes and immediately apply it to your nails; it will dry several times faster;
- the catalyst (usually cyanoacrylate based) can be in the form of an ointment, spray or gel. A couple of minutes after applying the varnish, drop one drop of the substance onto the nail plate and spread over the entire surface. The varnish will dry in 1-3 minutes;
- olive oil. Apply two or three drops to the plate, spread over the entire surface and wait about 5 minutes. Then rinse it off with a stream of cold running water;
- sunlight - dry your fingers directly under the sun's rays, this is a long drying process;
- a blue medical lamp can dry gel polish, but the process is lengthy;
- regular hairdryer. The result will be if it is powerful enough and there is a cold blowing mode. Blow freshly coated fingers with a powerful cold jet for 5 minutes; the gel polish should be a single layer. The method is long and the quality of drying is low.