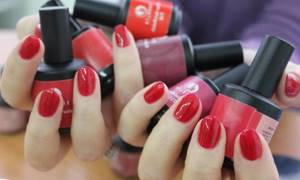
Minuses
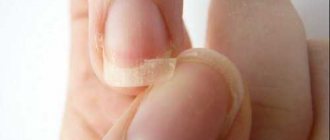
The main disadvantage of using such a pencil is the extremely low durability of the manicure obtained with its help. Essentially, when using it, you simply apply a layer of chalk to the inner surface of the free edge of the nail. Naturally, the result of such coloring remains unchanged only until the nails first get into water. This is especially noticeable on long nails; on short and very short nails, the manicure can last a little longer - until the second or third wash. In addition, chalk may also remain directly near the smile line, since water does not always get there.
The second disadvantage of a whitening nail pencil is that it is inconvenient to use. It is especially difficult, and sometimes completely impossible, to use it on short and very short nails. The fact is that the cone-shaped shape of the stylus does not allow you to do a manicure quickly and accurately. While the sharp tip of the stylus gets close to the smile line, the rest of its width stains not only the nail, but also the finger underneath it. It is almost impossible to avoid this drawback during operation, as well as to eliminate it after application, since the chalk simply smears or is erased from the nail too. This makes using the pencil impossible, especially for those whose nail bed is located far enough from the tip of the finger, that is, a fairly large part of the free edge is above the finger.
What is it and why is it needed
There are several types of pencils used for nail care. Whitening options have been developed specifically for French manicure. Their purpose is clear from the name, but there are still some subtleties that need to be known and taken into account by those who are going to use such a pencil.
So, its main task is whitening. No one is immune from particles of dirt and dust getting under the nails, which spoil the appearance of the manicure and create the impression of unkemptness. In addition, over time, nails may acquire a yellowish tint. There is no escape from this, since this is their natural feature. A whitening pencil will help you easily deal with all these annoying problems.
Its most common variants are made from white clay or medical chalk. They are distinguished by their snow-white color, which is exactly what is needed to give your nails a healthy, well-groomed look. With this pencil you can quickly and easily clean out any dirt, while at the same time it colors the regrown edge of the nail. The big plus is that this way you can quickly touch up your manicure; you just need to carry a pencil with you in your makeup bag.
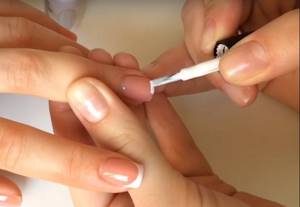
The pencil is used for French manicure and directly during its creation. Ideally, it and a clear varnish would be enough, but in reality it is still better to use white varnish, because it is extremely difficult to draw an even smile line with one pencil. The fact is that in this case its natural form is repeated, which is not always ideal. To apply varnish, it is convenient to use a special brush, thin, allowing you to paint accurately.
Application
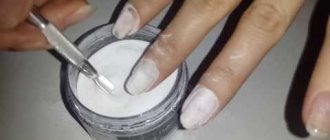
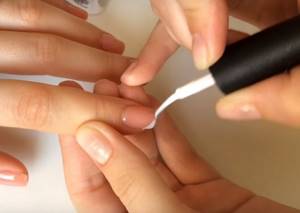
Below we will describe the technology of how to use a pencil for a French manicure yourself. Almost all such pencils are intended exclusively for home use and are not used by craftsmen. Before you begin your manicure, sharpen your nails and carefully remove any dirt from underneath them.
After the top coat of varnish has dried, your manicure is ready for use. More information about what a white nail pencil is, what it can be and how to use it is described in the video in this material. The use of this pencil is suitable for everyday manicure in a nude style.
Design ideas
An elegant and laconic French manicure is good in itself, but thanks to lovers of variety, the idea has received comprehensive development. Based on the classic version, fashionistas create new designs, experimenting with color, shape, texture, and decorations. Of course, it was not without criticism, but many girls like the idea. Even Hollywood actresses do not deny themselves the pleasure of decorating their nails with an unusual pattern.
Art French is not distinguished by the versatility of the original and does not suit all outfits, but it allows you to choose a harmonious manicure for each specific look. There are so many variations that it is impossible to list them all, but they can be conditionally divided into several groups.
Colored French
This idea turned out to be the easiest to implement; you just need to draw a smile line using any other varnish, not white. The central part of the nail can also be coated with a contrasting color. The result will be an unusual manicure, which, depending on the chosen range, can complement both a strict business image and a bright youth look.
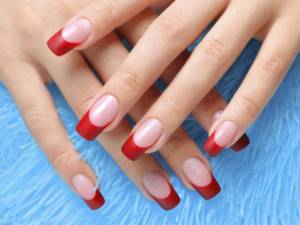
Colored French manicure can combine any shades
Twist
You can paint the tip of your nail with several colored varnishes. They are used to draw parallel stripes, waves, zigzags and swirls.
In the twist version, the tip of the nail is painted in several colors
Millennium
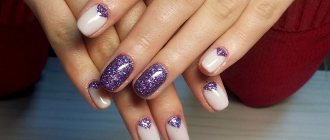
You can decorate the smile line with sparkles: paint over the entire tip of the nail, draw a thin strip along its edge, or create a sparkling gradient. The French jacket turns out to be very bright and festive, making it great for parties.
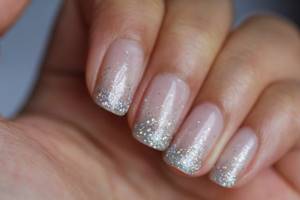
Millennium French is a manicure option where the smile line is decorated with sparkles.
Fan French
The tip of the nail can be decorated not only with colored or shiny varnishes. Granules for caviar manicure, velor fibers for velvet, mica, foil, rhinestones, beads, lace and even fragments of dried plants are used. The variety of materials will allow you to fully enjoy the creative process and create a unique design for any event.
Fan-french involves the use of all kinds of decorations in manicure.
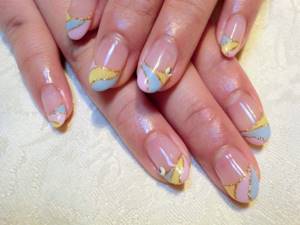
French with a non-standard smile line
The smile can be of any shape: beveled, triangular, wavy, V-shaped, double. Additionally, it is decorated with dots, thin lines, and patterns. It’s not difficult to make such a manicure, but the result of your efforts will not go unnoticed.
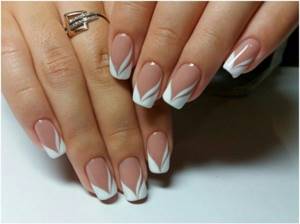
The smile line may be part of a complex pattern
Wedding jacket
To create this variety, traditional colors are usually used, but the nails are additionally decorated so that the manicure matches the dress and hairstyle.
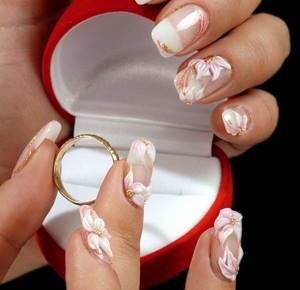
Wedding French is a combination of classic manicure with patterns and decorations
Video: moon manicure, colored French manicure and version with rhinestones
French is simple and complex at the same time. Its flawlessness and naturalness are the result of painstaking work. To master the technique, you will have to try, but the game is worth the candle, because the famous manicure will always help out, including situations when it is difficult to decide on an “outfit” for your nails. Even those who prefer variety in everything will be able to find dozens of original ideas for themselves or come up with an individual one, taking as a basis a classic design that is unlikely to go out of fashion.
Some disadvantages of whitening pencils
The main disadvantage of a whitening pencil is the fragility of the result obtained. It washes off very easily. It is enough just to rinse your hands so that not a trace remains of the manicure. This problem can be easily solved by always having it with you, then your nails can be quickly corrected, but will it be convenient, especially if you need to act quickly and in a hurry?
During the day, the pencil gradually moves from the surface of the nail to the skin with which it is constantly in contact. As a result, your hands may look dirty.
Most often, French pencils do not meet the expectations of women who see beautiful pictures with perfectly white nails and expect the same effect. In fact, it is impossible to achieve this without varnish.
The work takes place in several stages:
- the base is applied, a wide brush allows you to create an even background of the selected shade;
- the next step is a neat white smile;
- if desired, drawings are added, but with a thin tip;
- A protective base is applied over the finished manicure.
The convenience of varnish pencils also lies in the fact that the applied layers of varnish dry almost instantly, you don’t have to take breaks or wait long. In addition, a poorly executed drawing can be erased with a regular napkin, and the bottom layer will not be damaged.
As you can see, there are a huge number of tools to make hand care easier. The main thing is not to let your imagination fail you and not to give up the desire to experiment.
Types of white pencils for nail design
Coating techniques and cosmetics are constantly being improved, manufacturers strive to take into account the opinions and wishes of women, and thus wax whitening pencils were created. Their advantage is their long service life, because... The wax adheres tightly and securely to the nails and can even withstand hand washing.
Compared to representatives made from chalk or clay, wax ones lie more smoothly and easily and do not smear. Some companies claim that their regular use helps whiten the nail plate.
Necessary accessories
In order to create the perfect French manicure at home, first of all you need to buy the entire necessary set of tools for it. It includes:
- UV lamp. It is better to buy a more powerful lamp, because if it is not powerful enough, it will take much longer to dry.
- Orange stick.
- File.
- Nail degreasing agent.
- Cuticle softener.
- Base.
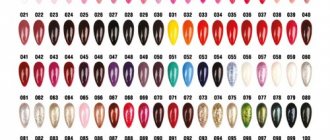
- Directly gel polish. Several colors, depending on wishes. A good alternative to white varnish can be a white or bleaching pencil. It is very easy to use, you don’t even need a stencil and after it your nails look very natural.
- Stencil for drawing a smile line.
- Top.
- Gel polish remover.
- Brush. If you want to make a manicure with a pattern, you will need an additional thin brush.
Purpose
What materials can this tool be used on? Obviously for crystal and opal rhinestones. These are the ones you should practice on. After trying it once, you will find that it is not without reason that the craftsmen praise this simple device - the tool really easily copes with crystals of different sizes and shapes - both flat and three-dimensional.
Having figured out how to use a rhinestone pencil, you can make your work much easier when working with other materials. The sharply sharpened spout will easily grab small bouillons, microscopic pixies (“diamond chips”), large sparkles, shinju stones, kamifubuki, metal elements, dried flowers and many other decorative elements.
A wax or paraffin pencil will be an excellent alternative to tweezers. With its help, you can place the crystal exactly where you need it, even in the very center of the composition, and you won’t have to move the other elements.
Benefits of pencils for French manicure
To objectively evaluate the French pencil, we list its useful properties and characteristics.
- Small size. A regular cuticle pencil will easily fit in a clutch, purse, or cosmetic bag. You can carry it with you everywhere or buy two pencils - for home and for work. It doesn't take up much space, and the cap will prevent your purse from marks that the pencil might leave.
- Affordable price . The cost of a pencil is 130-250 rubles.
- Instant results . The pencil immediately whitens the edge of the nail. To do this, it is not at all necessary to wait an hour, a day or a day. The result is noticeable immediately after its application. The pencil allows you to get rid of impurities and makes the tips of your nails snow-white, giving them a natural and healthy look.
- Can be used to complement a French manicure. It is enough just to paint the nail plates with transparent varnish, and instead of a white stripe on the edge of the nail, use a whitening pencil on the inside of the free tip.
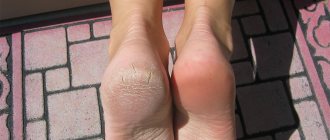
- Can also be used for pedicure if you want to add whiteness to the tips of your toenails.
- Strengthening nails . Regular use helps strengthen your nails and make them strong.
- Gives the manicure completeness.
- Used to form a smile line characteristic of a French coat. Some ladies find it easier to draw a smile line with a pencil than with a brush.
- Used as an express product that allows you to quickly fix your manicure.
Varnishing pencil
This pencil is something similar to a traditional office manicure corrector. It is made in the form of a plastic pen with a thin spout at the end. There is a small ball in the nose, which, when pressed, releases the polish contained in the pen onto the nail. Thus, the principle of operation and method of using such a pencil are similar to a stationery proofreader.
The disadvantage of such a pencil is that it gives a thin strip about 1 - 1.5 mm wide. Thus, it can only be used on short nails. After all, if you try to shade a long free edge with it, you will notice that it lies extremely unevenly.
https://youtu.be/JJx_asF_-BA
Easy option
It’s easy to paint French gel polish if you use one of the following methods:
Start the lines from the sides of the nail to the middle, bringing them together. The liner brush or the one that comes in the bottle with the product is held at a slight angle. The “whiskers” should be at the same level. If the side rollers are dirty, remove the varnish with an orange stick. This method can also be used with a hair brush.
Start applying the gel from the middle of the plate using vertical strokes. As you paint, you need to move the tool to the growth point in one direction, then in the other. For this method, they also use a “native” gel polish brush or liner. Inaccuracies are corrected with a hair.
On almond-shaped nails, the free edge of the nail is divided into 3 zones. You should start drawing from the growth point, that is, from the “antennae,” making a straight line to the first third. The same technique is used on the other side of the plate. When the “antennae” is ready, mark the width of the “smile” in the middle, then paint over the free space, rounding the previously drawn straight lines.
Terms of use
How to use a rhinestone pencil? In fact, everything is very simple. First, you need to sharpen it in such a way that one end is long enough, but at the same time the wax lead remains flat at the end.
To grab a pebble or bead, you just need to bring the pencil to it and touch it with light pressure for better grip. Thanks to the moderate stickiness of natural wax, the crystal is securely held on the tip of the lead, but does not get dirty and does not leave any marks on it.
When performing a manicure, rhinestones can be attached either directly to the last layer of varnish that has not dried (this is usually done when performing a manicure with gel polish), or to the dried varnish using special glue. After all the stones are laid out on the nail, they are covered with a layer of fixative for better fixation.
After using a pencil to transfer rhinestones to nails or any other surface, its sharpened end must be capped to prevent the lead from drying out. If it nevertheless dried out a little and lost its holding abilities, i.e. If it no longer holds the rhinestones securely, then it needs to be sharpened a little to update the edge of the wax lead.
If you don’t have such a pencil on hand, but still want to design your nails with rhinestones, you can replace it with a thin candle. If the pebbles are small, you can use a wet wooden stick or a thin brush dipped in water. Dots are also quite suitable for these purposes, the most important thing is to give its tip a certain stickiness.
Tags
exception. French varnish colored varnishes unusual varnish French white varnish Varnish for Geltek Sets of gel varnishes Gel for gel modeling Single-phase gels Two-phase gels Three-phase gels Universal gels of gel manufacturers Gel for nail design. Nail design for design for design for design for design Stamping design for design design manufacturers
designhair extensionsnailbrandfoilprofessionalpaintslidertoolssetsredliquideyelashescuticlespedicureeyesnettopsbuynailsmarkersavailabilitywaxstorefilefaceme sawlegcatcat lampproductbaseaccessoriesbeautyeyebrowsnewcosmeticappearanceplatesrelatedrunailrhinestonestnlordersitepatrisacosmeticsgelcollectionsbloom deliverytotalstampingstencilsfelt pensthin materialsvoguesearchdepilationrubbingmaskreplaceableelementsiriskserebrokodireportplanetacrygelunobasketgrattolingardenmasurarepublic
How and with what to whiten and strengthen nails?
Complex procedures that will not only whiten but also strengthen your nails are especially popular.
The method that was used in ancient Egypt is olive oil and lemon juice. Apply to the nail and rub well. After removing the excess, go over it well with a polishing file.
Another recipe from Cleopatra is milk and honey. Milk should not be skimmed. 20 minutes of relaxation will saturate your nails with calcium and eliminate the yellow tint.
You can get a double effect from a soda bath by adding a few drops of iodine.
The only difficulty with a paraffin mask is the duration of the procedure. You need to wait a couple of hours wearing gloves. After melting cosmetic paraffin in a water bath, add olive oil to the composition; apply to your fingers - the mask is ready!
How and with what to whiten nails from cigarettes?
One of the obvious signs of a smoker is yellow nicotine stains and dry skin on the hands. Experienced smokers may even experience deformation of the shape of their nails. The easiest way to eliminate unpleasant symptoms is to quit smoking. You can reduce the impact of cigarettes by using a cigarette holder when smoking. But, if this is beyond your power, you should take up cosmetic procedures:
- bath of apple cider vinegar and water, dosage 1:1. Time 20-30 minutes;
- a coffee scrub will cleanse your hands of yellowness and give your skin a pleasant aroma;
- Apply a small amount of castor oil to a cotton pad and press it onto the surface of the nail for a few minutes;
- Wipe your nails with hydrogen peroxide daily;
- in the summer, procedures with the juice of fresh berries - currants, cranberries - are quite effective.
There are many options for care, but all of them will be effective only with regular use. This should become an absolute habit, a daily ritual. Then your hands will be flawless, and it will be impossible to take your admiring glance off your perfect nails. Be beautiful!
How and with what to whiten nails after gardening?
It is always easier to prevent than to eliminate the consequences. Before working in the garden, apply hand cream, Vaseline, oil - any of the available products. This will prevent dirt from penetrating deep into the skin. If you don’t have cream on hand, then take any soap and lather your hands, especially carefully under the nails, leaving softened pieces. After this, let your hands dry. A thin protective film forms on the surface, a kind of invisible gloves that can be easily washed off after work and keep your hands clean.
Don't neglect real gloves. They may not always be convenient to work in, but they do an excellent job of protecting against dirt and minor injuries. The right gloves for a summer resident are made of thick latex, with a cotton lining.
You can whiten your hands after gardening with improvised means - sorrel, rhubarb, overripe tomatoes. Mash the leaves and wipe the dirty areas, just grease your hands with the tomato. The acid contained in these plants will help clean your fingers.
Potato broth will help soften and remove dirt. Boil a couple of potatoes, make a very thin puree, cool to an acceptable temperature and let your hands sit for 20 minutes.
How and with what to whiten fingernails and toenails at home?
How to whiten nails with citric acid?
Citric acid is an excellent bactericidal agent and a natural antioxidant. The result of using citric acid is not only an improvement in the color, but also in the condition of the nails. They will acquire shine and smoothness. Dosage – 1 teaspoon per glass of warm water. Duration: 15 minutes; after the procedure, moisten the cuticle generously with cream or oils. Frequency no more than once a week to prevent excessive softening of the nail plate.
How to whiten nails with peroxide?
If you need to urgently get your hands in order, you can whiten your nails with hydrogen peroxide. To do this you need peroxide and soda in a ratio of 1:2. Apply the mixture and rinse off after 2-3 minutes with water. The procedure is over, your manicure is in order.
How to whiten nails with lemon?
The lemon bleaching process is very simple. Cut a lemon and immerse your fingers in its pulp for a maximum of 10-20 minutes. Add olive oil to soften. Acceptable frequency is daily. Another option for lemon bleaching is to rub with freshly squeezed lemon juice twice a day until the desired color is obtained.
How to whiten nails with soda?
Baking soda has already been used in our recipes in combination with hydrogen peroxide, but now is the time for individual use. The abrasive properties of soda can easily help you whiten your nails; just apply it to a soft brush and rub the stained areas. If you have hangnails or wounds on your hands, you can make a bath with soda, adding 1 teaspoon per glass of water. Such procedures can be carried out once a week. You will get not only a whitening effect, but a strengthening effect.
How to whiten nails with toothpaste?
Whitening toothpaste will help eliminate yellow nails. The procedure can be carried out daily; select a separate toothbrush and simply brush your nails for 5-7 minutes. The effect of application will be noticeable after a few days.
When carrying out whitening procedures, remember:
- nails must be free of varnish;
- the presence of wounds and hangnails makes bleaching possible only with the help of baths;
- after the activities, use a nourishing cream;
- when varnishing, be sure to use a base coat, this will prevent yellowing;
- periodically let your nails rest, do not apply any coating.