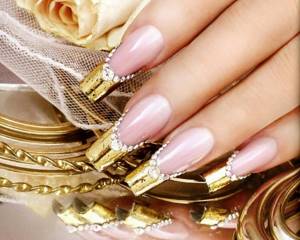
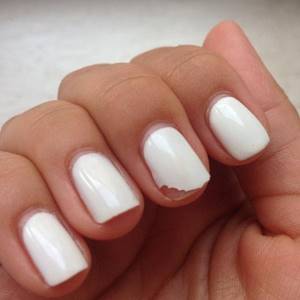
Thanks to gel polishes, girls can enjoy a long-lasting color coating for 2-3 weeks, rather than having to do a manicure every 3 days, wasting their precious time. But is just one gel polish enough to achieve such long-lasting wear?
Not really! To achieve a lasting result, we DEFINITELY need a base and top. We discussed what a top is and which option to choose in the article “Top for gel polish. What is it and what is it for? Well, now we’ll look at what a base is, why it’s needed and how to choose it?
What is a nail base and what is it for?
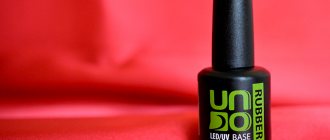
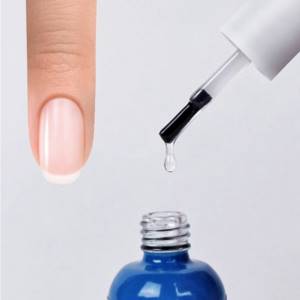
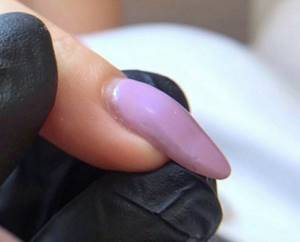
Gel polish base is a product that acts as a layer between the artificial coating and the nail plate. It is necessary to use a base when working with three-phase gel polishes (read more about three-phase gel polishes).
The base coat is primarily designed to provide reliable adhesion between the natural nail and the gel polish. But besides this, the base performs several more important functions:
- protects the nail plate from coloring pigments;
- smoothes the nail plate, thereby hiding its defects and imperfections;
- strengthens the nail plate: thanks to the base, owners of thin and brittle nails can wear artificial coating for 2-3 weeks;
- Using the base, you can make additional extensions to the nail plate, for example, the corners.
It is the base that comes into direct contact with the nail, so it is important that it not only provides a durable coating, but also does not harm the natural nail. The webinar “Chemistry of acrylates: all about materials” from the ParisNail school will help you understand the composition of artificial coatings.
NOTE! One of the reasons for the appearance of detachments, chips and cracks is an incorrectly selected base. The condition of the nail plate is different for everyone: for some it is strong, while for others it is thin, soft and plastic. You cannot use the same base for absolutely all nails. It is necessary to analyze the condition of the nail plate and pay special attention to the choice of base coat.
Building up
Is it possible to extend nails with a base? There is no clear answer to this question. It all depends on the goal. You definitely won't be able to make a long nail. It's better to use acrylic. The base is suitable either for building up just a few millimeters, or for restoring a damaged plate.
Algorithm of the wizard’s actions:
- Perform a mechanical or hardware manicure.
- Give the plate an unnecessary configuration.
- Attach the extension forms to your fingers. The use of types is allowed.
- Apply the product with a flat brush to the border of the form and the nail. Movements should not be spreading, but pointed. Quickly spread the drops over the surface and let dry a little. Then repeat the manipulation over the entire plate. However, pay special attention to the joint line during subsequent applications.
- Dry until hardened.
- Apply a final coat of product and dry again.
It must be remembered that water-based compositions are absolutely not suitable for this. Combined camouflage agents are also not recommended, since their structure does not become solid even after drying. If such a goal is nevertheless set, then acrylic or enamel-based products are suitable for this operation. For example, the transparent base gel ARTEX has proven itself well in a professional environment. For modeling on forms and tips, KODI, BASE UV GEL is also recommended.
Which gel polish base to choose?
What types of nail bases are there? What are their fundamental differences? Which one to choose? Let's figure it out.
Today there are 3 main types of base coatings:
- hard,
- elastic,
- camouflage.
Hard bases
A solid base is a base that almost does not bend after polymerization. Most often, solid bases are characterized by a liquid consistency. Due to their liquid consistency, such bases are more suitable for experienced professionals, since leveling the nail plate with them must be done quickly, otherwise streaks will appear. You won't be able to grow your nails with a hard base!
for ?
Hard bases are suitable for healthy, strong nails. On soft, bendable nails, such bases can cause chips and detachments.
Hard base Strong No. 3 light pink Bloom 30 ml
Hard base Strong No. 2 warm pink Bloom 30 ml
Hard base Strong No. 5 natural beige Bloom 30 ml
Elastic bases
Such bases have a thick consistency, after polymerization they are plastic and bend.
Elastic bases are great for beginners: they are easy to work with, as they do not spread, and the alignment is perfect. Using elastic bases you can extend your nails.
Rubber base Kodi 12 ml
Rubber base Lux Rubber Base UNO 15 ml
Rubber base for gel polish Rubber Diva 30 g
for ?
Elastic bases are great for soft, highly flexible nails. But on long nails they sag over time (we will discuss what this means below).
ADVICE! Sometimes it is not very clear from the name of the base whether it is hard or elastic. To determine the type of base, you can do the following: apply a small drop or strip of base to the surface of a transparent plastic bag and put it in a lamp to polymerize. If after polymerization the drop (strip) bends, it means you have a plastic base in your hands. If you can’t bend the drop and it cracks, then the base is solid.
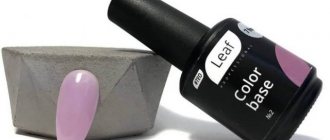
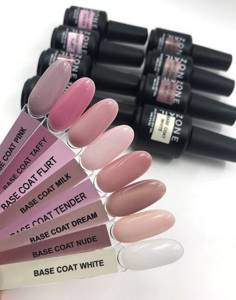
Camouflage bases
Camouflage base is a base coat and camouflage in one bottle. Their main feature is the lack of transparency and the presence of a natural shade. It can be milky, pinkish, natural beige. There are a huge variety of shade options. Manufacturers even add shimmer to the bases!
Camouflage base Coat Tender OneNail 15 ml
Camouflage base Rubber Base Glitter 4 Grattol 9 ml
Base Camuflage BEIGE UV/LED by Mystique 15 ml
for ?
Camouflage bases are an ideal option for creating a French manicure! Also, this is an excellent option for office workers whose dress code does not allow the use of bright colors of artificial turf.
conclusions
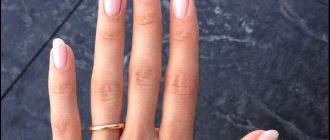
A manicure that uses gel polish is a multi-step procedure in which it is important to follow all the steps to prevent premature removal of the pigment. But when doing the technique independently at home, girls often miss some of the subtleties, including the use of a basic foundation, which is why they are then faced with a quick deterioration in the quality of the design. But if you spend an extra 10-15 minutes following the instructions step by step, you will ensure neat results that will last up to 4-5 weeks.
Source of the article: https://beautyart.pro/info/nogti/mozhno-li-nanosit-gel-lak-bez-bazy/
Frequently asked questions about databases
- Is it possible to apply gel polish without first applying a base?
- This is possible only if you use single-phase or two-phase gel polish, but above we already talked about the disadvantages of such coating systems. In case of using a three-phase system, the use of a base is MANDATORY! Otherwise, the gel polish simply will not stick to the nails and will stain them with its pigment.
- Can I use a top instead of a base?
- No, it contains a different chemical formula, and the coating will not last long. And tops usually have a more liquid consistency and this will cause streaks to appear.
- Is it possible to increase the length with a base?
- With the help of a thick base, we can only extend the nail, for example its corner! It will not be possible to increase the full length with a base. For these purposes, nail extension materials are used.
How to apply bonder, primer, base: sequence
There is a certain sequence that should be followed in order to get the most durable manicure and long-lasting coverage. To do this, you cannot exclude any of the stages of nail preparation; use all the products from the chain.
Instructions:
- The old coating is removed using a saw or cutter. There is no need to remove the base if you have previously covered your nails with gel polish. This layer should remain on the nails after removing the gel polish.
- Next, materials are used to remove pterygium on the nails. This is a thin film that grows under the cuticle and is one of the types of cuticle.
- If you apply gel polish to the pterygium, you will get detachments, pockets and air bubbles. To prevent this from happening, the pterygium can be removed in several ways. The nails are soaked in soapy water, after which the cuticle is pushed back with a pusher or an orange stick. Carefully, with the sharp side of the stick, scrape off the thin film that is located on the nail near the cuticle. This is the pterygium.
- If you leave small pieces, they will cause detachments. Therefore, we recommend using non-classic manicure and orange sticks for this. Hardware manicure is preferable before applying gel polish. This is an ideal option for removing pterygium.
- A flame or bullet cutter is used to lift the cuticle. These are pointed cutters that help to completely remove pterygium not only on the nails, but also under them, deep in the cuticle.
- In addition, this attachment lifts the cuticle up, it can be easily cut with scissors, pieces, or further processed with a ball cutter to remove dry cuticle without touching the nails.
- After you remove the pterygium, you need to clean the area near the side ridges. A needle and flame cutter will do the best job in this area. They look like thin tubes of small diameter, approximately 1-2 mm, which make it easy to crawl into the area between the side ridges and the natural nail and remove the contents that are there.
- After this, the natural nail is polished with a low-abrasive file. You don't need to completely file off your natural nail, you just need to remove the shine. A file with a particle size of 120-180 grit is suitable for this.
- After this, a dehydrator is applied to remove excess moisture from the nail, not forgetting to remove any remaining dust with a brush.
- After this, a primer is applied in one or two words. Before applying the bonder, you must wait until the primer has completely dried. After this, the surface will become whitish, with protruding scales.
- At this stage, you should not touch your nails with your fingers or touch your hair or lips. With these touches you add fat to the nail plate, which will contribute to the occurrence of detachments and reduce the wear of the artificial material.
- After the primer has dried, apply the bonder with a flat brush using rubbing movements. It should be as thin as possible. This is not leveling, so you don't need to achieve a perfectly flat surface. You will get a non-uniform surface, that's how it should be. It must be dried in a lamp for 30 seconds. There is no need to remove the sticky layer from the bonder; the task of the bonder is to increase the adhesion of materials with the help of stickiness.
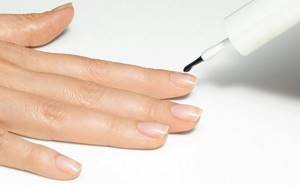
- After the bonder has dried, the base is applied as a leveling layer. This is where alignment needs to be done. It was created in order to make the nail perfectly smooth and hide errors and defects in the structure. Dries for 1 minute. Next, gel polish and top coat are applied.
In order for the coating to stay on the nails without chipping, peeling and cracking, it is necessary to properly prepare the nail and use a dehydrator, primer, bonder and base.
Nail extensions
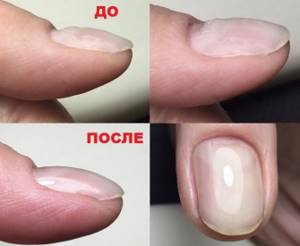
Why does the base sag?
Sometimes it happens like this: immediately after the procedure you enjoy a perfect, flawless manicure, and after a while a “dip” appears across the nail (as shown in the picture).
Why is this happening?
The thing is that in the stress zone (at the junction of the free edge and the nail bed), the base shrinks. This effect can only be achieved on long nails, because the stress zone is also a bend zone when pressure is applied to the free edge, and the length just puts stress on it.
Bases are soft gels, and they, in turn, as we said above, can be elastic or not.
Elastic bases perfectly strengthen the nail plate when leveling, because they are flexible, tenacious, and when the free edge moves, they, like an elastic band, move with it. But this is precisely why shrinkage occurs.
There are bases that contain solid plasticizers. Solid materials do not move with the nail and, accordingly, do not shrink. But keep in mind, UNDER HEAVY LOAD, almost any base will give minimal shrinkage.
What to do?
Strengthening with acrylic or hard gel, but this is a completely different procedure. In addition, the harder the material, the worse it soaks and the more difficult it is to cut.
How to extend nails with gel at home? Step-by-step instruction
It’s a rare girl who hasn’t dreamed of long nails at least once in her life, because they look so impressive, feminine and beautiful. But what should those who can’t grow their length do? Either the shape when growing is not satisfactory, or the nail plates are too thin or brittle - there can be a great many reasons. Will the dream of a perfect manicure really remain a dream? No, let's implement everything we have planned! Moreover, there is such a wonderful procedure as nail extensions. Today we will teach you a step-by-step technique at home using gel.
Why does the base bake in the lamp when drying?
In the bottle, the material is in a liquid state, its molecules are in chaos. But when exposed to UV/LED radiation, the molecules line up, forming a crystal lattice, and the material polymerizes, in other words, hardens. At this moment, an exothermic chemical reaction occurs, i.e. reaction that releases heat.
Photoinitiators contained in the base are responsible for hardening. The more photoinitiators, the faster the material polymerizes. And the faster it polymerizes, the more heat is released!
What else does it depend on?
- Color
- Condition of the nail plate
- Quantity of material
- Lamp power
- Sensitivity
Most often, craftsmen use a transparent base. The rays penetrate through it very quickly, since pigment does not interfere with them. Accordingly, the reaction occurs faster and more heat is released!
The thinner the nail plate, the more the base bakes. The nail plate itself is not sensitive, but under it, in the nail bed, there are sensitive capillaries and nerve endings. Through a thin nail, heat quickly passes to them, and we feel a burning sensation.
The larger the layer of material, the more photoinitiators we place on the nail plate, and the more heat is generated.
The higher the lamp power, the faster polymerization occurs, and the more heat is generated.
Some people have increased sensitivity in the morning, others in the evening. For some today, for others tomorrow. It all depends on the individual characteristics of the body.
What to do if the base bakes too much?
- Reduce the power of the lamp if it has a power reduction button.
- Take your hand out, turn the material down so it doesn’t spread, and press the pad of your finger against the table. This simple technique will help relieve pain!
- Instead of one thick layer, apply 2 thinner layers of base.
- Use camouflage bases. The presence of pigment prevents the penetration of rays and less heat is generated.
REMEMBER! The insanely strong burning sensation cannot be tolerated!
Why does the base chip?
Have you tried all kinds of bases, but your nails still appear chipped and peeling? There are several explanations for this, for example:
- you violate the technology of applying the base coat;
- your nails are characterized by hydrosis;
- your nails are characterized by onychoschisis (layering of the nail plate);
- you work in a humid outdoor environment (for example, as a cook or florist);
- you are the owner of “rag” nails;
- your nail plate is thinned mechanically (for example, due to improper removal of the coating).
The first reason is clear - you just need to correct your mistakes. But what about the other reasons? Do you want to part with your long-lasting, flawless manicure forever?
Of course not! You need to go through the webinar “Complicated cases in base coating of nails” from the teacher of the ParisNail school Velmitina Zaitseva.
You will receive a detailed algorithm for applying and fixing the material, learn all the secrets of the teacher and be able to avoid material detachments!
What is base alignment? Problems that may arise during alignment
As mentioned above, the base not only provides reliable adhesion of the natural nail to the artificial material, but also allows you to level the nail plate.
Alignment is the hiding of defects in the nail plate (irregularities, tubercles). Thanks to alignment, we get a perfectly shaped nail.
How is leveling done?
In most cases, alignment is done as follows:
- The first thin layer of base is applied, which is essentially a primer.
- Apply a second layer of base, which is evenly distributed over the nail, fading away in the area of the side ridges and cuticle, forming an ideal shape.
But in some cases, craftsmen perform leveling without applying the first thin layer.
Errors when working with the database. What not to do when applying base
- Applying too thin a base layer. It will cause all the irregularities and grooves on the nails to come out. A thin layer will affect the wear of the material. An unstrengthened nail will quickly begin to chip and crack.
- A base layer that is too thick , especially at the ends of the nail, will give unnecessary volume to the nail. And your nails will look like “pies”.
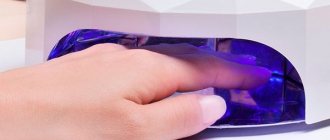
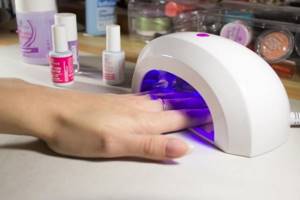
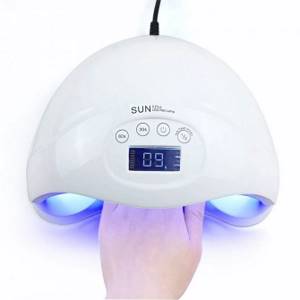
- Insufficient drying time for the base. Drying your nails for less than 15 seconds in an LED lamp is a mistake. The base on top will grab, but not on the inside. And by the way, there is a misconception that you can dry the coating later. There is a standard polymerization time: in a UV lamp 2 minutes in an LED lamp 30/60 seconds, depending on the material.
By the way, I found a very detailed video on this topic on YouTube.