Neon varnish: pros, cons, application secrets
Rich shades that captivate with their inner glow, bright colors that glow in the dark - that's all about
neon polish . The name “solar gas” began to be applied to unexpected, bold shades in the late 80s, when the fashion for outrageousness took precedence over classics and conservatism. Glowing nails in every sense are slowly but surely winning the hearts of young people today.
Varieties of pigment
There are 2 types of fluorescent powder:
- Invisible - Used in transparent substrates to create images that will only be visible under ultraviolet light or for sensitive markings (such as banknotes).
- Visible – has its own bright color, visible both in light and in the dark.
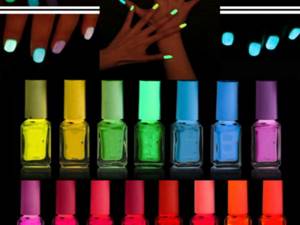
Today you can find a huge palette of colors of fluorescent powder - all the colors of the rainbow, fantastic acidic shades, delicate, bright, muted - for every taste. It is thanks to the wide range of colors that fluorescent powder is gaining increasing popularity.
What is neon varnish
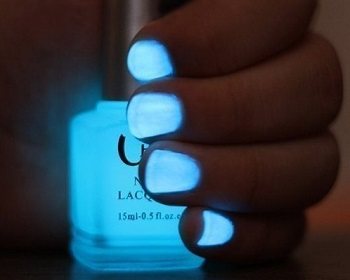
Unlike classic nail polish, neon contains special particles that allow it to glow in the dark. During the daytime, this pigment looks very rich. This feature of his could not go unnoticed by club party girls and young ladies. Being fashionable, bright and noticeable is the lifestyle of young people.
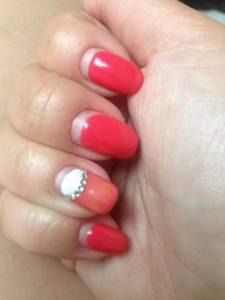
Today, this varnish is available in a very diverse palette, among which bed and muted shades should be highlighted. This range allows the older generation to use varnish. A lunar manicure with a neon design or a French manicure with a glowing nail tip is a trend for the coming summer.
Pros and cons of neon glow nail polish
The main advantage of this type of varnish is its attractiveness. All the rules of wearing it and the subtleties of application fade into the background compared to this unearthly beauty. But the “celestial bodies” also have their drawbacks:
- The polish is perfect for perfect nails. The manicure must be impeccable; even slightly smeared varnish on the cuticles will ruin the whole impression. Ideal nails are medium length and almond shaped. Remember that opaque varnishes visually shorten your nails and thicken your fingers;
- If handled carelessly, chips will form. Since the varnish tends to fade, all nails will have to be repainted;
- too “acidic” shades can penetrate the nail plate and stain it;
- coating requires a special style of clothing. It should be the only bright spot that does not cross out the wardrobe, but harmoniously complements it.
Secrets of applying neon nail polish
If you decide to do neon manicure at home, then you need to know some secrets:
Source of the article: https://www.figarohair.ru/manikyur/neonovyj-lak.html
A brief overview of glowing varnishes
Among the variety of luminous varnishes, we should highlight the products of such popular manufacturers today as Jerden, Dance Legend, El Corazon.
Luminous coating Jerden Crackle
This brand is known to all fans of fashionable manicure. And the presented varnishes with a luminous effect delight with their variety and quality. Moreover, the cost of such varnishes is affordable.
An easy-to-apply varnish with a luminous effect, Jerden Crackle adheres perfectly and retains its glow throughout the day .
Glow effect polish Dance Legend Top Party
Dance Legend Top Party Varnish
The bright, rich colors of Dance Legend Top Party will ensure attention at any party, and quick drying allows you to do a manicure with minimal time.
Minor disadvantages include the very strong smell of the product, which nevertheless disappears quite quickly. However, the long-lasting glow makes this varnish especially popular and attractive among young people.
Gel polish Hong Nuo
You can design your nails using Hong Nuo glowing effect gel polish. Ease of use and long-lasting glow ensured the demand for this gel.
The extension technique is the same as with conventional gel polishes . The absence of side effects is ensured by the quality of all components.
Neon gel polishes
Seasonality influences the choice of color for manicure - that's a fact. Summer is here, which means it's time for bright colors and designs. We know that many gel polishes are mixed with neon pigments, so they require special attention.
So, when working with neon gel polishes, manicurists encounter the following incidents:
- Colors fade under the sun's rays
- Dark spots appear on a fresh surface
Let's analyze the points in detail, because one case is enough, after which the manicurist becomes more experienced. It is important to be able to correctly explain to clients the reason for what happened, and to be an expert in nail service for them.
Color fading on nails is due to several reasons.
1. Colored gel polish may enter into a chemical reaction with the base coat and spots of a lighter tone will be visible on the nails. When the material is removed in these places, the base becomes yellow-orange in color. In the master’s vocabulary you can hear the following: ...the base “ate” the color.
We suggest trying to remove the sticky layer from the base, and only then apply color. Another option is to apply a thin layer to match the color of another base, with which there is no such reaction.
2. If a manicure uses a top coat without ultraviolet protection, then the colors will fade in the sun. Therefore, we recommend using topcoats with a UV filter for such colors. On the website rosilak.ru there is a PERFECT top, which has proven itself in protecting the gel coating from sunlight.
Now let’s find out why neon gel polish becomes stained immediately after coating.
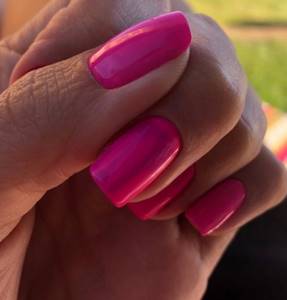
This is seen more often with bright pink flowers. Such stains may appear immediately or within 24 hours, since the polymerization process completely stops within 24-48 hours. However, if the client visits a solarium, the spots may temporarily appear again. Therefore, if during work a color with such a manifestation effect is identified under a large flux of UV rays, then be sure to warn the client about this in advance in order to avoid misunderstandings.
It is certain that the growth of professionals among nail service masters is changing the modern market of the nail industry towards a high culture of service services. Daily cultivation of the necessary rules: Being an expert and being customer-oriented will significantly raise you above your competitors and fill your cash register.
Our JOY collection includes neon gel polishes:
The most common problems in questions and answers
French gives off a yellowish tint.
Here it is important to understand exactly when this unwanted shade appeared and what provoked it. Very often, yellowing of the gel polish jacket is observed during the drying stage of the manicure. This is caused by the proximity of the fingers to the sources of ultraviolet radiation, that is, to the light bulbs themselves inside the UV device. Conclusion: the best option for applying and polymerizing gel polish is when each nail is coated and dried separately. In any case, your thumbs should definitely not be sent to the UV lamp along with the rest, because, due to the anatomical structure of the hand, they will be positioned differently, and this means problems with drying. If yellowness appears already in the process of wearing a manicure, then it could be caused by several reasons, for example: visiting a solarium, using self-tanning products, applying coffee bean-based scrubs to the body yourself (without gloves), and so on.
In some cases, yellowing of the jacket can occur even with an excess of natural ultraviolet radiation, especially for those girls who, in pursuit of an intense tan, abuse their exposure to the sun. A similar phenomenon is observed as a result of the appearance of microcracks on the coating, invisible to the human eye. Air begins to penetrate into it, causing yellowing of the white gel polish, as well as the appearance of stains on the colored one.
The gel polish does not apply uniformly, leaving bald spots.
But you shouldn’t be afraid of this at all. The technology for applying gel polish is multi-stage and includes 3-4 mandatory decorative layers. They must be thin, so it is not unusual that the first and second coats do not achieve the required degree of density and uniformity of coverage. Two subsequent layers will successfully correct the situation.
Gel polish is too liquid.
This applies to a greater extent to coatings with a low pigment content, that is, light pastel shades. To make, for example, light pink or nude color look beautiful, you need to paint your nail several times. Often the manufacturer deliberately makes the consistency more fluid to make application easier. After all, it is very difficult to cover nails with gel polish in 3-4 layers if it is thick.
Running onto the cuticle.
This situation is most often associated with a deviation from the correct technology for working with gel polishes. Many beginners, trying to apply a decorative layer as close to the cuticle as possible, do not maintain the required one millimeter indentation. But we are talking about a gel-based coating, which expands slightly in a UV lamp and, as a result, can flow onto the cuticle and skin. Also, bleeding onto the cuticle occurs in those who try to speed up the process and paint all their nails at once, and not one at a time, as recommended by professionals. Conclusion: applying gel polish at home will turn out no less beautiful than in the salon, if you do not neglect the rules.
Gel polish wrinkles, gathers towards the center, and forms bubbles.
If the gel polish wrinkles or gathers towards the center of the nail, then most likely there is a problem with the application. The layers were not thin enough and did not have time to dry thoroughly. Conclusion: it is better to apply 3-4 thin layers than two dense ones. Take your time and work on each nail separately. If bubbles appear when applying gel polish, there is also an explanation for this. This happens when the bottle is shaken (during transportation, as a result of improper mixing of the pigment). If the gel polish has been transported, wait and let the product settle before using it. For good pigment distribution, do not shake the bottle, but lightly roll it in your palms. Such problems could also be caused by improper storage, as a result of which the product lost its original properties. Have you ever wondered why many manufacturers produce gel polish in darkened glass bottles? The fact is that this material is susceptible to ultraviolet radiation and therefore must be stored where the sun's rays do not penetrate. But here’s one secret from the professionals: when applying, do not make sudden movements with the brush, otherwise small air bubbles will also remain on the surface. Work smoothly.
Gel polish does not dry.
Too thick gel polish layers do not polymerize well, and also if the master overdid it with their quantity, trying to hide the shortcomings of unprofessional application. It would be a good idea to pay attention to ultraviolet light bulbs. Over time, they lose their original properties and therefore must be replaced regularly, at least once every three to six months (depending on the intensity of use of the device).
Another reason for poor polymerization of gel polish is that some shades, regardless of the manufacturer, tend not to dry at all (for example, there are products that do not harden in LED lamps) or are characterized by a longer drying period. No advice will help here. If you come across such a capricious product, then this is a matter of chance and there is no need to blame the seller, because he cannot predict which shade will behave this way.
By the way, very often novice masters complain that the gel polish has not dried because it feels sticky to the touch. In fact, residual stickiness is a standard phenomenon during the polymerization of these coatings. Also, one should not talk about poor polymerization if you use gel polishes with a high degree of pigment saturation (dark, very bright shades), which I paint on a napkin when removing the sticky layer. This is a variant of the norm and does not mean at all that the coating has not dried. By the way, such complaints most often arise from beginners, who complain that the pigment reaches behind the brush of the top coat and, accordingly, then gets into the bottle, spoiling the top coat itself. Experienced masters always know how to work correctly with pigmented gel polishes and apply the top coat with a different brush than the one that comes with the bottle. Sometimes a slight deviation from the technology is allowed, when the residual stickiness is removed from the pigmented gel polish before applying the top. In general, there are many subtleties and nuances, and to learn about them, you need to undergo training.
The gel polish is removed with a film and chips off.
There are many reasons for this phenomenon. It is impossible to list everything, so we present the most common ones. In some cases, masters experiment (or save money) and perform gel polish manicure using a decorative coating from one manufacturer, a base from another, and a top coat from a third. In general, they sculpt from what is at hand. And the most surprising thing is that very often such a varied “pie” wears very well. But there are exceptions. Don't want any unpleasant surprises? Then listen to the basic recommendations and do not mix products from different brands in one manicure.
Another reason for poor wear of gel polish may be that the master neglected to use a dehydrator or primer (ultrabond), limiting himself to just one thing. This is fundamentally wrong, because these tools perform completely different functions and do not replace each other. The use of a dehydrator is especially important in case of hyperhidrosis (wet hands) and after performing the classic “wet” manicure procedure. The effect of the drug is expressed in the elimination of excess moisture from the top layer of the nail plate, while the deeper layers are not affected, the water balance does not disturb, and the nails do not suffer from brittleness and drying out. As a rule, the dehydrator contains no flavorings or dyes and does not cause allergies. It is important to understand that the dehydrator removes excess moisture, and the primer (ultrabond) is responsible for adhesion of the nail plate to the decorative material. For those with naturally wet or frequently sweaty palms, it is recommended to use both a dehydrator and a primer. A third reason for chipping and peeling may be due to improper sealing of the end. This should be done at the stage of applying each layer of all coatings.
Before decorating your nails, you should not use oils and hand creams, because it is quite difficult to remove them from the surface of your nails. The traditional trimmed manicure with soaking the nails in a bath, performed immediately before applying gel polish, is also a gross violation of technology. Remember - no wet procedures associated with prolonged exposure of marigolds to water. Only dry cuticle processing, best with a milling cutter. Also, gel polish does not wear well on improperly processed nail plates (the eponychium has not been pushed back, the overgrown cuticle has not been removed), on peeling or bumpy nails, and in the presence of other problems with their health. It is impossible not to mention another reason for the poor wear of the gel polish coating, which is the use of non-acytone liquids. Let’s say that before applying gel polish, the client independently removed regular polish from her nails using such a gentle product, supplemented with oils, vitamins and various other special ingredients. Of course, the master will be able to level out most of them with a modern degreaser, but some will still penetrate deep into the nail and may well negatively affect the durability of the gel polish manicure in the future.
The gel polish coating is difficult to remove and has to be cut off.
Perhaps the master overdid it with the primer, treating the entire surface of the nail plate with it, and not the area near the cuticle, on the sides and end. By the way, in order to quickly remove gel polish, before applying a special product you need to work with a buff to remove the gloss. This is a mandatory condition and cannot be neglected. It should also be taken into account that the longer the gel polish remains on the nails, the more difficult it can be to remove. And you will certainly have to tinker if you do not immediately ensure the tightest possible fit of a napkin soaked in a special product to the entire surface of the nail plate.
Gel polish on nails is cracking.
As a rule, some owners of long manicures encounter a similar phenomenon. The fact is that the nails are constantly experiencing various loads - they get caught here, hit here, and so on. And the longer they are, the more susceptible to deformation. And even if the nail plate itself accidentally bent and did not break thanks to the gel polish, this means that it was the decorative layer that took the blow and therefore may well crack. For example, working at a computer, when you constantly tap on the keyboard with overgrown nails, is stressful and can also cause cracks. In addition, the end of the nail plate, when interacting with the surface of the keys, gradually loses the protection of the top and finish, which subsequently leads to chipping and peeling of the gel polish.
Chips and cracks are common when using topcoats without a sticky layer. These coatings have low elasticity and give the effect of glass. When bending the nail plate, a top coat without an adhesive layer may not withstand tension and crack. As a rule, such tops are intended for design and decoration.
Gel polish lasts on the nails for only a couple of days, even with strict adherence to the technology.
In fact, such cases are quite rare, but they still exist. And the reasons should be sought in the characteristics of the female body. Sometimes the problem arises due to the presence of autoimmune diseases and diseases of the central nervous system, hormonal imbalances, and the use of antibiotics and vitamins. Even simple stress can affect the durability of a manicure. Everything is very individual and it happens that a small error during application, which could go unnoticed, coincides with some processes in the body and the gel polish wears much less than usual.
Duller than the top.
The problem of top coat fading is often related to improper removal of residual stickiness, for example, using the wrong liquid. Also, you cannot remove stickiness from all nails with the same napkin; it is better to provide separate napkins for each nail or choose new areas from a common one. Do not rush and remove the stickiness immediately after drying in the lamp; it is best to do this after the top has cooled.
Neon manicure 2022: 100 best summer nail design ideas
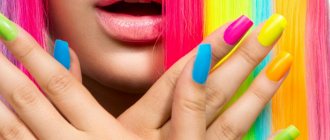
A neon manicure will prevent your nails from looking dull and boring. Neon colors are bright, stylish and especially suitable for the summer season. Neon has quickly become a favorite among stylish celebrities such as Rihanna and Katy Perry. Therefore, neon nails will always be a fashion trend and will be in demand among girls who follow fashion and beauty. We offer the latest selection of photos, a portion of inspiration for neon ideas for your nails. You will find a wide variety of designs for yourself: from fashionable patterns and designs to bright colors and various techniques.
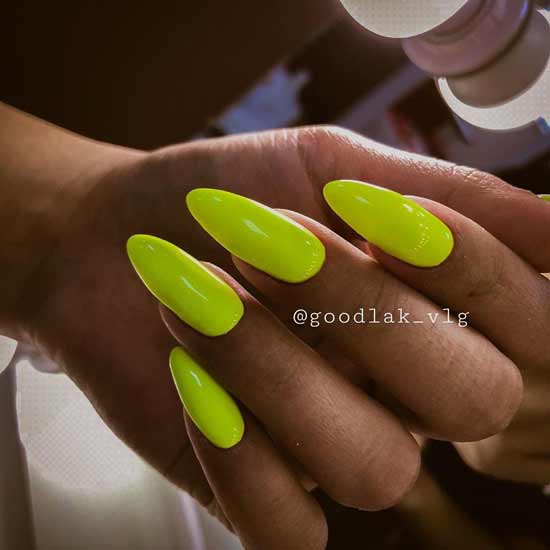
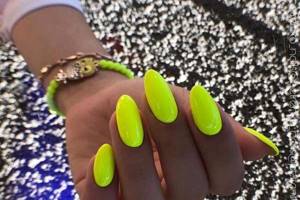
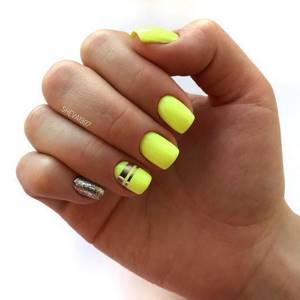
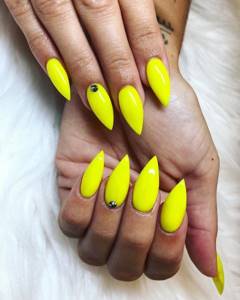
Bright neon nail polishes are nothing new for summer. But unlike the usual shades we are used to, which we are already tired of, acidic ones are the “hottest” colors for nails! So, neon nails are regaining their former glory and returning in a sour bright lemon color to all fashion catwalks.
Thus, Bella Hadid was recently spotted with a neon manicure while visiting Paris. And Kim Kardashian wore this shade of nail polish. Rihanna is also a fan of neon manicure, complementing it with stylish accessories. Be bold and experiment with this bold nail color.
Creation technique
All techniques for creating designs with neon nails have a number of features.
If several layers are applied, let each one dry, otherwise it will crack and bubble.
Pencil
This special product is a good option for a bright manicure. It will neatly fill the space.
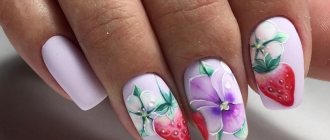
It is very convenient to draw neon flowers on your nails with a pencil, they turn out beautiful.
Varnish and gel polish
There are regular acid-colored varnishes on sale; they won’t last long on your nails, but you can do a manicure yourself without special tools or equipment. The product is applied using a brush in a bottle in 2 layers.
There are also neon shellacs. To apply them, you need a UV lamp in which to dry your nails. For durability, use a base base, as well as a finishing top. Manicure lasts 3-4 weeks.
Pigment
Neon nail pigment is a fine powder of a rich shade. Its composition is similar to starch.
To make a drawing using pigment, a dry brush is dipped in it and applied to the sticky layer of the base. The ornament is covered with a top coat and dried in a special lamp.
A variety of colors allows you to get new unusual shades, adjust the intensity, make your nails matte or shiny.
Powder
This product consists of crushed acrylic, resembling a powder in structure. In contact with the gel, the powder hardens and forms a hard surface. It anchors the design well.
Bright color options (pink, orange, etc.) are used for interesting solutions
by decoration. Powder particles fall on the entire plate or only part of it.
How to use neon nail powder:
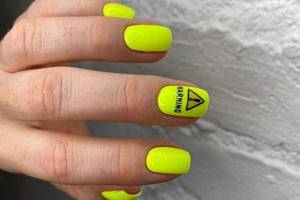
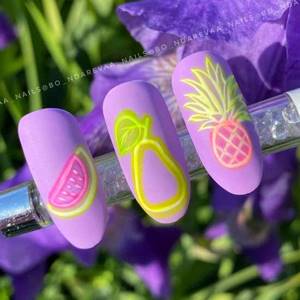
Neon Sign Design
The design is fashionable and simple. You can write and draw anything. The most popular design this year: OPEN signs, pineapple or pear fruits. The key to the success of the technique is just two things: choose the right pigment and consistency. This manicure is an excellent option for a casual and sporty style; it will be ideally combined with a denim look.
In neon light: bright manicure ideas
Anything but a boring classic? Those who are ready for bold experiments with manicure will find varnishes in neon shades.
it will take 4 minutes to read
Text: Alina Kharaz
Content:
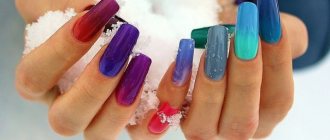
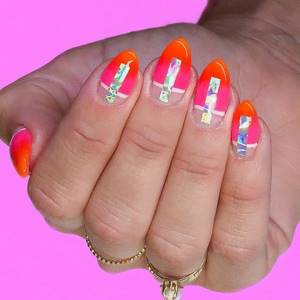
If a manicure is done with neon polish, you can’t just call it bright - it’s a real explosion of color on the nails, which even without design will not go unnoticed. True, like many other unusual beauty solutions, neon manicure requires mental preparation - it is difficult to predict whether the polish will be too “screaming” or not. Let's tell you more about how to use neon colors in manicure and what neon design options exist.

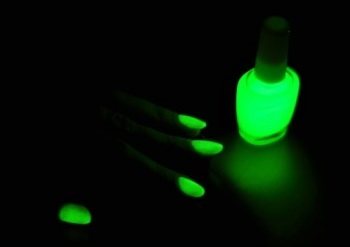
Applying fluorescent nail polish
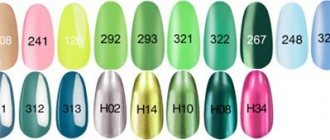
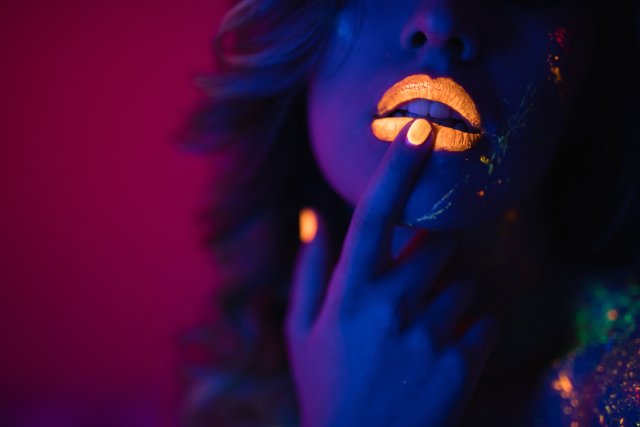
Light green and blue shades are considered the brightest, but you can choose other shades that suit your taste. The brightness of the glow depends on the concentration of pigment in the varnish. To understand what nail color will turn out under neon lighting, carefully study the color chart before purchasing nail polish. It indicates the color of the varnish in daylight and when exposed to ultraviolet lamps.
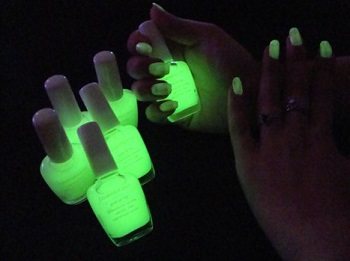
Experts confirm that such varnish is absolutely safe for human health, and its use does not have any harmful consequences. Fluorescent polish can be applied to both natural nails and extended nail plates.
Glow powder can be added to gel and acrylic, which are used to cast nail plates. Subsequently, the nail made in this way will glow under neon lighting, even brighter than with regular varnish.
Features of neon manicure
The main feature of neon manicure is, of course, its brightness. Not everyone can afford to wear this color on weekdays, so experiments with neon nail polish are often left for vacation.
But there is a nuance here: you need to keep in mind that neon nails contrast even more with tanned skin. This property of neon shades is well known to those who have ever bought a swimsuit in such colors.
Before creating a neon manicure, it is better to check whether the polish glows in the dark. Otherwise, it may come as a surprise when a manicure that is moderately bright during the day begins to show its “acidity” in the evening. Decide whether you need such a result at the stage of choosing a coating.
If you want a manicure with neon polish to look catchy at any time of the day, use this life hack: apply white polish as a base, and then distribute colored polish.
Manicure technique
There are no particular difficulties with using a luminous coating, since the technique of applying such varnish is simple and in many ways similar to conventional varnishes. This manicure can be done using one of two types of preparatory means for applying luminous varnish . This can be a primer and corrector . The difference between them lies in the technique of performing manicure.
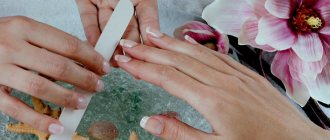
Manicure made with glowing varnish
To perform such a manicure, you will need ordinary nail clippers, a nail file, a special product or acetone for degreasing nails, the luminous varnish itself and a primer or corrector .
If a primer is used, then a base can be used underneath it. If it is a corrector, then you should choose a regular colored varnish on which the corrector will be applied.
A step-by-step manicure with glowing varnish is as follows:
The corrector is applied to an existing layer of varnish , and since it is a diluted colorless varnish, its glow is somewhat less than that of the primer . For this reason, you need to apply the corrector in five to six layers - this will provide a brighter glow in the dark.
The more uniformly the luminous coating is applied, the brighter the manicure will be . You also need to remember that with nails that attract the attention of others, your hands should be in perfect order: bright varnish should be applied to treated and very neat nails.
The question often arises: is it possible to make a building gel glow at home? To do this, a luminescent pigment is added to the gel polish or acrylic. The main thing is to evenly add this pigment and thoroughly mix the gel polish.
Design in neon shades: 2022 trends and ideas
Neon nails have no chance of going unnoticed even with a single-color coating, but this is not a reason to refuse interesting design options. The most fashionable beauty solutions for 2022 are in front of you.
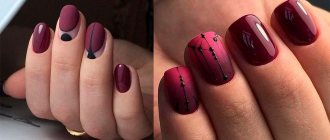
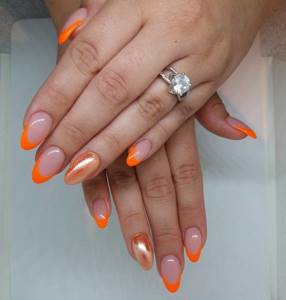
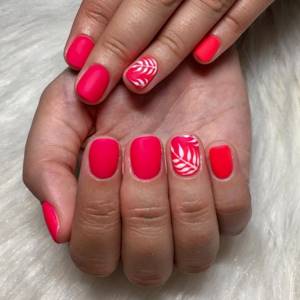
Neon French
Judging by the photos in beauty blogs and on the pages of popular nail artists, there can be a great many variations of the French look using neon polish. And they all look original enough on the nails that a manicure with a familiar design won’t be considered banal.
“Acid” tips in tandem with a neutral matte background or a combination of two neon colors using the French technique - both options are possible; Also, in such a design, neon and nude are often combined - a neutral powdery shade of varnish. The result exceeds all expectations: a soft and delicate contrast is obtained.
Matte neon manicure
Contrary to expectations, the matte “finish” does not reduce the brightness of the neon manicure. On the contrary, the color thanks to this coating becomes even more striking. Some people completely matte their nails, while others choose more complex beauty solutions - and only make matte the color blocks of the actual design. Even if there are few of them, the contrast of textures will make nail art more expressive.
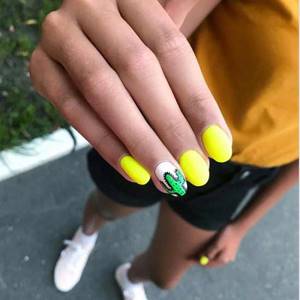
neon gradient
One of the main advantages of neon shades is that they all combine freely with each other. Therefore, you can create a gradient manicure using any colors: pink and yellow, green and blue, blue and red - they look good in a pair, and the ombre effect will make the duet even more harmonious. By the way, as in French manicure, in a gradient manicure you can successfully combine neon and a soft flesh tone.
Application
The pigment particle size is about 15-80 microns, this allows you to obtain smooth and even painted surfaces. In its normal state, in daylight, it looks like an ordinary powder of a rich color (lemon, red, green, blue, etc.).
How to use fluorescent powder? Depending on the purpose of use, the powder is mixed with a binder in a certain proportion. Connectors can be:
- acrylic varnish, gel polish;
- epoxy resin;
- glycerol;
- oil;
- polyester resin;
- liquid latex;
- wax emulsion and so on.
Application is carried out using a brush, airbrush or sponge.
Fluorescent powder is used in different areas, usually more with a decorative or advertising bias, since its distinctive feature is to attract attention. Areas of application:
- floristics;
- airbrushing, car styling;
- Interior Design;
- decoration of restaurants, bars, night clubs;
- clothing and shoes;
- souvenirs, masks, badges;
- drawings on the body, body art;
- painting;
- technical application: leak detection in complex systems;
- manicure;
- advertising products, posters, billboards;
- decorations.
The use of fluorescent substances is safe for health.