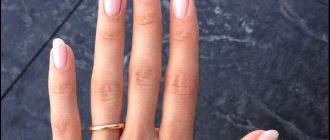
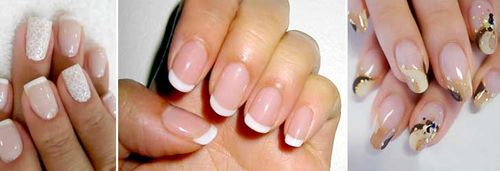
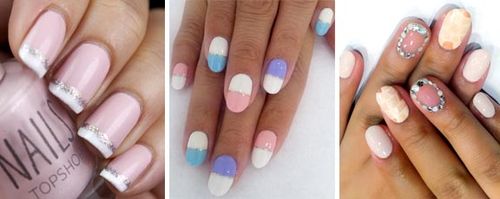
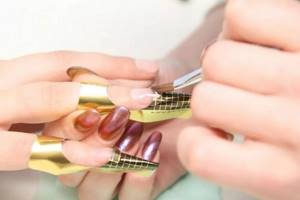
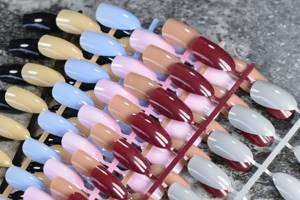
Correct application of gel polish on tips
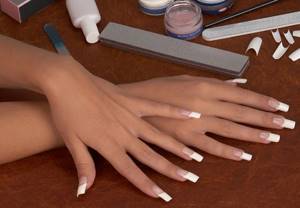
Nail extensions are one of the most common ways to lengthen the nail surface. The process can be carried out using a special gel or overhead tips. Any of these materials will help give the desired shape and design to your nails.
Applying gel polish to tips is the most common option, because Shellac can advantageously emphasize the special beauty of false nails.
What are tips?
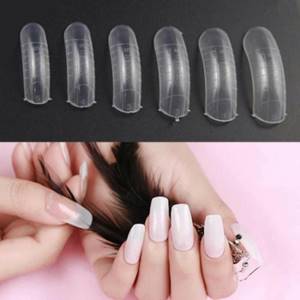
Tips are an artificial nail template that is glued on top of the natural one using special glue. The main purpose of using tips is to lengthen the nail plate.
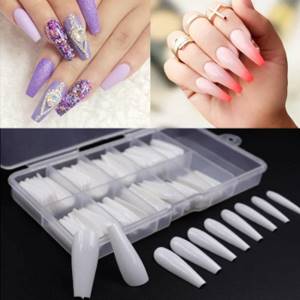
Plastic templates for nails are distinguished:
- Shape (elongated, curved or straight).
- By color (white, transparent or matching the color of a natural nail, available with colored designs).
- By purpose (for French or adding length).
When searching for suitable material, you should be extremely careful, as you can often find fakes of low quality. Such tips bend poorly, weigh down the nail plate and do not allow air to pass through to the nail. All this leads to premature correction.
High-quality tips are made from elastic materials that allow the nail plate to breathe. This artificial nail template is as close as possible to the natural one, so the master won’t have to file off a lot of unnecessary stuff.
What to choose: tips or forms
Naturally, each of the presented techniques has both advantages and disadvantages.
Tips
Advantages:
- A great way to lengthen brittle and thin nails;
- The finished form does not require additional adjustments;
- The process of forming artificial nails is accelerated.
Tips
Flaws:
- Limited model range;
- Not applicable to downward growing nail plates;
- Peeling in the bonding area.
Forms
Advantages:
- Significant change in the shape of the nail;
- Wide range of models;
- Increased resistance to mechanical stress.
Flaws:
- More time is spent on the procedure;
- There is no possibility of gluing to a severely damaged nail plate.
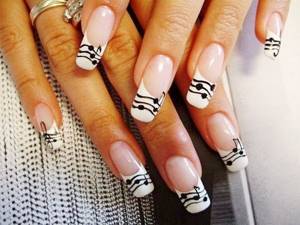
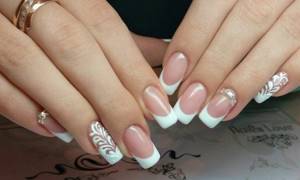
Extended nails with music notes patterns
Whether it is possible to use tips or another method of extension directly depends on the skillful hands of the master. Also, considerable responsibility falls on the manufacturer of manicure accessories. The main thing is to carefully and properly care for artificial nails at home.
Right choice
When lengthening your nails using tips, pay attention to some factors that significantly affect the accuracy of your manicure.
- If the shape of your nail plate is flat or, on the contrary, too convex, you should purchase special tips that fit the shape of your nail.
- For standard-shaped nails, the most common templates are suitable and do not require any additional actions.
- If it so happens that the surface of your nail is “wavy”, you can take standard tips, but you need to glue them with a special glue - gel. It is he who is able to fill all the unevenness of the nail plate and tightly attach the artificial nail. This glue dries for a long time and is extremely convenient to use.
- When the free part of the nail grows upward, in this case a short length of the tip is what is needed, since such a nail will not become deformed as it grows.
Choose tips strictly according to these rules, because the beauty of artificial nails depends entirely on their accuracy and naturalness.
Acrylic or gel?
Alisa Patrakeeva, manicurist: “Nowadays in the nail service it is customary to talk not only about nail extensions, but about nail modeling. Using acrylic and gel, defects in the client’s nail plate are corrected. Nails can be different: downward growing, springboard-shaped (the tip “looks” up), it happens that the nails grow slightly to the side, and not straight. Modeling corrects defects in natural nails.”
Acrylic technology
Pros of acrylic:
• acrylic nails are more durable than gel nails, since the density of acrylic is higher than that of gel;
• you can remove acrylic nails, unlike gel nails, using a special solution without filing them;
• acrylic French looks more natural than gel;
• it is best to correct nail defects with acrylic, since it is possible to “sculpt” the nail, but the gel only spreads.
Cons of acrylic:
• unpleasant, pungent odor of monomer during the extension procedure;
• some types of acrylic acquire a yellowish tint when removing brightly colored nail polish (by the way, you can only use liquid without acetone for acrylic nails);
• acrylic nails are more difficult to do from a professional point of view, so it is difficult to find a good nail technician.
Gel technology
Pros of the gel:
• since the gel is more like glass, some types of designs look more interesting under it, for example dried flowers;
• easier to find a master.
Cons of the gel:
• gel nails can only be removed by filing;
It is important to remember that none of these materials are worse or better. They're just different. And you need to determine what is right for you.
Some tips for wearing artificial nails:
• If you have never had long nails, grow your nails a little longer first so that you gradually get used to them.
• On the buttons of the telephone, remote control, etc. It is better to press only with pads, not to knock on the table, keyboard keys, etc. Many people, believing that artificial nails are more durable than natural ones, begin to put more stress on them, which leads to disastrous consequences.
• To keep your nails healthy, you need to nourish not the nail plate itself, but the root of the nail, which is located just below the cuticle. This is where the nail is formed. If you nourish this place with oils and creams, the nail plate will grow healthier.
• If you decide to remove artificial nails, then after this you can take several paraffin baths in a beauty salon to restore the nail plates. We can talk about complete restoration of the nail plate after extensions only after the nail has completely grown back, that is, after a couple of months. But, as a rule, if artificial nails are removed correctly, no dangerous consequences should be expected, but just remember that your nails are now thinner and need to be handled with care.
By the way, extended or strengthened nails save you from bad habits (squeezing pimples, picking cuticles - this is simply impossible to do with thick nails). Extensions help you get rid of the habit of biting your nails and restore your nail bed. On the other hand, with artificial nails it will be difficult for you to do some useful small work (fasten an earring, chain, etc.)
Tip processing
Having selected the tips you need, do not rush to glue them right away; first, take a few steps that will make your false nails more natural.
An artificial plate requires the following processing:
- Remove the sharp corners of the tip according to the shape of your nail.
- Carefully sand the artificial plate so that it fits snugly and completely follows the shape of the nail.
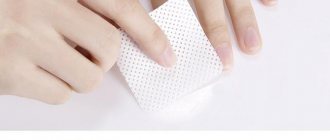
- Thoroughly degrease each tip.
After treatment, try to touch the artificial nails as little as possible so that excess particles from your hands do not spoil the strong adhesion.
Coating
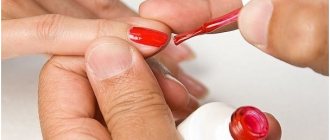
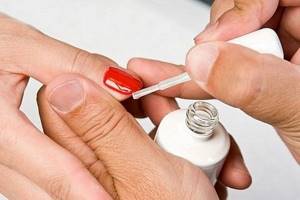
To complete your manicure, you need to know how to coat the tips with gel polish to make your nails look natural and well-groomed.
The gel polish is applied in two stages. First, a thin first layer is applied to the prepared surface with a brush, which is distributed evenly over the entire area. Then it must be dried well under an ultraviolet lamp. The second layer is applied in the same way. After the gel polish has completely dried, the surface of the nail is carefully sanded. Remember that it should be perfectly smooth, as in the photo.
Now you can apply a pattern to a new nail, glue rhinestones, or make any design.
We remove tips
Even if the extension is done according to all the rules and with high quality, it must be removed periodically so that the nail can rest. Therefore, many are interested in the question of how to remove gel polish from tips.
You can go to a salon, or you can do it yourself. The main thing is to do everything carefully. To remove, you will need any acetone-based manicure remover, cotton pads, foil, files, cuticle sticks.
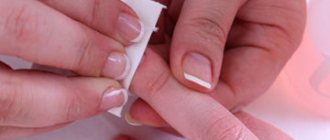
Using a nail file, carefully file off the top layer of the nail. Then soak the cotton pads generously with nail polish remover. Wrap each nail with a disk, put a foil cap on top, and hold for 15-20 minutes.
Foil caps are not very comfortable to hold. They constantly fly off and tear. It is much more convenient to use special tips for removing gel polish. They are made in the form of a clip-clamp and are shaped like a nail. Therefore, the cotton pads will be securely fastened.
After wrapping, the varnish becomes soft like wax and can be easily removed with a wooden stick. If the varnish has not softened well, you need to repeat the wrapping procedure again, as in the photo. After removing all the gel, let the nail dry and buff it. Apply a protective varnish to it.
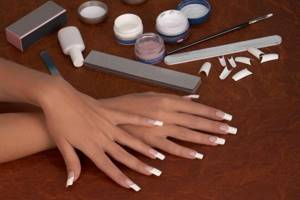
Preparing nails for lengthening
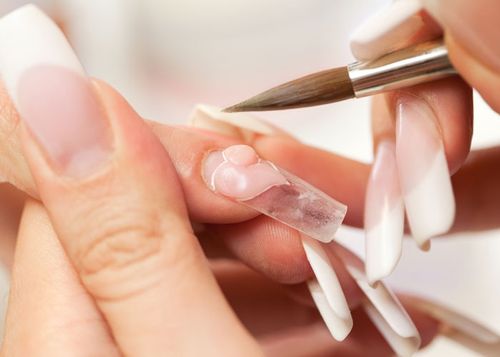
Before applying gel polish to the tips, you should properly glue the artificial nail. Although this process takes a little time, it is also the most responsible.
- First of all, we put the handles in order.
We perform nourishing or softening baths (depending on the needs of your skin).
- We process the nails.
We remove or push back the cuticles, clean the nail ridges from excess skin.
- File your nails to the desired length.
It is better to make the nail plate shorter, leaving a free edge of 3 - 5 mm. This length is well suited for working with tips.
- We polish each nail.
Here it is enough to remove the glossy layer.
- Apply degreaser, followed by primer and let dry completely.
- Now you can safely apply glue to the feet - the line marked on the tips.
We wait 10 – 15 seconds, gently pressing it onto the nail.
After making sure that the material holds tightly, you can safely move on to the next stage.
Types of tips for nail extensions
There are tips not only for nail extensions, but also on daisies or holders. They are used to paint a palette of colors of varnishes and gel polishes, to demonstrate the design. Such tips, of course, are not suitable for extensions.
We are only interested in three types of tips:
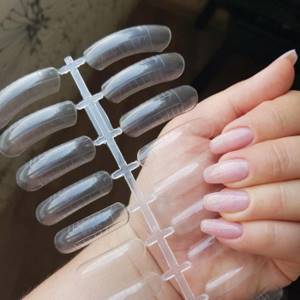
Bottom tips
They are also called tip tips. Previously, they were simply called extension tips, but with the advent of new types of templates, it was necessary to give them a distinctive name.
These are the most “ancient” of the tips on which nail extensions are performed. They are made from ABS plastic (the most widely used), polyflex or nylon.
Important! To check these tips for quality, try bending them a little. If after this you see that a white stripe appears at the bend, it means they have poor elasticity.
Visually, the tips are divided into two halves: the smaller one is the contact zone (attached to the nail), and the larger one is the free edge (responsible for the length of the future nail). There are also non-contact tips (there is no contact zone and there is no separation). They are considered more suitable when performed after building up a French style design.
There is a wide variety of tips in the shape of the free edge: square, almond-shaped, stiletto, etc. However, this same shape can always be changed with a file if desired. The bend on the contact side of the tip may also differ: concave, convex or v-shaped.
In addition to the shape, the tips also differ in color. The most widely used are transparent ones, since in this case it is easier to match the color to the natural nail with a modeling material. There are also tips in a translucent milky white color, matching the color of natural nails, with a French zone and even with a pattern. But they are not very popular.
These tips are usually sold as a set for the size of each of 10 nails. But since everyone's nails are different, sometimes you have to file them a little wider to make them perfect.
Let's summarize by noting the advantages and disadvantages of lower tips.
Pros:
- Durable, shape well, but at the same time elastic,
- Variety of colors and shapes,
- Widely distributed, cheap and available,
- Suitable for all artificial materials.
Minuses:
- Disposable,
- They require sawdust after modeling,
- It's not always easy to choose the width,
- Poor quality glue can cause detachments,
- They form an extra layer, which can make your nails look thicker.
Top tips
Can also be found under the name upper forms. They have a more curved configuration, as they are designed to model the nail from top to bottom. That is, the material is distributed directly onto the tip, and only then transferred from it to the natural nail and polymerized, after which the plastic is removed from the nail.
Such forms can be used repeatedly (it is stated that one set is enough for more than 100 extension procedures). They simplify the painstaking work of leveling the nail bend zone (stress zone or apex). This reduces the time spent on filing and shaping the modeled nail.
Pros:
- Reusable,
- Easily shape the nail
- Fewer layers and time for the procedure,
- Suitable for gel, acrylic and polygel.
Minuses:
- Higher cost
- May not suit some nail shapes,
- Nails that are too long can cause pecking.
Liquid tips
Also reusable and the principle of operation is somewhat similar to the upper forms. They are made from a flexible polymer, so they are softer, which allows them to be used on nails of a wide variety of shapes.
Suitable for working only with gel, a more liquid material, which is why they got the name “liquid”.
They differ from the top tips in that they do not form the entire artificial nail, but only its base layer, on top of which modeling material is then laid out.
The tips have a mesh applied to them, which will help with laying out the smile line, which will be very appealing to beginners. Another convenience is small handles at the ends to make it easier to remove the mold after drying.
Pros:
• Due to flexibility, they are suitable for different shapes of natural nails,
• Reusable, can be used up to 300 times,
• Convenient to remove,
• There are markings for laying out a smile.
Minuses:
• Can only work with gel,
• Modeling time is longer than using upper forms,
• Cost is higher than disposable ones.
It is impossible to say unequivocally which of the listed tips for extensions is better. You can draw such a conclusion for yourself only after trying everything in practice.
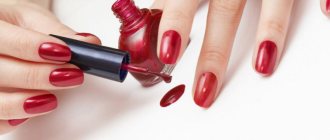
Application of color coating
It is recommended to start the process of covering artificial nails with the little finger of the right hand, drying each nail in a UV lamp. Only in this case will you be protected from getting gel polish on the cuticle.
The coating procedure itself consists of the following steps:
- Level the surface of the existing nail.
- We file down the free edge and give it the desired shape.
- Apply degreaser.
- We “merge” the natural nail and the tip.
To do this, apply an even layer of gel to the entire surface, paying attention to the end of the nail, and then dry it. The surface should be flat and smooth, without sharp transitions or notches.
- Switching to gel polish.

Apply a thin but even layer of Shellac until the desired color density is achieved. Dry each layer thoroughly in a UV lamp.
- If desired, we do artistic painting, use sand or rhinestones to give a bright design to your nails.
- We apply the finish coating, paying special attention to the end, and then dry it.
- Remove the sticky layer and apply softening cuticle oil.
After all procedures, we moisturize the skin of our hands with a nourishing cream.
Nail plate extension with gel
Currently, stylists use three main types of gel:
- Single phase. Here, one product is used at all stages of creating a coating.
- Two-phase. Naturally, two substances are involved in the simulation. One product is applicable in the process of direct extension to create the shape and strength of the nail. The second substance levels the top layer and gives it shine and smoothness.
- Three-phase. Therefore, when making adjustments, it is necessary to have three components: basic, formative and fixing.
The use of the scheme is directly dependent on the method of creating an artificial nail. For example, if you use tips, you can use a single-phase or two-phase circuit. Their durability is enough not to remove the artificial layer from a natural nail.
Using tips
In addition, gels for formed nails are divided into sensitive and non-sensitive to light. In the first case, to impart hardness to the substance, it must be dried under a UV lamp. This is the main condition for the strength of the applied layers. The instructions also indicate the degree of sensitivity to light rays. After exposure to the lamp, it becomes difficult to remove such a coating.
When considering the second type of gel, it should be borne in mind that it requires a special product to harden. In one case it may be ordinary water, and in another it may be a catalyst. Their consistency is much denser and the cost is higher.
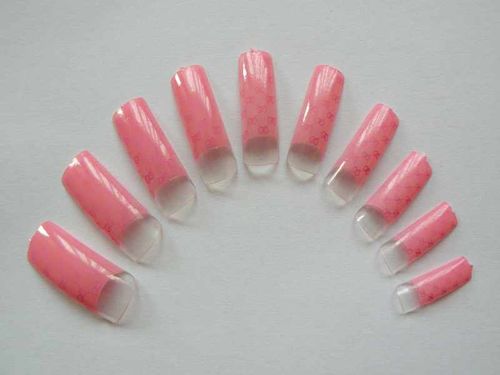
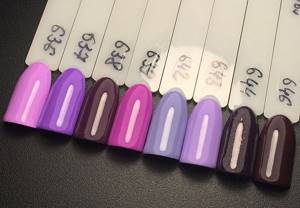
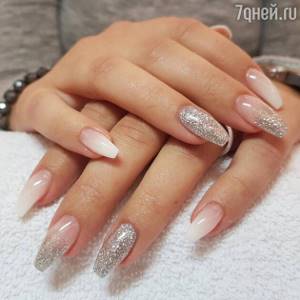
Tips - pink color
How does the correction happen?
No matter how “strong” your manicure is, after two to three weeks the nail plate grows back and correction is no longer possible.
The main steps are as follows:
- Carefully file off the “old” layer of gel polish without damaging the nail plate.
- If necessary, remove cuticles.
- We eliminate all irregularities present on the surface of the nail. When peeling off the tips, apply an additional layer of gel to tightly attach the artificial part of the nail.
- If the surface is leveled, we begin the already known process of applying Shellac.
Remember, any extension partially injures the nail plate, so give your nails a “rest” from time to time.
Form extensions
Extension forms are stencils with markings and a window. The markings allow you to calculate the appropriate length and width of the nail. The templates are applied to natural nails, covered with gel and hardened. Unlike tips, the forms are removed at the end of the procedure, so the nails are less thick.
Forms are disposable and reusable. Disposable forms are also called soft forms and are made from paper or flexible plastic. The advantage of these forms is that they are very pliable and easily take the desired shape. On the other hand, they may become wrinkled during the procedure.
Reusable molds are made of metal or hard plastic. They are more expensive, but quickly recoup their cost. The convenience of these forms is that they do not deform during operation, gel does not leak through them, and they eliminate gaps. If you choose the most suitable shapes for each nail, you will not have any problems. It is important to remember that reusable forms must be disinfected before each use.
What is needed, besides shapes, to create a chic length?
Materials for extension onto forms
To apply nail extensions to forms, we will need the following set:
Nail modeling gel polymerizes only under the influence of UF radiation; an LED lamp is not suitable for extensions. You can use an LED lamp to design your nails with gel polishes.
At first glance, it seems that you need a lot of materials, but most of them are universal and, if you love manicure and do it yourself, they will be useful for other purposes.
You can't do without antiseptic! Remember to disinfect. Untreated nails, hands and tools are a risk for fungal infections. Medical alcohol, chlorhexidine or lotion with an antibacterial effect are suitable as an antiseptic.
So, we have everything you need for nail extensions on forms. It's time to figure out how to do this.
Extension on forms. Step-by-step instruction
Stage 1
Any beauty procedure begins with disinfection. We treat our hands and nails with an antiseptic.
Stage 2
We perform a manicure, trim the cuticle and remove the pterygium. We file the free edge, then use a buff to remove the gloss from the surface of the nail plate. Using a brush, remove nail dust.
Stage 3
Degrease your nails using a dehydrator. We apply a primer for better adhesion of the material to the plate.
Stage 4
Cover the nail with a very thin layer of base coat. Dry in a UF lamp for at least 2-3 minutes (depending on power).
Stage 5
This is the most important step, where you need to show skill and maximum accuracy. The final result depends on the installation of the forms. We install the forms using a metal plate and tubes to press the “arch”.
If you are completely new to extensions, we recommend using solid forms. When working with them, you just need to choose the right size and carefully adjust them to each nail.
If you are working with soft forms, first adjust the window to the size of the subungual arch. Make sure there are no gaps, otherwise the gel will leak into the holes, and this will be noticeable during regrowth.
What if you get very soft shapes? In this case, we recommend gluing the two forms together so that they are denser and do not wrinkle.
Extend your nails into shapes using the following pattern: 4 nails on one hand, then 4 nails on the other hand, then thumbs. If this is your first time doing this, the best option would be to work on each finger individually.
Stage 6
We form an artificial nail using modeling gel.
How to apply the gel? To do everything correctly, we divide the nail into 3 zones:
Next, we proceed to the direct application of the gel:
Stage 7
Now we remove the sticky layer so that the dispersion does not prevent us from adjusting the surface of the plate and the free edge. Next we remove the forms. We grind the resulting nail so that the surface is as smooth as possible, and correct the shape of the free edge. Usually, dispersion is needed for materials to adhere, but in our case, the materials will be fixed by grinding the surface.
Stage 8
Apply camouflage gel or colored gel polish in 2-3 layers (depending on the density of the pigment). Dry each layer in a UF lamp.
Stage 9
We decorate the nails in accordance with the chosen design, adding decorative elements if desired.
Stage 10
Apply top coat and cure. Preferably twice as long as in the previous stages.
Stage 11
Remove the sticky layer. We treat the cuticle and periungual ridges with oil.
Why gel polish?
Shellac is a fairly durable material that occupies one of the first places when choosing a high-quality coating for both natural and artificial nails.
Advantages of the material:
- The dazzling gloss will not wear off or fade for several weeks.
- When applied correctly, gel polish has a long service life, without chips or abrasions.
- Inexpensive manicure for everyone.
- Shellac can be applied to an artificial or natural nail surface.
- The varnish is environmentally friendly to the body and is allowed during pregnancy and lactation.
- Even a beginner with little experience can handle the application.
The main thing is to follow the correct technique for using gel polish and only then will you be able to consider the significant advantages of Shellac coating.
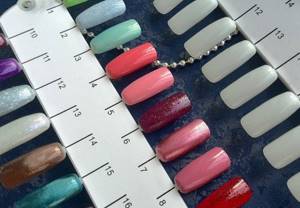
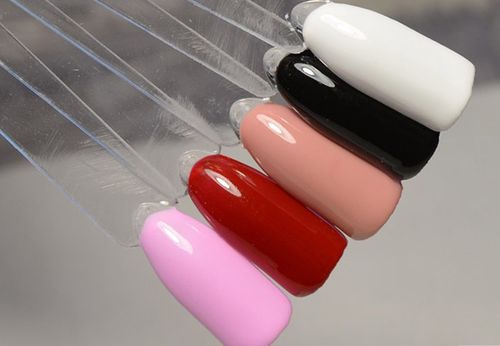
How to choose a good palette
You may be interested in:Fluorescent polish: features and nail design options
There are different plastic molds for applying varnish samples. Some have a completely transparent structure, others are milky, and others are white.
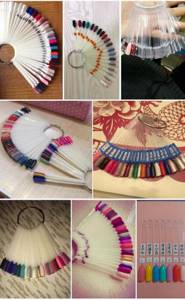
To apply the sample, it is better to use milk palettes. Or natural, slightly yellowish in color. The applied sample on them will be closest in color to the painted nail.
Some palettes cannot withstand the action of solvents - acetone or alcohol. These are not worth purchasing. Good professional palettes are made from durable plastic and are easy to work with.
Helpful information
If you decide to add length to your nails, you should learn some basic rules that will help you achieve maximum naturalness of your nails.
- Correctly chosen tips are the key to a successful manicure. Each nail should be given special attention, since cutting out the desired shape of the nails of the right hand may not coincide with the left.
- The tip application should take up a little less than half of the entire nail. If the artificial nail takes up more space, it needs to be cut down.
- Do not ignore the process of polishing the nail plate. You should not file off the entire nail, just remove the glossy layer for a strong grip.
- It is better to apply the glue to the tips using a toothpick. Remember, the specially designed material dries within 15 seconds, so act quickly.
- For beginners, it is better to purchase a special gel glue, as it takes longer to dry. Its adhesiveness is high, but at the same time you have time to apply it evenly and carefully glue the tips.
- The artificial material is so versatile that you can apply regular nail polish over it to create a “quick manicure.”
An artificial tip will serve you for quite a long time, but as the nail grows, you will have to resort to correction.
Do not forget that chemical compounds have a detrimental effect on your nails, so take breaks between extensions. At this time, take nourishing baths to strengthen your nails with the addition of sea salt or special restorative mixtures for nails.
Rubbing in, extensions, gel polish – which manicure is safer?
For those who don’t want to think about the beauty of their nails every week, there are several options for permanent manicure. If earlier we could only consider extensions, now gel polish has appeared, and more recently, the rubbing method. But how do these types differ from each other, and which one is safer?
How nail extensions are created
Extending nails using tips is a thing of the past, and acrylic with its pungent smell also went there. Nowadays artificial nails are created using acry gel. This material allows you to create any shape and length of your nails, even if they grow poorly.
The composition is applied to the primer using a damp brush and secured with a topcoat; the result is analyzed in a lamp at each stage. The shape of acry-gel nails is smoothed using a file and a device.
Acry gels come in color, and then you just need to apply a top coat on top. And there are transparent ones, then gel polish or a special camouflage coating is applied on top, also based on the composition of the gel polish.
How does extension affect nails?
Extensions are a gift for weakened nails that often break and grow poorly.
Contrary to popular belief, the extension compound cannot destroy the nail plate, unless, of course, correction is done regularly, preferably after three weeks.
What is gel polish nail polish?
Gel polish coating became a new milestone in the history of manicure 10 years ago. Without any extensions, the girls received a manicure that lasts on their nails for up to a month.
The essence of this technique is that a special acid base is applied to the nail to improve adhesion to the surface of the plate, polarized in a lamp, then a colored coating and top coat (each stage is also recorded in a lamp).
The first “swallows”, or rather the bases of gel polishes, were very acidic. These compounds dried out the nail plate, affected the cuticle area and harmed the health of the nails.
Such products disappeared from sale about 5 years ago. Now the percentage of acid content in gel polish lines is strictly controlled by the European Union, and the content of these components has been reduced to the required minimum. Therefore, you should not be afraid of permanent manicure.
How does gel polish affect nails?
On the forums, a number of girls complain that gel polish does not stick to their nails. For some it falls off immediately or after a few days, for others after a week. This happens for several reasons, and the gel polish itself has nothing to do with it. The nail plate of such girls may be very wet due to health problems or hormonal changes. No acid primer will work on a wet surface. Accordingly, the varnish will not adhere to the plate and will quickly fall off.
The second problem is onycholysis or detachment of the nail plate, which can occur due to injuries or improperly performed manicure procedures throughout life (for example, if the master filed the nails too much on the sides). This nail plate is very mobile; the coating also moves along it, which slides off and falls off.
If girls have the above problems, it is better for them to give preference to nail extensions with colored gel polish. This will be a worthy way out of the situation.
Some girls avoid permanent manicure because they believe that gel polish is harmful to their nails. There is a rational grain here, but the problem is not in the procedure, but in the master. Many “craftsmen” use old terribly acidic bases to make the coating last longer, or pour the gel almost under the cuticle. This greatly dries out the nail surface and cuticle. Therefore, you need to carefully choose a specialist, ask for documents on the composition of gel polishes in the salon, and still you need to rest your nails for a while and go without coating just with a hygienic manicure. For example, once every two months.
How does the rubbing method differ from the above procedures?
Manicure using powder originated in America, became popular in Europe two years ago, and recently came to Russia. This method is very different from all previous ones. And most importantly, it does not require polemicization in a UV lamp.
Experts say that this manicure is suitable for absolutely everyone, lasts a month, and most importantly, it makes the nails strong and does not allow them to break.
Source
Photo of nail polish coating
Even more photos at the link: Gel polish photo.
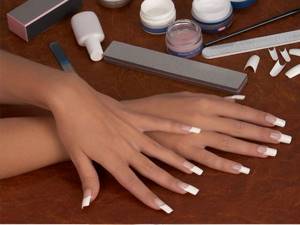
Extensions with tips
Tips are plastic false nails that are glued onto natural nails. They can be transparent, white or colored and are selected individually for each nail.
Tips are ideal for short, narrow or irregularly shaped nails. Tip extensions can also be performed in one, two or three phases.
To make your manicure look truly natural and aesthetically pleasing, you need to choose the right tips.
How to choose suitable tips?
Here are some recommendations for wisely choosing tips:
• The plastic from which the tips are made must be elastic and thin. • The size should correspond as much as possible to the size of natural nails. • For convex and flat nails you need to choose special tips. • For uneven, wavy nails, it is recommended to use a gel adhesive that fills in the unevenness.
You can buy tips using our website with delivery throughout Russia.
Materials for extensions onto tips.
For extensions using this technique you will need the following materials:
Extension with tips. Step-by-step instruction
Stage 1
We prepare the workplace, disinfect hands, tools, materials and surfaces. To make it more convenient to work, you can select tips and immediately arrange them in the order of gluing on each nail. Tips should not exceed 2/3 of the natural nail. The excess must be carefully cut off. You cannot glue tips that are narrower than the nail. It is better to choose the one that is wider and carefully file it to the size of the nail.
Stage 2
We perform a manicure, trim the cuticle and carefully remove the pterygium. If pieces of skin remain, this may cause the gel to peel off. We cut off the free part of the nail to 0.5 millimeters and process it with a file. Use a buff or file to remove the glossy surface from the nail plate. Clean it with a brush.
Stage 3
Apply glue to the tip up to the step line, which is applied to the edge of the nail. To improve adhesion, you can apply glue to the area where it joins the tip. Apply the tip to the middle of the nail at a slight angle and press the rest of the nail. The line of the step should coincide with the edge of the nail. For gluing, hold for 15 seconds. If you find bubbles between the tip and the nail, try to squeeze them out or re-glue the tips.
Stage 4
Using a tip cutter, we remove the excess length, giving the nail the desired shape. Using files with large cells, we file the tips for leveling. Using a buff or the same file, we treat the surface of the tips for better adhesion to the gel. We pay special attention to the junction of the tip and your nail. Using a file, we clean this place as thinly as possible so that the transition is invisible. Remove dust from nails and finger skin with a brush. We treat the nails with a degreasing solution, apply a primer and polymerize.
Stage 5
Let's start working with the gel. Apply the first thin layer. Be sure to retreat about a millimeter from the cuticle and side ridges. Dry in a UF lamp for 2-3 minutes. Apply a thicker layer to the middle of the nail, gradually reducing it towards the sides. Dry at this stage for at least 3 minutes! If you experience discomfort from heating your nail, you can take a break and then continue drying. When interrupting drying, turn the nail down so that the unformed layer of gel does not spread. After drying, remove the sticky layer.
Stage 6
Now we give our nails the final shape. Using a file or buff, we process the surface of the nail, removing any unevenness in the arch. We clean the sides and the area of the nail near the cuticle, reducing the coating to nothing as much as possible. We file the tips of the nails so that they are as thin as natural nails. We process irregularities on the free edge. We wipe off the dust with a brush.
Stage 7
We're almost done! Apply the final coat so that it lays on the nail in a thin, even layer. This time we also cover the places left earlier along the side ridges and cuticle. Dry in a UF lamp. Some manufacturers produce a topcoat that does not have a sticky layer. If there is such a layer, then it must be removed.
Nails are ready! We treat the cuticle with special oil.
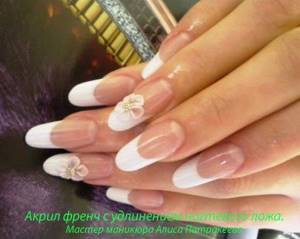
Tip extensions are also used to create a beautiful French manicure. A tip is attached to the base of the nail with glue, then gel is applied to the artificial material. The gel nail is dried in a UF lamp. Depending on your wishes, a smile is painted on top of the gel, or between layers. Beauty!
note
Unlike gel, working with acrylic is more difficult. This is a less plastic material and you need to work with it with clear movements and quickly. Another disadvantage of acrylic extensions is its pungent odor and the possibility of allergic reactions. However, there are also advantages over gel: a harder coating, easy to remove, you can model complex shapes and designs of artificial nails.
In addition to tips, you can perform gel nail extensions on forms. These are special templates made of different materials, which are removed after extension.
Tips for nail extensions are conventionally divided into three zones:
- contact (the area where the template is glued to the nail);
- stop line (located on the inside and aligned with the natural nail when gluing);
- free edge (varies in length and shape).
We recommend: Spring nail designs: a variety of shades and styles
When choosing tips, you should take into account the thickness and elasticity of the material from which they are made. Among the most popular materials are nylon and ABS plastic.
Stage 2. Preparing the nail plate for coating
Next, you need to prepare the nail plate for coating with gel polish. This stage is very important, since it determines how well the adhesion of the natural nail and the artificial coating will occur. To carry out proper preparation, we will need the following materials:
The acid-free primer acts as double-sided tape and ensures strong adhesion of the natural nail to the artificial nail.
The acid primer lifts the keratin scales of the nail plate for better adhesion to the artificial material. Since the acid primer contains aggressive components, you must be careful not to get it on the skin and cause a burn. It is recommended to use it before extensions for girls with wet or oily nail texture.
What do we do at this stage?
Kinds
Like gel polishes, paints can have a sticky layer after polymerization. But this doesn't always happen. There are also those that do not require dispersion removal. But these are not all the differences between gel paints. They are also distinguished by the following types of structure:
- dense;
- translucent;
- transparent.
Thick paints completely cover the nail, resulting in a monochrome coating. Translucent, as well as transparent, you can tint the previous layer or create the effect of stained glass, penumbra, gradient, etc.
With a sticky layer
There is no particular difference between the result obtained after using gel paint, which has or does not have a dispersion layer after drying. It's more of a production cost. If you use this product, you will need additional liquid to remove stickiness.
Paints with a dispersion layer allow you to create designs using the casting technique and other effects where “gluing” is necessary, for example, velvet manicure.
No sticky layer
For a manicurist, a product without a sticky layer is more convenient to use. Most modern paints have lost the ability to leave stickiness after drying. Practicality is evident: after each drying step under the lamp, you do not need to wipe your nails. Also, products without a sticky layer do not need to be fixed with a top coat if the surface of the design covers less than half the area of the nail.
Paints without a sticky layer are optimal for all painting techniques. You can create original design options by combining a dense texture with a transparent or translucent one.
To help a beginner: how to choose starter kits for applying gel polishes for a nail artist?

The question worries every master who is just starting his journey in the nail industry.
There are many brands, textures and colors of gel polishes, but it is difficult to tell a beginner how many and what kind of work should be in a master’s case before starting work. Therefore, today we will deal with this topic, answering all the questions that have arisen.
To begin with, to start a business, each master needs to purchase ready-made manicure kits.