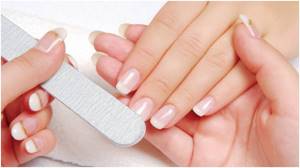
Today, many girls for whom the beauty of their hands is important strive to master the basics of manicure art on their own. It’s more difficult for them than for professional craftsmen, because they have to look for answers to many questions on their own. Yes, and for those who have received a diploma as an oil master, sometimes it is not easy to master working with some material.
Currently, a huge number of products are being produced. And technologies from different manufacturers may vary. This is why situations arise when the usual established technique does not bring the results that we would like to expect.
Our article is devoted to one of those issues that cause a lot of controversy in the beauty communities. Do I need to remove the sticky layer from the base? Most professionals answer this question in the negative, but if everything were so clear, disputes would not arise at all.
What is a sticky layer
Many gel materials, which include bases, varnishes, building and strengthening gels, paints for painting and top coats, polymerize in ultraviolet or LED rays and form a sticky layer. Why is this happening? During drying, the substance passes from one state of aggregation to another, and a crystal lattice is formed. The process is accompanied by the release of a dispersion liquid, which is the very stickiness that can be seen on the surface. In some cases, heat is also released - it is because of this that materials are said to be baked in a lamp.
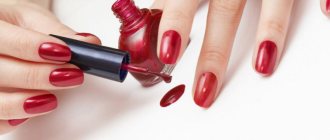
Applying single-phase varnish: useful tips
Correct application of single-phase gel polish requires not only compliance with the sequence of actions, but also knowledge of some subtleties:
- A layer that is too thick will cause “waves” to appear and the coating will peel off quickly. It is better to make two layers, drying each of them.
- Gel polish should be dried in accordance with the manufacturer's recommendations. If your hands are in the lamp 2-3 times longer than indicated in the instructions, then such an intense coating, on the contrary, can ruin the coating rather than fix it.
- Minor imperfections made when applying the first layer can be easily corrected with a second layer, especially if a dark or rich shade is chosen.
Applying single-phase gel polish at home, even by an inexperienced master, will take less than half an hour, so taking care of your manicure will not require a lot of time. In addition, such products are also very profitable, because there is no need to purchase accompanying consumables: top coat, base, means for removing the sticky layer and others.

Will there be a sticky layer on the base?
Many people know that there are tops without a sticky layer. But it is unlikely that you will be able to find a base with such a feature on sale.
Why is that? Because in some cases the stickiness of the top interferes with the master. Non-dispersion material is used for complex designs. For example, it is used to color rhinestones and bouillons. Removing stickiness from a non-uniform surface is extremely problematic.
The base is top coated with varnish, gel or top without fail. The craftsman does not have to wipe the material lying in the thin crevices between the rhinestones and opals. Even if the stickiness is not needed, it is quite easy to remove it from the base. Therefore, almost all bases on the market are not without this stickiness. When buying a new material, be sure that after drying you will find stickiness.
How long does it take to dry the base in the lamp?
The standard polymerization time for the base is two minutes in a UV lamp.
, one minute - in an LED
lamp
. For some manufacturers or at high power, the time may be different.
Interesting materials:
How to transfer contacts from a broken phone? How to spray flowers with peroxide? How to switch a double-circuit boiler to summer mode? How to move a photo from gallery to album? How to transfer data from a broken phone to a computer? How to transfer data from a phone with a broken screen? How to transfer data from a broken iPhone? How to transfer data from a broken phone to a new one? How to transfer information from a broken phone? How to transfer contacts from a push-button Nokia to Android?
Do I need to remove the sticky layer from the base?
But the dispersion layer is not only a side effect, otherwise manufacturers would have long ago figured out how to get rid of it. The sticky layer also serves to adhere the layers to each other. The coating adheres better when applied to a dispersion substrate. So is it necessary to remove the sticky layer from the base? It turns out that it is an integral part of the right technology.
But we have not yet received an answer to the question of whether it is necessary to remove the sticky layer from the base. It’s too early to draw conclusions. But let us remember that if there are no “aggravating circumstances”, you can simply ignore it. After applying the base and drying it, simply move on to the next step.
Why does single-phase gel polish sometimes not last well?
In order for your manicure to be durable, you need to use only high-quality products from trusted manufacturers. If, even if this rule is observed, the durability of the coating leaves much to be desired, this indicates that errors were made during application, due to which air bubbles appeared and adhesion to the surface deteriorated. How to apply single-phase gel polish correctly so that it does not lose its beauty even after a week?
- Do not shake the bottle before use.
- The polishing of the nail must be of high quality so that there are no grooves or other defects left on the surface.
- It is necessary to apply layers of medium thickness so that they can dry well.
- You can touch your nails only after the coating has cooled completely - a few minutes after application.
Despite the lack of base and top, single-phase products are in no way inferior to three-phase gel polishes. And for home use, this option is completely optimal, since its application takes almost the same time as a regular manicure, but its durability is several times higher.
Before sawdust
Thick bases are used not only to ensure adhesion between the nail bed and the decorative coating. Using this material you can level the nail plate and even complete the missing corners.
Of course, to get perfect highlights, you need experience, dexterity and theoretical knowledge. For a beginning craftswoman, the result may be the opposite: the base will not level the surface, but, on the contrary, will distort it. Material that is not laid out correctly can form sagging and bumps when baked in a lamp. What to do in this case? Will we really have to do a complete dismantling and start all over again?
Fortunately, the situation can usually be corrected with a file. It is enough to simply polish the tubercles and thickenings well, removing excess volume. But before you pick up the file, you need to remove the sticky layer from the base. Otherwise, you will get dirt and you won’t be able to get the job done quickly. Sanding a sticky surface is a waste of time. Wipe the nail, getting rid of the dispersion layer.
Gel polish does not dry in the lamp: reasons and ways to prevent them
The most common reason that gel polish does not dry in the lamp is that its expiration date has expired.

The photo shows an example of expired gel polish
Manufacturers indicate that their products can be used for 2 years, but this period should be counted not from the date of manufacture, but from the moment of opening/first use. It is also important to store gel polish correctly - away from heating devices, in a dark place.
These factors most often “work” on those varnishes that have too extravagant shades or are not popular. It will not be possible to solve the problem of expiration date, but a long break in the use of a particular material makes it necessary to carefully roll it in your palms before opening the bottle. It is strictly forbidden to shake such varnishes - the pigment will be distributed unevenly in the varnish, as a result the coating will be of poor quality.
How to apply thick varnishes correctly
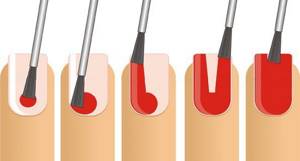
An example of step-by-step application of gel polish.
Many gel polishes contain a large amount of pigment - their colors are rich and bright. Professionals emphasize that such material should be applied with an absolutely dry brush and in an extremely thin layer - in general, it is better to apply 2 ultra-thin layers and dry them step by step than to get by with one “thin” one, reducing the time of the entire manicure.
If a thin layer was applied, but the gel polish still shrank and wrinkled after drying in the lamp, then this means that the thickness needs to be reduced. The application of ultra-thin layers of coating of highly pigmented materials also reduces their consumption, and at the prices of branded products this is relevant.
How to care for dryer lamps
You need to clean the equipment every day after finishing work, but change the light bulbs much less often - no more than once every 5-6 months, if you work with them every day and for 2-3 manicures.
In order for the gel polish to dry completely, you need to monitor the condition of the light elements - simply look inside the structure and identify those lamps that shine weaker or have gone out completely. This applies to all types of equipment, especially hybrid ones - if the master dries the coating for 60 seconds, then if only one element fails, the time should be increased. And if this does not happen, then the gel polish may not dry completely under the same working conditions.
Varnish and base of different brands
Some people believe that it is absolutely forbidden to use products from different brands. But if earlier such an idea was quite common, today most masters claim that this statement is greatly exaggerated.
And yet there is some truth in it. It happens that when using products from different companies, the varnish simply rolls off the base. Before you have time to finish painting your nail, you may notice a bare end or a gap near the cuticle. Let's not argue with the fact that some products are simply categorically incompatible. But in most cases, simply wiping your nails with a clinser is enough.
So, an important point that is also worth remembering: after the base, you need to remove the sticky layer if the varnish and base of different brands do not work well together. As a rule, this trick works well. But it also happens that simple wiping is not enough. Then it’s worth going over a well-dried base with a soft buff. There can be no clear recommendations. Experiment to determine which method works best for your materials.
Why does gel polish shrink, wrinkle, and curl up in the lamp?
If the gel polish shrinks, wrinkles, or curls after drying the nails in the lamp, then the reason must be sought directly in the material used:
- highly pigmented color - these will be bright, “dense” shades, in which a high concentration of pigment prevents the penetration of light rays, which prolongs the polymerization process;
- the shelf life of the gel polish has expired - it is usually calculated from the moment the bottle is opened (2 years), after this time the material not only dries poorly in the lamp, but also does not stick to the nails and can cause allergies (such residues are better used on tips);
- gel polish has not been used for a long time - the pigment in the bottle has already settled to the bottom, the composition becomes uneven, and this does not allow it to dry well, but if you carefully roll the bottle in your palms, the problem will disappear (it is strictly forbidden to shake it - bubbles will appear in the varnish, which then they will remain on the nails);
- the decorative coating was not stored correctly - the place should be dark and not hot so that the gel polish does not thicken and lies evenly on the nail plate.
Cheap gel polish, an outright fake of well-known brands, shrinks, curls and wrinkles in the lamp. That is why it is recommended to purchase truly branded decorative materials from suppliers with an impeccable reputation.
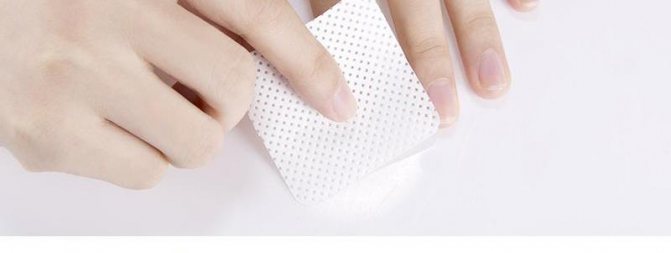
How to remove the sticky layer from the base
We looked at some special cases when it is necessary to remove the dispersion layer, and also talked about when this should not be done. If you are faced with a situation in which it is better to get rid of stickiness, you will probably wonder what is the best way to do this.
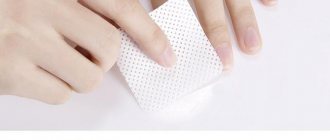
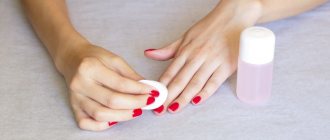
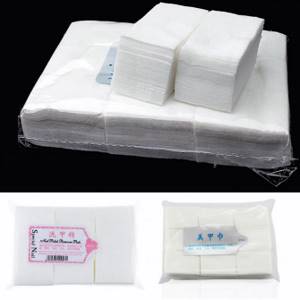
The ideal option is a special liquid. It is not so expensive that saving on it would be worthwhile, and its consumption is low. A pack of lint-free wipes will also last a long time. These are the best materials for removing stickiness.
But it happens that the right remedy runs out at the most inopportune moment. You can replace the clinser with alcohol tincture, cologne, and even regular vodka. But in this case, some side effects may appear, for example, clouding of the base, acquisition of a yellowish or gray tint.
You can also wipe your nails with nail polish remover, but you need to do this very quickly to avoid a reaction. If you hesitate, the base may peel off.
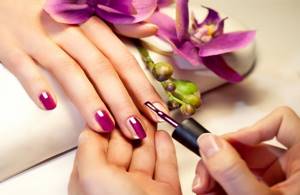
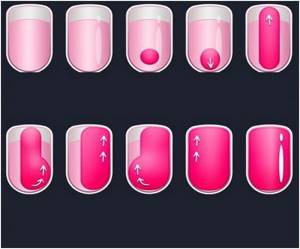
How to apply single-phase gel polish correctly?
The use of single-phase products differs from the classic version of manicure only in the number of actions. The step-by-step technique for applying single-phase gel polish includes the following steps:
- Treat the nail - you need to remove the previous coating, decide on the shape and length of the nail and polish it.
- Apply a nail degreasing agent that provides improved adhesion to the surface.
- Carefully paint over the nail plate - single-phase gel polish is applied according to the standard pattern, starting from a point in the middle of the nail.
- Remove any remaining product that has escaped from the nail - orange sticks are perfect for this purpose.
- Dry the surface in a UV lamp (2 minutes) or LED lamp (1 minute).
- Apply a second layer of gel polish and dry it.
This completes the work - using single-phase gel polish is really very simple, and it saves a lot of time. After the procedure, it is recommended to use a special cuticle oil, which will help soften and soothe the skin.
What not to do
The main thing to avoid is experimenting on your own hands. If you want to see how materials from different brands will work, practice on tips. Be sure to make a mark on the tip if you think it’s better to remove the stickiness from the base!
Do not use household chemicals or medications to remove stickiness. In general, you should be especially careful with any substitutes for professional products.
Never use cotton pads, sponges, napkins, paper or regular cotton balls to remove stickiness. Any material that leaves lint is detrimental to manicure. In extreme cases, lint-free napkins can be replaced with paper tissues. But working with them is much more difficult.
So, we have found answers to the question of whether it is necessary to remove the sticky layer from the base, when it is worth doing this and when not, and also considered what materials should be used for this.
Peeling of gel polish due to general health condition

Manicure on thin, weakened nails fades very quickly
- Weak, sick nails . An important, but not often encountered, factor in nail peeling is unhealthy nails. If a person has suffered from a serious illness and has weakened immune resistance, this affects the condition of the nails. Another common reason is nail plates damaged by frequent manicures.
Do not forget to carry out regular procedures to restore and strengthen the nail plates: baths, compresses, paraffin therapy sessions.