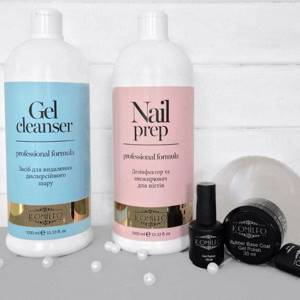
Today I decided to answer frequently asked questions regarding the sticky layer on the base, gel polish and top coat for gel polish: what role does it play, how to remove the stickiness and is it really that important if there are tops without a sticky layer. Let's figure it out.
A sticky or dispersion layer (or simply dispersion) is the residual stickiness on the gel polish, base and top after it has been polymerized in a lamp. It is very easy to feel it with your finger if you touch the surface of the gel polish after drying (but it is better not to do this). It serves for:
- increasing adhesion between layers of gel polish: base with colored gel polish and gel polish with finish;
- giving elasticity to the gel polish coating, which is very important if your nails are flexible and bend well.
What is the sticky layer and why does it remain?
When performing a manicure at home, enterprising young ladies take into account many points: the quality of the coating itself and accompanying decorative materials, sharpening the working edges of scissors or tweezers, as well as the optimal abrasiveness of the nail file. All this is under the sensitive attention of the craftswoman. The one thing that is often overlooked is removing the sticky layer. No, no, we are not talking about the standard removal of stickiness from the finishing top, but about the dispersion layer of the classic gel.
In order to answer the question asked 100% correctly, it is important to understand what exactly the mixture contained in the shellac bottle consists of. In fact, contrary to popular belief, the entire periodic table is not hidden behind transparent glass walls. Most often, the following ingredients can be seen in the formula:
| Formula Component | Its purpose |
| Plasticizers | Particles of a substance that gives the polymerized gel elasticity and plasticity. Plasticizers are especially important at the moment when there is a mechanical effect on the nail plate. It is the quality of the plasticizer raw material that determines whether the coating will be chipped or not. |
| Polymers | Another mandatory item in the list of ingredients of any gel polish. Polymers are designed to improve durability and increase the degree of adhesive adhesion of natural nail keratin to artificial coating. It is logical that in expensive varnishes the plasticizers are also of higher quality, while in budget ones they are cheaper |
| Solvents | It is a mistake to believe that polymerization is an ordinary process of hardening varnish under a UF or LED lamp. In fact, polymerization is the process of evaporation of solvents from the surface of the coating, due to which it hardens |
| Silicates | An auxiliary ingredient that should also be included in any varnish. Silicates control the degree of pigment settling and prevent the varnish from delaminating; they are also responsible for the overall viscosity of the consistency |
| Titanium dioxide | Another “chemical” ingredient. Essentially, this is a snow-white pigment that is added to almost every gel polish to emphasize the intensity of the original shade. |
| TSF | Perhaps the most “controversial” component of varnish. It is designed to improve the degree of adhesion of the coating and the nail plate, which directly affects the durability of the manicure. But such an additive is safe only in the absence of formaldehyde. Read the ingredients carefully |
| Mica | The component thanks to which we observe a delicate pearl shimmer. Essentially, mica is an accumulation of finely dispersed reflective particles that block direct sunlight or artificial rays |
| Camphor | The same plasticizer, but of natural origin. At the moment, camphor is being removed from use, as it is a powerful allergen. |
This, perhaps, is the entire “base” on the basis of which shellac or gel polish is then formed. Naturally, each of the presented components directly affects the quality of the coating itself, its intensity and durability, but part of the responsibility for this also lies with the master who processes the nail plates. So what is this sticky layer of shellac? Essentially, polymerization is the process of turning a measure into a viscous but liquid consistency, which gradually hardens under UF or LED lighting by evaporating solvents. As a result of this metamorphosis, a sticky layer called a dispersion layer is formed on the hard surface. It is needed for adhesion of materials of different nature. In the case of gel manicure, to increase the adhesive ability of the artificial gel and natural keratin contained in the nails.
In other words, dispersion is a by-product of drying the gel coating, necessary for better bonding of all layers of the gel and the natural nail. And answering the question: “Do I need to remove the sticky layer from the base?” – the answer is clear – “No!” A sticky layer is simply necessary so that all layers of the manicure - base, color and top - adhere well to each other. When removing the dispersion, both from the base and from the color layers, the manicure loses its strength; it chips and peels off from the nail faster.
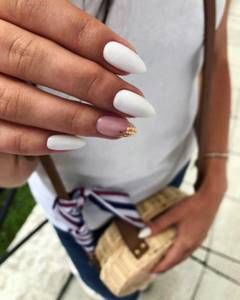
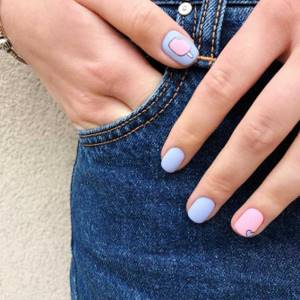
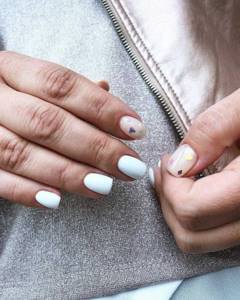
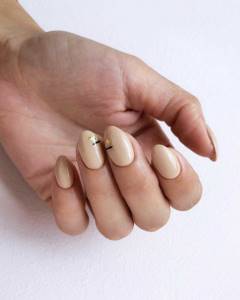
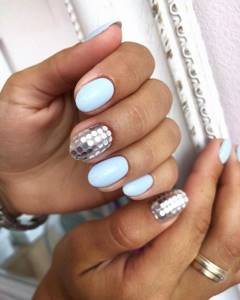
Photo of nail polish coating
In this section, we answered the questions that were most often asked in our group in VKONTAKE, and also met on various forums dedicated to applying shellac yourself.
Questions about applying and removing shellac at home:
How to apply shellac correctly? Do I need to buff the nail plate before applying shellac, or remove the sticky layer after applying the base coat?
The process of applying shellac includes several stages:
Attention!
Before applying shellac, treating the surface of the nail plate with a buff is not required!
Stage 1 - degreasing and disinfecting the nail plate
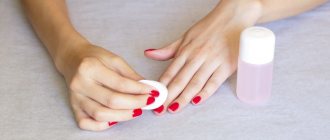
using a cotton pad (or lint-free cloth) soaked in a special product for degreasing nails and removing the sticky layer (for example, ScrubFresh from CND or Cleaner from Severina). Pay special attention to the side surfaces of the nail plate.
Attention!
There is no need to remove the sticky layer after drying the base coat! It serves to ensure strong adhesion of the color coating to the base coating, thanks to which the shellac coating stays on the nails for up to 2-3 weeks, depending on the individual properties of the nail plate.
Stage 2 - applying the base coat.
Apply Shellac Base Coat to pre-degreased nails and dry in a UV lamp (36 W) for 1 minute.
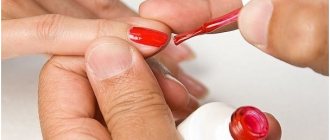
Stage 3 - application of color coating (Color).
Apply the first layer of colored shellac coating and dry it in a UV lamp for 2 minutes.
Then, apply a second layer of color coating and dry it in the same way, 2 minutes.
The color coating must be applied in a thin layer in order to avoid cracking and the appearance of unevenness.
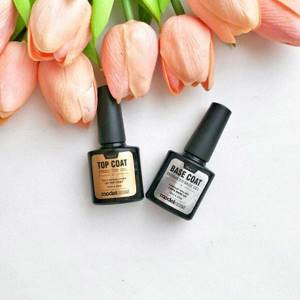
Stage 4 - applying the top coating (Top Coat).
Apply Top Coat and dry it in a UV lamp for 2 minutes.
Stage 5 - removing the sticky layer.
Using a cotton pad soaked in liquid to remove the sticky layer, carefully remove the sticky layer. (if you are using Shellac Top Coat without a sticky layer, this step is not required)
After completing the shellac application process, you need to lubricate the cuticle with a special oil.
You can learn more about the application process by watching our video instructions.
Do I need a primer and finishing gel when applying Shellac Bluesky?
Bluesky Shellac is applied in 3 stages: base coat, color coat and top coat.
First, before applying the base coat, the unfinished plate is degreased using a degreasing agent and removing the sticky layer. For additional, more thorough degreasing, you can use Ph bond (balanced dehydrator), which provides stronger drying and degreasing of the nail plate. Frequent use of Ph bond is not recommended, because it dries out your nails quite a lot, which can subsequently lead to increased brittleness.
Is it possible to apply 3 layers of color?
2 layers of color coating is the optimal number of layers to apply, because... This is exactly the amount that ensures a neat appearance of the manicure without weighing down the nail, and also stays on the nails longer. But if the color coating turns out to be too light, not dense enough, or does not lie smoothly enough when applied in 2 layers, a 3rd layer can be applied, provided that the coating is applied thinly and evenly enough.
What and how to remove shellac and how long does it take?
Shellac can be removed using any concentrated acetone-containing product, it can be a special shellac remover, a biogel remover, or a remover for acrylic and artificial nails. Also, for removal you will need cotton pads and ordinary food foil, which can be replaced with special “windings” for removing shellac.
The remover must be kept on the nails for no more than 10 minutes, then you need to carefully scrape off the softened, cracked coating from the nail plate using a wooden stick (orange stick or orange stick).
In total, the removal process takes no more than 20-25 minutes.
You can learn more about the shellac removal process by watching our video instructions.
Can shellac be removed with regular remover?
varnish or is only a special liquid suitable for this?
In principle, any liquid containing acetone is suitable for removing shellac. But if you remove it with regular nail polish remover, it will take much longer and as a result, gel particles may remain on the nails and make their surface uneven. When using a special product (for example, CND Product remove, x-stronge from Severina, etc.), you only need 10 minutes to completely dissolve the coating. At the same time, the nail remains completely clean.
What to do if shellac gets on your skin during application?
Nothing wrong with that! The main thing is to remove it before polymerization in a UV lamp. You can do this with an orange stick, or you can use lint-free wipes to avoid accidentally leaving lint on the surface.
Do degreasing and shellac removers have to be of the same brand as the coating?
You can use any manufacturer's product that suits you best for removing and degreasing. It is not necessary to use products from the same manufacturer as the shellac itself.
What to do if shellac is difficult to remove?
In order for shellac to come off easily from the nail plate, it is necessary that the shellac remover be on the nail for no more than 10 minutes.
If you have difficulty removing the shellac, you can first sand the top layer a little with a buff until the glossiness of the coating disappears.
UV lamps for shellac:
Is it possible to dry shellac in a 9 W UV lamp? If yes, how long does it take?
Unfortunately, it is almost impossible to dry shellac in UV lamps with a power of less than 36 W. Theoretically, this is possible, but as practice shows, it is practically impossible and the process can take up to several hours.
How often do you need to change the bulbs in a 36W UV lamp?
The frequency of replacing bulbs in a UV lamp directly depends on the frequency of its use. With standard home use of the lamp once every 2 weeks, it is recommended to replace the lamps at least once every 5-6 months.
Interaction of Bluesky shellac with gel polishes from other manufacturers:
Are Bluesky shellac base, color and topcoats interchangeable with corresponding coatings from other manufacturers, in particular CND?
Bluesky shellac is fully compatible with CND coatings. You can use both CND colors with Bluesky top and base, and vice versa. It is also possible to use ORLY gel polish colors with Bluesky top and base.
Is there a fundamental difference between CND Shellac and Bluesky Shellac?
There are no fundamental differences between the coatings. CND is the first and most popular shellac manufacturer and surpasses Bluesky in price. But nevertheless, Bluesky is a high-quality analogue of CND.
Using design elements when creating shellac manicure:
Is it possible to apply dry glitter with shellac coating?
Applying shellac using glitter is possible; it is best to pre-mix dry glitter with a small amount of top coat and apply it to the dried color coating, or instead of applying the color coating directly to the base, dry it in a lamp and then apply the top coat.
You can find out more about using dry glitter when applying shellac
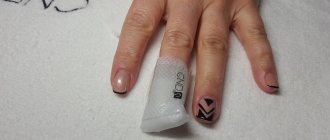
2.How to properly use stickers and rhinestones when applying shellac? At what stage of shellac application are similar design elements used?
Stickers and rhinestones are applied to the second color layer (it is best to apply stickers or rhinestones to the color coating that has not yet dried, then dry and cover with top coat). It is also possible to apply a thin layer of top coat to the dried colored coating and attach a sticker or transfer, dry it in a lamp, cover it with top coat and dry it again. in the case of rhinestones, a small drop of top is applied to the dried color, the wanderer is immersed in it, dried in a lamp, then the entire nail is covered with top and dried in a lamp for 2 minutes.
How to make a neat smile line when applying shellac without using stencils?
If you don't feel comfortable making a smile line with a shellac brush, you can use an angled design brush.
You can watch video instructions for creating a French manicure using shellac
How to make shellac surface matte?
To create a matte finish, there is now a special matte top, which is applied at the final stage instead of the usual top. After drying it in a lamp for 2 minutes, the sticky layer is also removed from it.
You can purchase the matte top on our website here.
General issues:
What is the difference between shellac and gel polishes?
Unlike gel polishes, the nail plate does not need to be filed before applying shellac. Also, when removing it, prior to applying the remover, no preliminary destruction (filing) of the coating is required.
Does shellac hide unevenness and defects of the nail plate?
Due to its density and the presence of the target component in the composition, shellac allows you to hide minor unevenness of the nail plate or significantly reduce its visible defects when they are more pronounced.
Attention!
Shellac should not be used if you have serious diseases of the nail plate, including fungal infections, which often lead to nail deformation.
What is the difference between a top coat with and without a sticky layer?
The difference is that after drying the top coat without a sticky layer, you do not need to wipe your nails with liquid to remove the sticky layer. Drying the topcoat in this case is the final step.
Why does shellac hold up very poorly for some people and after just a couple of days it cracks and comes off in layers?
Sometimes shellac may not adhere well to nails due to the individual characteristics of the nail plate, for example, in the case of an overly moistened or oily nail plate, with which the coating cannot adhere sufficiently. Also, shellac may not adhere well enough to a heavily peeling nail plate, because... the coating may fall off along with the partially peeling layer of the nail plate
Which color is best for beginners?
For those who are just starting to learn how to apply shellac at home, we recommend using light enamel colors (27CS, 40504, 40514, etc.) and light shades with micro-shine (59A, 40502, 40512, 40513, 40528, etc. .d.)
How to distinguish fake Bluesky shellac from real one?
The main distinguishing feature is the price. Real Bluesky shellac does not cost less than 350-400 rubles.
The second distinguishing feature is the smell. Real CND and Bluesky Shellac has a light odor, unlike fakes, which have a strong chemical smell.
7.How long after removing the previous coating can a new one be applied?
Shellac coating does not harm the nail plate, so if you remove the coating correctly and carefully, you can immediately begin applying a new one.
How to remove the sticky layer
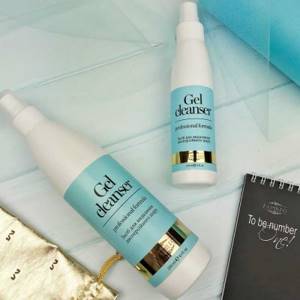
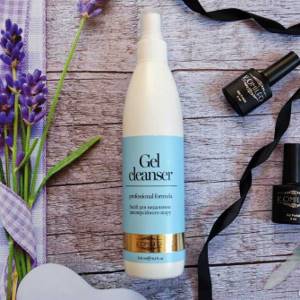
A newcomer to the nail service will probably have a question - how to remove the sticky layer without compromising the quality of the coating and what products from famous brands should be purchased for this. In fact, you should not pay attention to the price or name of the product. In fact, a specialized cleaner, which is the very liquid for eliminating dispersion, is an aqueous-alcohol solution of a certain concentration. Only, unlike its homemade counterpart, a pleasant perfume scent has been added to it. It is advisable to purchase a clinser of the same brand as the gel polish itself, as it is believed that they will interact with each other more harmoniously.
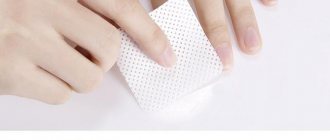
The algorithm for your manipulations is simple: moisten the napkin generously in the solution, and then use massage movements to remove the stickiness from your fresh manicure. Also, when eliminating the dispersion layer, use exclusively lint-free cloth wipes made from synthetic material. Standard cotton-based cotton pads not only violate the integrity of the coating, but also leave particles of their lint behind, which will visually spoil the appearance of manicured fingers.
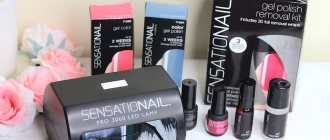
Many women are interested in the question: is it possible to remove the sticky layer with nail polish remover? After all, it copes perfectly with all its stated functions. Well, let’s be categorical here - it’s better not to start such experiments and still fork out for a professional cleaner. Why? Yes, simply because the liquid contains highly concentrated acetone, which corrodes even plastic. What do you think it will do with a thin coating? That's right, it will remove not only the dispersion, but also the varnish itself. To be fair, let us note that some non-acetone analogues do not contain acetone directly, but contain ethyl acetate, glycerin and isopropyl alcohol. Again, the purpose of such a liquid is to remove nail polish from extended nails without damage. Some brands of cleansers, such as Sensationail, still contain acetone, but in a very low concentration, and only as an addition to the alcohol base. This allows you to combine the stripper and degreaser into one solution. Although here, most likely, acetone gives a more drying effect, because isopropyl alcohol itself dissolves fats quite well.
How to choose a cleaner
- compound . Make sure that the composition contains oils - lavender, rosemary. And extracts, for example, chamomile. Additional components take care of the nail and allow the cleanser not to dry out the skin;
- clinsers with pump dispenser . They are much more convenient to use and allow you not to be distracted by wetting the napkin;
- smell. A pungent odor, both chemical and fragrance, can cause headaches if inhaled for a long time. Try to purchase cleansers with an unobtrusive smell.
What is a primer and when is it needed?
When to remove the sticky layer
Beginners are probably wondering: how to remove the sticky layer from the top coat and when is the best time to do it? And if the first point has already been considered by ProstoNail specialists, then the second requires somewhat more detailed elaboration. In fact, everything is quite easy: you just need to complete your trendy manicure with a layer of top coat (glossy or matte finish - at your discretion), and then, having additionally sealed the free edges of the plate, put your fingers under the ultraviolet radiation of the lamp. After waiting for a certain period and turning off the timer, let your fingers cool a little. Literally after a couple of seconds, take a lint-free napkin (cotton will leave traces of cellulose), moisten it generously in the cleanser and pass it over the dispersion layer. If you strictly adhere to the sequence of actions declared in this instruction, then no problems with the durability, gloss or pigmentation of the coating will arise in the future.
What to do when a salon manicure begins to lose its attractive appearance
Quite often, women encounter this problem when a manicure done in a beauty salon using shellac begins to peel off. If you go to a beauty salon to remove the coating on your nails, they will be able to do this for you in the shortest possible time using special cosmetics. What to do if your nails look terrible and you don’t have the opportunity to go to a beauty salon in the near future? Then you need to make every effort and try to remove the coating from your nails on your own at home.
Do I need to remove the sticky layer from the base?
The base is the coating option that is applied directly for preparatory purposes. There is no need to confuse the base with the primer, since their functions are fundamentally different. The primer, regardless of whether it contains acid or not, is designed to eliminate excess oil produced naturally on natural nails. While the base should level the plate and also provide better adhesion of the colored pigment of the varnish to the nail. So why remove the sticky layer from the base? In fact, there is no need. This need arises for masters only in a few cases:
- when a too cheap and low-quality base is used. As a rule, its components leave much to be desired, which is why the basic properties and consistency of the product are violated. Then it is logical to wipe the dispersion layer with a lint-free cloth;
- When the bases of some brands, such as TNL or IRISK, do not require removal of the sticky layer from them, in many cases this leads to the gel polish peeling off from the base. Here you need to look at the situation and read the instructions for use;
- when you have added new, previously unknown and untested products to your collection. Naturally, then you cannot predict how one or another component of your ideal manicure will behave in collaboration. Then it makes sense to immediately remove the sticky layer from the base;
- In addition, some manicurists believe that removing the sticky layer provides better controlled distribution of the base layer, and this is true - after all, the sticky base layer literally absorbs (adheses) the gel polish over the entire surface;
- when you need to make particularly filigree nail art. This is also true for fashionable design using the negative space technique. Indeed, in this case, you need to apply gel or acrylic paint immediately over the base.
Every rule has its exceptions. The main thing is to diligently study the theory before you start making complex decorations on your graceful fingers.
What to do if the sticky layer comes off with the varnish?
Often, after polymerization and removal of the dispersion layer, the gel varnish itself goes along with the napkin. What is the problem and how to avoid this unpleasant phenomenon? Think about it, you may be making the following mistakes:
- Do not dry the varnish completely. Check the timer on the lamp and adjust the drying time depending on the manufacturer's requirements;
- replace the lamps. There is a possibility that it is your lamp that is faulty, then you just need to change the light source to a more advanced and new one;
- Perhaps this defect is caused by poor-quality liquid. Check its composition for the presence of acetone. If its percentage is exceeded, either do not use this bottle, or try diluting it with water;
- if there is more pigment in a color gel than necessary, then with a considerable degree of probability it will not polymerize well;
- Pressing the plate too hard while removing the dispersed layer can also cause imperfections. Your movements should be progressive and soft.
Almost certainly, when “holes” form in the coating, one of the above reasons is to blame. Analyze the information and correct your mistake.
Instructions for applying shellac
Unlike nail extensions, which require special skills and training, shellac can be done by anyone. The main thing is to do everything according to the instructions and carefully.
- Nail preparation.
The nails need to be given the desired shape, cuticles removed, and the edges filed well. After this, you need to lightly walk the buff over the entire nail plate and file off the gloss; this is called polishing the nail and has nothing to do with filing before extensions. - Wipe your nails with a degreaser (or substitute).
- Apply a thin layer of top.
Do not forget to “seal” the edge of the nail, that is, go over the top not only along the plate itself, but also along the edge of the edge of the nail.
Make sure that the transparent top does not extend beyond the nail.
You can remove excess with an orange stick. If the varnish is “baked” in the lamp, nothing can dissolve it and the varnish that has gone beyond the nail can cause the manicure to become unstable. “Bake” the top in the lamp for 2 minutes or 30 seconds depending on the type of lamp. - Apply a thin layer of colored shellac.
The layer should be very thin, almost transparent! Layer thickness is a typical mistake for beginners. By analogy with ordinary varnish, when we try to even out all the flaws with new and new strokes, beginners do the same with shellac, as a result, a too thick layer of varnish swells up after a couple of days. You also need to “seal” the edge with color. Cure the layer in a lamp. - Apply the next layer of colored varnish.
The layer should again be thin.
Each layer is polymerized in a lamp. Remember the main rule of shellac: 4 thin layers are better than 2 thick ones!
Excess colored varnish also needs to be removed with an orange stick before sending the layer to dry in the lamp. If you are not going to decorate your nails, then you don’t need to remove the sticky layer that remains after drying in the lamp, just don’t pay attention to it. - Once you are satisfied with the density of the color, you can cover it with top
. The top coat is applied in a moderately thick layer and is also polymerized in the lamp. - You should always remove the sticky layer from the top!
Simply wipe with alcohol or a degreaser soaked in a lint-free cloth.
You can literally go about your business right away, your manicure is ready. There is no need to sit for another hour, afraid to move a finger, as happens with ordinary varnishes.
A simple shellac manicure without complex decor takes 30-40 minutes, provided that all five fingers are dried in the lamp at once.
How to replace the liquid for removing the sticky layer
We have already talked about the fact that the liquid that removes the sticky layer from the gel is sold in literally every specialized store. It can also be found among products on online platforms. But sometimes there are situations when the clinser has run out, and only one question is pulsing in your head - how can you remove the sticky layer if you don’t have the treasured bottle at hand? ProstoNail experts decided to put together a whole list of budget alternatives:
- water-alcohol mixture. Perhaps the easiest way to “mess up” something similar to a cleanser is to mix an aqueous-alcohol solution yourself. At the same time, do not forget about the proportion: 70% liquid and only 30% high-quality medical alcohol (it can be purchased at the pharmacy). In case of an imbalance, characterized by an excess of alcohol content, you risk burning the cuticle and drying out natural nails, but if there is more water, the sticky layer may not come off at all. By the way, be also prepared for the fact that the pigmentation of the manicure may decrease significantly, and the varnish will lose its original mirror gloss;
- vodka. If you have a bottle of this strong drink in your home bar, you can also easily replace the clinser. All you need to do is uncork the bottle and generously soak a lint-free napkin with its contents, removing the dispersion barrier from it;
- a degreaser, which in professional circles is also proudly called a dehydrator. Perhaps this is the most optimal substitute. It will not dissolve the gel coating, will reliably remove the dispersion, and will give a pleasant glossy shine. However, it will not provide proper strengthening of the top layer;
- nail polish remover. This is probably the most extreme option. Why? Yes, because it was originally designed to remove coating. But since the situation requires it, then use this solution, but only if it does not contain acetone. Otherwise, you will not only not see the famous glossy shine that attracts the gaze of aesthetes, but also the varnish itself. It is likely that it will come off after the cotton pad.

As you can see, a product for removing the sticky layer is not the last resort, but still, if you decide to get a gel manicure, then immediately purchase everything you need. Of course, every enterprising young lady can resort to the help of analogues once or twice, but that’s why they are analogues, only to emphasize the perfection of the original.
Creating a flawless manicure is not an easy task. But for readers of the ProstoNail portal there are no difficulties.
Significant Aspects
Watch the video carefully to remember the correctness and nuances of the removal procedure.
The success of creating a manicure depends not only on skill, but also on the quality of the products used. Experienced nail industry professionals recommend using all the necessary components from one brand. In this case, it is desirable that the brand be fairly well-known and proven to be the best. The sticky layer of the base should be removed not with cotton pads, but with special lint-free wipes. In this case, you will avoid sticking of small fibers. It’s also worth moistening the napkin well and changing it at least twice.