- 2560
- 09-01-2018
- Author: Mysekret Team
- 0
Women's hands always attract the eye, perhaps for this reason masters come up with so many different manicure techniques and try to make hands more and more attractive. Today we propose to reveal the topic of combined manicure. We will tell you what it is, reveal the secrets of the technique for performing the combined version, and give step-by-step instructions (in photo and video format) for beginners.
Peculiarities
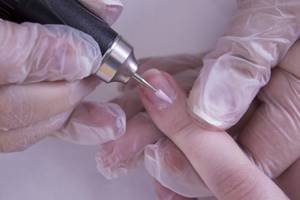
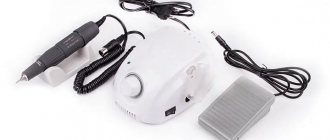
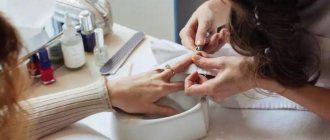
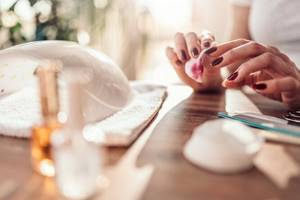
The description of hardware manicure is very similar to dry European manicure. Only if in the second case special hand tools are used to remove dead skin, cells and roughness of the nail, then in the first case a device is used. The device for this nail treatment can be imagined as a small milling machine. It consists of a handle, a motor and a shaft on which you can install a variety of attachments. Models are represented by the brands Vitek (Vitek), Scarlett.
Photo – Hardware manicure
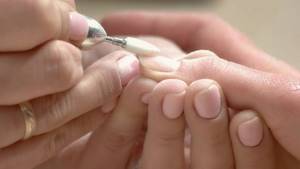
Due to the complete absence of cutting tools, this type of hand care is used for those with very delicate skin and blood vessels close to it. To remove the cuticle, a special rough attachment is used, which simply removes the top dead layer of skin with multiple passes. This makes this technology not only the safest, but also practical, because if you have a device for hardware manicure, absolutely anyone can do it.
Contraindications to the procedure
It is not permissible to perform a hardware manicure on the nails of a woman suffering from one of the following ailments:
- The cuticles are inflamed and swollen;
- The skin next to the nail has damage (scratches, wounds);
- The nail is affected by a fungal infection;
- The cuticle is too thin;
- Microvessels are located too close to the cuticle;
- Severely deformed nail plates also cannot be treated with the device.
Review of cutters for hardware manicure
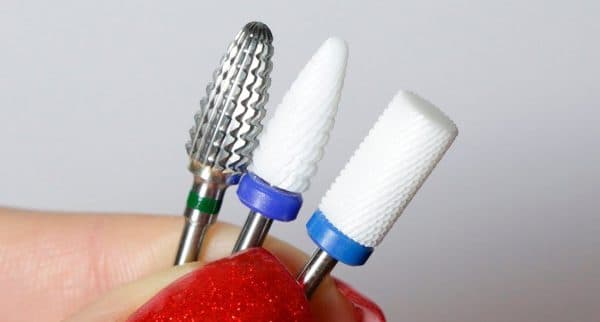
Depending on the specific operation, you need to select special cutters, so a machine for hardware manicure and pedicure can be equipped with the following types, depending on the material :
- Diamond. They are worth choosing if you plan to work with delicate areas - the ends of the nail plate, removing thin cuticles (not cut with scissors and trimmers). They are considered the most effective and expensive, thanks to the smallest grains of diamond dust they help not only completely solve the problem of uneven nails, but also ensure its prevention;
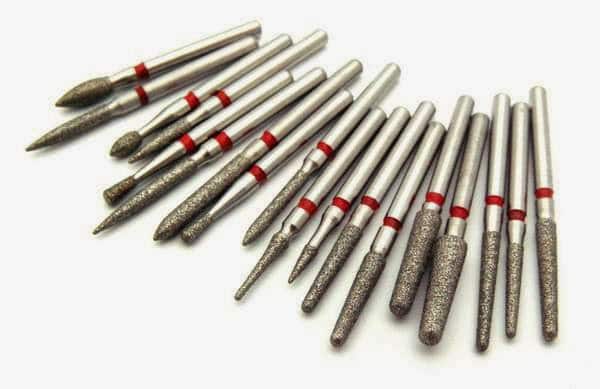
Photo – Diamond cutters - Ceramic. They are often included both in a professional kit for hardware manicure and for beginners. Ceramic is harder than diamond, so it is used for problem areas. With the help of such cutters you can easily cut off even calluses or corns on the heels. Such nozzles are classified by grain size. It varies from 100 to 400 microns (the latter are used exclusively on the heels and feet);
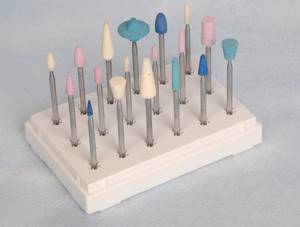
Photo - Ceramic cutters - If you want to try to do an unedged hardware manicure at home, then even silicon carbide cutters. They are the cheapest and most accessible. You can buy them in almost every cosmetic store. It should be noted that these attachments are considered disposable and must be disposed of after use. They are not recommended for use on the nail plate and cuticles, but they are widely used in removing difficult calluses.
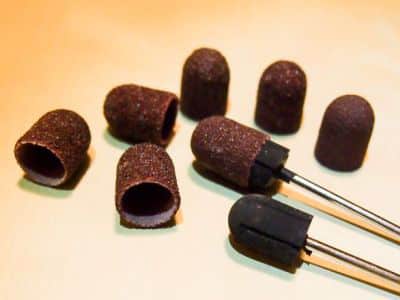
Photo – Silicon carbide cutters
There are also types of cutters according to their intended purpose . You may have seen that the sets contain a variety of attachment options: cylindrical, conical, trapezoidal, round. Let's look at some of them:
- Reverse cone. Used to treat nails before French manicure. Allows you to get an even tip of the plate, without notches and height differences;
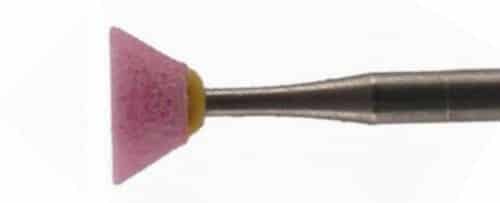
Photo - Reverse cone - spherical bur. This is a special manicure device for getting rid of small cracks and growths. If a strip of rough skin has formed around the nail, then such a ball is simply irreplaceable. It will help to completely cut off the problematic epidermis, without touching the plate;
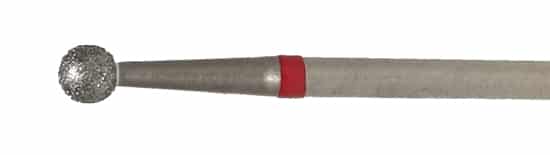
Photo – Spherical pine forest - Cylindrical Tools (thin, wide) are used for shortening nails, creating designs, removing gel polish and numerous other manicure operations. This is the widest group of cutters;
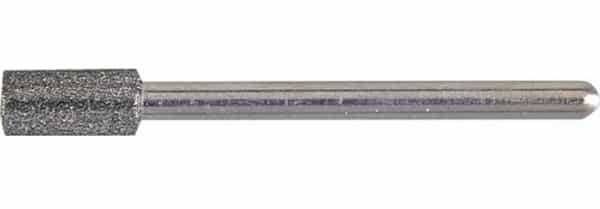
Photo - Cylindrical nozzle shape - Drum - the only type of cylinder that has a narrower purpose than complete processing. With its help, dead cells are removed from rough areas of the hands and feet, thick nails are trimmed, and their growth line is straightened. Without it, not a single hardware extension or shellac coloring is carried out;
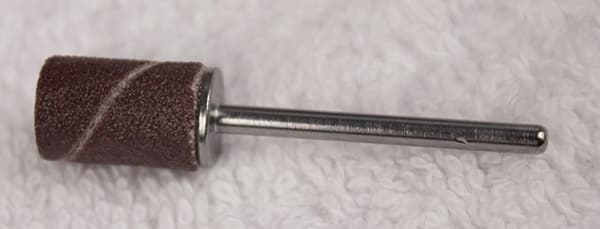
Photo – Drummer - Polishers. All of them have the shape of a rounded cone. They are made exclusively from soft materials: silicone, plastic. Sometimes they are additionally treated with a polymer coating (to give the plates more shine). Any professional manicurist has several polishers: soft, medium hard and hard. Each of them ensures shine and absence of roughness on a specific plate. For example, soft is suitable for natural nails, while extensions or painted with biogel are treated with hard or medium-hard.

Photo – Polisher
Reviews claim that even for a home hardware manicure you need to buy at least 4 types of attachments.
If you need to know how to properly do a pedicure at home, we recommend reading about it here. Here we have also posted step-by-step photos of the process itself.
Additionally on the topic of the current article: instructions on how to do a manicure at home with video.
How often should the procedure be done?
In terms of durability, a hardware manicure is very different from an edged or some other type. If you cover your nails with gel polish, the procedure can be performed once every 3-4 weeks. It is recommended to pay attention to your arms and legs more often and just maintain the condition so that it does not become neglected and you do not have to spend a huge amount of time on it. Another video from the master will help you achieve perfection in hardware manicure:
In beauty salons, a special coating is applied over the varnish, which allows you to keep your nails looking presentable for much longer. Many women noted that after visiting a manicurist, the effect of the treatment was much higher than with home procedures and it lasted much longer. But over time, you will also learn and will be in no way inferior to any master in professionalism.
If we are talking about extended nails, then you cannot do without qualified help. You will have to visit a specialist every 3-4 weeks to adjust the shape of your nails.
Step-by-step instruction
If you have already acquired a device and cutters, we recommend that you study the tips on how to properly do a hardware unedged manicure at home:
- The procedure is carried out only on a dry plate. Otherwise, the plate will begin to heat up, which will cause some discomfort. In addition, the areas will be less well processed;
- If you are using a combined or customizable device (for example, Strong), then you need to set the speed to a speed of up to 10,000. If it is higher, then you will simply erase your nails due to the lack of proper experience;
- Do not press the clipper close to your nail or, especially, put pressure on it while working;
- The first few times you need to practice on the silicone tips first. Then, when working with rough cutters, you will already know how to hold them correctly, at what angle and for how long.
Instructions and technology for performing hardware manicure step by step:
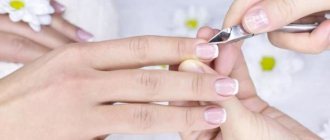
- The cuticle needs to be moved closer to the nail hole using a special wooden stick. Try to act carefully so as not to damage it;
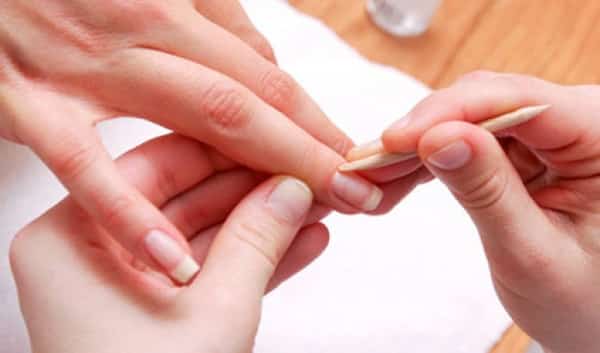
Photo – Wooden stick - On it and the side rollers on the sides of the plate, the use of drums with medium hardness is allowed. Watch your own feelings, if it seems that the cutters are not removing enough, then you can take tools with more abrasiveness;
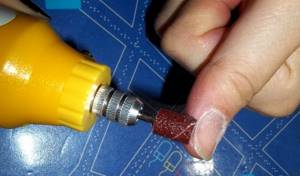
Photo - Drum processing - On the palms and fingers, you need to clean dead cells using soft abrasive ball-shaped burs;
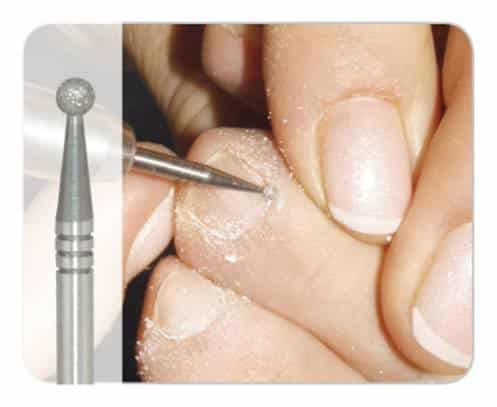
Photo - Using a spherical bur - Use cylindrical or trapezoidal cutters to give the plate the desired shape. Be careful - the rules of proper manicure require leaving more than 2 mm above the level of the fingertips, even on short nails;
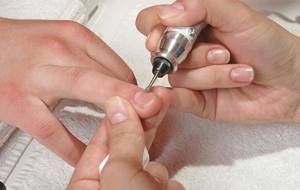
Photo - Processing with a trapezoidal cutter - After this, polishing begins. The technique of this stage is quite difficult for beginners. Firstly, you cannot bring the edge of the polisher to the nail - it will scratch the plate, secondly, you cannot hold the polish in one place for longer than 1 second;
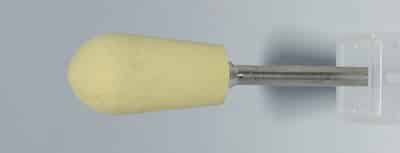
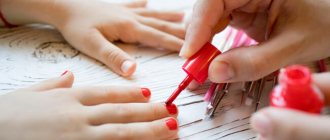
Photo – Nail polisher - All that remains is to clean the space from dust and nail residues, lubricate it with oil and paint it.
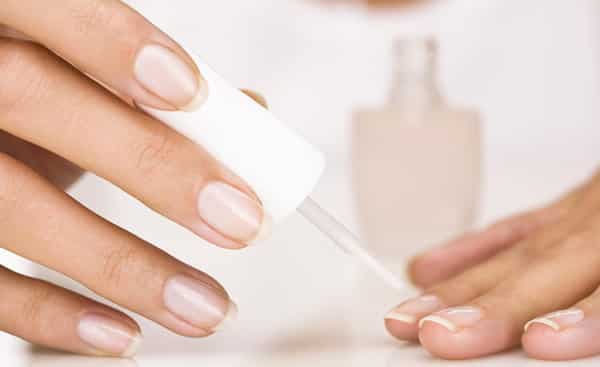
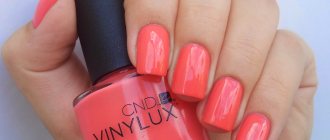
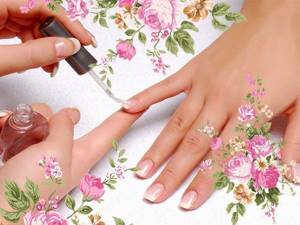
Photo - Applying varnish
For a better understanding, we recommend watching a video master class from professionals on how to do a hardware manicure.
Video training for beginners on how to do a hardware manicure
How to do a classic edged manicure for yourself at home?
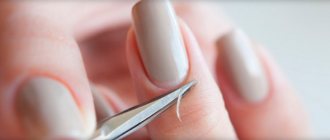
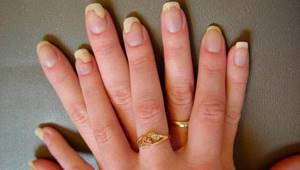
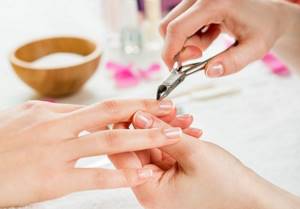
There is a misconception that a manicure cannot exist without a coating. This is not true, because the coating is just decoration. Well-groomed nails that do not need to be covered with polish or gel polish are truly appreciated. Well-groomed nails should be clean, neat, without burrs, cuticles, with a perfectly even shape and shine. In order to achieve this result, you need to do a manicure. There are several ways to do it. Classic manicure is performed by steaming using nippers, tweezers, and scissors.
Instructions:
- To do this, you need to fill a special hand bath with some warm water and add sea salt and a few drops of liquid soap. Hold your hand for 5 or 10 minutes.
- After this, one by one, the fingers are removed from the bath. It is necessary to use a pusher or an orange stick to push the cuticle towards the hole. After this, the pterygium at the cuticle is scraped off. Using the sharp side of an orange stick, a transparent film is exposed that must be removed.
- After this, you need to use pliers to cut off the cuticle along the perimeter of its growth. The sharp side of the stick removes the contents from under the nail, if any. This is dirt, possibly dead skin particles.
- Next, you need to use a file for natural nails to trim the free edge and give it shape. The choice of shape depends on the thickness of your fingers and the characteristics of the nail bed.
- Once all the manipulations are done, to give your nails more shine, they can be polished with a regular polisher. The final stage of a classic manicure is applying cuticle oil.
- This manicure is classic, but the most time-consuming, using cutting objects that will have to be sterilized from time to time or use special means to remove microorganisms. In addition, professional tools are quite expensive. It is necessary to sharpen them when they become dull.
- Do not use files with coarse abrasives for shaping. Products made from artificial materials are not suitable for natural, thin nails. They scrape the edge and make it ragged.
Advantages and disadvantages
Naturally, each cosmetic procedure has its own advantages and disadvantages. Among the advantages it should be noted:
- Session speed. No need to waste time soaking cuticles, removing skin with incisors, etc.;
- There is absolutely no chance of being cut or stabbed. Machine attachments completely eliminate this possibility. In addition, they help ensure long-lasting results;
- A trimmed manicure causes the cuticle to grow in an unnatural direction, while a hardware manicure simply corrects its appearance. This is very important for those who visit beauty salons no more than once a month;
- It is not so dangerous in terms of introducing infections or fungi under the skin.
But hardware manicure technology is not as good as it seems. Firstly, a lot depends on the master, his experience and attentiveness. For a correct and high-quality result, you need to change attachments several times and carefully inspect the treated areas.
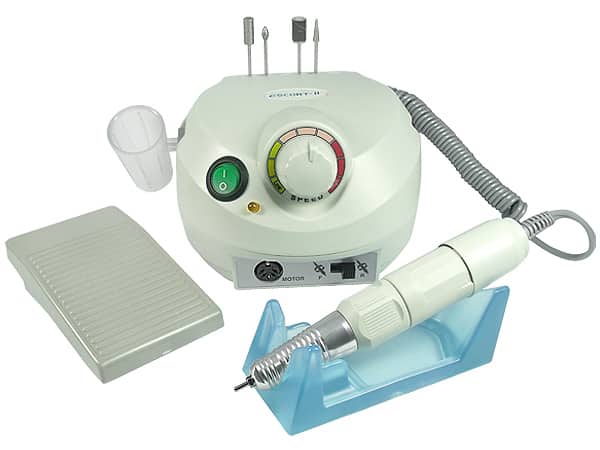
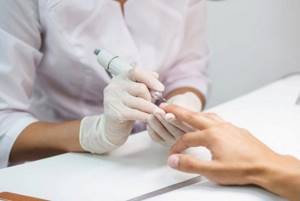
Photo – Machine for hardware manicure
Secondly, consistency is extremely important. You cannot first polish the nail and then clean off the cuticle - this can negatively affect its structure or even damage the epidermis. And the most important point is that the tool must either be processed regularly or used as a disposable one. When processing cutters after each use, they are destroyed faster, and this entails additional costs.
When choosing which manicure is better, hardware or edged, you need to compare all the pros and cons. Of course, trimming with scissors looks more effective and has a greater effect. But on the other hand, the hardware version of the service guarantees protection against wounds and cuts, blood infections and many other factors.
Recommendations for nail care after manicure
Daily care is the key to beautiful hands and well-groomed nails. After a manicure procedure, special care is required because the cuticle skin and nails become more sensitive, and after removing the decorative coating, the nails are weakened and susceptible to splitting.
Important points in caring for the skin of your hands, cuticles and nails:
- Daily moisturizing and nourishing the skin of the hands with special creams and compositions.
- Applying nourishing oils to the cuticle area. Jojoba, almond, apricot and grape oils are especially effective.
- Nourish and strengthen the nail plate with oils and creams that also have antibacterial and brightening properties. The most popular oil is lemon.
- Periodically rest nails between applying decorative coatings.
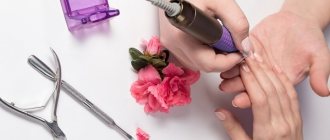
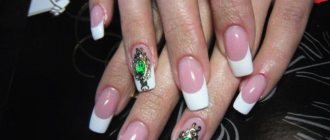
An individual approach and selection of procedures are the main advantages of a combined manicure. This method allows artists to create unique nail designs every time.
Author: Maria Andryukova
Safety regulations
Manicure using hardware processing is performed the same way both in beauty salons and at home. Inexperienced professionals who are doing the procedure for the first time need to know certain rules. To avoid cutting the skin and damaging the plate, it is important to consider the following points:
- The handle of the device should be held firmly, this will minimize its vibration;
- Do not press the nozzle tightly against the plate;
- During the procedure, you need to maintain an angle of 45 degrees, especially for the correction of lateral zones and hardened areas;
- the nozzle must be moved smoothly from the center to the edge and not linger long in one area;
- It is recommended to start work with minimal machine speed.
In addition, correct operation of the machine also plays a huge role in the safety of the procedure. It needs to be looked after and thoroughly cleaned of dust after each session. Do not overheat the device: if excessive heat appears and a burning smell is noticed, the device must be turned off immediately and allowed to rest for 20 minutes. The device should be stored in a box in a dry place.
Cleaning the attachments
It is very important to follow the rules of disinfection. Sterilization is necessary to completely destroy bacteria, which provides protection for the body. Disinfection of equipment should be carried out immediately after use of the equipment.
Processing of nozzles is divided into three stages:
- disinfection;
- cleaning;
- sterilization.
Disinfection
Disinfection is needed to reduce the number of bacteria. Choose products from professional stores - for example, for burs and rotary tools. When you finish working with the cutter, clean it and dip it in a container with the prepared preparation. The expiration time is indicated on the packaging.
It is not necessary to purchase expensive solutions in the store. You can prepare a disinfectant at home. All ingredients are available without a prescription at the pharmacy.
To do this you will need:
- 70% medical alcohol - 200 ml;
- potassium permanganate solution (potassium permanganate) - 60 g;
- boric acid salt - sodium tetraborate (otherwise known as borax) in glycerin - 20 g;
- small container with a lid.
Preparation of the drug and disinfection:
- Pour alcohol into the container.
- Add boric acid salt.
- Stir the mixture in a circular motion. It should become cloudy within 2 minutes. Add a little salt if it doesn't.
- Add potassium permanganate. The solution should turn light pink with a purple tint after stirring.
- Pour the mixture into a container and place the manicure accessories there.
- Place the dishes in a steam bath for 15–20 minutes. The temperature should not exceed 50°C, otherwise the instruments may darken.
Cleaning
After work, it is necessary to clean the cutters from dust and other contaminants. The procedure is carried out with a metal brush.
It is necessary to remove accumulated dirt and grease residues. Rinse the tools under water using nail degreaser. However, a fungus that survives temperatures above 100°C will not be killed. When finished, dry the attachments with paper towels. If dirt remains, repeat the procedure.
Corundum and steel attachments need to be cleaned especially carefully.
A wire brush will effectively clean cutters
Sterilization
One of the most accessible methods is to sterilize instruments in the oven.
Sterilizing metal utensils in the oven is a simple and effective way to kill all germs
You need to do the following:
- Preheat oven to maximum temperature.
- Place the tools so that they do not lie on top of each other.
- Leave the accessories in the oven for 15-20 minutes.
- Take them out and let cool.
- Place the tools in a case or sealed bag.
Tips for beginners
You can master the art of manicure yourself. Learning a craft occurs better and faster under the guidance of an experienced specialist.
- If you lack experience and self-confidence, you can attend nail service courses or individual master classes.
- Use video tutorials: you don’t need to leave the house, you can pause the video at any time, or rewatch an unknown place.
- Select the right cutters for the appropriate procedures.
- You should periodically give the machine a rest to avoid overheating.
- Removing shellac should be done as carefully as possible.
- You shouldn’t skimp on the machine: the quality of the electric motor in budget models may be noticeably inferior to higher-quality analogues.
- During training, you should avoid sudden movements, teaching your brush to move smoothly, without pressing on the surface of the nail;
- It is important to remember that even experienced specialists avoid long-term work at high speeds: although the degree of removal will be low, the texture will remain intact and undamaged.
Be patient: not everyone succeeds in mastering the procedure the first time; it is quite normal to make mistakes at the initial stage.
Sources
- https://womenshealth.su/kosmetologiya/apparatnyj-manikyur/
- https://vplate.ru/manikyur/apparatnyj/
- https://ladysdream.ru/apparatniy-manikyur-obuchenie-dlya-nachinayuschih.html
- https://LadyBeautiful.ru/kak-delat-apparatnyy-manikyur.html
- https://www.LadyWow.ru/apparatnyj-manikyur.html
- https://nails-class.ru/manicure/504-apparatnyj-manikjur.html
- https://moi-manikur.ru/vidy-manikyura/hardware-manicure.html
- https://heaclub.ru/kak-sdelat-manikyur-samoj-sebe-v-domashnih-usloviyah-s-lakom-i-bez-laka-poshagovaya-instrukciya-vybor-materialov-i-instrumentov-dlya-provedeniya- obreznogo-i-apparatnogo-manikyura
- https://manikurus.com/vse-o-manikure/apparatnyy/v-domdshnyh-usloviyah
- https://noemi.salon/snyatie-gel-laka-apparatom/
- https://tn-club.ru/narashchivanie/kak-snyat-gel-lak-frezoj.html
- https://lifenail.ru/manikyur/%D0%B0%D0%BF%D0%BF%D0%B0%D1%80%D0%B0%D1%82%D0%BD%D1%8B%D0%B9 -%D0%BC%D0%B0%D0%BD%D0%B8%D0%BA%D1%8E%D1%80-%D0%BD%D1%8E%D0%B0%D0%BD%D1%81 %D1%8B-%D0%B4%D0%BB%D1%8F-%D0%BD%D0%B0%D1%87%D0%B8%D0%BD%D0%B0.html
- https://tehnika.expert/dlya-krasoty/prochaya/apparatnyj-manikyur-v-domashnix-usloviyax-sovety-novichkam.html
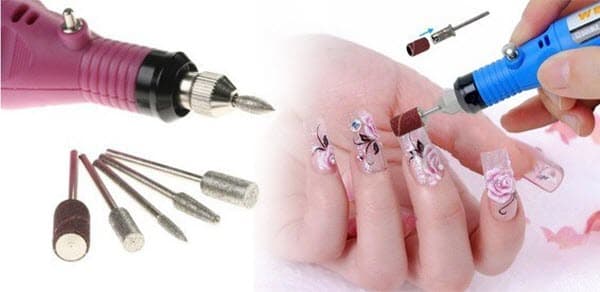
Removing gel polish with a machine
To remove the gel coating, use the same device that is used to perform a hardware manicure. The only difference is the attachments used (cutters) that are inserted into the device. The operating principle of removing shellac with a device is to mechanically remove layers of gel from the nail plate. This is possible due to the high rotation speed of the cutter.
The procedure can be done using a regular nail file, but this method will take much longer and can damage the nail structure.
Ceramic cutter
They came to the nail industry relatively recently. They are durable, have high strength and wear resistance. The main difference from their metal counterparts is the absence of heating during operation. When working, they act softly, as they have a high cutting ability. In practice, it has been established that one such cutter lasts three or even four times longer than a carbide cutter. But what is the design of gel polish on short nails, you can see here.
When removing nails with a cutter, it should be taken into account that its rotation should occur at lower speeds than when performing a manicure, approximately 10-15 thousand rpm.
Carbide cutter
Metal instruments of this variety have appeared a long time ago; they come in not only straight, but also cruciform and oblique shapes. Conventional attachments made of this material work only in one direction, but their reversible type rotates counterclockwise and clockwise.
The latter cut the gel material like shavings, rather than turning it into dust. Carbide cutters ideally remove artificial nails; if they are used for gel plates, you need to choose a tool with large notches.
Pros and cons of hardware removal
Hardware removal of gel polish has a number of advantages:
- There is no risk of damaging your nails. Thus, the liquids used to remove the coating contain acetone, an aggressive substance that dries the nail plate and leads to cracks. In addition, when removing the gel with a nail file, there is a risk of accidentally touching the top layer of the plate and damaging its structure.
- Save time. Removing shellac with a machine takes on average 10-15 minutes, while the manual method takes more than an hour.
The disadvantages of hardware work include technical features: skills in working with equipment, correct direction of movements, etc. In addition, using the device also requires additional costs for the purchase and replacement of cutters or repair of the device.
The most common mistakes of novice masters
- Before the procedure, it is not recommended to treat your hands and nails with cream or oil.
- To avoid injury to the nail, do not set the device to too high a speed.
- Cutters should be used exclusively for their intended purpose.
- It is important to choose the correct abrasiveness of the nozzles. Cutters with dark markings are used to process hard cuticles, and with light stripes - for thinned and weak cuticles.
- The device should not be allowed to overheat; for this purpose, it is recommended to periodically disconnect it from the network or initially purchase a tool with a built-in cooling system.