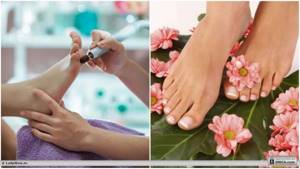
To keep your feet healthy and attractive, you need to take good care of them, including a pedicure. One of the popular types of foot treatment is hardware pedicure. It can be done both in the salon and at home. Today we will look at what treatment is, how to do a hardware pedicure and what is required for it. We have also prepared step-by-step instructions for you for beginners.
Advantages of hardware pedicure
The main advantages of foot treatment include:
- safety - there is no risk of cutting the skin or leaving other damage, as with the classic procedure;
- delicacy - suitable for those with thin sensitive skin and even children;
- hygiene - the possibility of infection with a fungus is excluded, since no microdamages remain on the skin;
- long lasting result – after grinding with a machine, the skin remains soft and tender longer,
- A hardware pedicure should be done on average once every 4-5 weeks, while a classic pedicure should be done every 2-3 weeks.
Medical pedicure for nail fungus
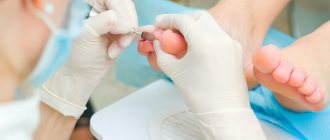
Medical pedicure for nail fungus in Moscow, at the Podology Clinic, includes preliminary disinfection, softening and delicate removal of the top layer of the nail plate with special milling attachments.
This virtually painless procedure, which ensures more complete and deeper penetration of antifungal ointments, can reduce the treatment period for onychomycosis by 1.5-2 times. It can be performed at all stages of the disease, even if more than 60% of the nail surface is affected.
Types of hardware processing
Classic hardware pedicure . With this treatment, a device for hardware pedicure is used on the heels, under the toes, and on other rough areas. They use it, only with a different attachment, to remove the overgrown cuticle and file down the overgrown edge of the nail.
Uncut pedicure . The key difference from the previous treatment method is that the device does not remove the cuticle. It is not removed mechanically at all, but is only softened with special preparations with acids or oils. After this, they move it away with an orange stick so that it looks neat.
SPA pedicure . SPA pedicure is the most intensive foot care complex. Before treatment, the feet undergo spa treatments - steaming in a bath with salt and oils, peeling, massage and others. For SPA pedicure, special moisturizing and nourishing creams and oils are used.
How should you work?
Usually, before doing a hardware pedicure on their own, I advise girls to visit the specialist in the salon several times, experience the full “taste” of this procedure, and at the same time get answers to their questions from a professional.
Then carefully study the instructions for the electric machine, understand in detail all its options and attachments. Well, then, you can start performing the procedure, which I will tell you step by step.
Preparing feet and nails
This is the first step when performing a hardware pedicure. To do this you need:
- Remove old nail polish.
- Treat tools, hands and feet with a disinfectant solution.
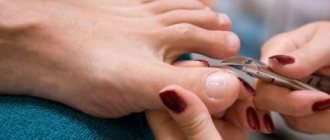
- Trim your nails at your discretion, using clippers to adjust their shape and length.
- Wash your feet thoroughly and then dry them with a towel.
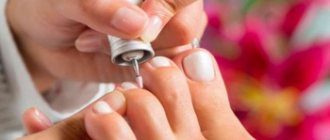
- Then a special gel with keratin properties should be applied to the feet to soften the compacted, rough layer. Typically, according to the instructions, its duration of action is from 10 to 20 minutes. At the same time, it selectively acts on the keratinized layers of the skin, where there are no nerve endings and blood vessels.
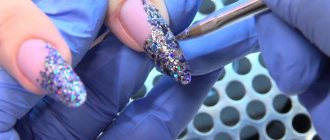
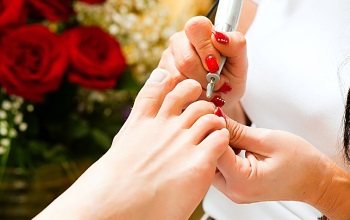
Hardware processing
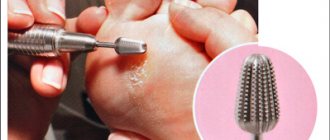
After the gel has had the desired effect, its remnants must be removed with a napkin, and the damaged areas are further removed with grinding attachments. To do this, take a rubber holder and a disposable cap that has a rough abrasiveness.
Thus, the main stratum corneum and small calluses are removed. Then you should carry out high-quality polishing with gentle abrasive attachments to eliminate the appearance of a “fringe” effect after the procedure.
After polishing, the skin of your feet should have a healthy pink tint. When finishing treating your feet, they should be sprayed with warm water from a spray bottle and wiped dry with a paper or terry towel.
At the next stage, we move on to processing the fingers and the area between them. At the same time, I will make a reservation in advance that this area, where there are many sweat glands, is much more sensitive than the foot. To process it, you need to use a stone attachment with medium abrasiveness.
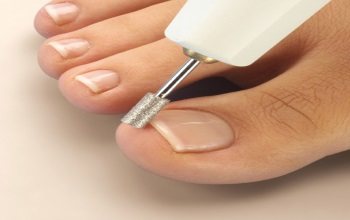
And before working with the nail plates and cuticles, you should cover them with a gel-like softener so that they can be easily moved away. Here I would like to note that during a hardware pedicure, the cuticle is not cut. It is only treated with spherical nozzles coated with diamond, and the nails are polished using a felt analogue.
We're reaching the finish line
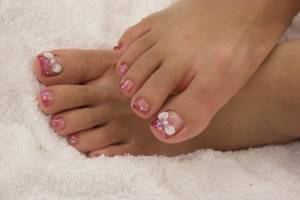
After the basic treatment of the feet, nails and interdigital space, the legs should be pampered with nourishing creams, protective oils and a light massage. If desired, you can varnish your nails and decorate them with small decorations to feel more confident and add a little charm to your image.
What you need for a hardware pedicure
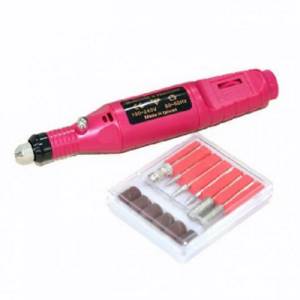
To do a hardware manicure and pedicure, you will need a device for a hardware pedicure, attachments for it, including:
- nozzles for hardware pedicure of small diameter for processing the overgrown edge of the nail;
- needle-shaped and spherical burs for the cuticle and side roller;
- large-diameter nozzles for removing corns, calluses, and areas of rough skin.
In addition to the apparatus, you will need a bath in which to steam your feet, soft buffs for polishing your nails, moisturizing and nourishing creams. You also need colorless caring varnishes and colored decorative coating.
Medical pedicure for ingrown toenails
In case of ingrowth of the nail plate into the lateral periungual fold, hardware correction is performed, followed by the attachment of a special structure for the non-surgical treatment of onychocryptosis. This allows you to almost painlessly redistribute the pressure, create optimal tension, lift the ingrown edge and straighten the curvature of the nail plate.
For a problem such as an ingrown toenail, a pedicure aimed at solving specific medical problems is considered a very successful alternative to surgery. When carried out regularly, it not only helps to get rid of constant pain, but also practically reduces the risk of relapse of the disease to zero.

How to learn how to do a hardware pedicure at home
To do a hardware pedicure at home, you first need to understand the attachments and cutters for the machine. Training in hardware pedicure begins with studying the classification of attachments.
Diamond bits
Above we have listed the forms of nozzles and indicated what they are used for. It remains to deal with the rigidity of the cutters. When choosing hardness, you need to follow the basic rule: hard cutters are used to shorten nails and remove calluses and corns, soft cutters are used to treat cuticles and small rough areas.
Diamond cutters have colored serrations that indicate hardness. So, the hardest ones have black notches, the medium ones have blue ones, the softest ones have red, green, yellow ones.
Ceramic tips
Ceramic attachments are suitable for training in hardware manicure and pedicure. They are used by beginners as they are softer and safer. Made from corundum, a material with a grainy surface. Their hardness is distinguished as follows:
- blue and pink have a hardness of 100 microns, that is, they are the softest;
- white ones have a hardness of 200 microns, they are medium;
- black and brown have a hardness of 400 microns, they are the hardest.
Sand caps
Sand or silicon carbide caps are an effective tool for treating rough skin. They are placed over the cutter and used once, after which they are disposed of. To treat your feet efficiently, you need a three-stage treatment:
- an 80 grit cap is used to remove the underlying rough skin;
- a cap of 150 units is needed for sanding, that is, removing unevenness from the treated skin;
- A cap of 320 units is used when polishing the foot, making it smooth and soft.
Processing technology
When treating feet with a machine, it is important to select the intensity of pressure. If you press the cutter too hard, the skin can be damaged. The direction of movement is also important. Experienced professionals advise:
- when training, choose a cutter rotation speed lower than recommended;
- position the nozzle at an angle of 35 degrees relative to the surface being processed;
- process the cuticle from the center to the edges, nail folds - according to the growth of the nail;
- move the cutter in the direction opposite to its rotation so that the nozzle does not slip;
- Do not press the attachment too tightly and do not hold it in one place, otherwise you may damage the skin;
- Be sure to apply the cream after treating your feet.
A detailed video tutorial with instructions for a novice master can be viewed here:
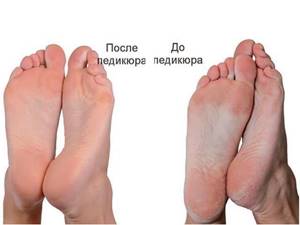
What is the essence of the procedure?
Using a hardware version of pedicure, nails and feet are treated with a special machine, which polishes off unevenness, corns, rough skin, and eliminates other problems.
It is considered a more advanced method in contrast to classic pedicure, in which the foot is treated with a blade, grater, water and special softening creams.
Hardware pedicure and its results
The pedicure machine uses attachments with an abrasive surface that rotate at speeds of up to 50 thousand revolutions per minute. Experienced professionals not only eliminate minor defects, but also solve problems of cracks, ingrown nails, and fungal infections.
The standard version of the hardware pedicure technique includes treatment of heels, toes, keratinized areas, cuticles and overgrown nails. There is also an untrimmed method without mechanical removal of the cuticle; in this case, it is only gently moved with a stick. The most enjoyable spa pedicure is when steaming, peeling and massage are performed before using the machine.
It is believed that it is quite difficult to carry out such processing correctly at home. However, pedicure machines have been in great demand lately. This technology is especially easy for those who are masters of classic manicure and pedicure. But mastering it from scratch is also possible, the main thing is to have the desire and a good professional apparatus.
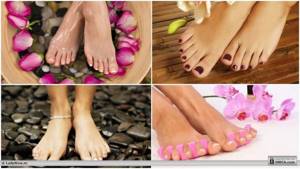
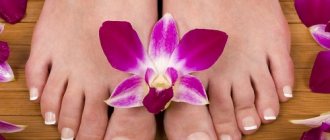
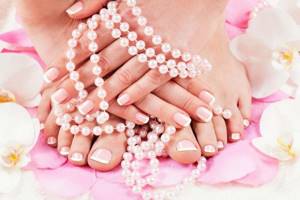
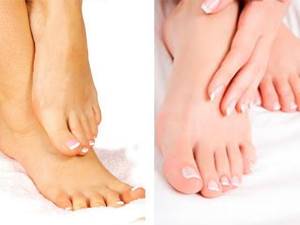
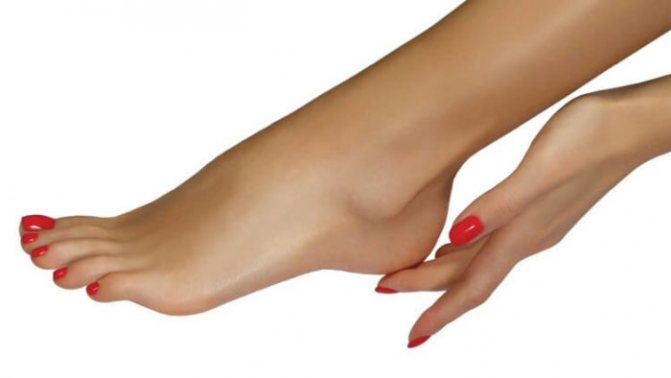
Beautiful legs after a hardware pedicure
Cost of medical pedicure
Since podology is a relatively young clinical discipline, not everyone knows where to get a medical pedicure in Moscow. Consequently, many, in the old fashioned way, turn to beauty parlors and other establishments that perform purely aesthetic procedures and do not always pay close attention to the client’s infectious safety.
At the same time, contacting a podiatry clinic, where all standards of disinfection and sterilization are strictly observed, guarantees the safest possible solution to each patient’s problem. Our certified specialists, who actively use the most advanced techniques and technologies, will help restore the beauty and health of your feet in the most effective way.
The approximate price for Podology Clinics is indicated in the price list, and the final cost is set individually, after a preliminary examination.
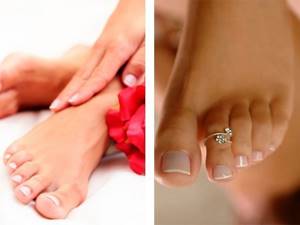
Healthy, well-groomed nails, smooth, child-like soft feet give not only aesthetic appeal to their owner, but are also an indicator by which one can judge the state of health of the entire body. Therefore, do not forget to give them regular treatment and preventive treatment. To make an appointment for a medical pedicure in Moscow (the address of the Podology Clinic is listed in the “contacts” section), you need to contact our administrators, who will select a convenient date and time for you to visit the clinic.
For those wishing to get acquainted with the results of the work of our podiatrists, we suggest looking at photos “before and after a therapeutic pedicure” in Moscow.
Milling cutters
As mentioned above, in order to perform a high-quality hardware pedicure, as in the photo, you need to select the right cutters. Masters say that in order for a really high-quality pedicure, you need to change at least five attachments - cutters. They differ from each other in the material of manufacture, shape, and, accordingly, the scope of application. According to the material they can be:
- Ceramic;
- Sand;
- Felt;
- Diamond, etc.
Their shapes vary from various types of cones (wide, narrow, truncated) to prisms and even balls. Each of them performs a specific role. They also differ in abrasiveness. Thus, felt ones are the most low-abrasive and are used only for polishing.
Pedicure at home: instructions
This is a completely simple procedure, it won’t take you much time, and the result will make others admire you! There are many ways to do a DIY pedicure at home. We'll look at step-by-step instructions on how to do it right!
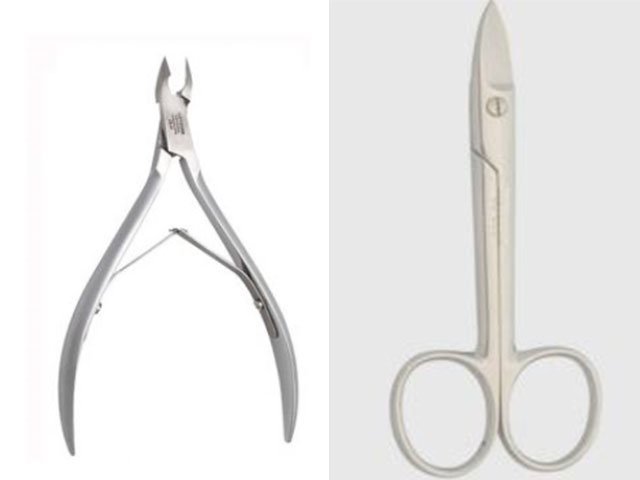
Required Tools
For this you will need:
- high quality scissors and tweezers,
- orange stick,
- wire cutters,
- brush,
- file,
- cotton pads,
- and nail polish remover.
In addition to the above tools for pedicure at home, you must have a bath, scrub, callus and corn remover and, of course, foot cream. You can take any cream that you use daily, be it moisturizing or deodorizing.
If you have all these tools, then you can easily repeat the salon pedicure process. The main thing is to store them correctly. It is better to do this in a special cosmetic bag, clean and dry. After each use, thoroughly sterilize each item.
Pedicure: step by step
When creating a pedicure at home with your own hands, you should follow the instructions. So, let's consider all stages of the procedure.
Step 1: Start with a foot bath. Before performing this procedure, you should remove all nail polish. For it, you can use sea salt, soda, calendula or chamomile tinctures. Or you can buy a ready-made softener with an antibacterial effect. As the water in the bath cools, it should be filled with hotter water so that your feet are well prepared for the pedicure process. You should steam your feet for about 20-30 minutes, then wipe dry with a towel.

Step 2: removing corns. Next, you need to take care of your feet, removing all corns and calluses. They can be removed using a pumice stone or a razor specifically designed for this purpose. Walk the pumice stone in a circular motion over the entire foot - this will help get rid of dry skin. To give your legs a more well-groomed appearance, use a scrub. Distribute and massage your feet, toes and between your toes. After this procedure, rub the cream into your feet.
If there are calluses and cracks, you can remove them using tweezers .
Step 3: prepare the nail and cuticle. Under no circumstances should you cut the cuticle, just push it back with a stick. You can apply an emollient cream or oil for this. Next, the nails should be trimmed and filed, but do not round their edges. This can lead to ingrown nails and you can’t do it without the help of a specialist.

Don't forget about dirt under your nails! Clean it thoroughly!
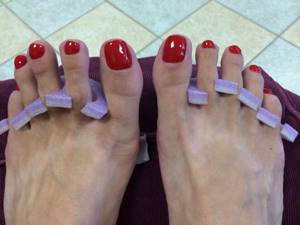
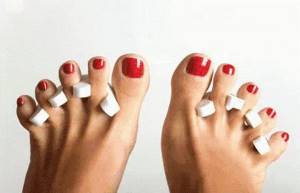
Step 4: Applying varnish. The first layer is a transparent nail base. It will protect the surface. Apply colored varnish in one or two layers, allowing each of them to dry thoroughly. Apply a fixing varnish on top to prevent the color from chipping.
This completes the DIY pedicure at home! There is nothing complicated, the main thing is to learn how to do it correctly!
Pedicure using acid, alkaline keratolytics or removers
This pedicure option is suitable for anyone who does not want to work with cutting tools or apparatus. It is easy to perform, takes minimal time, and the results are just as effective.
To do an acid pedicure at home you will need an acid keratolytic. It is also called remover, peeling. There is also an alkaline version of the composition. This is a product that softens the skin to a liquid paste. All that remains is to remove it with a pusher or an orange stick in the cuticle area and a file on the feet.
Alkaline keratolytics are stronger and penetrate deeper into the skin. Acidic ones are softer in impact and are suitable for unused feet.
Even after removing the product, it continues to work for some time in the deep layers of the skin, so it is necessary to use a neutralizer. It is consumed economically, and the results from using the system are impressive.
The products are presented in the form of foam softeners, gels, and liquids. Popular brands:
- Callus Remover PNB
- Naomi Callus Remover
- My Nail Callus Remover
- Salu
- Comilfo
- Pro Link Be Natural
- Farmona
Types of keratolytics used in pedicure: a complete guide for masters
Step-by-step instruction:
- Apply remover to dry cuticle skin and leave for 1-5 minutes, as indicated in the instructions for each specific product.
- Use a pusher or an orange stick to remove the cuticle and pterygium. Wipe with a damp cloth and treat the area with a neutralizer.
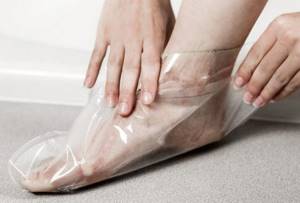
- Apply a keratolytic agent to the surface of the foot and toes, wrap your foot in polyethylene, cling film or put on a shoe cover to create a greenhouse effect. Leave for 5-10 minutes, depending on the condition of the rough skin.
- After the time has passed, wipe your foot with a damp cloth and use a grater to remove all remaining dead skin.
- Apply neutralizer.
- After drying, spread the foot cream with massage movements.
- Apply a decorative coating to your nails and apply oil to the cuticles.
There is also another product for chemical peeling of feet, which we discussed in detail - these are special exfoliating socks for pedicure.
How to extend the life of a pedicure
Advantages and disadvantages
This type of procedure has many advantages:
- The gel, which is used to soften the stratum corneum, acts gently without touching living cells, so the risk of injuring the skin is zero. In addition, this product has a disinfectant effect;
- The use of various attachments allows you to treat the skin even in the most inaccessible places;
- Massage is an undoubted positive addition to the procedure;
- After the procedure, the skin grows much slower than with a classic trim pedicure;
- This type of procedure can be done for both women and men. In addition, many doctors recommend hardware pedicure as a preventive measure for foot diseases with diabetes.
Like any other procedure, hardware pedicure has its disadvantages, which include:
- High price. In order to pamper your feet with a hardware pedicure, you will have to shell out a considerable amount of money;
- The opportunity to get an appointment with a non-professional. With this outcome, be prepared that within a few days you will have to visit the beauty salon again;
- If the feet are in a neglected state, then one procedure will not be enough. You will have to come to the salon 5-10 times.
Pedicure 2022: fashion trends (photos)
More ideas for stylish pedicures and big toe designs here.
Share with your friends!
Read us in the Zen channel