Hardware manicure is one of the most accurate and fastest ways to treat the skin of your feet and toenails quickly and accurately. At the same time, not all masters know how to competently work with such a device, and therefore, they often have to combine hardware manicure with other types of nail treatment. The video lessons posted below will tell you how to do a hardware pedicure.
[yandex1] [google1]
What is the essence of the procedure?
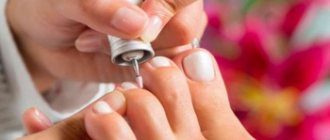
Using a hardware version of pedicure, nails and feet are treated with a special machine, which polishes off unevenness, corns, rough skin, and eliminates other problems.
It is considered a more advanced method in contrast to classic pedicure, in which the foot is treated with a blade, grater, water and special softening creams.
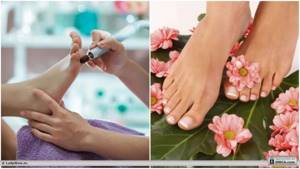
Hardware pedicure and its results
The pedicure machine uses attachments with an abrasive surface that rotate at speeds of up to 50 thousand revolutions per minute. Experienced professionals not only eliminate minor defects, but also solve problems of cracks, ingrown nails, and fungal infections.
The standard version of the hardware pedicure technique includes treatment of heels, toes, keratinized areas, cuticles and overgrown nails. There is also an untrimmed method without mechanical removal of the cuticle; in this case, it is only gently moved with a stick. The most enjoyable spa pedicure is when steaming, peeling and massage are performed before using the machine.
It is believed that it is quite difficult to carry out such processing correctly at home. However, pedicure machines have been in great demand lately. This technology is especially easy for those who are masters of classic manicure and pedicure. But mastering it from scratch is also possible, the main thing is to have the desire and a good professional apparatus.
Beautiful legs after a hardware pedicure
Classic or edged pedicure at home: description and materials
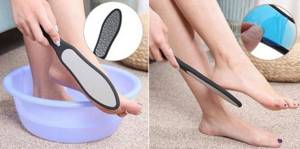
A classic pedicure is a procedure that combines:
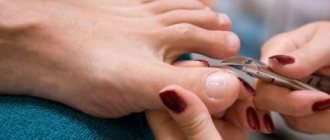
- soaking the feet in water with further removal of the rough skin of the cuticle and pterygium using scissors or nippers, a pusher and an orange stick;
- correction of the shape and length of the nail plates;
- processing with a stop file or grater.
Due to the fact that this version of the pedicure procedure uses cutting tools - scissors or nippers - it is also called trimming.
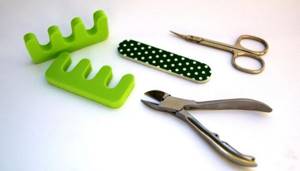
To perform a trim pedicure at home, you will need the following materials and tools:
- Foot bath
- Salt, soda, shower gel or liquid soap
- Large scrub
- Pusher, orange stick
- Nail file 180/220 grit
- Nail clippers
- Nail scissors or skin clippers
- Grater or file for feet, coarse abrasiveness 80/100 grit
- Finger separator
- Light moisturizer
- Cuticle oil
- Large napkins or towels
- Gel polish or varnish for decorative nail coating
What is needed for a hardware pedicure?
To get a quality pedicure, you first need to decide on the device. There are now many models on the market, differing in the number of special attachments (mills), power and design.
Universal machines suitable for hardware manicure and pedicure are in high demand. It is important that the device has a power of at least 40 watts, a rotation speed of at least 15 thousand revolutions per minute, as well as the possibility of reverse reverse.
One of the main conditions for multiple comfortable pedicure procedures is the availability of a set of cutters, which will contain all the necessary caps:
- small diameter attachments for removing overgrown nail edges;
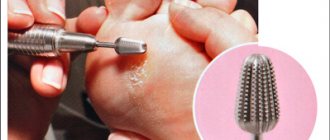
- large attachments for removing rough skin, calluses and corns;
- spherical and needle-shaped burs for processing the side roller and removing the cuticle.
Also from the inventory you will need a bath for washing your feet, buffs for polishing, moisturizing and nourishing creams, colorless and decorative varnishes.
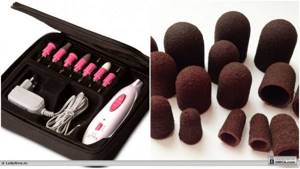
Example of a machine and attachments for hardware pedicure
In addition to size and shape, cutters differ in composition and rigidity.
Standard types of nozzles for the hardware method:
- Diamond caps are cutters with color-coded cuts, where black is a rough tip for shortening nails and removing calluses, blue is a medium-hard tip for light seals, and red, yellow and green are soft for neat treatment of feet and cuticles.
- Ceramic tips are ideal for beginners, as they are softer and safer. The softest ones are blue and pink, the medium ones are white, brown and black are the hardest.
- Silicon carbide - disposable sand caps, fixed over the cutter, also provide for three-stage processing.
In order to accurately determine the need for a particular attachment, you need to carefully evaluate the rigidity and area of problem areas. Based on this, the stiffness and size are selected.
Types of cutters for hardware pedicure
If you do a pedicure not only for yourself, but also for other people, you need to take care of sterilizing the device and cutters, wear gloves, a mask and an apron, and also choose a comfortable chair and lamp.
Step-by-step instructions with photos
A careful study of processing technology helps you quickly master the use of a pedicure machine.
Here are some important tips from the experts:
- Move the machine in the opposite direction from its rotation, do not stop in one place;
- Do not press the cutter too hard against the skin to avoid damaging it;
- For the first time, operate at low speeds, below the recommended speed;
- Position the cutter at an angle of 30-40 degrees to the surface;
- Process the cuticle from the center to the edges;
- Walk along the nail folds along the growth of the nail.
The stages of the procedure will depend on the number of attachments in the kit. Stepped, gradual processing will be preferable for a smoother, cleaner effect.
Classic step-by-step instructions:
- Prepare your feet by wiping off the old polish with a solution. If there is gel polish, remove it using a grinding cutter, after treating the nail plates with acetone and foil.
- Wash your feet in cool or warm water and soap and dry well.
- Apply an antiseptic solution to the entire surface of your feet and toes and wipe with a clean towel.
- Treat the skin of the feet with a large, hard cutter, remove non-inflamed calluses, corns and rough skin of the soles.
- Next, use a medium-abrasive nozzle, eliminating small irregularities, paying special attention to the treatment of the heels.
- If there are cracks on the heels, outline the formation with a thin nozzle.
- Using large, soft cutters, sand and polish the entire skin of the feet until smooth.
- Use a small soft brush to work on the side ridges and between the toes.
- Remove cuticles using a needle cutter or a diamond cutter with a ball end. If you are afraid of damaging the skin, then treat the cuticle with an emollient for the first time and move it away.
- File off the required part of the edges of the nails with a medium-abrasive cutter and give the desired shape.
- To polish the nails and pterygium, use a felt or rubber tip or use a buff.
- Wipe your feet with a disinfectant.
- Apply moisturizer and apply a light foot massage.
- Finally, you can apply varnish - healing, strengthening or colored. Do not forget to degrease the nail plates from the cream before doing this.
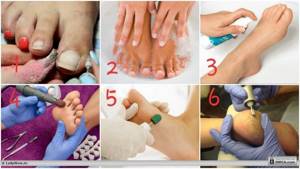
Step-by-step instructions for hardware pedicure: first stage
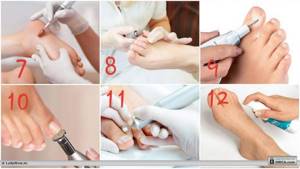
Second phase
Self-training in hardware pedicure may take time, but gradually the skill of selecting cutters will improve, and the movements will become correct and as accurate as possible. After just a few procedures, it will be possible to appreciate all the advantages of this technique.
Do I need to register a business?

Is it worth registering your business at all? Of course yes! You don’t need a license, but you do need to register your individual entrepreneur.
This can only be achieved after receiving a certificate that confirms that you are qualified in this area. Also register with the tax service. After this procedure, you will need a cash register. You will find out the entire necessary list of papers and requirements when registering your small business.
Fortunately, in our country, this procedure will not take very long, a maximum of 1 month (it takes a long time to wait for a cash register, but it is necessary for work).
You can work without registration until you accumulate the required amount of money to obtain a certificate, etc. But in any case, each case is individual, so before starting all the paperwork, consult. If you do not have a whole room allocated for this work, but only a small corner, then the registration conditions will be different.
Advantages
The hardware method is increasingly replacing the classic trimmed pedicure due to the absence of disadvantages. The only downside may be the need to spend money on purchasing a good device and cutters. However, the impeccable results are worth the investment.
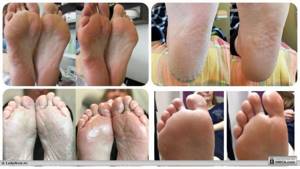
Photos before and after hardware pedicure
Advantages of hardware pedicure:
- safety from cuts and other damage, thereby eliminating infection by fungus or bacteria;
- all items are easily disinfected; for greater confidence, there are disposable nozzles;
- delicate treatment suitable for sensitive skin, even children's;
- the result lasts longer, the procedure can be performed once a month, unlike the classical method, recommended for every two weeks;
- copes with most problems - hyperkeratosis (roughened layers of skin), ingrown nails, corns, heel cracks and spurs, hardened calluses, fungal diseases, thickening of the nail plate;
- does not require preliminary steaming, all manipulations are performed dry;
- much less time is spent than with manual instrumental techniques;
- the procedure is painless and does not cause discomfort;
- has no contraindications, suitable even for patients with diabetes and varicose veins.
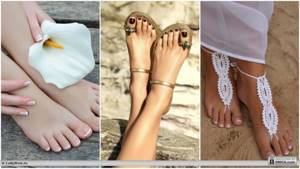
The well-known truth that proper foot care has a beneficial effect on overall health makes many people think about acquiring the skill of doing a hardware pedicure on their own. With this device you can be confident when wearing open shoes, as well as visiting the beach or pool. After all, the hardware method is great for maintaining the beauty and softness of feet for a long time.

