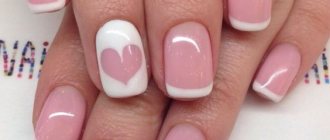
French manicure is considered the most universal and widespread nail design technique among professionals and simple fashionistas. French has not lost its relevance for many seasons, being considered the best choice for stylish business women, teenage girls, creative individuals, athletes, etc.
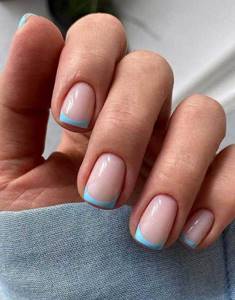
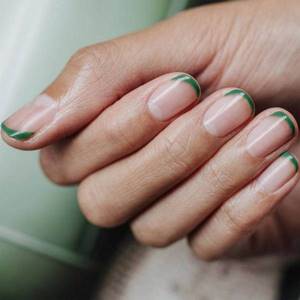
But modern fashionistas are not used to standing still, so the classic French jacket is being replaced by the reverse one, which looks no less impressive and attractive. The main difference between the new variation of French manicure is the location of the contrast zone. In anti-french it is not at the end of the nail, but near the hole.
Every girl can do the reverse French, just follow the recommendations presented in our article.
Reverse French shellac
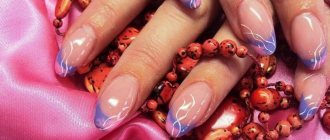
Reverse French, lunar French, anti-French, inverted French - call it what you want - remains one of the most popular options for classic Hollywood and runway design today. The Americans called French in the opposite direction MOONicure, changing the first four letters in the word MANicure to MOON, which translates as “Moon”. Smile lines are located in the holes of the nails, taking the shape of either a crescent moon or the outline of a half moon.
What is a classic French?
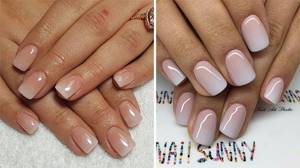
This is a coating that emphasizes the natural beauty of nails. As the main one, choose a varnish of a natural shade - beige, pink. Some artists use a completely transparent base to achieve the most natural effect. The free tip is covered with snow-white color. This combination turns out to be truly exquisite. Women love the French jacket for its versatility. In addition, as it grows, it is not very noticeable.
The classic French style appeared quite a long time ago. Therefore, now there are an incredible number of variations. For example, the tip can be painted not only white, but also any bright shade.
Reverse French black
Reverse French yellow and black
Reverse French red and black
Lunar
The main idea of lunar is to highlight the lunula with contrasting varnish. It looks like an upside down smile. To complete such a design, you will need a special stencil, but experienced craftsmen can do this on their own using a brush.
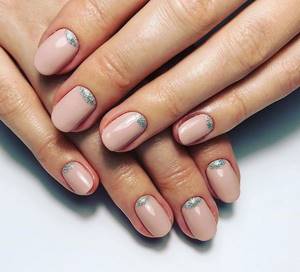
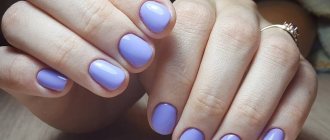
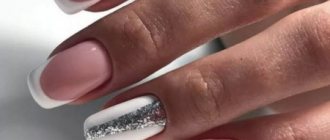
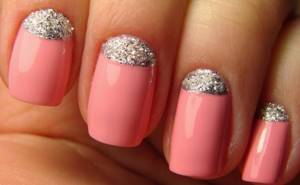
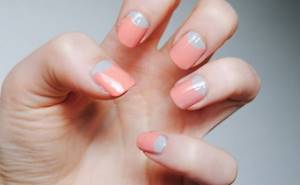
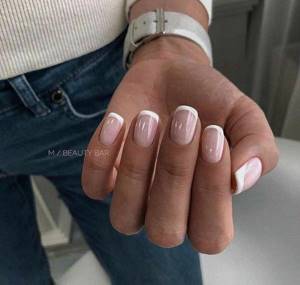
Reverse French pink
Reverse French white with pink
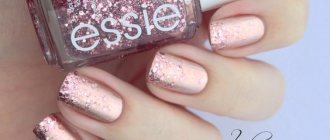
View all 93 photos Pink jacket >>
Which shade should I choose?
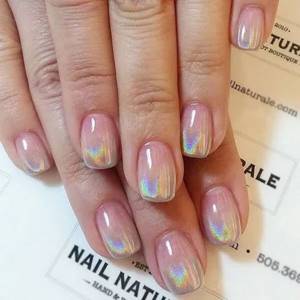
The reverse French manicure, a photo of which is included in the article, is beautiful in both pastel and bright colors.
Delicate pink, peach and beige colors create a romantic mood, perfectly complementing skirts, blouses, dresses and other feminine outfits. You can also choose light blue, lilac or faded light green tones. These soft colors do not attract unnecessary attention, but at the same time create a feeling of well-groomed.
Bright shades catch the eye and make the owner of an unusual moon manicure stand out from the crowd. In addition to it, it is better to choose equally colorful clothes: acid T-shirts, beach shorts, etc. By the way, a bright manicure will be especially appropriate on vacation.
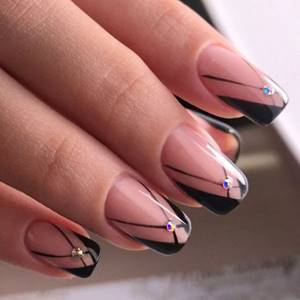
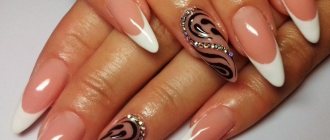
Reverse French with a pattern
View all 130 photos of French with a pattern >>
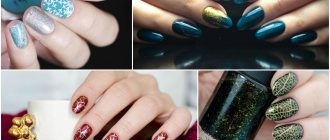
Fashion design 2020-2021: trends in nail art
French manicure has firmly taken first place on the pedestal of the nail industry. It is popular due to its simplicity and beauty, femininity and elegance. It remains just as relevant in 2020.
French is constantly transformed, modified and updated. In its classic version, it suits any style of clothing. But the fashion trends for 2022 are richer shades and bolder designs.
The trend is in bright colors with patterns and various decorations in the form of rhinestones, sparkles and ribbons. They fit harmoniously into the usual French manicure technique. In 2022, top nail art experts offer fashionistas not to limit themselves to nude colors and a couple of rhinestones.
It will be fashionable to highlight the tip of the nail in various ways, as well as apply a matte finish and combine it with a glossy one. Ombre and the “smile” style also remain relevant this year.
Reverse French on short nails
French manicure looks great on nails of any length and shape. The main thing is to choose a color that is in harmony with your color type, and our photos and high-quality pictures collected on the foreign Internet will help you decide on the design.
The reverse French technique at home will not cause any particular difficulties, but it will require patience. Choose a video tutorial and try it out, experiment with colors and textures, don’t be afraid of innovations - you can handle any design!
View all 130 photos French for short nails >>
What combinations should you avoid?
When creating a manicure with a smile, you need to take into account that not all color combinations will look beautiful. You should not prefer too aggressive nail designs, which because of this will become the main element of the image, which is a sign of bad taste. The manicure should only complement the image and harmonize with the overall style.
Not the best color combinations are red and black, black and yellow, as well as those that do not fit together in principle (red and pink, blue and cyan).
Everyday manicure for business women should be done in natural colors or white and black. For summer parties during vacations and seaside holidays, it is appropriate to use bright combinations. An evening manicure is best created by choosing rich, but not provocative tones that will match the outfit. Also in this case, the classic, natural color scheme looks beautiful.
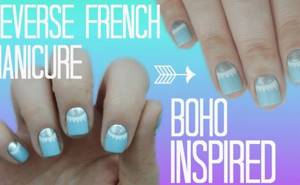
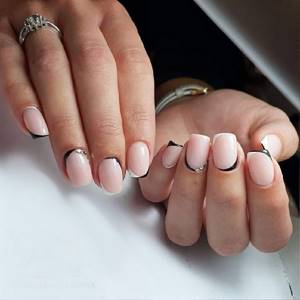
Reverse French with Negative Space
How to make a reverse French?
No matter what you use - gel, gel polish, regular polish, acrylic paint or foil - you need a steady hand and confident technique. You can draw a curved line in the nail hole using a rounded adhesive stencil. If you don’t have a stencil, you can use regular electrical tape or the rounded edge of an adhesive plaster. If you watched the previous videos in this article, you have already seen that with an experienced hand you can draw a smile line without any stencil - just draw it with a brush.
![]()
Try this master class using adhesive tape:
How to draw a smile line step by step:
How to make anti-french?
Regular varnish or its gel analogue are the main contenders for creating a manicure with anti-french. You can use anything, the main thing is to prepare the necessary tools and choose a color scheme for your manicure.
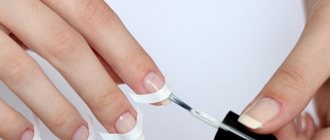
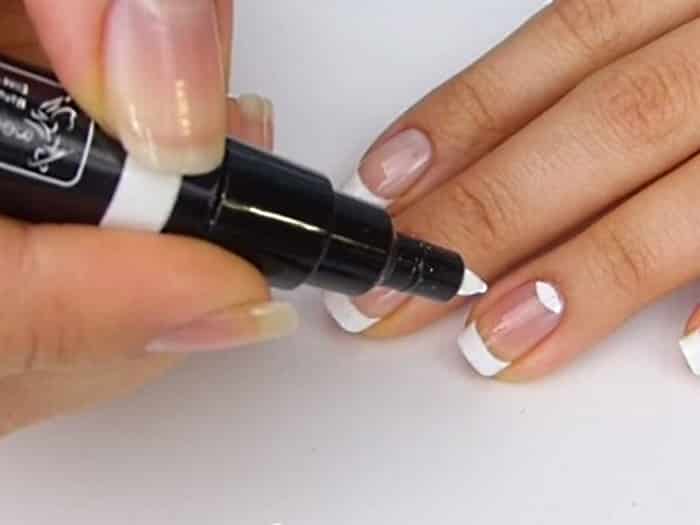
Reverse French gel polish step by step
To take advantage of all the delights of this long-lasting coating, you need to have additional products that will make your manicure stronger. Next you need to follow a few simple steps:
Step 1. Prepare the surface of the nail for coating: form a free edge with a nail file, process the cuticle, clean the nail to remove the shiny film;
Step 2. Use base coat. Dry.
Step 3. Paint the nail with the color that will color your smile and let it dry.
Step 4: Apply the second color, leaving a space for a smile at the base of the nail. It is better to start painting the nail from the middle, gradually painting along the sides. After completely painting the nail, the coating polymerizes.
Step 5. Cover the nails with top coat, dry, remove stickiness.
Further, the nail design can be complemented by painting and decor. If necessary, you can apply more colored layers to create a multi-layered manicure.
This is how reverse French is done step by step
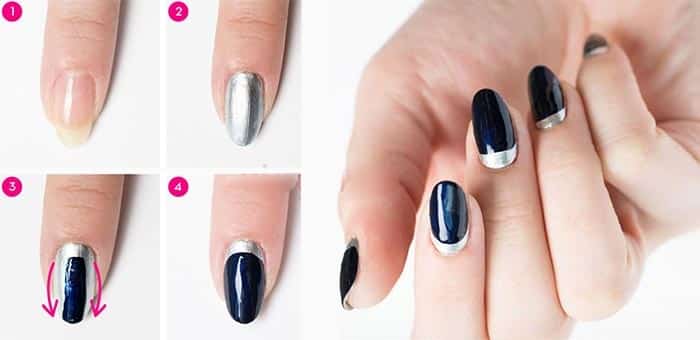
Result
Brushes for painting with regular varnish
Standard brushes, which are purchased along with colored varnishes, are often not suitable for use in painting the nails or making subtle decorative stains. There is enough choice of brushes for painting. They differ according to the following criteria:
- form:
- thickness;
- material.
The semicircular shapes of the brushes are convenient for uniform application of varnish when drawing straight lines (which is important when painting holes, smiles, etc.). The thickness should be chosen according to the volume and complexity of the work. But you should not choose natural fibers from materials; they can crumble and apply varnish unevenly. But it’s worth paying attention to nylon: this material holds its shape well, holds the pigment between the fibers and applies it evenly.
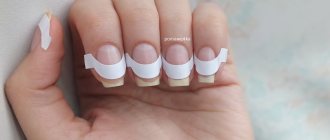
Stencils and applicators
Many have seen white stripes or circles in stores. But not everyone realizes that in front of them are convenient assistants in creating almost all types of French and lunar designs. Among the stencils you can find the desired shape to make a manicure quickly and efficiently. As a rule, they consist of paper with an adhesive side. Such blanks fit tightly to the surface of the nail and are removed with a slight movement of the hand.
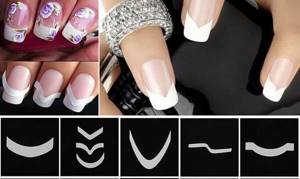
Stencils for French and reverse French
To make the nail design process easier, applicators are used. They help both novice nail art masters and debutantes in manicures for home use to cover their nails evenly without protruding beyond the sides of the nail. They are made of silicone, easily put on the fingertip, and after drying the coating, they are removed.
Applicators for manicure
Markers for manicure
You can make a design easily and simply using manicure markers. They come in different colors, dry quickly, and after painting with such markers you need to seal them with a topcoat. Using a marker, you can make the finest lines without a trace of layering on the background coating. Very convenient for marking the smile line.
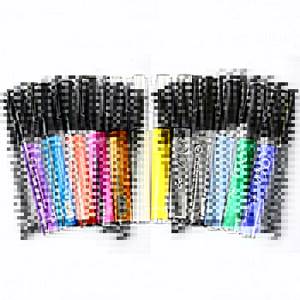
Markers for manicure and an example of a manicure using it
Reverse French nail extension
View all 110 photos Extended French nails >>
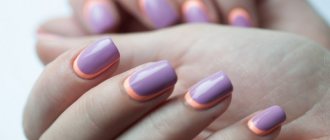
Side
The side French is the following picture: a uniform color of varnish is applied to the main area of the nail, and a strip of a different color is drawn on the side. Usually these are contrasting colors.
For example, the entire nail can be covered with a dark shade of varnish, and the smile can be covered with a light shade. But combining matte and glossy finishes is not recommended.
With rubbing
Another interesting type of decor is rubbing. It perfectly complements any manicure design. It can be varied by rubbing, applying it to all nails or to some separately. You can also use the rub only along the edge, which will also be very original.
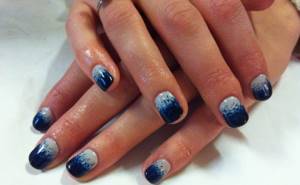
Ombre
The ombre style is characterized by a very smooth transition from one color to another, and can combine 2 or 3 shades at once. And on long nails you can use 3 or more shades. Ombre looks more beautiful on oval or almond-shaped nails. The color transition can begin either from the classic version (from the free edge) or from the reverse (that is, from the lunula).
With monograms
A manicure with various curls and monograms can be created both on part of the nail and on the entire nail plate. This pattern resembles lace or flowers. The design is applied using a brush or stamping.
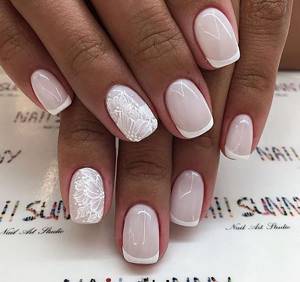
Monograms painted with glossy varnish on a plate coated with matte varnish look original. Another original solution is to sprinkle the painted monograms with special powder. This will create a 3D effect.
Stamp for stamping
View this post on Instagram
Publication from STAMPING FROM AROUND THE WORLD (@mystamping.ru)
This method of creating a French manicure came to us from social networks. It will require:
- Silicone stamp for stamping. Rubber will not work, since the surface must be elastic and soft enough;
- White gel polish;
- Camouflage and regular base;
- Thin brush;
- Top;
- Lint-free wipes;
- Degreaser;
- Skin Defender is a liquid tape to protect the skin.
You need to start your manicure, as in the previous instructions, with hygienic treatment of your fingers, cuticles and sawdust. Once the nail is ready, lightly buff the surface and wipe the nails with degreaser.
Step-by-step instruction:
- Apply a thin layer of base, and then 1-2 layers of camouflage, letting each of them dry;
- Apply liquid manicure tape carefully around the nail. This step takes place for girls with short and medium nails - when imprinting white gel polish, it will be problematic not to touch the skin. If you have long nails, then it is not necessary to use a defender;
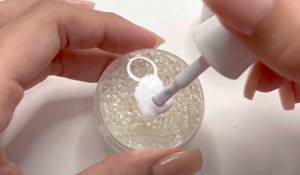
- Degrease the surface of the stamping stamp and apply white gel polish to it. Try not to make the layer of white too thick to avoid a step at the border of the French;
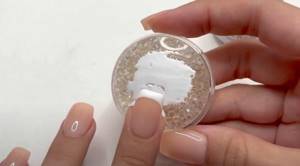
- Press the prepared nail at an angle of 45 degrees into the gel polish on the stamp - the deeper, the wider the smile line will be. It may not work out the first time - practice on tips and after 2-3 times you will understand at what angle and with what force to press the nail;
- After such manipulation, you will receive a French jacket with a smooth curve, but without a mustache - if you want, you can finish them by hand with a thin brush;
- If you applied liquid tape, you can remove the film at this stage. Using a thin brush, give the smile line a more neat appearance, evenly distribute the gel polish, and straighten the edges. Don’t forget to look at how things are on the back side of the nail - sometimes gel polish gets clogged there and needs to be removed before drying - the same thin brush will help you with this;
- Dry the gel polish, cover the design with a top coat and dry again.
The girls have already managed to adapt this method and came up with a life hack - replacing the silicone stamp with a weakly inflated balloon. We haven’t tried this technique, but social network users claim that it works well.
With rhinestones
Manicure using rhinestones is considered the most attractive and chic. The stones shimmer in the light, attracting attention. Swarovski crystals are perfect for such purposes, although they will cost the fashionista more than regular rhinestones.
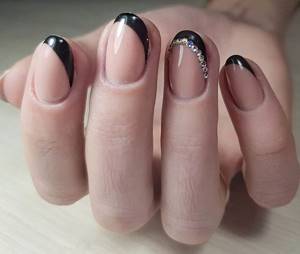
For a French jacket, it is better to use rhinestones of the same type and size. They are harmonious on any surface, but the main thing is not to overdo it with their quantity.