Treating your nails before a manicure is the initial stage of any manicure, both in a beauty salon and at home. Today, many women prefer to cope with this caring procedure on their own, in order to save the family budget or out of fear for their own health. After all, it is no secret that many diseases of a viral nature, which are very difficult to treat, are transmitted through blood.
Coming to a beauty salon, every woman plays roulette. No matter what reputation the salon has, no matter how much the masters talk about their integrity, the “human factor” will never disappear from our lives! The disinfectant ran out, the sterilizer broke, they forgot to treat the surface of the table or hand rest, etc. There are plenty of options. Hepatitis and HIV can be an additional “bonus” to a great manicure.
Rules for perfect coverage
There are several main factors on which the final result depends - a high-quality and beautiful coating.
- High quality manicure . No matter how hard you try, no matter how many layers of material you put on your nails, until a clean manicure is done, there can be no talk of any beautiful coating. If the manicure is poorly done and there is pterygium or smooth, untreated areas left on the nail plates, then the material may flow along the surface. This means that there will be streaks, an uneven paint line, material will be poured into possible cuts, the color will be in a rut, and you will have to file the nails when removing them;
- Materials with suitable consistency . All the materials you work with should be familiar to you: their consistency, fluidity. Select the materials with which you are comfortable painting, drawing, modeling, etc.;
- Convenient coating tools . Again, you should be comfortable and comfortable working. Select brushes of the required length, the correct shape of the nail file and the rest of the tools;
- Knowledge of the architecture and capabilities of certain materials . It is important to understand how the material behaves on nails and what thickness of coating it can provide. And if during the manicure process you need to do leveling, then several layers in a decorative manicure, then you just need to know and regulate the placement of the material on the nail plate;
- Refined movement technique and coverage algorithm . Of course, everything needs to be done quickly so that the material does not flow down or accumulate on one side. It is also necessary to observe a strict sequence of layers. You understand, if you apply a top coat instead of a base coat or vice versa, then it is unlikely that such a manicure will have the correct architecture, be beautiful and last a long time.
Hand mask
Paraffin masks for the skin of the hands are an ideal remedy for their restoration. The skin becomes hydrated, soft and smooth. To carry out this procedure at home, you need to purchase special paraffin at the pharmacy. Following the instructions, melt it until liquid. Paraffin should not boil; the skin should feel “pleasantly warm” when applied. Paraffin is applied in several layers. To do this, you can simply dip your hand in paraffin several times.
Then put a plastic bag on it and wrap it with something warm, for example, a terry towel. It’s good to do this procedure together with a friend to help each other cope with the second hand. You need to keep this mask for 15-20 minutes. Then remove the paraffin along with the package and your hands will be simply magical. This mask can be done once a week after a hygienic manicure before applying varnish.

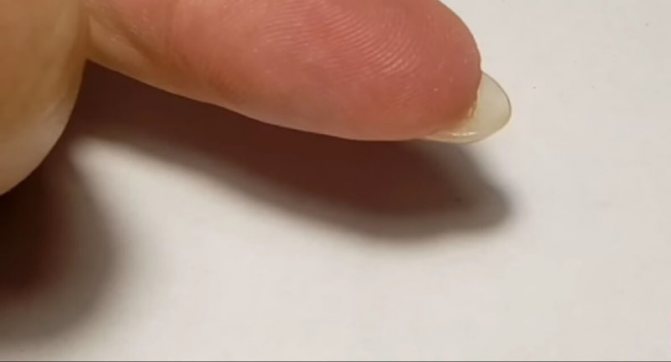
Layers of the natural nail plate
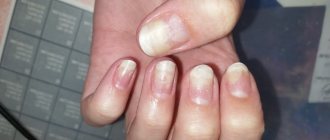
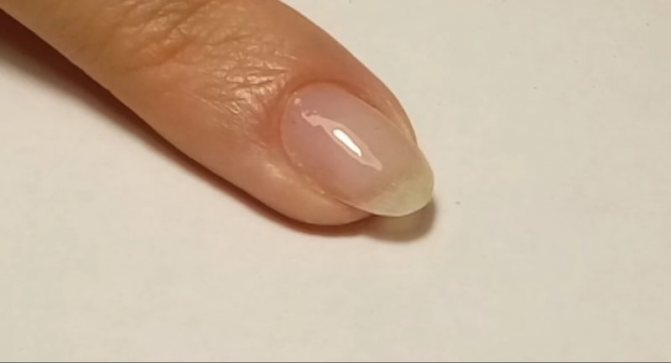
You need to understand which nails can be done with any type of manicure, which of them will take a little longer to work on, and with some you can’t do anything at all. It depends on the condition of the natural nails.
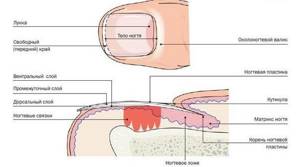
Dorsal - a layer that affects the adhesion between the polymer artificial material and the nail plate. Everything works out due to its presence.
If you degrease poorly, then poorly raise the scales of the dorsal layer, leaving shiny smooth areas, then most likely there will be no adhesion in places. The dorsal layer guarantees good adhesion of the material to the nail plate.
The presence of material detachments may be due to the following reasons:
- Improper preparation - poorly sanded surface with shiny areas;
- The nail plate can be very mobile, and the material chosen is too hard, so there is no shock-absorbing membrane between the nail and the hard material.
Intermediate or soft keratin . Nails with such a top layer will already have poor adhesion; nail strengthening is a must. If you have such nails in front of you, then do the following:
- Shorten the length;
- We use a primer;
- Strengthen your nails by straightening them.
Ventral . For marigolds with a ventral top layer, any type of manicure is in principle contraindicated. There is no coupling, it cannot be covered, a recovery period is required.
Learn more about the structure of nails, which affects their growth and healthy appearance.
Cuticle remover, oils and scrubs
Cuticle remover, oil, scrub, cream and cotton pads can be purchased at any cosmetic store. You can use home remedies: salt and oil baths or oil massage. Oils are used cosmetic or essential. The most useful are coconut, almond, avocado or tea tree oil. Fruit acids, which are sold in pharmacies, will do an excellent job of softening the cuticle.
Stages of preparation for coating
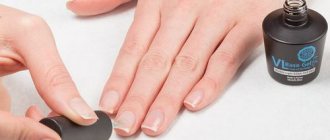
- The first thing you need to do is a hygienic manicure, which includes cleaning your hands, removing the old coating, shaping your nails, cleaning and treating the skin around the nails and the nail plates themselves;
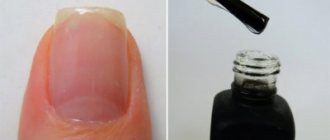
- Degreasing nail plates . The lipid layer, this natural fatty film, must be removed with a degreaser. You cannot begin to lift the scales of the dorsal layer along the fatty layer. Be sure to degrease the surface first;
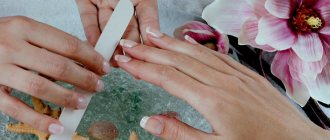
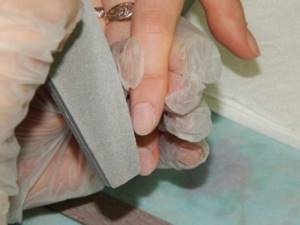
- Sanding the top layer the nail plate is produced in one direction. First, we identify the middle part of the nail, where the central plane is located, and two side slopes. Dense lipid plaque, which has settled into the porous structure of the dorsal layer, is lifted with a 180 grit buffer in the case of a dense nail structure, with a hard lipid layer, or 200 grit in the case of a thinner structure. We move the periungual roller and move the file strictly in one direction from one side to the other, first on the side slope from the roller to the center, then move to the central plane, and then to the other side slope;
- Dehydrator application . Apply liberally to the entire nail plate and draw out moisture and excess fat from the lower layers of the scales. You can even walk on the skin around the nail;
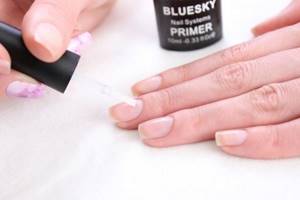
- Primer application. If the nails are healthy and problem-free, then we proceed immediately to applying the base. If there are minor problems, then we use a primer. To do this, squeeze out the brush, use a semi-dry brush from the bottle to the middle of the nail (from the smile line to the free edge), and rub the primer into the structure of the dorsal layer with trampling movements. It’s as if you want to fill all the areas and weak spaces of the natural nail. After application, polymerize in a lamp for 30 seconds. The primer works on the natural nail. Used when nails are damaged, hyperplastic, and heavily exfoliated. There is no point in applying primer over the base coat.
Products for treating cuts
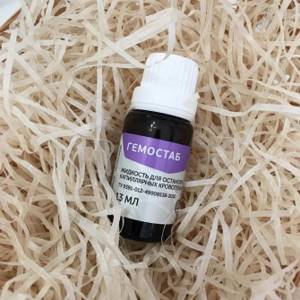
Usually treated with alcohol or hydrogen peroxide, but such antiseptics thin the blood. Professionals use hemostatic fluids that quickly stop bleeding and do not interfere with the quality application of varnish. You just need to moisten a cotton swab in the solution and apply it to the wound for a few seconds.
“Vagotil”, “Gemostab”, “Capramin” and “Enoji” have successfully migrated from surgery, gynecology and dentistry to the nail industry. You can use medical glue, which stops bleeding well.
“Vagotil” gives an immediate effect, but can turn the skin jaundiced. “Hemostab” not only stops bleeding, but also relieves pain. “Capramin” does not cause allergies, does not stain the skin and has no specific odor, and the box contains a very convenient pipette for dosing.
Leveling technology
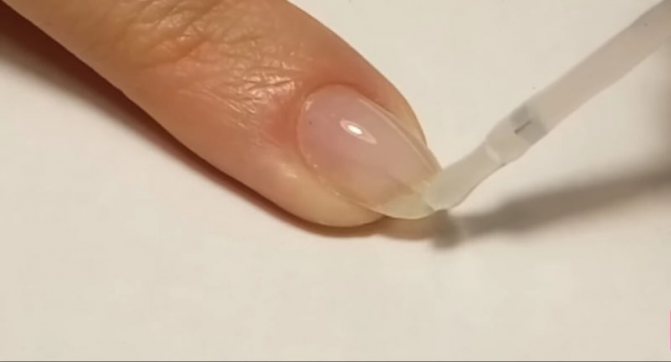
- First layer. The applied first layer of base coat must be cured in a lamp if:
Nails are thin or damaged, and applying too much material can burn them. Apply the base using trampling movements. When leveling healthy nails, there is no need to dry the first layer, it remains damp;Several bases are being connected: the plastic one is used first, and the more rigid one is covered on top;
- Drop installation. At an angle of 45 degrees, the drop is placed on the nail with a brush and pulled to the sides towards the lateral sinuses and downward according to the “left-right-center-down” pattern. The result should be a beautiful, even funnel;
- Contraction of volumes. As soon as a funnel is formed, we begin to pull the material from the funnel area to the free edge of the nail plate;

- Marigold flip at an angle of 45 degrees to the parallel of the table so that the distributed material is collected at the apex, the highest point of the natural nail.
- Polymerization in a lamp.
For the leveling process, you can replace the base coating with biogel and follow the same scheme. It is also important when distributing the material to move the brush over it gently, without pressing.
Biogel and its properties for strengthening, building, health and growth of nails
General safety rules
How to properly treat fingernails, hands and tools so that the manicure process is safe? The process of sterilizing instruments is described in detail above, but there are several more rules that should be followed for your own good.
All actions must be performed very carefully and slowly, because you can cut yourself or the client. It is worth asking the client in advance whether his capillaries are located close to the surface of the skin. If this is the case, then it is worth recommending an unedged manicure to avoid injury.
If you receive a “wound” in the fight for the beauty of your nails, the cut must be treated immediately. This is not a tragedy. If all manicure instruments are disinfected according to SES rules, and the wound is immediately treated, then you don’t have to be afraid of becoming infected with something dangerous.
How to treat cuticles at home
There are two ways to tidy up the cuticle: using trimming, and not using it. The first option, trimming, stimulates the cuticle to grow faster over time (similar to frequent hair cutting), so the second method is more gentle if the cuticle does not bother you much.
For the non-edging method, a special removal compound is used. Its consistency can be liquid, gel-like, in the form of a cream or as a lotion - this is not the main thing: the essence is in the composition containing softening fruit acids. After application, there will be a feeling of dryness - do not worry, this is normal, since the product tends to degrease living tissue:
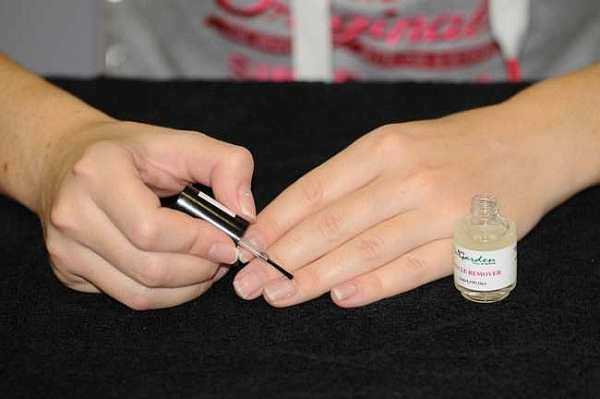
“Lubricate the cuticle and side ridges from the inside...”
coat the cuticles and side ridges from the inside using an orange wood stick (an ideal tool due to its softness and ability to kill germs); wait a minute or two; Remove the dead top layer from the nail carefully, starting from the side edge. Move the softened film with a stick and, moving in an arc, walk along it and the rollers. The pellets formed in this case consist of dead cells, which indicates the readiness of nail treatment; rinse off the remaining composition; polish the rough surface of the rollers (if necessary) with a diamond file or get rid of dead bodies with a cutter, but be careful not to injure living tissue.
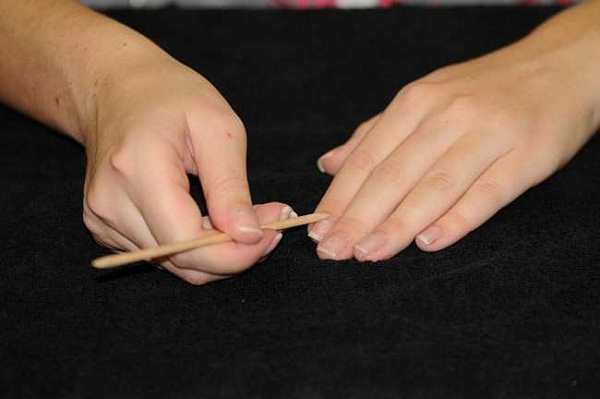
“Clean off the dead top layer from the nail carefully...”
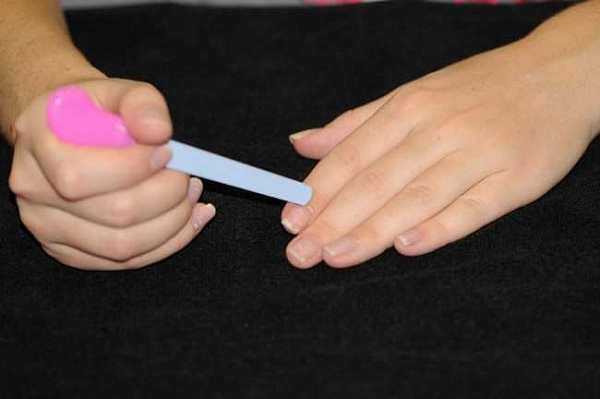
“Sand the rough surface of the rollers with a diamond file...”
This composition inhibits the growth of the cuticle, so further processing will not occur soon.
The trimming method for getting rid of cuticles starts with a finger bath. The dosage of the solution for steaming is in the following proportions:
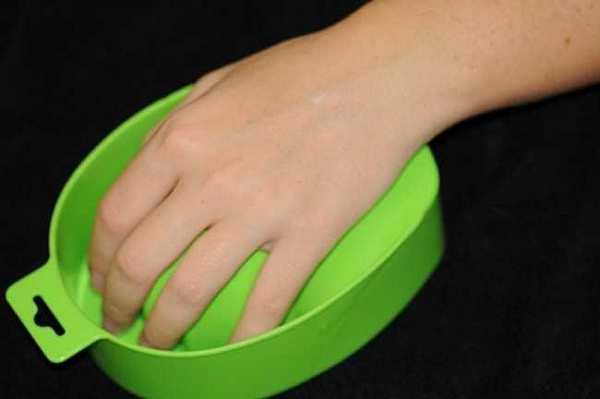
Do as in the photo
water: 1 glass; sea salt (helps strengthen the nail plate, but is not used if there is damage or inflammation on the skin; in this case, it is replaced with chamomile infusion): 1 teaspoon; lemon juice (accelerates cuticle separation): up to five drops; iodine (added for peeling nails): three to four drops.
Steps to remove cuticles using the trimming method:
disinfect the necessary tools (tweezers, nippers) with an alcohol-containing solution and check them for sharpness - with blunt utensils you will not be able to achieve the desired effect and may damage the tissue; make a bath in accordance with the recommendations for the composition of the solution; After steaming your hands for five to seven minutes, take them out and dry them with a napkin or towel, completely removing moisture; move the cuticle away from the edge using an orange stick; cut the cuticle carefully using sharp nail clippers or tongs: move the tool smoothly, without interruption, “drawing” a rounded line and leaving a smooth edge. Cut moderately to avoid injury to the skin and the formation of burrs; treat the cut areas with an alcohol-containing solution.
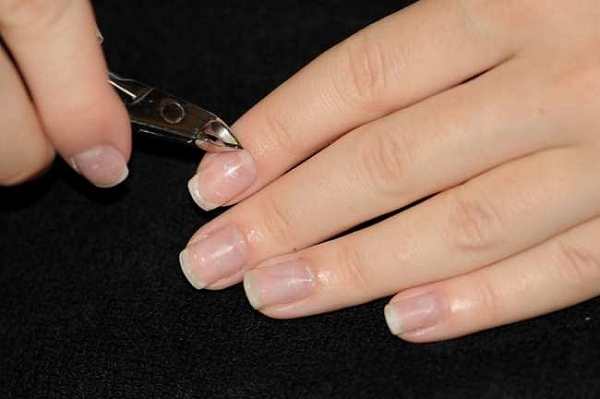
“Cut the cuticles carefully using sharp nail clippers or tongs...”
It is imperative to get rid of painful hangnails: they bring discomfort and, when inflamed, spoil the appearance of the fingers. To carry out the procedure, you will also need tools (disinfected and sharp) and warm water with glycerin (one teaspoon is enough for a bath):
steam your fingers; dry your hands; carefully cut off the burr with tweezers (nippers), holding them perpendicular to the burr; Treat skin lesions with an alcohol-containing liquid.
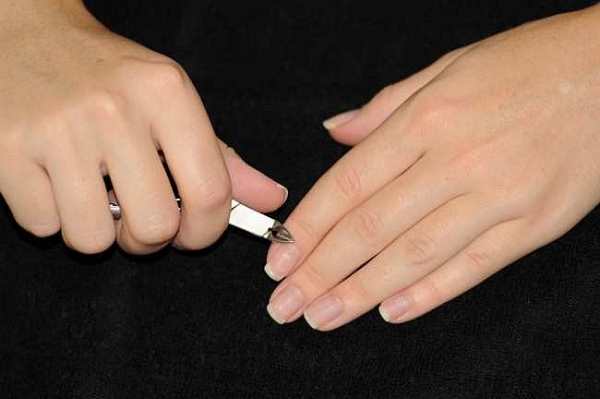
“carefully cut off the hangnail with tweezers...”
Having dealt with the cuticles and hangnails, soften the nail plates and surrounding tissues with a special cuticle oil by lightly massaging and kneading your fingers. This should not be neglected: massage with oil is not only pleasant, but also useful - it strengthens the nail, regenerates the water-fat protection and softens the cuticle. If there is no special composition, take regular but real oil (for example, olive oil). Carrying out this procedure every day will give you beautiful nails after a while.
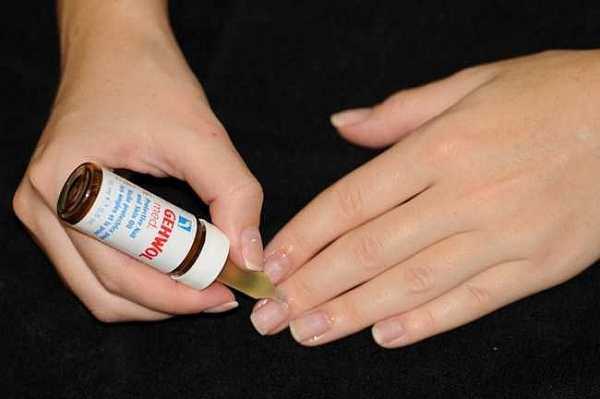
“soften the nail plates with a special cuticle oil...”
Important : if you paint your nails, such a procedure should be postponed and performed after the coating has completely dried: if the plates are greasy, the varnish will lie unsightly on a slippery surface and will quickly peel off.
Again, if coating with varnish is not expected soon, you can smear your nails instead of oil with a special strengthening agent: this is especially important for those who cannot boast of strong and fresh nails.
The choice of funds is yours, today there are quite a lot of them: when choosing, read the instructions, it will tell you whether it is for you or not. The IBX System complex, which acts deeply inside the nail and gives it elasticity, strength and a healthy appearance, has received excellent reviews. After applying it, you can immediately decorate your nails with any coating - it will create a protective layer and protect your delicate nails.
Nail fungus: treatment rules
How to properly treat nails with fungus? This disease requires long-term and systemic treatment. Fungal infections remain viable after washing or cleaning with conventional means; a person becomes dangerous to others and even to himself, because without proper treatment, relapses are guaranteed.
To remove the fungus, you need to regularly apply compresses, baths, use tablets and medicated varnishes. How to properly treat fungal nails? Using a sterile instrument, the nail plate is first treated with a file, and then with antifungal ointments.
For procedures, you can use “Chlogexidine” in the form of a ready-made solution (1%). Use a cotton pad to thoroughly wipe the inside of the shoes, the insole, and all tools for manicure and pedicure. Socks need to be boiled in a special solution or treated with a pharmaceutical antifungal drug.
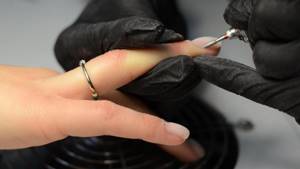
Hardware manicure: tools
How to properly treat your nails with a manicure machine? This is a device that looks like a small milling machine on which you can install different attachments. The manicure technique differs only in that dead skin is removed not with hand tools, but with a mechanical device.
The machine for hardware manicure can be equipped with diamond, ceramic or silicon carbide cutters. Diamond ones are the most effective and expensive, they perfectly solve the problem of unevenness and ensure its prevention. Ceramic ones are used for problem areas and are good for pedicures. Silicon carbide cutters are the cheapest and most available, but are considered disposable and must be disposed of after the procedure.
There are different options for nozzles. A reverse cone is used to treat nails before a French manicure, a spherical bur is needed to remove small growths and cracks. A cylindrical tool is used to shorten nails, remove gel polish, create designs and other procedures.
Using a drum, rough areas are removed, thick nails are trimmed, or the growth line is straightened. Polishers are made of plastic or silicone in the form of a rounded cone. According to reviews, even for a home manicure you need to purchase four types of attachments.
Nail treatment with a machine
How to properly treat your nails with a manicure machine? There is no need to steam them, because the procedure is carried out only on a dry nail plate. The rpm is set to a speed of up to 10,000. The machine must not be pressed or put pressure on it during processing. First, it is advisable to practice on silicone tips.
So, how to properly treat your nails with the device? The cuticle is first pushed back to the nail hole with an orange stick. In this area you can use medium-hard drums. Removal of dead cells on the palms and fingers is performed using ball-shaped burs. Trapezoidal or cylindrical cutters can be used to give the nail plate the desired shape.
Next, how to properly treat your nails with a machine? Now you can start polishing. This is quite difficult for beginners: you cannot bring the edge of the polisher to the nail to avoid scratches, you cannot hold the tool in one place for more than one second. Next, all that remains is to remove dust and nail residues, lubricate the skin around it with oil and apply varnish.
Pedicure
How to properly treat your toenails? During a pedicure, the nail plate is processed in the same sequence as during a manicure. First, the skin is steamed, then you need to trim your nails and cuticles. Pedicure requires treatment: care for the skin of the feet, cracked heels and calluses. How to treat toenails is clear, but what to do with rough skin?
Dead skin is removed with a pumice stone, but first you need to steam your feet in a warm bath for 10 minutes. Scrubs and peelings are great for getting rid of rough particles.
But a neglected situation cannot be corrected with a regular pedicure. To remove cracks and hardening, you need to apply a nourishing mask, wrap your feet in cellophane and put on warm socks. It is recommended to leave the mask on overnight, and in the morning wash your feet and lubricate them with nourishing cream. The result will appear only after several procedures.
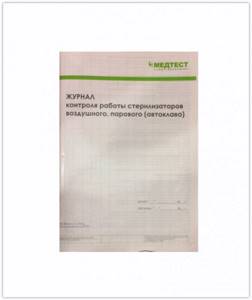
Rule 4. Regular maintenance of documentation on quality control of tool processing.
Inspection bodies often request 3 mandatory documents from craftsmen (production control logs):
- “Log of control of concentrations of solutions of disinfectants and sterilants.” Express test strips are glued there to determine the presence of active substances in the solution. This is necessary in order to replace a low-quality solution in a timely manner;
- “Logbook for recording the quality of pre-sterilization treatment.” It reflects the results of tests for blood residues (azopyram or amidopyrine tests). 1% of each type of instrument or 1 set is checked at least once a month.
- “Sterilization control log (form 257/U).” It constantly contains data on the quality of the sterilizer, obtained using indicators.
Treatment agents for mycosis
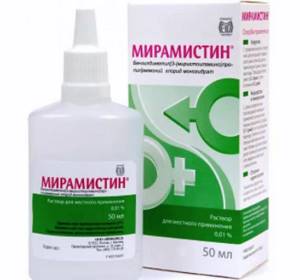
How to properly treat toenails if you have fungus? You can use pharmacy “Miko-stop”, “Miramistin”, “Dezavid”, “Laina” and the already mentioned “Chlorhexidine”. Myko-stop spray is suitable for emergency disinfection. “Miramistin” - this drug is used in a large number of cases, including for treating shoes. “Dezavid” is available in the form of a solution and spray. Can be used after nail removal. “Laina” is used on household items, but shoes must be dried after treatment.