Of course, it is very important for a woman to always look beautiful and impeccable. Particular attention is paid to the condition and appearance of the nails. Every detail is important: from the well-groomed ends to the quality of the coating. Unfortunately, not all girls manage to paint their nails perfectly - without streaks and unnecessary strokes on the skin. However, we dare to assure you that a neat manicure can be done at home. We will tell you how to paint your nails correctly for flawless nail art.

To make your manicure look perfect, it is not enough just to apply the coating carefully. It is very important to properly prepare your nails, starting with the cuticle and side ridges. You can use our recommendations, covered in articles about classic and European manicure. In them you will find a lot of useful information, supported by useful photos and video instructions. Be sure to align all ends to the same length. Next, we will talk about how to carefully paint your nails yourself at home. Believe me, this simple skill will be very valuable to you. You can constantly improve your skills, making every future nail art flawlessly beautiful.
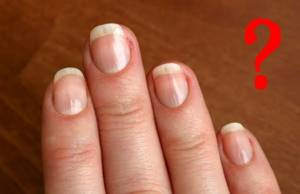
Preparation for the procedure
Start over. In order for the varnish to lay down evenly, and then remain as homogeneous, the nails must be prepared for application of the coating. How to do it?
- First of all, remove the old varnish. Take this point seriously. It is important that the old coating is completely removed and does not remain on the edges of the nails. How the new varnish will adhere depends on this.
- Adjust the shape with a nail file if necessary.
- Take a buff (or a soft polishing file) and sand the nail plate strictly in one direction. This will make it perfectly smooth and remove even peeling and unevenness that is invisible at first glance.
- Rinse your hands in water and dry them with a paper towel.
- Apply special oil to soften the cuticle. Massage the product into your nails to moisturize them. Do not skip this step, as the coating will adhere worse to an overdried plate.
- After about 5 minutes, the cuticle will become soft, and you can remove it in any way you like (cut it or just move it away). This way the varnish will not get on the skin, and you won’t have to touch it up, risking smearing the rest of the manicure.
- Wash your hands well again with soap and dry them. Just in case, wait a few more minutes so that there is no excess water left on the skin.
- And now a very important point: degrease your nails. Simply wipe them with a cotton pad soaked in nail polish remover. Now don't touch the plate with your fingers! If you accidentally hit your nail, wipe it again. Due to the fat, the coating will bubble and quickly begin to peel off.
- Apply the base and let it dry (this will take at least 10 minutes). It will provide better adhesion of the coating to the nail, and will also prevent the plate from staining if you use a bright, saturated color. In addition, the base protects nails from splitting and dryness.
The preparation is over! It's time to choose the color of your future manicure.
Cuticle removal
This stage always follows the bath while the cuticle is still soft. We push back the cuticle with a metal spatula or an orange stick and begin cutting. To cut it off, use tweezers or curved nail scissors. Remove any remaining skin from the surface of the nail plate with a spatula.
In the process of moving and cutting, try to ensure that your actions are as careful as possible. Otherwise, you may damage the skin or the base of the nail.
If you decide to do an unedged manicure, you won't need scissors or tweezers. Apply a special product to the cuticle and remove it with a stick.
How to choose a color?
You need to choose a shade not only based on the colors of the clothes you wear (although this is also important!). Skin tone, as well as the length of nails and fingers, will be equally important. But first things first.
Depending on the length of the nails
It's simple here:
- on long nails , but dark tones are best avoided (they can turn your manicure into creepy claws);
- short nails , on the contrary, look good in dark colors (black, chocolate, blueberry, etc.), since such shades visually narrow and elongate the nail plate;
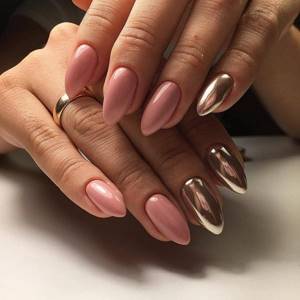
- if you have medium length , experiment with textures (metallic, glitter, matte effect), and choose any colors.
Depending on skin tone
The most difficult thing is to choose a finish for a nude manicure, since it must be in perfect harmony with your skin tone. Proceed like this:
- if your skin is very light and pale, use cool pink or beige with a gray undertone;
- if your hands are a little dark or slightly tanned, with a slight warm tint, pay attention to sand or golden cream;
- dark-skinned girls should avoid excessively yellow tones - it is better to choose coffee.
And now about bright colors. The darkest colors look good on dark hands - deep wine, black, plum and others. On girls with light tanned skin, rich, pure tones without any admixture of gray or white look great: bright red, blue, turquoise. White-skinned girls, on the contrary, suit pastel and gray colors.
Be careful with red nail polish! Although this color is considered a classic, it can highlight the presence of wounds or inflammation on the skin.
Depending on finger length
Let's answer succinctly: if you have short or full fingers, to visually narrow and lengthen them, choose colors that are close to your skin tone. If your fingers are thin and long, any dark or bright shades will look great on your manicure. Girls who fall into a category somewhere between the previous two are completely free to choose their coverage (only with restrictions imposed by the length of their nails and skin tone).
Manicure with gel polish for beginners: step-by-step lessons
Manicure with gel polish is a common occurrence, because ordinary varnishes are already fading into the background due to their impracticality. Gel polishes allow you to get a high-quality coating that can please the eye for 2-3 weeks. Of course, there were some downsides. After 2.5 weeks, the overgrown part of the nail catches the eye, which spoils the impression of the manicure done. It’s okay if you have the opportunity to visit a specialist, but there are situations when going to the salon is impossible for certain reasons. In this case, a manicure with gel polish under the cuticle will help.
This technique increases the wear time of gel polish. Within 2 weeks, your nails will look as if you just recently had a manicure. Of course, making it at home will be problematic. To get a good result you need to have certain skills.
The secret of applying gel polish under the cuticle First, with a standard brush, gel polish is applied to the nail as close to the cuticle as possible. Then the side ridges and cuticle are pushed back with a light finger pressure and gel polish is carefully applied to the unpainted area of the nail with a linear brush. The result is recorded in the lamp.
If you still want to try it, it is recommended that you first watch video tutorials that are dedicated to learning how to do a classic manicure with gel polish.
Video tutorial: How to carefully apply gel polish under the cuticle?
https://youtube.com/watch?v=HyH_qzbNDmA%3F
STEP-BY-STEP INSTRUCTIONS WITH PHOTO FOR APPLYING GEL POLISH
The first stage is preparing the nail plate.
Roughen the surface of the nail using a buff.
We remove dust and degrease the nail using a special product for degreasing and removing stickiness from nails. We carry out all manipulations using lint-free manicure napkins.
Apply primer.
The second stage is coating.
The first layer consists of the base (base coat). Dry in UV (2-3 minutes) or LED lamp (30-40 sec).
Next, a color coating is applied (gel polish in 1-3 layers depending on the consistency). Each layer is also polymerized in the lamp (the exposure time is similar).
At the end of the manicure, a finishing coat (top) is applied. Also dried in a lamp. If necessary, remove the sticky layer using a special product that was used to degrease nails during the preparation stage.
Thus, the minimum kit for a beginning manicurist looks like this:
To remove gel polish:
- Gel polish remover;
- Foil or special finger pads;
- Cotton pads;
- An orange stick, or a pusher, or a special cutter.
For a manicure:
- Manicure set with scissors, clippers, pusher, spatulas, etc.
- Orange sticks;
- Remover (cuticle softener);
- Cuticle oil;
- Files;
- Manicure machine (if you want to do hardware manicure at home).
To prepare your nails for applying gel polish:
- Buff;
- Lint-free wipes;
- Means for degreasing and removing stickiness;
- Primer.
To apply gel polish:
- UV or LED lamp;
- Standard set base top;
- Colored gel polish;
- A linear brush (for manicure under the cuticle) and a set of brushes for artistic manicure (if desired);
- Nail decor (if desired): foil, rhinestones, microbeads, acrylic powder, stickers, stamping kit and much more.
How to apply: instructions
So, you prepared your nails, applied the base and let it dry. Now what?
- Dip the brush into the varnish, and then remove the excess on the neck of the bottle. We need a very thin layer!
- Fix your hand by resting your elbow on the table. This way all your movements will be smoother and more precise.
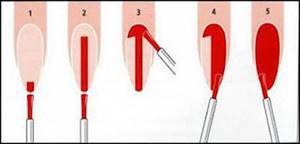
- Apply a drop of product to the middle of the plate, then spread it with a brush, first to the base and then to the tip (down and up).
Start applying not with your thumb, but with your little finger - it will be more convenient.
- Now slowly, in one motion, paint the side of the nail on one side, then on the other.
- Seal the nail: lightly run the brush along the tip of the plate from one edge to the other (also in one motion!).
- Repeat on other fingers.
- Allow the coating to dry for at least 10 minutes.
- Apply the second coat in the same way as the previous one and let it dry.
- Now you can apply the finishing coat. In general, this is not necessary, but this way you can extend the life of your manicure. This topcoat will also help the varnish adhere to the plate faster, preventing smearing.
You will find the TOP 6 ways to quickly dry nail polish in this material.
If varnish with glitter
It would seem, what’s wrong with this: paint according to the same scheme, what’s the difference? The fact is that glitter applied in only two stages is unlikely to completely cover the plate. You will need to use at least 4 layers! Can you imagine how long this will take? To make things easier, do this:
- use a special base for polishes with glitter to quickly erase your manicure;
- Apply a shiny varnish to a sponge (any kind suitable for foundation will do) so that the shining particles cover it tightly, without gaps;
- drive glitter into your nails with a sponge;
- When the glitter is dry, apply a topcoat.
All! Your nails shine evenly!
If the coating is matte
A beautiful matte manicure can be easily done at home. The advantage of varnishes with a matte effect is that they are denser and more saturated. How to use them? Just like regular ones, but with a small exception: just one coat is enough! As you understand, this procedure is faster.
Please note: matte textures do not stand up next to oily products. So until this varnish is completely set (and this is about an hour), do not apply nourishing cream or cuticle oil to your hands. Also, avoid using oil-based dryers.
You can also buy a matte finish. It should be applied as a topcoat over regular varnish. It's simple!
Painting nails at home
How to beautifully, easily and correctly paint your nails at home?
Everything is very simple here: all you need is a good supply of time, a little patience and endurance, as well as the necessary tools and means for manicure. The process of painting nails will become more pleasant and of high quality if you sit comfortably in a chair or chair, place a small pillow or roll of rolled fabric under the hand being painted, adjust the lighting, turn on your favorite music and get down to business with all the confidence and desire. The emotional mood in this event is no less important than the quality of the varnish and the set of necessary accessories.
A big challenge for girls who do their own manicure is the procedure of applying varnish to their right hand. How to paint the nails on your right hand correctly, with two colors, one, and even learn how to make pictures and drawings? Here are some small details:
- In order for a right-handed person to paint his nails unusually and beautifully on his right hand, like a skilled master, you need to carefully examine the nail plates of your hand;
- then you should choose one of the nails and focus on it;
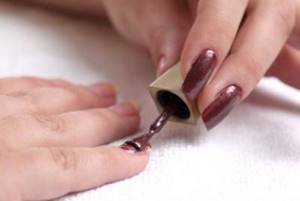
- Having dipped the brush in the varnish, you need to begin to carefully and carefully apply it to the plate, starting from the right side and gradually moving to the center, and then to the left side;
- After allowing the first layer to dry, you should paint the nails with the same care with the second layer of paint.

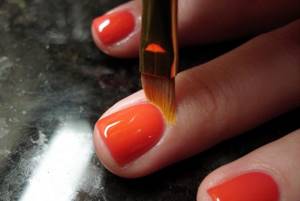
How to paint your nails
How to paint the nails on your right hand

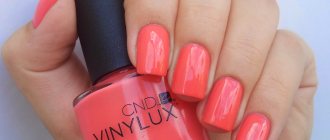
Paint your nails with red polish
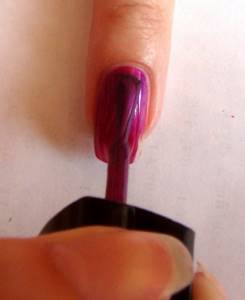
Carefully paint the nail
How to correct a manicure if polish gets on your skin?
It's not always possible to paint your nails perfectly without going over your fingers or cuticles. For this case, there are special correctors in stores that can easily remove excess varnish. If you don’t have such a product, take a regular thin brush (any lint-free brush will do), dip it in nail polish remover and carefully walk over the skin around the nail, wiping off excess coating. When the brush becomes dirty, wipe it on a napkin (also lint-free), dip it in the liquid again and continue until the manicure is perfect.
You can often come across advice to lubricate the skin around the plate with PVA glue and then remove it (it turns into a dried film) along with excess varnish. But not everyone will put glue on their hands, right?
Preparing toenails for varnish
Before you start applying nail polish, you need to get a pedicure. After steaming your feet well in a warm bath, treat them with a pumice stone or a foot scraper. After this, you need to remove the cuticle and shape your nails. If necessary, the nails can be softened before cutting the legs. When all this is done, you should move on to the most enjoyable part of the pedicure: massage using any foot cream.
The key to a flawless manicure and pedicure is the lack of haste, because in order to paint your nails well with varnish and not spoil the result after applying it, you need a certain amount of time for it to dry.
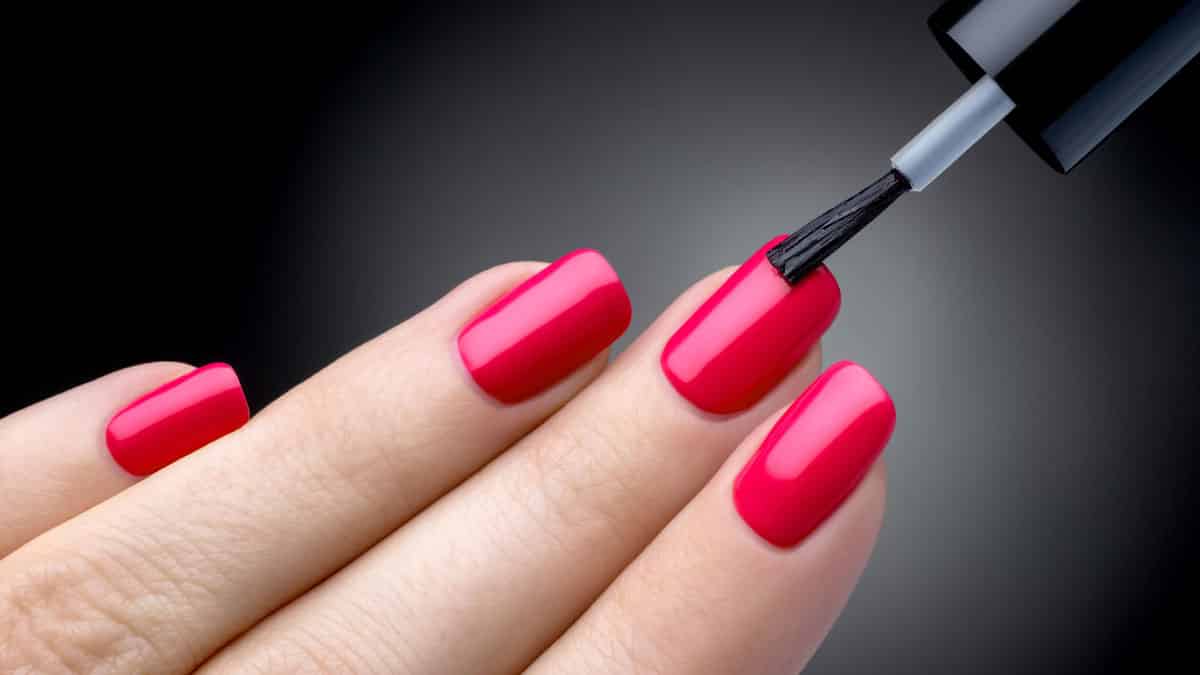
How to paint your nails
A few more tips
- If you first apply one layer of white coating, and on top of it - a layer of bright, the color of the latter will appear better.
- To do a French or moon manicure, you don't have to use special strips. They can be replaced with regular tape.
- You can make a polish with glitter at home by adding a little highlighter, eye shadow with shimmer or blush with a radiant effect to a bottle with a transparent coating.
- To ensure that there are no traces left on the skin around your fingers from removing colored or shiny nail polish, first apply a rich cream to your hands, and only then remove the coating. This advice will come in handy when you decide to quickly change one manicure option to another.
Design ideas
Regular varnish allows you to not only carefully paint your nails at home, but also make an unusual design on them.
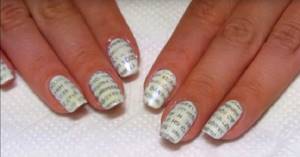
An interesting option is to use newspaper. First, the nails are covered with a base coat, then with white varnish. When it dries on the nails, pieces of newspaper with letters are soaked in alcohol for ten seconds and immediately applied tightly to the nail plates. The top is coated with clear varnish.
A toothpick can be used to easily create a design on painted nails. To do this, take a varnish that is contrasting to the main color and apply dots with a stick. You can distribute them over the surface in different ways. For example, make a lot of them at the very edge, gradually reducing the number towards the nail hole.

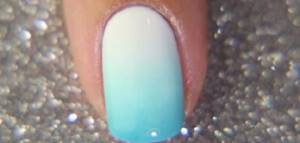
You can create the effect of transition from one color to another. To do this, several strips of varnish of different colors are applied in a row to an ordinary kitchen sponge. The skin around the fingers needs to be covered, for example, by covering it with PVA glue or wrapping it in cling film (you just have to make a hole in it for the nail). Now you can make fingerprints, then cover your nails with a transparent layer on top and remove the protective agents from your fingers.
For manicure design ideas with regular polish, see the following video.
Caring for colored nails
To make your new manicure last longer, follow these simple recommendations.
- For the first time after a manicure (at least an hour), avoid contact with water. The varnish has not yet fully set, and water can shorten its wear time.
- The main enemy of the coating is household chemicals, so do all housework (even washing dishes!) strictly with rubber gloves.
- Remember to use a cuticle oil (such as almond, coconut or castor) daily. This will make it easier for you to remove it without damaging your manicure.
- Moisturize your hands with cream morning and evening.
The skin suffers after using nail polish removers, even if it looks normal. The cream will help her recover quickly.
- Wear gloves if it's cold outside. Choose natural materials. This way you will protect your nails and hand skin from drying out, and your manicure will look more well-groomed.
Design for sharp nail shapes
The sharp shape of the nails looks impressive and bold, revealing the character and strength of its owner.
There are two ways to design such nails: balance the bright shape with a calm, monochromatic finish, or go all the way, choosing abundant decoration (rhinestones, pearls and bright stickers are our best friends).
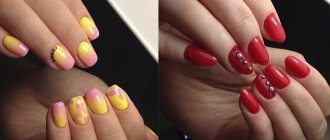
Dangerous? Wonderful! Summer colors on sharp nails Sharpness can be gentle
For a trendy design for a sharp shape, we recommend purchasing:
- Gel polish X-Gel No. 178 InGarden yellow-green
- Gel polish 004 Genetic beige
- Sequins Mermaid Tail 1510 with hexagons RocheNail
- Decor in a bag Transparent pearlescent balls ECLIPSE mix
- Rhinestones Mix sizes opal YMMY Professional 720 pcs
- Decor in a jar Marine mix gold ECLIPSE
How to save the coating if it is chipped or damaged?
In the evening you painted your nails, and in the morning you woke up with some kind of “crumpled” manicure. Admit it, did this happen? The recipe for this disease is simple: you need to apply a finish to the coating. It will even out everything and the varnish will look like new again.
It's worse if a chip appears on the nail. If it is just beginning to appear, sand the area with a polishing file and apply topcoat. But if the coating has already chipped... Well, also file down the chipped area, and then just change the design! The ideal option is to apply glitter. Their texture will hide the unevenness of the manicure.
By the way, if the varnish has already begun to chip, do not delay removing the coating (how to remove shellac yourself at home?). This means that it has already served its purpose on your nails and it’s time to replace it.
That's all! Now you can paint your nails at home no worse than a professional would do in a salon. Let your manicure cause only admiration!
Nail art according to Feng Shui: why highlight individual nails with color
In Eastern traditions, each finger is responsible for certain areas of human life, and through the hands there is a connection with energy in the surrounding world. Hence the popularity of acupuncture.
When you need to create additional vibrations in your surroundings and focus attention on a desired area of life, highlight this area on your hands with a stylish colored manicure.
Today, a miracle will not happen, but a constant focus on what you are striving to develop will allow you to see more opportunities in everyday life and take small but necessary actions when the situation requires it. After all, even your manicure calls for this! Let it become a little cheat sheet of success and achievements for every day.
How to choose nail polish color for an event, clothing, combination with other colors
Up to date with trends
A manicure that makes your hands look younger should take into account not only the color palette, but also the latest fashion trends. A woman who keeps up with the latest trends in the world of nail art is perceived as a young, active and modern fashionista who takes care of herself and the trends.
But at an elegant age, you should selectively approach fashion trends. We have highlighted several new products for the 2019-2020 season that a woman over 40 years old can adopt:
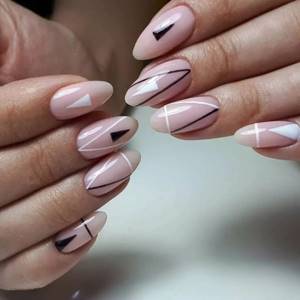
- abstraction and geometry;
- minimalism;
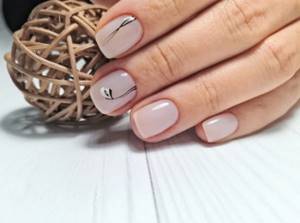
- inscriptions;
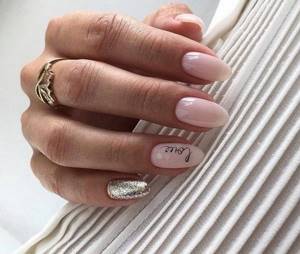
- decoration made of foil, rubbing or laconic rhinestones, as well as stretching using sparkles;
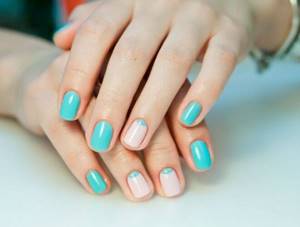
- “negative space” technique;
![]()
- abstract web;
- translucent coating with laconic decor.
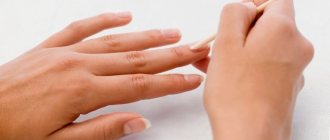
How to paint your nails neatly and evenly without staining your cuticles or skin?
- Before you start applying a decorative coating, you must remove or push back the cuticle, otherwise the varnish will get on the skin, lie unevenly and you won’t be able to create a neat manicure. You can get rid of the cuticle by trimming it with tweezers from a manicure set, using a special cosmetic product, or pushing back the skin using an orange stick, file or toothpick.
- The varnish is applied with just three or four light strokes. Relax your hand and, without pressing on the brush, draw straight lines. Some find it more convenient to paint the nail first along the edges, then the center; for some, on the contrary, it is more convenient to start from the middle. But it’s definitely not worth making a lot of strokes, trying to create an even line, and putting too much pressure on the brush.
- Leave a place on the sides of the nail that is not painted over with varnish. Firstly, this way you will be much less likely to stain your skin, and secondly, because of this, your nails will visually appear longer
Varnish application technique
How to beautifully paint your nails with regular polish?
- If, despite your best efforts, the varnish does not apply evenly, then most likely it is too thick. You can try diluting it with acetone or buy a new one. To prevent the varnish from drying out so quickly, always screw the lid tightly and make sure that nothing remains on the rim
- If the polish doesn't stick well, you probably applied too much of it. If you apply several layers of varnish, they should be as thin as possible, and the varnish should be uniform and fairly liquid. When only cheap varnish is available, it is better to apply it in one layer
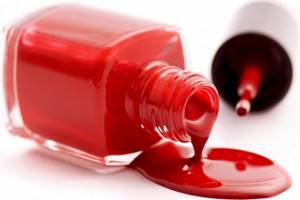
Nail polish should be liquid
What each finger is responsible for in Feng Shui manicure

It is fashionable to highlight one ring finger or the ring finger with the middle finger. According to Feng Shui, the middle one is responsible for financial wealth and success, and the nameless one is responsible for successful relationships, romance and love. If you want to attract them into your life, accent these two fingers with a different color or a different design. But what about the other fingers on the hands, because they are also responsible for something? Absolutely right!
- Thumb
Highlighted with a different shade of varnish, it will declare strength of character, will, resistance to stress and assertiveness. Complement your manicure with a ring on your thumb to enhance your character vibrations.
- Pointing
A manicure in a different color on the index finger puts emphasis on leadership qualities, the desire to attract attention in society, the desire to stand out and influence the opinions of others.
- Average
Highlight the middle finger on one or both hands with a manicure of a different color, and it will bring you financial wealth, career advancement, approval and praise from others.
- Nameless
Do you want romantic relationships, fidelity, stability, family happiness and true friendship? Focus on the color of your ring finger and you will get everything you want.
- Little finger
For creative, creative, and business girls and women, a manicure of a different color on the little finger promises success in all their endeavors and projects. Make plans, implement them and don’t forget about the color of your nails and a good mood while you conquer creative and business heights.
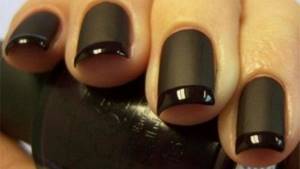
How to beautifully paint your nails with black polish?
Black varnish also comes in different colors: charcoal, the color of wet asphalt, or with a metallic sheen. Girls will find their own fun shade in stores.
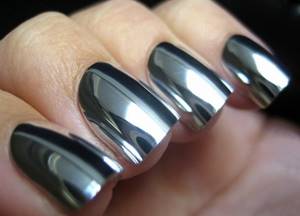
Metallic nails
The combination of glossy and matte black varnish looks interesting.
You can beautifully paint your nails with black polish
Color psychology: character at your fingertips

The colors are divided into warm and cold, bright and calm, and in addition to them there are all metallic shades and various options with sparkles. First decide on the group, and then on the color.
- Bright colors – self-confidence and an active life position
Red, orange and yellow manicure, or any combination of these three shades, reveals a confident woman leading an active social life. From blood red to cheerful yellow, your nail art will turn heads. Complement the color with glossy shine, and half of the stylish look is already ready.
- Calm shades - for responsible and open personalities
Blue, green, turquoise manicure will immediately emphasize your even and collected character. The shades pair well with silver and gray in everyday styles. Complement your manicure with a bag, scarf or other accessory in the same palette to emphasize the richness of the color.
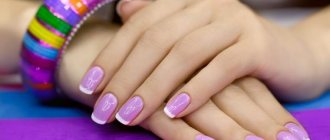
- Pastel shades – femininity and romance for every day
Do you want to emphasize your lightness, flirtatiousness and openness of character? A manicure of lilac, peach, and mint colors will help with this. The shades will organically fit into the spring-summer look, creating a feeling of novelty and anticipation of seasonal changes.
- Metallic shades – mysterious and powerful
Deep and mesmerizing highlights of golden and silver colors will immediately reveal your desire for openness, the desire to attract attention and catch admiring glances. Gold and silver will effectively complement other colors, creating a festive mood. Save them for a romantic date, party, dinner party.
How to find out your character by the shape of your nails and hands
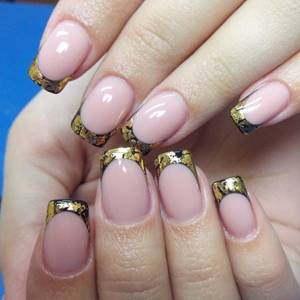
French
French manicure is a sure indicator of elegance and good taste. This laconic design is equally suitable for women over 50 and young girls. But the desired anti-age effect will only work in the classic version of the French jacket, which is designed in refined light shades.
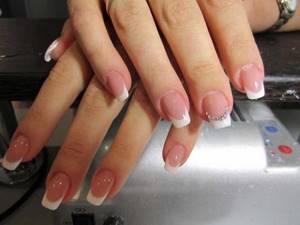
If the nail plate is not in the best condition, rely not on a transparent coating, but on a dense nude base in warm beige, peach, lilac or light pink.
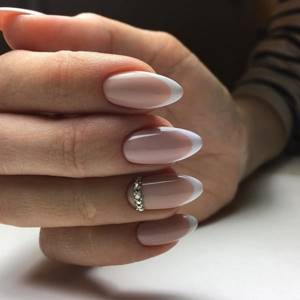
An anti-aging jacket will look elegant not only with a white smile, but also with a edging in the form of foil or sparkles. The sparkling design will make the skin of your hands more youthful, emphasize the lady’s well-groomed appearance, and will also look expensive and luxurious.